Table of Contents
Advertisement
Available languages
Available languages
Quick Links
Advertisement
Table of Contents

Related Manuals for Online USV XANTO 6000


Summary of Contents for Online USV XANTO 6000
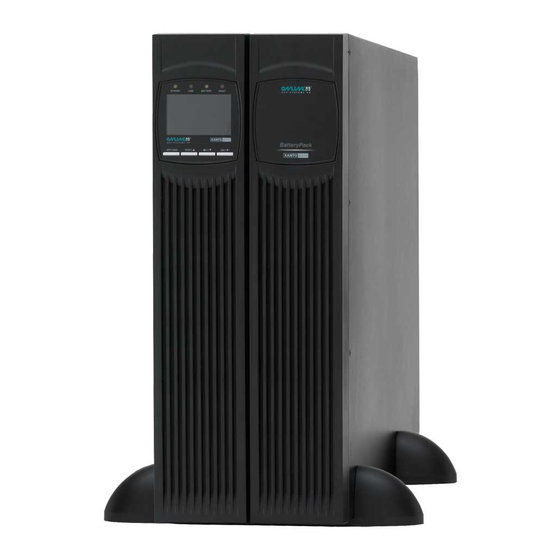
- Page 1 USV XANTO 6000 – 20000VA Sicherheitsinformation und Schnellstartanleitung Safety information and quick start guide Informazioni di sicurezza e guida rapida www.online-usv.de • www.online-ups.com • www.online-ups.it...
-
Page 2: Table Of Contents
Inhaltsverzeichnis Einleitung ................................... 3 Sicherheitsinformation ............................4 Schnellstartanleitung .............................. 5 Impressum ................................18 Content Introduction ................................8 Safety information ..............................9 Quick start guide ..............................10 Imprint ..................................18 Sommario Introduzione ................................13 Informazioni di sicurezza ............................14 Guida rapida ................................15 Sedi .................................... -
Page 3: Einleitung
Sicherheitsinformation und Schnellstartanleitung Einleitung Vielen Dank, dass Sie sich für ein Produkt der ONLINE USV-Systeme AG entschieden haben. Dieses Merkblatt enthält wichtige Anweisungen, die Sie während der Installation und Wartung der USV-Anlage und der Batterien befolgen müssen. Bei Nichteinhaltung können technische Schäden sowie schwere, mitunter sogar tödliche Verletzungen die Folge sein. -
Page 4: Sicherheitsinformation
Sicherheitsinformation • Die USV-Anlage führt lebensgefährliche Spannungen. Alle Reparatur- und Wartungsarbeiten sollten nur von Kundendienstfachleuten durchgeführt werden. • Die USV-Anlage enthält eine eigene Energiequelle (Batterien). Der Ausgang der USV-Anlage kann Spannung führen, auch wenn die USV-Anlage nicht an eine Wechselstromquelle angeschlossen ist. •... -
Page 5: Schnellstartanleitung
Schnellstartanleitung 1. 19″-Rackinstallation (nur XANTO 6000 / 10000) Passen Sie die Displayausrichtung der USV-Anlage dem liegenden Rackeinbau an. Entfernen Sie hierzu die Frontblende, indem Sie diese nach vorne ziehen. Drücken Sie anschließend die Plastikklammern am Display auseinander, um es aus der Befestigung zu lösen. Drehen Sie es um 90 Grad und stecken Sie es wieder in die Frontblende. - Page 6 100A 100A Entfernen Sie die Abdeckung der Klemmleiste und schließen Sie die Leitungen gemäß der Abbildungen an: Abbildung 1: Klemmleiste XANTO 6000 / 10000 Abbildung 2: Klemmleiste XANTO 10000 3/1 Abbildung 3: Klemmleiste XANTO 20000 3/1 Sicherheitsinformation und Schnellstartanleitung USV XANTO Seite 6 •...
- Page 7 Kritische Verbraucher sollten nicht an die programmierbaren Ausgangssteckdosen angeschlossen werden. 5. Batteriepaket anschließen Die USV-Anlagen XANTO 6000, 10000 und 20000 3/1 verfügen über keine interne Batterie. Zum Betrieb ist mindestens ein Batteriepaket erforderlich. Für die Installation von ein oder mehr Batteriepaketen verbinden Sie deren Ausgang „VDC Output“...
-
Page 8: Introduction
Safety information and quick start guide Introduction Thank you for choosing a product from ONLINE USV-Systeme AG. This sheet contains important instructions that you must follow during the installation and maintenance of the UPS system and the batteries. Failure to comply can cause serious technical damage, serious injuries or even death. Please read all the instructions in the manual before working with the device. -
Page 9: Safety Information
Safety information • The UPS system carries life-threatening voltages. All repair and maintenance work must be carried out by customer service personnel. • The UPS system has its own energy source (batteries). The output of the UPS system can be live even when the UPS system is not connected to a source of alternating current. -
Page 10: Quick Start Guide
Quick start guide 1. 19″ rack installation (XANTO 6000 / 10000 only) Adjust the display direction of the UPS system for horizontal rack installation. To do this, remove the front pa- nel by pulling it forward. Then push the plastic catches on the display apart to release it. Rotate it 90 degrees and insert it back into the front panel. - Page 11 100A Remove the cover of the terminal strip and connect the cables as shown in the diagrams below: Figure 1: XANTO 6000 / 10000 terminal strip Figure 2: XANTO 10000 3/1 terminal strip Figure 3: XANTO 20000 3/1 terminal strip...
- Page 12 5. Connecting battery pack The XANTO 6000, 10000 and 20000 3/1 UPS systems have no internal battery. To operate them, at least one battery pack is required. To install one or more battery packs, connect their “VDC Output” to the “VDC Input”...
-
Page 13: Introduzione
Informazioni di sicurezza e guida rapida Introduzione Grazie per aver scelto un prodotto di ONLINE USV-Systeme AG. La presente scheda contiene istruzioni importanti da osservare durante l’installazione e la manutenzione dell’UPS e delle batterie. La mancata osservanza di queste istruzioni può causare danni tecnici, nonché lesioni gravi e talora mortali. Prima di lavorare con l’appa- recchiatura, leggere tutte le istruzioni fornite nel manuale. -
Page 14: Informazioni Di Sicurezza
Informazioni di sicurezza • All’interno dell’UPS sono presenti tensioni molto pericolose. Tutti gli interventi di riparazione e manutenzio- ne devono essere eseguiti esclusivamente da personale qualificato del Servizio di Assistenza Clienti. • L’UPS contiene una propria sorgente di energia (batterie). L’uscita dell’UPS può erogare tensione anche quando l’ingresso non è... -
Page 15: Guida Rapida
Guida rapida 1. Installazione in rack da 19″ (solo XANTO 6000 / 10000) Regolare l’orientamento del display dell’UPS per il montaggio orizzontale in rack. Rimuovere a tal fine il pan- nello frontale, tirandolo in avanti. Premere quindi sulle clip di plastica di fissaggio per liberare il display, girare quest’ultimo di 90 gradi e inserirlo nuovamente nel pannello frontale. Rimontare infine il pannello frontale in sequenza inversa. - Page 16 100A 100A Rimuovere il coperchio della morsettiera e collegare i cavi come indicato nelle figure seguenti: Figura 1: morsettiera XANTO 6000 / 10000 Figura 2: morsettiera XANTO 10000 3/1 Figura 3: morsettiera XANTO 20000 3/1 Informazioni di sicurezza e guida rapida UPS XANTO Pagina 16 •...
- Page 17 5. Collegare il pacco batterie I sistemi UPS XANTO 6000, 10000 e 20000 3/1 non sono dotati di batteria interna. Per il funzionamento è richiesto almeno un pacco batterie. Per l’installazione di uno o più pacchi batterie aggiuntivi, collegare la rispettiva uscita “VDC Output”...
-
Page 18: Impressum
All rights reserved. Unauthorised reproduction in part or in whole is not permitted without consent. Il contenuto è soggetto al diritto d'autore Copyright © 2022 della ONLINE USV-Systeme AG. Tutti i diritti riservati. Riproduzione per intero o parziale non consentita senza autorizzazione. - Page 19 www.online-usv.de • www.online-ups.com • www.online-ups.it...
Need help?
Do you have a question about the XANTO 6000 and is the answer not in the manual?
Questions and answers