Table of Contents
Advertisement
Quick Links
Advertisement
Table of Contents

Related Manuals for IBM EXP3000


Summary of Contents for IBM EXP3000
- Page 1 System Storage EXP3000 Installation, User’s, and Maintenance Guide...
- Page 3 System Storage EXP3000 Installation, User’s, and Maintenance Guide...
- Page 4 Note: Before using this information and the product it supports, read the general information in Appendix B, “Notices,” on page 41. Third Edition (December 2007) © Copyright International Business Machines Corporation 2007. All rights reserved. US Government Users Restricted Rights – Use, duplication or disclosure restricted by GSA ADP Schedule Contract with IBM Corp.
- Page 5 Les sikkerhetsinformasjonen (Safety Information) før du installerer dette produktet. Antes de instalar este produto, leia as Informações sobre Segurança. Antes de instalar este producto, lea la información de seguridad. Läs säkerhetsinformationen innan du installerar den här produkten. © Copyright IBM Corp. 2007...
- Page 6 Each caution and danger statement in this document is labeled with a number. This number is used to cross reference the English-language caution or danger statement with translated versions of the caution or danger statement in the IBM Systems Safety Notices document.
- Page 7 DANGER Multiple power cords. The product might be equipped with multiple power cords. To remove all hazardous voltages, disconect all power cords. (L003) Safety...
- Page 8 1. Turn off everything (unless instructed otherwise). 2. Attach all cables to the devices. 3. Attach the signal cables to the connectors. 4. Attach the power cords to the outlets. 5. Turn on the devices. (D005a) System Storage EXP3000: Installation, User’s, and Maintenance Guide...
- Page 9 CAUTION: >18 kg (39.7 lb) 18-32 kg (39.7-70.5 lb) The weight of this part or unit is between 18 and 32 kg (39.7 and 70.5 lb). It takes two persons to safely lift this part or unit. (C009) Safety...
- Page 10 System Storage EXP3000: Installation, User’s, and Maintenance Guide...
-
Page 11: Table Of Contents
Inventory checklist ......9 Installing the EXP3000 in a rack ....9 Installing hot-swap hard disk drives . - Page 12 Hardware service and support ....40 IBM Taiwan product service ....40 Appendix B.
-
Page 13: Chapter 1. Introduction
IBM System Storage EXP3000 and instructions for replacing components. The IBM System Storage EXP3000 is referred to in this document as the EXP3000. This document contains information about: v Setting up and cabling the EXP3000 v Starting and configuring the EXP3000... - Page 14 For documentation updates, click the Install and use tab. If the EXP3000 is directly attached to an IBM System x server or the EXP3000 is attached to an IBM System x server through an IBM ServeRAID HBA: To check for updates, complete the following steps: 1.
-
Page 15: The Ibm Documentation Cd
Bay 10 Bay 11 Bay 12 The IBM Documentation CD The IBM Documentation CD contains documentation for the EXP3000 in Portable Document Format (PDF) and includes the IBM Documentation Browser to help you find information quickly. Hardware and software requirements... -
Page 16: Notices And Statements In This Document
Select the EXP3000 from the Product menu. The Available Topics list displays all the documents for the EXP3000. Some documents might be in folders. A plus sign (+) indicates each folder or document that has additional documents under it. Click the plus sign to display the additional documents. -
Page 17: Features And Operating Specifications
Features and operating specifications Table 3 contains a summary of the features and operating specifications of the EXP3000. Depending on your EXP3000 model, some features might not be available, or some specifications might not apply. Table 3. Features and operating specifications... -
Page 18: Major Components Of The Exp3000
The major CRUs in the EXP3000 are SAS or SATA hard disk drives, ESMs, and power supplies. See “Replaceable EXP3000 components” on page 25. v Fault indicators All CRUs have fault or status light emitting diodes (LEDs) to indicate hardware failures. - Page 19 Rear view Filler panel Hot-swap power supplies Chapter 1. Introduction...
- Page 20 System Storage EXP3000: Installation, User’s, and Maintenance Guide...
-
Page 21: Chapter 2. Installation
Chapter 2. Installation This chapter provides information about installing and cabling the EXP3000. The EXP3000 connects to a RAID controller in a server or in another supported device such as an IBM System Storage DS3200 or DS3400. See http://www.ibm.com/ servers/storage/disk/exp3000/index.html for an interoperability matrix that lists supported RAID controllers to which the EXP3000 can connect. - Page 22 The EXP3000 comes with filler panels in the drive bays. Before you install a new hard disk drive, remove the filler panel and save it for future use. Each of the 12 bays must contain either a filler panel or a hard disk drive.
-
Page 23: Installing An Additional Esm
4. Gently slide the ESM into the bay until it stops. Rotate the handle downward into the closed position until it clicks. 5. Connect the SAS cable or cables to the ESM. See “Cabling the EXP3000” on page 12 for more information. -
Page 24: Cabling The Exp3000
RAID controller. Depending on the capabilities of the RAID controller, you can add a second ESM to the EXP3000 to provide a redundant drive path to the server, and you can create a chain of EXP3000s to the RAID controller. See the documentation that comes with the RAID controller or the device that contains the RAID controller for information about the capabilities of the RAID controller. -
Page 25: Dual-Esm Configuration
SAS cable SAS cable EXP3000 To connect RAID controllers A and B to one EXP3000 that has two ESMs, complete the following steps: 1. Connect the EXP3000 to RAID controller A: a. Connect one end of a SAS cable to RAID controller A. - Page 26 Connect the other end of the SAS cable to the In (↑) SAS connector on the left ESM in the EXP3000. 2. Connect the left ESM of the EXP3000 to the next EXP3000 in the chain: a. Connect one end of a SAS cable to the Out (↓) SAS connector on the left ESM of the EXP3000 that you just connected.
-
Page 27: Connecting The Power Cords
Connecting the power cords The EXP3000 comes with two power cords. You can connect the power cords to a primary power unit inside the rack cabinet, such as a properly grounded ac power distribution unit (PDU) or uninterruptible power supply. - Page 28 System Storage EXP3000: Installation, User’s, and Maintenance Guide...
-
Page 29: Chapter 3. Exp3000 Controls, Leds, And Power
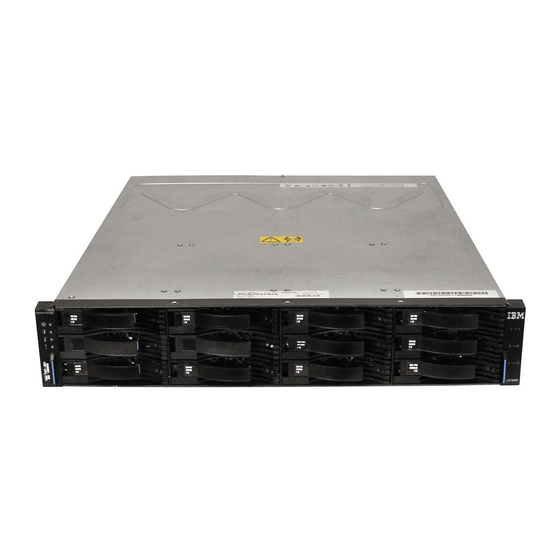
This section describes the controls and light-emitting diodes (LEDs) and how to turn the EXP3000 on and off. Front view: components The components on the front of the EXP3000 are shown in the following illustration. Hot-swap hard disk drive Filler panel... -
Page 30: Front View: Leds
Drives 1 - 4 Drives 5 - 8 Drives 9 - 12 Front view: LEDs The LEDs on the front of the EXP3000 are shown in the following illustration. Hard disk drive activity LED Hard disk drive status LED System Storage... -
Page 31: Rear View: Power Supply
When it is flashing, it indicates that a drive Identify or Rebuild is in progress. Rear view: power supply The two hot-swap power supplies are on the rear of the EXP3000. Attention: The EXP3000 comes with two installed power supplies. When one power supply fails, the power-supply unit must be replaced to reestablish redundancy. -
Page 32: Rear View: Esms
Fault LED (amber) AC power LED (green) DC power LED (green) When this green LED is lit, it indicates that the EXP3000 is turned on and is supplying both 5-volt and 12-volt dc power to the EXP3000. OK to remove LED (blue) This LED is supported only when the EXP3000 is attached to a DS3000 controller. -
Page 33: Exp3000 Power Features
2. Check the system documentation for all the hardware devices that you want to turn on and to determine the correct power-on sequence. Note: Be sure to turn on the EXP3000 before or at the same time as you turn on the device that contains the RAID controller. -
Page 34: Turning Off The Exp3000
Except in an emergency situation, never turn off the power if any fault LEDs are lit on the EXP3000. Correct the fault before you attempt to turn off the power, using the correct troubleshooting or servicing procedure. This ensures that the EXP3000 turns on correctly later. -
Page 35: Turning Off The Exp3000 In An Emergency
To turn off the EXP3000, complete the following steps: 1. Make sure that all amber status or fault LEDs on the EXP3000 are off. If any status or fault LEDs are lit (on hard disk drives, power supplies, or ESMs), identify or correct the problems before you turn off the power. - Page 36 Note: Be sure to turn on the EXP3000 before or at the same time you turn on the device that contains the RAID controller to which the EXP3000 is connected. 3. Turn on each connected device, according to the power-on sequence that is described in the documentation that comes with the device.
-
Page 37: Chapter 4. Replacing Components
Replaceable components are of three types: v Tier 1 customer replaceable unit (CRU): Replacement of Tier 1 CRUs is your responsibility. If IBM installs a Tier 1 CRU at your request, you will be charged for the installation. v Tier 2 customer replaceable unit: You may install a Tier 2 CRU yourself or request IBM to install it, at no additional charge, under the type of warranty service that is designated for your server. -
Page 38: Installation Guidelines
EXP3000 and other devices that you will connect to the EXP3000. v Back up all important data before you make changes to disk drives. v You do not have to turn off the EXP3000 to install or replace hot-swap power supplies or hot-swap hard disk drives. -
Page 39: Handling Static-Sensitive Devices
Do not leave the device where others can handle and damage it. v While the device is still in its static-protective package, touch it to an unpainted metal part of the EXP3000 for at least 2 seconds. This drains static electricity from the package and from your body. -
Page 40: Replacing A Hot-Swap Hard Disk Drive
Replacing a hot-swap hard disk drive Hard disk drive problems include any malfunctions that delay, interrupt, or prevent successful I/O activity between the hosts and the hard disk drives in the EXP3000. This includes transmission problems between the host controllers, the ESMs, and the drives. -
Page 41: Replacing An Esm
10 seconds after the drive state changes. Replacing an ESM If you are replacing the only ESM in the EXP3000, you must turn off power to the EXP3000 before you replace the ESM. Refer to the documentation that comes with your RAID controller for additional information and instructions. -
Page 42: Replacing A Hot-Swap Power Supply
8. Connect the SAS cable to the ESM. 9. Turn on the power to the EXP3000. For more information, see “Turning on the EXP3000” on page 21. 10. Go to http://www.ibm.com/servers/storage/support/ to check for ESM code updates. -
Page 43: Replacing The Bezels
7. Make sure that the new power supply that you are installing is turned off. 8. Hold the new power supply so that the handle is fully extended. 9. Gently slide the power supply into the EXP3000 until it stops. Rotate the handle upward into the closed position until it clicks. -
Page 44: Removing The Bezels
Handles To remove either the left or right bezel, complete the following steps: 1. If the EXP3000 is on a table or other flat surface, elevate the EXP3000 front slightly or extend the front over the table edge. 2. Grasp the handle on the front of the bezel and pull until the bezel is clear of the bottom tab on the chassis flange. -
Page 45: Replacing A Drive Compatibility Key
26. 2. Make sure that it is safe to proceed: v If you are replacing the release tab on the only ESM in the EXP3000, make sure that the EXP3000 is shut down for maintenance. v If you are replacing a power-supply release tab, make sure that the power supplies are providing redundant power (on both power supplies, the ac power LED and dc power LEDs are lit, and the fault LED is off). - Page 46 1. Read the safety information that begins on page iii and “Installation guidelines” on page 26. 2. Turn off the EXP3000, or wait until the EXP3000 is shut down for maintenance. 3. Remove the three hard disk drives that are in the column of bays that contain the broken drive compatibility key.
- Page 47 6. Reinstall the hard disk drives in the bays from which they were removed. See “Replacing a hot-swap hard disk drive” on page 28. 7. If you turned off the EXP3000 in step 2 on page 34, turn it on. Chapter 4. Replacing components...
- Page 48 System Storage EXP3000: Installation, User’s, and Maintenance Guide...
-
Page 49: Chapter 5. Solving Problems
Chapter 5. Solving problems The following table contains troubleshooting information to help you solve some basic problems that you might have with the EXP3000. Table 5. Troubleshooting information Component Problem indicator Possible cause Possible solutions Hard disk drive Amber fault LED lit Drive failure Replace the failed hard disk drive. - Page 50 Front panel Power supply Make sure that the cables are connected and the power supplies are turned on. Hardware failure If any other LEDs are lit, have the EXP3000 serviced. Some or all Intermittent or Defective ac or dc 1. Check the ac or dc power source.
-
Page 51: Appendix A. Getting Help And Technical Assistance
If you need help, service, or technical assistance or just want more information about IBM products, you will find a wide variety of sources available from IBM to assist you. This section contains information about where to go for additional information about IBM and IBM products, what to do if you experience a problem with your system, and whom to call for service, if it is necessary. -
Page 52: Software Service And Support
You can find service information for IBM systems and optional devices at http://www.ibm.com/systems/support/. Software service and support Through IBM Support Line, you can get telephone assistance, for a fee, with usage, configuration, and software problems with System x and xSeries servers, BladeCenter products, IntelliStation workstations, and appliances. For information about which products are supported by Support Line in your country or region, see http://www.ibm.com/services/sl/products/. -
Page 53: Appendix B. Notices
Web sites. The materials at those Web sites are not part of the materials for this IBM product, and use of those Web sites is at your own risk. IBM may use or distribute any of the information you supply in any way it believes appropriate without incurring any obligation to you. -
Page 54: Important Notes
Maximum internal hard disk drive capacities assume the replacement of any standard hard disk drives and population of all hard disk drive bays with the largest currently supported drives that are available from IBM. System Storage EXP3000: Installation, User’s, and Maintenance Guide... -
Page 55: Product Recycling And Disposal
IBM makes no representations or warranties with respect to non-IBM products. Support (if any) for the non-IBM products is provided by the third party, not IBM. Some software might differ from its retail version (if available) and might not include user manuals or all program functionality. -
Page 56: Battery Return Program
United States, go to http://www.ibm.com/ibm/environment/ products/index.shtml or contact your local waste disposal facility. In the United States, IBM has established a return process for reuse, recycling, or proper disposal of used IBM sealed lead acid, nickel cadmium, nickel metal hydride, and battery packs from IBM equipment. - Page 57 For proper collection and treatment, contact your local IBM representative. For California: Perchlorate material – special handling may apply. See http://www.dtsc.ca.gov/ hazardouswaste/perchlorate/.
-
Page 58: Electronic Emission Notices
Properly shielded and grounded cables and connectors must be used in order to meet FCC emission limits. IBM is not responsible for any radio or television interference caused by using other than recommended cables and connectors or by unauthorized changes or modifications to this equipment. -
Page 59: Taiwanese Class A Warning Statement
This is a Class A product. In a domestic environment this product may cause radio interference in which case the user may be required to take adequate measures. European Community contact: IBM Technical Regulations Pascalstr. 100, Stuttgart, Germany 70569 Telephone: 0049 (0)711 785 1176 Fax: 0049 (0)711 785 1283 E-mail: tjahn@de.ibm.com... -
Page 60: Korean Class A Warning Statement
Korean Class A warning statement System Storage EXP3000: Installation, User’s, and Maintenance Guide... -
Page 61: Index
40 chaining the EXP3000s 12, 13 heat output specifications 5 Class A electronic emission notice 46 help, getting 39 components of EXP3000 6 hot-swap components CRU part numbers 25 hard disk drive 17 power supply 19... - Page 62 22 turning off the unit in an emergency 23 turning on the unit 21 United States electronic emission Class A notice 46 United States FCC Class A notice 46 System Storage EXP3000: Installation, User’s, and Maintenance Guide...
- Page 64 Part Number: 43W7852 Printed in USA (1P) P/N: 43W7852...
Need help?
Do you have a question about the EXP3000 and is the answer not in the manual?
Questions and answers