Table of Contents
Advertisement
Quick Links
Advertisement
Table of Contents

Subscribe to Our Youtube Channel
Related Manuals for GREEN INSTRUMENTS Maritime G6200


Summary of Contents for GREEN INSTRUMENTS Maritime G6200
- Page 1 G6200 Water Monitoring System User Manual Maritime...
- Page 2 This means that documentation is subject to change without notice. Green Instruments A/S has taken all measures to ensure the information in this user manual is accurate and comprehensive. Green Instruments A/S reserves the right to make corrections and cannot be held liable for any errors or omissions in this manual.
-
Page 3: Table Of Contents
Content Content Terms & abbreviations ......................7 Introduction ..........................8 About the system ......................8 2.1.1 PAH ......................... 8 2.1.2 Turbidity ........................ 9 2.1.3 pH & Temperature .................... 9 Technical specifications ....................10 Storage and handling ....................13 2.3.1 Storage ......................... 13 2.3.2 Calibration kit ...................... - Page 4 Water Monitoring System User Manual Operation ............................34 Sampling ..........................34 6.1.1 Remote operating mode ................34 6.1.2 Local operating mode ..................34 Adjustment of reduction and safety valve............. 35 6.2.1 Reduction valve ....................35 6.2.2 Safety valve ......................35 Adjustment of needle valve ..................
- Page 5 10. Troubleshooting ........................66 10.1 General troubleshooting ....................66 10.2 PH/Temperature ......................69 11. System hibernation ........................72 12. Maintenance instructions ....................73 MI6200-0001 ........................73 MI6200-0002 ........................74 MI6200-0003 ........................75 MI6200-0004 ........................76 MI6200-0005 ........................77 MI6200-0007 ........................78 MI6200-0008 ........................
- Page 6 Water Monitoring System User Manual List of Figures Figure 4.1: HMI home screen layout, menu structure and settings options ..18 Figure 4.2: Trend screen ......................19 Figure 4.3: Alarm screen ......................19 Figure 4.4: User access levels ....................20 Figure 4.5: Admin login......................20 Figure 4.6: Settings screen ......................21 Figure 4.7: Sensor pop-up ......................21 Figure 4.8: System settings ......................22...
-
Page 7: Terms & Abbreviations
Terms & abbreviations 1. Terms & abbreviations The following table lists terms and abbreviations that are used in this user manual. When a term is first used, it will be written out in full and include its abbreviation for the sake of clarity. Description Abbreviation Exhaust Gas Cleaning System... -
Page 8: Introduction
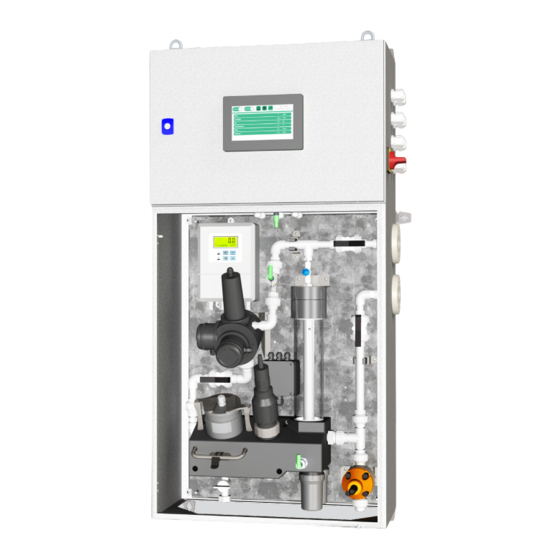
Water Monitoring System User Manual 2. Introduction 2.1 About the system The G6200 water monitoring system is a modular system that continuously monitors scrubber water. With its robust and durable design, the system can be used in both open, closed, and hybrid systems and includes a de- bubbler, which avoids interference due to sample degassing. -
Page 9: Turbidity
Introduction 2.1.2 Turbidity The Turbidity measures the turbidity of water in accordance with MEPC.259(68) & MEPC.340(77). The module used a 90° IR technique in accordance with ISO 7027. The Turbidity module can detect soot, particles, and suspended soil in the water. Special precaution is taken to avoid interference from dissolved gasses and bubbles and an integrated wiper keeps optical fouling at a minimum. -
Page 10: Technical Specifications
Water Monitoring System User Manual 2.2 Technical specifications G6200 Water Monitoring System Function Monitoring EGCS discharge water in accordance with IMO resolution MEPC.259(68) & MEPC.340(77) Power supply 400-440VAC 50-60 Hz 3 phased Display 7" TFT LCD color display External communication Standard: Modbus TCP/IP ■... - Page 11 Introduction Sensor Modules PAH Module – Type G6111 Compliance Complies with MEPC.259(68) & MEPC.340(77) Certificates Download at https://greeninstruments.com/ Measurement technology UV induced fluorescence Excitation wavelength: 254 +/-10 nm Detection wavelength: 360 +/- 50 nm The PAH measurement is compensated for the effects of turbidity by means of a turbidity compensation formula and input from the turbidity sensor module G6120.
- Page 12 Water Monitoring System User Manual Power supply Refer to Electrical Drawings Wetted materials AISI 316 or PPS, glass, PVDF & PVC Signals 2 Analog 4-20 mA (Passive) Accuracy Max. ±0.2 pH unit Specifications are subject to changes without notice. Page of 82 Ver.
-
Page 13: Storage And Handling
Check for any damage. If any damage is found immediately make a note on the delivery document. Remove the packing and check for intrusive water or signs of humidity. Check for missing parts against the packing list. Any discrepancy or damage should be reported to Green Instruments A/S immediately. Page of 82... -
Page 14: Safety
The installation and operation of this system and associated equipment must be carried out by skilled, and trained personnel. Green Instruments A/S bears no responsibility for the operation of the system and associated equipment. The correct and safe operation of this equipment depends on proper handling, installation, operation, and maintenance. - Page 15 Safety The equipment must only be used as described in this user manual. If the system is used in any other way not specified by Green Instruments A/S, equipment safety may become impaired. Green Instruments A/S cannot be held liable for any resulting damage or injury.
- Page 16 Water Monitoring System User Manual ATTENTION Sensors can become damaged. The sensor modules must be connected to the WMS before powering up otherwise they can become avoid damaged. When the system is powered on, the connection to the sensor modules must not be disconnected.
-
Page 17: Menu Structure
Menu structure 4. Menu structure The WMS HMI home screen layout, menu structure and different user options are shown in Figure 4.1. Figure 4.2 shows the trend screen and Figure 4.3 shows the alarm screen. The illustrations use yellow lines and yellow boxes to show the relationships between screens and different user options, and to explain button functions. -
Page 18: Figure 4.1: Hmi Home Screen Layout, Menu Structure And Settings Options
Water Monitoring System User Manual Figure 4.1: HMI home screen layout, menu structure and settings options Page of 82 Ver. 1.1 – Revision March 2022... -
Page 19: Figure 4.2: Trend Screen
Menu structure Figure 4.2: Trend screen Figure 4.3: Alarm screen Page of 82... -
Page 20: Security And Login
The user can change calibration set-points, sensor communication, sensor setup and sensor signal scaling. To access this level, the user must contact Green Instruments with the information shown on the login screen. Green instruments can then generate a one-time password that will be active for 30 minutes after login. -
Page 21: Settings
For sensors that do not require calibration, it is only possible to edit the moving average (refer to Figure 4.6). The settings screen also contains greyed out buttons. To enable these, contact Green Instruments. Figure 4.6: Settings screen Pressing the pH, Turbidity or PAH button will generate a pop-up window, as shown in Figure 4.6. -
Page 22: System Settings
Water Monitoring System User Manual When pressing the Calibration or Validation buttons the user will be instructed in how to perform the selected function (refer to section 7). 4.3 System settings The system settings screen can be accessed from the settings screen (see Figure 4.6). - Page 23 Menu structure But if the flow sensor is not triggered (because there is no flow) within the set time, then the Flow Alarm will trigger. Default setting: 60 seconds Range: 5–240 seconds Low flow warning/alarm During sampling water flow can decrease. If the water flow falls below the low flow warning set-point, this will trigger a low flow warning.
-
Page 24: Alarm Action
Water Monitoring System User Manual Pressure alarm delay This pressure alarm delay allows for small pressure fluctuations without trigging the high pressure alarm. When the WMS is sampling, the pressure alarm delay sets the length of time that can expire before the high-pressure alarm is triggered because of high pressure. -
Page 25: Installation
Installation 5. Installation 5.1 Mechanical 5.1.1 System installation WARNING/ATTENTION Faulty operation/system failure hazard This section provides critical information regarding the installation of the system and must be read carefully. Incorrect or improper installation may result in system failure or faulty operation. Failure to comply with the installation requirements may result in personal injury and/or damage to equipment and will render the warranty void. -
Page 26: Sampling Point
Furthermore, the installation must comply with good practice regarding the size and length of the pump suction pipe, transfer piping, and flow velocity. For additional information please consult the pump manual. For further assistance, please contact Green Instruments. Page of 82... -
Page 27: Electrical
Installation 5.2 Electrical WARNING Risk of electrocution Before starting the fully installed WMS for the first time, check and ensure that all electrical connections have been correctly wired in accordance with the electrical documentation. 5.2.1 Electrical documentation The electrical documentation is delivered separately and covers all versions and options. -
Page 28: Commissioning
Water Monitoring System User Manual 5.3 Commissioning This section describes the commissioning process of the WMS. To operate the system successfully, it is important that the user reads this section in detail and becomes familiarized with the functions and features available in the system. -
Page 29: Figure 5.1: Modbus Map
Installation R Security W Security Variable name Data type Range Modbus Function Level Level Stop / Start Boolean 0 - 1 400000,0 0 = Stop, 1 = Start Reserved 40000.1-11 Reserved Remote / Local Boolean 0 - 1 400001 0 = Remote, 1 = Local Running / Stopped Boolean 0 - 1... -
Page 30: Web Viewer (Vnc)
Water Monitoring System User Manual 5.3.3 Web viewer (VNC) The WMS can be connected with an external display, monitor, or PC. This function is available per default and can be accessed from a browser on a PC connected to the system. Please note that even though this function supports all functions on the HMI, it is not advisable to control all functions remotely, for example, validation procedures and most service/maintenance tasks should not... -
Page 31: Remote Connection
HTTPS (HTTP over TLS) to remote IP address of GateManager, ■ remote port 443 TLS over HTTP to remote IP address of GateManager, remote port 80 ■ To enable this function, contact Green Instruments for further information. Page of 82... -
Page 32: Commissioning Checklist
Water Monitoring System User Manual 5.3.5 Commissioning checklist After completing the installation, verification of the installation and setup is required. To verify that the installation and setup is correct, carry out the following: Ensure that the inlet and outlet connections are connected as specified ■... - Page 33 Installation Verify that the phase sequence of the power supply is correct, and that the ■ rotation direction of the motor corresponds to the inlet/outlet connection on the pump. Carefully read and follow the instructions in the pump manual before starting the pump for the first time. Page of 82...
-
Page 34: Operation
Water Monitoring System User Manual 6. Operation This section explains how to operate, calibrate, and validate the WMS. It also explains how to adjust valves, handle alarms/warning, logs, and software updates. 6.1 Sampling The WMS can operate in either remote or local. 6.1.1 Remote operating mode When the WMS is in remote mode, it is possible to start the sampling via MODBUS. -
Page 35: Adjustment Of Reduction And Safety Valve
Operation 6.2 Adjustment of reduction and safety valve 6.2.1 Reduction valve If the WMS is equipped with an inlet pressure reduction valve, this can be adjusted to obtain the correct pressure range. Refer to section 2.2 for information about the system specifications. To adjust the reduction valve, it is important that the system is running and water is flowing. -
Page 36: Adjustment Of Needle Valve
Water Monitoring System User Manual 6.3 Adjustment of needle valve The white needle valve located above the de-bubbler controls the ratio of water/air mix flowing from the top of the de-bubbler and the flow of bubble- free water that flows from the bottom of the de-bubbler to the sensors. The valve must never be fully closed, otherwise it will stop the de-bubbler from functioning. -
Page 37: Moving Average
Operation When fitting the new electrode, be sure to retract the safety cap enough to allow thread engagement. The safety cap may have pushed the gasket upwards, and this will cause the thread not to engage properly. Ensure that there is water inside the measuring chamber before the electrode cap is removed and before the sensor is mounted into its measuring chamber. -
Page 38: Log & Data Export
SD card can then be inserted into a PC and the files copied to a folder on the PC. The data can then be used or sent to Green Instruments on request. Login and open the System Settings screen. Refer to Figure 5.2. Press the system settings button and then press the Export Data Log button and wait for the display message “Export Successful”. -
Page 39: Software Update
Operation 6.9 Software update 1. Remember to note down the system serial number and system running hours prior to carrying out any updates. 2. Login and open the System Settings screen. Refer to Figure 5.2. Press the system settings button in the System Settings screen. Figure 6.4: Software update Note: Both PLC and HMI updates must be executed in the correct order to ensure that the system will function as intended. - Page 40 Water Monitoring System User Manual Updating PLC firmware and software 1. The files relevant for PLC updates must be transferred to a formatted SD-card that does not contain any other files. The SD-card name must be CLONE_G6200. This update package contains both FW and SW. The file structure should look like this: 2.
- Page 41 Operation 4. Press the three dots (…) on the green HMI SW button. 5. Follow the instructions on the HMI. 6. After successful update, remove the USB memory stick again. 7. Remember to reinsert the existing USB memory stick in the USB slot on the back of the HMI.
-
Page 42: Validation & Calibration
7. Validation & Calibration 7.1 Introduction PH, Turbidity and PAH sensor modules can all be validated and calibrated using certified calibration standard liquids supplied by Green Instruments. The calibration kit includes all calibration materials necessary to perform a validation and/or calibration. -
Page 43: Figure 7.1: Main Page
Validation & Calibration Figure 7.1: Main page To perform a validation, press the settings button and login as a service user with level 2 access. Refer to section 4.1 or Figure 7.2 below to see how to log in as a service user. Figure 7.2: : Login screen Page of 82... -
Page 44: Ph Validation & Calibration
Water Monitoring System User Manual On logging in, the service user is shown the Settings screen. Here the user can select pH, Turbidity or PAH sensor and perform a validation, calibration, or change the moving average. The Flow, Pressure and Temperature sensors cannot be validated or calibrated but their moving average can be changed. -
Page 45: Figure 7.4: Valves
Validation & Calibration NOTICE Validation procedure uses pH buffer 7. Calibration procedure uses pH buffer 4, 7 & 10. 1. Select “Local” and “Stopped” on the HMI. Close the “Outlet” and “Inlet” valves. If the system is equipped with at motor valve, the valve will close when “stopped”... -
Page 46: Figure 7.5: G6130 Ph Pop-Up Menu
Water Monitoring System User Manual Figure 7.5: G6130 pH pop-up menu 7. Follow the instruction on screen using buffer 7 or follow steps 8-12 below. Figure 7.6: G6130 pH validation menu 8. Validation procedure: Make sure the rotary switch on the sensor is set to position “M”... -
Page 47: Figure 7.7: G6130 Ph Calibration
Validation & Calibration 9. Wait for the display to update the validation result. If the validation is successful, the screen will display a “Validation Passed” message and calibration will not be required. If the validation fails, the screen will display a “Validation Failed” message and calibration will be required. Refer to Figure 7.3. -
Page 48: Turbidity Validation & Calibration
Water Monitoring System User Manual 20. Re-insert the sensor in the measuring chamber and fasten the union. 21. Close “Drain” valve. Open “Inlet” valve and “Outlet” valve. 22. Return the system into normal operation mode: Select the slider to “Remote”. Please refer to section 10.2 to verify that validation and calibration is valid and that the electrode does not need to be replaced. -
Page 49: Figure 7.8: G6120 Turbidity Pop-Up Menu
Validation & Calibration Figure 7.8: G6120 Turbidity pop-up menu 9. Follow the instruction on screen as shown in Figure 7.9 using standard 10 NTU or follow steps 10-12 below. Figure 7.9: Turbidity validation 10. Enter the turbidity concentration used and press the “Start Validation” button. - Page 50 Water Monitoring System User Manual 12. If the validation fails and the value has drifted more than +/- 2 NTU, a cleaning and/or a calibration is needed. 13. Before continuing, open the “Calibration” valve. Wait for the liquid to exit through the drain valve and then flush with clean water. Close the “Calibration”...
- Page 51 Validation & Calibration 27. Open the “Calibration” valve. Wait for the solution to exit through the drain valve. Flush with clean water. Close the “Calibration” valve. Dry the measuring chamber to remove any excess water. 28. Validate the sensor again. Follow HMI. Pour Standard 10 NTU into the chamber until the lenses are covered.
-
Page 52: Pah Validation/Calibration
Water Monitoring System User Manual 7.4 PAH validation/calibration Validation is a part of the normal maintenance of the PAH module and is used to ensure the PAH module is functioning correctly. Calibration is used to correct PAH reading offsets. Figure 7.9 is a flow chart showing the procedures that must be done to ensure the PAH module is functioning correctly. -
Page 53: Pah Validation Methods
Validation & Calibration 7.4.1 PAH validation methods PAH measuring chamber: Used for inline measurements ■ PAH calibration chamber: Used for calibration and validation ■ NOTICE The calibration kit includes a PAH calibration chamber. Sensor performance in the measuring and calibration chamber can be doublechecked by use of a test media, for example, bottled water. -
Page 54: Before Validation/Calibration
Water Monitoring System User Manual 7.4.3 Before Validation/Calibration PAH Sensor Check 1. Set the operation sliders to “Local” and “Stopped”. Close the “Outlet” and “Inlet” valves. 2. Open the “Drain” valve. 3. Find a clean cloth, water for flushing and calibration chamber, syringe, needle, and relevant PAH standards from the calibration kit. -
Page 55: Pah Validation Procedure
Validation & Calibration PAH validation tolerance µg/l Standard concentration Lower tolerance Upper tolerance Table 7.2: Validation tolerance table NOTICE Immerse the sensor into the calibration as quickly as possible after opening the ampoule to ensure the best performance and validity of the calibration liquid. -
Page 56: Figure 7.12: G6111 Pah Pop-Up Menu
Water Monitoring System User Manual 1. Perform PAH sensor check as described in section 7.4.3 2. Go to “Settings” menu. Login. Select “G6111 PAH”. Select “Validation” Figure 7.12: G6111 PAH pop-up menu Figure 7.13: PAH validation Enter PAH liquid concentration value based on the sensor range, please select the validation liquid in accordance with Table 7.1. -
Page 57: Pah Calibration Procedure
Validation & Calibration 4. Inject the content of the syringe into the PAH calibration chamber. Ensure that no air is mixed with the validation liquid. Look into the chamber to check and remove any air bubbles with the tip of the syringe needle. - Page 58 Water Monitoring System User Manual 1. Enter the PAH liquid concentration value based on the sensor range, please select the calibration liquid in accordance with Table 7.1. Starting from the lowest concentration. 2. Take the syringe and attach the needle. Break the neck of the ampule – fill the syringe with the entire content of the ampule.
-
Page 59: Maintenance
Maintenance 8. Maintenance 8.1 Planned maintenance NOTICE The following maintenance program is for general use and must be adjusted in accordance with your specific system requirements and conditions. The maintenance program is based on optimum conditions and compliance with the system specifications. Failure to comply with the system specifications can affect how often maintenance must be carried out on the system and its components. -
Page 60: Figure 8.1: Planned Maintenance Program For The Wms
Water Monitoring System User Manual Planned Maintenance Program Description Turbidity light source MI6200- replacement 0002 Turbidity O-ring MI6200- replacement 0003 Turbidity wiper unit ... -
Page 61: General Inspection & Cleaning Routines
Maintenance 8.2 General inspection & cleaning routines Make sure that the sensors and measuring chambers are clean. Follow the planned maintenance program. If a sensor measurement is static or seems unrealistic, or if its response time is slow, then the sensor and measuring chamber may need to be cleaned. -
Page 62: Lifetime Of Components
A calibration certificate will be issued accordingly, covering the next period. For further inquiry – please contact Green Instruments A/S. 8.3.2 Turbidity The lifetime of the turbidity sensor is mainly determined by the light source. - Page 63 Maintenance 8.3.3 pH The lifetime of the pH sensor is mainly determined by the lifetime of the electrode. The electrode has a shelf life of 1 year at 25 °C and has an operating lifetime of approximately 1 year at 25 °C. Storage or operation at higher temperatures or pressures will shorten the lifetime of the sensor.
-
Page 64: Services
9.1 Remote connectivity Using a secure and encrypted remote link, our trained technicians can directly access the heart of the installed system and can perform advanced diagnostics and fast troubleshooting. Contact Green Instruments for more information. 9.2 PAH services Contact the manufacturer’s spare parts department two months in advance of the PAH sensor’s 3-year replacement due date to schedule its... -
Page 65: Turbidity
A new calibration certificate will be issued. Contact Green Instruments A/S for more information. 9.4 pH The pH module does not require factory calibration. However, upon request, our service engineers can perform a full calibration at our factory or on- board the vessel. -
Page 66: Troubleshooting
Water Monitoring System User Manual 10. T roubleshooting For troubleshooting of the system, please refer to the PI diagram of each system. Troubleshooting should always be carried out by skilled personnel. WARNING/ATTENTION Electrocution hazard The water monitoring system is connected to hazardous electric voltages, which can cause personal injury or mechanical damage if not handled correctly and in accordance with normal safety regulations. - Page 67 Troubleshooting Trouble Possible Cause Action Turbidity module Incorrect Dirty sensor Try to clean the sensor optical indication of window or chamber windows and chamber Turbidity value manually Faulty wiring Check the wiring from the Turbidity sensor to the Turbidity analyser. Faulty light source Try to validate the Turbidity sensor...
- Page 68 Water Monitoring System User Manual Trouble Possible Cause Action Flow alarm Flow alarm Blocked flow path Clean strainer, open valves if semi-closed, check pipework is not blocked Check and adjust Check the pressure reduction the flow regulating valve. Clean if necessary valve.
-
Page 69: Ph/Temperature
Troubleshooting 10.2 PH/Temperature Resetting Calibration Offset The pH sensor and pH electrode must be calibrated together to ensure correct functionality. Calibration data is stored within the pH sensor while the pH electrode acts as the sensing element. During a calibration, the calibration data within the sensor is updated/ overwritten in order to compensate for the deterioration of the pH electrode. -
Page 70: Figure 10.1: Ph Negative Offset - Reading Too Low
Water Monitoring System User Manual Example 1: pH negative offset – reading too low Step Description Buffer solution Observed pH Calibration data Conclusion Step 1 Initial test Not accepted Offset too large Step 2 Reduce offset by (90% buffer 7.0 Before calibration: Accepted. - Page 71 Troubleshooting Signs of a defective electrode The following signs indicate an electrode is reaching the end of its lifetime. The electrode must be replaced whenever one of the following signs are observed: The pH/Temperature sensor is difficult to calibrate. Storing a calibration point ■...
-
Page 72: System Hibernation
Water Monitoring System User Manual 11. System hibernation NOTICE It is recommended that the following spare parts are kept in stock for when the system is used again following a long period of inactivity: Calibration liquids ■ pH electrode • ■... -
Page 73: Maintenance Instructions
Maintenance instructions 12. Maintenance instructions System type Water monitoring system MI6200-0001 Task: Turbidity wiper blade replacement Task description: This instruction describes how to replace it. The Wiper blade may only be replaced by a trained technician. Difficulty 1-5 Overhaul interval Estimated time consumption As necessary 5 min. - Page 74 Water Monitoring System User Manual System type Water monitoring system MI6200-0002 Task: Turbidity light source replacement Task description: This instruction describes how to replace it. The Turbidity sensor light source may only be replaced by a trained technician. Difficulty 1-5 Overhaul interval Estimated time consumption Every 5 years...
- Page 75 Maintenance instructions System type Water monitoring system MI6200-0003 Task: Turbidity O-ring replacement Task description: This instruction describes how to replace Turbidity O-rings. O-rings may only be replaced by a trained technician. Difficulty 1-5 Overhaul interval Estimated time consumption As necessary 10 min.
- Page 76 Water Monitoring System User Manual System type Water monitoring system MI6200-0004 Task: Turbidity wiper unit replacement Task description: This instruction describes how to replace the Turbidity wiper unit. The Turbidity wiper unit may only be replaced by a trained technician. Difficulty 1-5 Overhaul interval Estimated time consumption...
- Page 77 Maintenance instructions System type Water monitoring system MI6200-0005 Task: Turbidity analyser replacement Task description: This instruction describes how to replace the Turbidity analyser. The Turbidity analyser may only be replaced by a trained technician. Difficulty 1-5 Overhaul interval Estimated time consumption As necessary 30 min.
- Page 78 Water Monitoring System User Manual System type Water monitoring system MI6200-0007 Task: pH electrode replacement Task description: This instruction describes how to replace it. The pH electrode replacement may only be replaced by a trained technician. Difficulty 1-5 Overhaul interval Estimated time consumption Yearly 10 min.
- Page 79 Maintenance instructions System type Water monitoring system MI6200-0008 Task: Pressure reduction valve & safety valve replacement Task description: This instruction identifies the location of the safety valve & the pressure reduction valve and describes how to replace them. The safety valve and pressure reduction valve may only be replaced by a trained technician.
- Page 80 Water Monitoring System User Manual System type Water monitoring system MI6200-0009 Task: Pressure reduction valve function test Task description: This instruction describes how to test the pressure reduction valve. The test may only be carried out by a trained technician. Difficulty 1-5 Overhaul interval Estimated time consumption...
- Page 81 Maintenance instructions System type Water monitoring system MI6200-0010 Task: Safety valve function test Task description: This instruction describes how to test the safety valve. The safety valve may only be tested by a trained technician. Difficulty 1-5 Overhaul interval Estimated time consumption Every 6 months 2 min.
- Page 82 Water Monitoring System User Manual System type Water monitoring system MI6200-0013 Task: pH Sensor Replacement Task description: This instruction describes how to replace the pH sensor. The pH sensor may only be replaced by a trained technician. Difficulty 1-5 Overhaul interval Estimated time consumption As necessary 5 min.
- Page 83 EUROPE Green Instruments A/S Erhvervsparken 29 9700 Brønderslev, Denmark Tel: +45 96 45 45 00 sales@greeninstruments.com AMERICA Green Instruments USA, Inc. 6750 N. Andrews Avenue Suit 200 Fort Lauderdale, FL-33309, USA Tel: +1 954 613 0400 usa@greeninstruments.com ASIA Green Instruments (S) Pte. Ltd. 4008 Ang Mo Kio Avenue 10 #01-09/10 Techplace I, Singapore 569625 Tel: +65 3100 0577 sales.sg@greeninstruments.com...
Need help?
Do you have a question about the Maritime G6200 and is the answer not in the manual?
Questions and answers