
Related Manuals for Lowrance LHR-80


Summary of Contents for Lowrance LHR-80
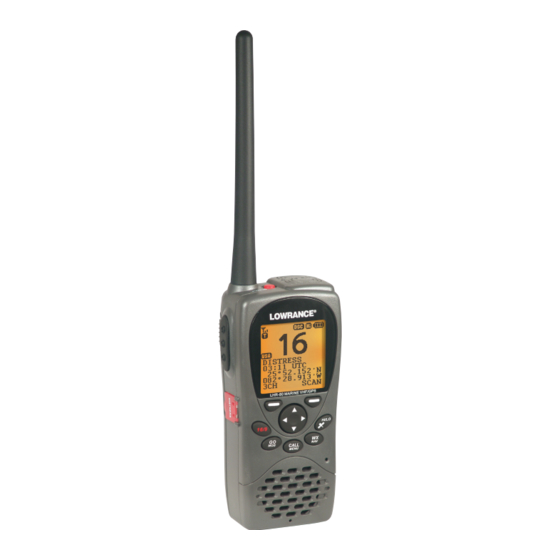
- Page 1 LHR-80 Handheld Marine GPS VHF Radio Installation and Operation Instructions Pub. 988-0158-101...
-
Page 2: Important Safety Information
We reserve the right to do so without warning. All features and specifications are also subject to change without warning. All screens in this manual are simulated. LHR-80 VHF shown on cover. Other models covered in the manual are similar. -
Page 3: Table Of Contents
4-1 Buddy List (Manage your buddy list. US only) ... 26 4-1-1 Add a new buddy name ...26 4-1-2 Edit a buddy name ...27 4-1-3 DELETE a buddy name ...27 4-2 Waypoint ... 28 4-2-1 Add a new waypoint ...28 Lowrance - LHR-80 Installation and Operation Instructions... - Page 4 4-9-1 Enter or Check your ATIS MMSI ...45 4-9-2 ATIS Select...46 4-10 Get Buddy ... 46 4-11 Track Log ... 47 4-12 Erase Track ... 47 4-13 Reset (Reset to factory defaults) ... 47 Lowrance - LHR-80 Installation and Operation Instructions...
- Page 5 6-4 Receive Distress Acknowledgement (DISTRESS ACK) ... 62 6-5 Relay a Distress Call from the Distress LOG (RELAY) ... 62 Appendix A - Technical Specifications ...64 A-1 General: ...64 A-2 Receiver: ...64 A-3 Transmitter: ...65 A-4 GPS and Navigation:...65 Lowrance - LHR-80 Installation and Operation Instructions...
-
Page 6: Safety And Operational Information
Due to European Union (EU) regulations, DSC is not available in the LHR-80E (EU) model. Never leave your radio in a closed car or trunk; the extremely high temperatures gener- ated in hot weather can damage the electronics. Lowrance - LHR-80 Installation and Operation Instructions ...76 CAUTION... - Page 7 Documentation, the English language version of the Documentation will be the official version of the Documentation. This manual represents the LHR-80 radio at the time of printing. Lowrance reserves the right to make changes to specifications without notice. Lowrance - LHR-80 Installation and Operation Instructions...
-
Page 8: Section 1 - General Information
Section 1 - General Information Congratulations on your purchase of this handheld VHF marine radio LHR-80, designed and built using superior technology and craftsmanship. It provides the following useful features: • Adjustable contrast settings for the LCD • Adjustable keypad backlighting for easy night time use •... -
Page 9: Section 2 - Controls And Keys
Favourite channels: channel name 1, 2 or 3 Time COG/SOG Latitude Vol + and Vol - Longitude Left-key LHR-80 MARINE VHF Right-key DISTRESS (US only) 16/9 HI/LO/GPS HI/LO GO/MOB WX/NAV CALL/MENU WATERPROOF Speaker Lowrance - LHR-80 Installation and Operation Instructions... -
Page 10: Keys/Controls & Functions
SCAN/ ENTER right-key Scan. Quickly press and release for Dual Watch - scan between your current channel and the priority channel in DUAL mode. Lowrance - LHR-80 Installation and Operation Instructions... - Page 11 GPS Satellite mode. WX/NAV Quickly press to access WX channel (US/Canada only). Lowrance - LHR-80 Installation and Operation Instructions disappear. The skip function is cancelled accordingly. Besides, selection is shown on the LCD...
- Page 12 BATTERY CAUTION: This device uses a Lithion Ion battery - please observe the following cautions. • Do not disassemble. • Do not incinerate or expose to fire. • Dispose of used batteries according to local codes and requirements. Lowrance - LHR-80 Installation and Operation Instructions CAUTION...
-
Page 13: Section 3 - Vhf Radio Operation
Pivot the locking tab up until it snaps into place on the back of the battery pack. 3-1-2 Initial Charge You can either charge the Li-Polymer battery pack when it is attached to the radio or separated: Lowrance - LHR-80 Installation and Op WARNING... -
Page 14: Gps Connector
To maximise battery life: remove the battery from the charger after approximately 3.5 hours. Overcharging batteries may result in damage to both the battery pack and radio. 3-1-3 GPS Connector Lowrance - LHR-80 Installation and Operation Instructions CAUTION NMEA(+)(RED) NMEA( )(BLACK) -
Page 15: Mounting Battery Charger To Flat Surface
Insert screws into bracket, and turn in a clockwise motion until locked firmly into place. Insert screws into battery charger and mount it to bracket. Turn screws in clockwise motion until firmly locked into place. Lowrance - LHR-80 Installation and Operation Instructions Wire Color Function... -
Page 16: Installing The Belt Clip
The belt clip supplied with your radio allows you to attach the radio to your belt. To install the belt clip, slide the belt clip to the back of your radio, make sure that the buckle is aligned. Lowrance - LHR-80 Installation and Operation Instructions... -
Page 17: Installing And Removing The Antenna
Removing the antenna: 2. Unscrew the antenna in a anti-clockwise motion until it is removed (as illustrated below). Note: Do not operate the radio or press PTT key without the antenna being installed. Lowrance - LHR-80 Installation and Operation Instructions... -
Page 18: Power On/Off
To adjust the squelch level, press SQ / accordingly. 3-6 Volume control Press VOL to adjust the volume level. A volume sub-menu will appear when pressed. It times-out after 5 seconds. Lowrance - LHR-80 Installation and Operation Instructions switch (on the top side of radio) until the screen... -
Page 19: Channel Selection
Press and hold “PTT” to transmit, then speak into the microphone, while the screen. Release PTT, to receive conversation. Lowrance - LHR-80 Installation and Operation Instructions to increase, or press CH CAUTION appears on screen and audio is emitted from the speaker. -
Page 20: Dual Watch Operation
CH2 will remain unless you delete them. To delete a favorite channel: • Select that channel, then hold down 3CH until a dialogue box appears to prompt the deletion. Lowrance - LHR-80 Installation and Operation Instructions appears on screen disappears. symbol appears on the , or... -
Page 21: Scan Operation
If no WP is set, ‘NO ACTIVE ROUTE!!’ will appear to prompt you that no WP is selected. During Nav Mode: • PTT – return to normal mode and TX. • 16/9 – return to normal mode and go to 16/9 Lowrance - LHR-80 Installation and Operation Instructions... -
Page 22: Wp Select Mode
• Soft Key It will zoom in/out the circle to see more/less area. • Go to Navigation Mode Lowrance - LHR-80 Installation and Operation Instructions WP LIST 13 CAMP 1 MOB 1 CAMP 2 MOB 2 CAMP 3 MOB 3... -
Page 23: Gps Satellite Mode
16/9 (16) Return to normal model and go to 16/9 • Return to normal mode • Left soft-key Return to normal mode • Other key Error Beep Lowrance - LHR-80 Installation and Operation Instructions key to enter GPS satellite mode. -
Page 24: Section 4 - Advanced Operation
• ATIS SETUP • ATIS MMSI (EU only) • GET BUDDY • ATIS Select • Track Log • Erase Track • RESET Lowrance - LHR-80 Installation and Operation Instructions • UIC (US only) • CH NAME • RING VOLUME • KEY BEEP • UNITS • WATCH MODE (US only) • WX ALERT (US only) • NMEA OUT... - Page 25 Item within the Set-Up Menu list. To confirm a selected item, push ENTER soft-key. Or use CH knob to enter alphanumeric or alphabet data. To confirm a selected item, push ENTER soft-key. Turn unit off. All changes are saved to EEPROM. Lowrance - LHR-80 Installation and Operation Instructions...
-
Page 26: Buddy List (Manage Your Buddy List. Us Only)
After you enter the last digit of the MMSI, a new screen appears automatically to show the new buddy name and MMSI. Checks that it is correct; and then push ENTER to save the new entry. (If it is not correct, select ESC). Lowrance - LHR-80 Installation and Operation Instructions BUDDY LIST ENTER NAME _ _ _ _ _ _ _ _ _ >MANUAL NEW... -
Page 27: Edit A Buddy Name
Press ENTER to save the edits or CANCEL to keep the original entry. 4-1-3 DELETE a buddy name MENU SELECT BACKLIGHT LAMP > BUDDY LIST Lowrance - LHR-80 Installation and Operation Instructions BUDDY LIST SEA ROSE MENU SELECT >EDIT >SEA ROSE... -
Page 28: Waypoint
A new screen appears automatically to show the new waypoint details. If they are correct, press ENTER to STORE the new waypoint. (If they are not correct, select ESC). Lowrance - LHR-80 Installation and Operation Instructions ENTER WP ENTER WP _ _ _ _ __ _ _ _°... -
Page 29: Edit A Waypoint
A new screen appears. Press ENTER if you want to STORE the new waypoint. If you want to keep the original entry, move the cursor to NO then press ENTER. Lowrance - LHR-80 Installation and Operation Instructions WAYPOINT WP LIST >WP LIST... -
Page 30: Delete A Waypoint
ENTER. The cursor is at GO and push ENTER and enter the navigation mode. The waypoint is set as your next destination. Lowrance - LHR-80 Installation and Operation Instructions WAYPOINT WP LIST >WP LIST... -
Page 31: Backlight Adjustment
/ to adjust the setting, Press ENTER to confirm the setting and return to the MENU SELECT. MENU SELECT LAMP BUDDY LIST >CONTRAST Lowrance - LHR-80 Installation and Operation Instructions BACKLIGHT LAMP TIMEOUT >ALWAYS ON 3 SECONDS 5 SECONDS CONTRAST... -
Page 32: Gps/Data
Use the GPS/DATA menu to manually enter your latitude and longitude and the UTC (time data). If GPS receives data automatically - all manual entries will be erased. LOCAL/DST BACKLIGHT CONTRAST >GPS/TIME Lowrance - LHR-80 Installation and Operation Instructions GPS/DATA MANUAL LL >MANUAL SETTING MANUAL LL _° _ . _ _ _N 27 °... -
Page 33: Settings: Ll Display (Show Or Hide Your Position)
If your position and time data is being updated, you can use TIME DISPLAY for to choose whether to show or to hide the time on the screen. MENU SELECT BUDDY LIST CONTRAST > GPS/DATA Lowrance - LHR-80 Installation and Operation Instructions GPS/DATA SETTING MANUAL >SETTING >LL DISPLAY... -
Page 34: Time Offset (Local Time)
Enter + or – followed by the time difference between UTC and your local time. Half hour increments can be used (as in this example). Local time is shown with the suffix LOC. Press ENTER to confirm the selection. Lowrance - LHR-80 Installation and Operation Instructions GPS/DATA SETTING MANUAL >TIME OFFSET... -
Page 35: Settings: Time Format (12 Or 24 Hour Clock)
The cursor is at 12 HR (to show the suffix: am or pm). If you want to use the 24 Hr clock, move the cursor to 24 HR. Press ENTER to confirm the selection. Lowrance - LHR-80 Installation and Operation Instructions ‡ Standard Time = Universal Time... -
Page 36: Settings: Cog/Sog (Course & Speed Display Options)
In the radio setup menu, select GPS/DATA then SETTING, next select GPS ALERT. Select ON/OFF as desired, in this example, ON has been selected, so if GPS DATA is not available, the NO GPS alert will sound. Lowrance - LHR-80 Installation and Operation Instructions GPS/DATA SETTING MANUAL >SETTING... -
Page 37: Turn Gps Enable On/Off
ENTER to confirm selection. MAG VARIATION XX.X °W (or E) Note: W is the default and tenths of a degree is required. SAVE >YES Lowrance - LHR-80 Installation and Operation Instructions GPS ENABLED >ON BEARING >TRUE MAGNETIC... -
Page 38: Radio Setup
Select EDIT and press ENTER to edit the existing name tag. Input the new name over the existing one and press ENTER to display the YES/NO confirmation. To delete the channel name, just select DELETE then press ENTER. Lowrance - LHR-80 Installation and Operation Instructions >USA INT’L CANADA . -
Page 39: Ring Volume Adjustment
You can select your preferred measurement units for distance and cross track error. Select RADIO SETUP, then units. Select your preferred measurement units and press ENTER. RADIO SETUP RING VOLUME KEY BEEP >UNITS Lowrance - LHR-80 Installation and Operation Instructions CH NAME CALLING CALLING >EDIT RING VOLUME >HIGH... -
Page 40: Set The Priority Channel (Watch Mode) Us Only
4-7-8 Set NMEA OUT (NMEA OUT) RADIO SETUP WATCH MODE UWX ALERT >NMEA OUT This radio supports to output NMEA 0183 sentence of DSC & DSE. Lowrance - LHR-80 Installation and Operation Instructions WATCH MODE >ONLY 16 16CH+9CH WX ALERT >ON NMEA OUT >ON... -
Page 41: Dsc Setup (Us Only)
MMSI. Press ENTER to confirm the number and move to the next position. If you make an error, select the < character then press ENTER to backup. Lowrance - LHR-80 Installation and Operation Instructions INPUT USER USER MMSI MMSI >STORE... -
Page 42: Maintain Groups
Press ENTER to confirm each correct alphanumeric character and to move to the next position. Lowrance - LHR-80 Installation and Operation Instructions GROUP SETUP GROUP NAME >MANUAL NEW... -
Page 43: Edit User Groups
Select what you want to delete and press the Select DELETE and press YES, then press thee ENTER to empty the group and return to the GROUP SETUP screen. The LCD displays the group as follow. Lowrance - LHR-80 Installation and Operation Instructions FISHING 1 EDIT NAME 012345678 >EDIT... -
Page 44: Response To Individual Calls
> DSC SELECT 4-8-5 LL Reply You can set the radio to respond to the Position Request. It can be done in three ways, auto- matic, manual, and off. Lowrance - LHR-80 Installation and Operation Instructions DELETE GROUP GROUP SETUP EILEEN >YES... -
Page 45: Atis Setup (Eu Only)
ATIS MMSI along the dashed line. Press ENTER to confirm each entry and then move to the next line. If you make an error, press CH correct the entry. Lowrance - LHR-80 Installation and Operation Instructions LL REPLY >MANUAL AUTO... -
Page 46: Atis Select
Select GET BUDDY and then press ENTER. Select ON or OFF as required, then press ENTER to confirm the selection. Note: For EU, use clone software to Enable/Disable the GET BUDDY menu. Lowrance - LHR-80 Installation and Operation Instructions ATIS SETUP ATIS SELECT ATIS MMSI >ATIS SELECT... -
Page 47: Track Log
TRACK LOG ERASE TRACK > RESET Select RESET, press ENTER, the radios asks for confirmation. Select yes, press ENTER to reset the radio and return to the menu. Lowrance - LHR-80 Installation and Operation Instructions TRACK LOG >50M 100M ERASE TRACK >NO... -
Page 48: Section 5 - Sending And Receiving Dsc Calls (Us Only)
An MMSI is a nine-digit number used on Marine Transceiver capable of using Digital Selective Calling (DSC). This number is used like a telephone number to selectively call other vessels. 5-1-2 How can I obtain a MMSI assignment? Contact your local dealer. Lowrance - LHR-80 Installation and Operation Instructions CAUTION... -
Page 49: Dsc Call Types
The call at the end of the list is automatically erased. This means the earliest call is stored at the end of the list. There are only 10 calls that can be stored. Lowrance - LHR-80 Installation and Operation Instructions WARNING... -
Page 50: Send An Individual Call
The radio summarizes the call details and asks for confirmation to send the call (SEND?). Press ENT to send the call. The radio goes to CH70 and the Tx is displayed on the screen while the DSC call is being sent. Lowrance - LHR-80 Installation and Operation Instructions INDIVIDUAL INDIVIDUAL >... -
Page 51: Send A Group Call
The Tx icon is displayed on the screen while the call is being sent. 5-4 Send an All Ships call DSC CALL LAST CALL GROUP >ALL SHIPS ALL SHIPS ROUTINE >SEND? Lowrance - LHR-80 Installation and Operation Instructions GROUP RD GROUP >RD GROUP GROUP #2 GROUP #3 >SET CHANNEL ALL SHIPS ALL SHIPS >ROUTINE... -
Page 52: Reply To A Call In Your Call Log
ROUTINE >SENT? Press call/menu to show the DSC CALL menu. The cursor is at last call. The contact details of the most recent incoming call are shown. Lowrance - LHR-80 Installation and Operation Instructions 112345678 11 112345678 >CALL BACK INDIVIDUAL... -
Page 53: Reply To A Call In Your Distress Log
UTC time of the boat in distress. The other screen shows the na- ture of the emergency (if specified) and the MMSI of the boat that relayed the distress call. Lowrance - LHR-80 Installation and Operation Instructions DISTRESS... -
Page 54: Reply To The Last Call
If there is no reply (UNABLE TO ACKNOWLEDGE), a message asks if you want to retry (SEND AGAIN?). Select YES and then press ENTER to retry the call. This cycle repeats twice. If the call still cannot be placed, the radio returns to normal operation. Lowrance - LHR-80 Installation and Operation Instructions BARRY BARRY INDIVIDUAL... -
Page 55: Request The Ll Position Of A Buddy (Ll Request)
Note: To delete a buddy from the track list, select the buddy that you want to delete, then press ENTER. Select Yes and press ENTER to confirm your choice. Lowrance - LHR-80 Installation and Operation Instructions LL REQUEST > SAM... -
Page 56: Select Your Want Track's Buddy
Press CALL/MENU to enter DSC mode, then select TRACK BUDDY. Select START TRACK, then YES. (The START TRACK display changes to STOP TRACK. To stop tracking at any time, just press YES.) Lowrance - LHR-80 Installation and Operation Instructions TRACK BUDDY SET BUDDY TRACK START >... -
Page 57: Receive An All Ships Call
The position that is received is not stored in your radio’s Log, but is broadcast over NAVBUS to the Chartplotters. Press any key to acknowledge, or wait for the automatic 20 second timeout. Note: The LHR-80 is capable of receiving and displaying the LL position data at normal or enhanced resolution. -
Page 58: Reply To An Ll Position Request
When the radio receives an LL position request it beeps to alert you. Meanwhile the LCD screen displays the position request and the MMSI of the caller. The radio acknowledges the request automatically and immediately sends your boat’s position to the caller. Lowrance - LHR-80 Installation and Operation Instructions... -
Page 59: Do Not Reply To An Ll Position Request
Your radio can automatically or manually reply to the incoming caller depending on the INDIV REPLY settings. Press ENTER to send an acknowledgement to the incoming caller, or LHR-80 automatically sends an acknowledgement to the caller. This stops the two-tone alert. -
Page 60: Section 6 - Distress Calls (Us Only)
Press ESC if you need to cancel the distress call. This is the only key that operates in Distress mode. Lowrance - LHR-80 Installation and Operation Instructions DISTRESS CALL DISTRESS CALL >UNDEFINED... -
Page 61: Receive A Distress Call
9s and 8s respectively. The LHR-80 is capable of receiving enhanced LL position data if the vessel transmitting the Distress Call is sending. It provides the position of the distressed vessel to within 20m (60ft). -
Page 62: Receive Distress Acknowledgement (Distress Ack)
Press CALL/MENU to enter the DSC CALL menu, then select DIST LOG. The most recently received distress call is the first entry(01) in the Distress Log. Select the distress call that you want to relay, then select RELAY. Lowrance - LHR-80 Installation and Operation Instructions SINKING 654365436 39°... - Page 63 The radio automatically selects CH16 (For ALL RELAY), or manually set the working channel (INDIV RELAY). It displays the detail of the distress call on the screen. Press ENTER to Relay the distress call. Lowrance - LHR-80 Installation and Operation Instructions...
-
Page 64: Appendix A - Technical Specifications
Squelch sensitivity Adjacent Channel Selection Spurious Response Rejection Intermodulation Rejection Audio Power Output Lowrance - LHR-80 Installation and Operation Instructions Floating and totally submersible to JIS-7 All US, Canadian and International Channels 10 NOAA Weather Channels Transmit -156.025 to 157.425 MHz Receive - 156.025 to 163.275 MHz (US only) -
Page 65: Transmitter
A-4 GPS and Navigation: Satellites tracked Navigation Plotter Units NMEA Output Lowrance - LHR-80 Installation and Operation Instructions 1 or 5 Watts (Selectable) 40 dB more than 70 dB less than -70 dBc Transmit (High) 1.75 A, Transmit (Low) 0.8 A... -
Page 66: Appendix B - Frequency Charts
161.850 157.300 161.900 157.350 161.950 157.400 162.000 156.025 160.625 156.075 160.675 Lowrance - LHR-80 Installation and Operation Instructions TRAFFIC TYPE Public Correspondence Public Correspondence Public Correspondence Port Operations Port Operations, Selected VTS Areas Inter-ship Safety Port Operations Commercial (inter-ship only) -
Page 67: Special Notes On International Channel Usage
This channel is only available on DSC enabled radios. Note: The INTERNATIONAL mode is not legal for use in US or Canada waters. KEY: S = Simplex operating channel; D = Duplex operating channel. Lowrance - LHR-80 Installation and Operation Instructions Port Operations Port Operations... -
Page 68: Usa Channel Chart
156.225 156.225 156.275 156.275 156.325 156.325 156.375 156.375 Lowrance - LHR-80 Installation and Operation Instructions TRAFFIC TYPE Port Operations, Selected VTS Areas US Government, Coast Guard Port Operations, Selected VTS Areas Inter-ship Safety Commercial Commercial (inter-ship only) Recreational Calling Channel... -
Page 69: Special Notes On Usa Channel Usage
Distress, Safety, and Ship Calls. No voice communication is allowed on CH70. This channel is only available on DSC enabled radios. KEY: S = Simplex operating channel; D = Duplex operating channel. Lowrance - LHR-80 Installation and Operation Instructions Boat Operations, Recreational Boat Operations, Recreational... -
Page 70: Canada Channel Chart
161.850 157.300 161.900 157.350 161.950 157.400 162.000 162.000 156.025 160.625 156.075 156.075 Lowrance - LHR-80 Installation and Operation Instructions TRAFFIC TYPE Public Correspondence Public Correspondence Public Correspondence Canadian Coast Guard, SAR Port Operations, VTS in Selected Areas Inter-ship Safety Commercial... -
Page 71: Special Notes On Canada Channel Usage
Lightly shaded simplex channels 21A, 23A, 61A, 64A, 81A, 82A, and 83A cannot be lawfully used in Canada waters unless special authorization is obtained from the Canadian Coast Guard. Not for use by the general public. Lowrance - LHR-80 Installation and Operation Instructions Canadian Coast Guard Public Correspondence, Duplex U.S. -
Page 72: Weather Channels
162.500 WX07 162.525 WX08 161.650 WX09 161.775 WX10 163.275 Lowrance - LHR-80 Installation and Operation Instructions TRAFFIC TYPE NOAA Weather Channel NOAA Weather Channel NOAA Weather Channel NOAA Weather Channel NOAA Weather Channel NOAA Weather Channel NOAA Weather Channel CANADIAN Weather Channel... -
Page 73: Appendix C - Eu Inland Waterway Channels
156.575 156.6 a) r) 156.625 156.65 f) g) 156.675 156.7 156.725 h) j) 156.75 o) j) 156.775 156.8 Lowrance - LHR-80 Installation and Operation Instructions TRANSMITTING SHIP-TO-SHIP FREQUENCY (MHZ) SHIP LAND 160.625 160.65 160.675 160.7 160.725 160.75 160.775 160.8 160.825 160.85... - Page 74 86), Ukraine and the Federal Republic of Yugosla via. The Administra tions concerned should make any possible attempt to make these fre quencies channels as soon as possible available for the radiotelephone service on Inland Waterways and/or the required service catego ry. Lowrance - LHR-80 Installation and Operation Instructions 156.825 156.85 156.875 161.5...
- Page 75 After permission of the competent authority, this channel may be used only for spe cial events on a temporary basis. In the Czech Republic this channel is used for service category nautical information. In the Czech Republic this channel is used for service category ship-to-port authorities. Lowrance - LHR-80 Installation and Operation Instructions...
-
Page 76: Special Channels
The special channels above maybe fitted to your radio. These are only licensed for use in the country indicated. No attempt should be made to use them in any other country. Lowrance - LHR-80 Installation and Operation Instructions TRAFFIC TYPE... -
Page 77: Navico Full Two-Year Lowrance Vhf Warranty
REMINDER: You must retain the sales slip or sales receipt proving the date of your original purchase in case warranty service is ever required. NAVICO, 12000 E. SKELLY DRIVE, TULSA, OK 74128, (800) 324-1356 Lowrance - LHR-80 Installation and Operation Instructions... -
Page 78: How To Obtain Service
If you have technical, return or repair questions, contact the dealer in the country where you purchased your unit. To locate an Lowrance dealer near you, visit our web site or consult your telephone directory for listings. Lowrance - LHR-80 Installation and Operation Instructions 800-324-1356 800-661-3983 905-629-1614 (not toll-free) www.lowrance.com... -
Page 79: Accessory Ordering Information For All Countries
Write the Return Authorization (RA) number on the outside of the box underneath your return address. For your security, you may want to insure the package through your shipping courier. Lowrance does not assume responsibility for goods lost or damaged in transit. Lowrance - LHR-80 Installation and Operation Instructions... - Page 80 Copyright © 2008 Lowrance Pub. 988-0158-101 All Rights Reserved Printed in China - 042008 Navico 1177 MN000799A-G...
Need help?
Do you have a question about the LHR-80 and is the answer not in the manual?
Questions and answers