Advertisement
Quick Links
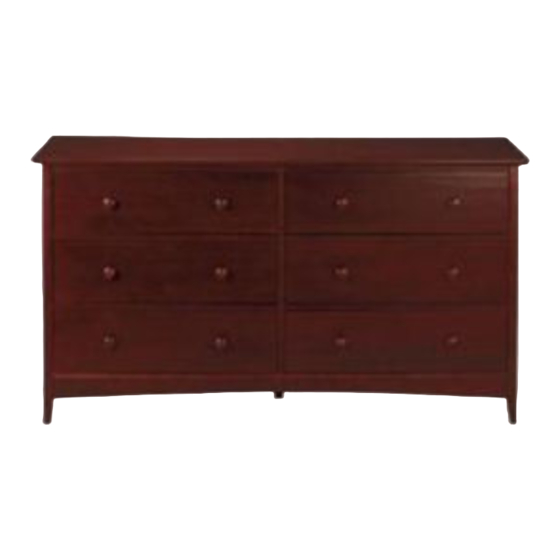
HAWTHORNE 6 DRAWER DRESSER 25"Hx44"W
SKU # 2048900120R (Dark Cherry)
SKU # 2048900550R (Oak)
SKU # 2048900410R (White)
SKU # 2048900210 (Black)
30 Min.
BEFORE BEGINNING ASSEMBLY, CHECK TO MAKE SURE ALL
PARTS AND HARDWARE ARE ACCOUNTED FOR.
IT IS SUGGESTED THAT YOU SAVE THE CARTON AND PACKING
MATERIAL UNTIL AFTER ASSEMBLY IS COMPLETED. SELECT A CLEAN,
SMOOTH SURFACE TO WORK (SUCH AS CARPET).
THEN, FOLLOW THE EASY STEPS BELOW.
IF PARTS ARE MISSING, PLEASE CALL 1-800-998-7021 FOR INFORMATION.
MADE IN BRAZIL
16 02 08 2
Advertisement

Related Manuals for Home Decorators Collection 2048900120R


Summary of Contents for Home Decorators Collection 2048900120R
- Page 1 HAWTHORNE 6 DRAWER DRESSER 25"Hx44"W SKU # 2048900120R (Dark Cherry) SKU # 2048900550R (Oak) SKU # 2048900410R (White) SKU # 2048900210 (Black) 30 Min. BEFORE BEGINNING ASSEMBLY, CHECK TO MAKE SURE ALL PARTS AND HARDWARE ARE ACCOUNTED FOR. IT IS SUGGESTED THAT YOU SAVE THE CARTON AND PACKING MATERIAL UNTIL AFTER ASSEMBLY IS COMPLETED.
- Page 2 Part# Description Sizes (w x d x h) 44¨ 14 15/16¨ 11/16¨ Left Side 24¨ 13 3/4¨ 1 5/8¨ Right Side 24¨ 13 3/4¨ 1 5/8¨ Left Drawer Side 11 13/16¨ 4 5/8¨ 9/16¨ Right Drawer Side 11 13/16¨ 4 5/8¨ 9/16¨...
-
Page 3: Hardware Pack
1/4¨ x 1 3/16¨ 1/8¨ x 1 3/16¨ 1/16¨ x 7/8¨ 1/8¨ x 1 3/16¨ 1/8¨ x 5/8¨ 3/16¨ x 1 9/16¨ 1/4¨ x 1 15/16¨ HARDWARE PACK... - Page 4 1. Prepare for future assembly by: S T E P * Insert wood dowels (A) into all drawer sides (4) & (5) * Insert wood dowels (A) into the side parts (2) & (3) * Insert wood dowels (A) into the divider (9) * Insert wood dowels (A) into the bottom panel (11) * screw mini-fix pins (B) into the top panel (1) * screw mini-fix pins (B) into the divider (9)
- Page 5 2. Attach the plastic plug (J) to central foot (12) then screw the S T E P 2 adjustable foot (K) into the plastic plug. Using the holes as guide, attach the central foot (12) to bottom S T E P 3 panel (11) and secure using screw (M) and allen key (N) as shown.
- Page 6 4. Using the dowels and mini-fix pins previously attached in step S T E P 4 1 as guide, assemble the rails (10)to the division panel (09) as shown. S T E P Using the dowels and mini-fix pins previously attached in step 1 as guide, assemble the bottom panel (11)to side(2) and divider (9)as shown.
- Page 7 Attach the front rail (13) to the bottom panel (11) using the S T E P 6 mini-fix pins as guides, secure using mini-fix drums (C) as shown. Attach the top panel (1) and secure using mini-fix drums (C) S T E P 7 as shown.
- Page 8 8. Using dowels as your guide, aling and attach a left (4) and a S T E P 8 right (5) drawer side to a drawer front (6) as shown. Secure using screws (D) as shown. 9. Slide in the drawer bottom (7) as shown. S T E P 9...
- Page 9 10. Align and attach the drawer back (8) as shown, secure using S T E P 10 screws (D). 11. Attach the drawer knobs (F) to the drawer front (6) using screws S T E P 11 (G) as shown. Then, attach the plastic drawer stop (H) to the drawer back (8) using screw (I) as shown.
- Page 10 12. Slide in the drawers. To remove the drawer you must press S T E P 12 down the drawer stop as shown. 13. Complete the assembly of your dresser by nailing the back panel S T E P 13 (14) using nails (E).
Need help?
Do you have a question about the 2048900120R and is the answer not in the manual?
Questions and answers