Advertisement
Advertisement

Related Manuals for AnyTone AT-5555 PLUS


Summary of Contents for AnyTone AT-5555 PLUS
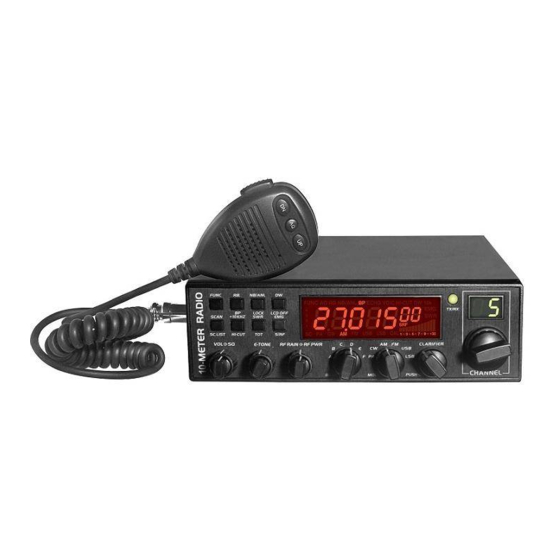
- Page 1 AT-5555 PLUS AT-5555 PLUS/N 10 METER RADIO Instruction Manual...
- Page 2 The aim of all this is to offer innovative, exclusive and efficient solutions. The new AT-5555 PLUS and AT-5555 PLUS / N models are the latest results of what has been written: they ensure you exceptional performance for comfortable use, reliable operation and exciting horizons.
-
Page 3: Table Of Contents
CONTENTS FUNCTIONS & FEATURES ................................1 WARNING ......................................1 RESET FUNCTION (Resume Factory Default) ..........................1 INSTALLATION ....................................2 HOW TO USE YOUR RADIO ................................4 FUNCTION MENU SETUP ................................9 SPECIFICATIONS ....................................12... -
Page 4: Functions & Features
25. Key-Lock Function FUNCTIONS & FEATURES 26. VOX function 1. Large panel which displays frequency and all kinds of 27. CTCSS/DCS code information 28. RX compander: noise blanker 2. DUAL-DIGITAL TUBE FOR CHANNEL DISPLAY 29. Noise gate setting: mic noise adjustable 3. - Page 5 1. WHERE AND HOW TO MOUNT YOUR RADIO Antenna selection: For the best signal radiation, a well-calibrated antenna length is a)It is important to identify the proper place of the installation by very important, on the other hand, there are other factors to be considering "key criteria", such as easy access and congenial considered: the size of the vehicle and its usual speed.
- Page 6 Your RADIO is protected against an inversion of polarities. However, YOUR SET FOR THE FIRST TIME (without transmitting or using the <<Push-To-Talk>> switch on the microphone) before switching it on, you are requested to check all the connections. a) Connect the microphone Your equipment must be supplied with a voltage of 12 volts DC(Direct Current).
-
Page 7: How To Use Your Radio
-Set to channel 20 on D bank in FM. DW: Appears when DW function is started. 10K: Appears when +10KHZ function is started. -Press <<push-to-talk>> button on the microphone to transmit. EMG: Appears when EMG channel is used. -At the moment, LCD would display SWR value which should be as close as possible to 1. - Page 8 it is desired that the control be adjusted only to the point where the open field. receiver background noise or ambient background noise is eliminated. Amplitude Modulation/AM: Communication on a field with relief and Turn fully anticlockwise then slowly clockwise until the receiver noise obstacles in middle distance (the most used).
- Page 9 FUNC key, and then press other keys to realize the second functions enable this function. silk-screened under the button. "FUNC+ Keypad name" is to be used To enable the DW function, firstly turn the SQ control clockwise in the following operating instruction. until the background noise is cut out.
- Page 10 channel. You can receive the calling, and also, can transmit on this (2)FUNC+ SWR channel by pressing PTT key. If there is no transmission or detected When pressing this key, TOT ON or TOT OFF would display on the signal on that channel within 5 seconds(time to resume scanning can LCD for 2 seconds.
- Page 11 24. EXT SP or PA SP 1. PTT EXT SP Transmitting key, Press to speak and release to receive a message. Accept 4 to 8 ohm, 4 watt external speaker to be connected. When 2. UP/DN external speaker is connected to this jack, the built-in speaker is These key allow increasing or decreasing a channel number.
-
Page 12: Function Menu Setup
FUNCTION MENU SETUP (06) NC This menu refers to RX noise compander The initial functions and parameter can be changed via the following setting. settings and operations. Please read the following instruction before making any desired amendments. Default: OFF To enter Function Menu: under ON state, press and hold FUNC key for (07) NG more than 2seconds, and then release the FUNC key to enter into the This menu refers to TX noise gate setting. - Page 13 (13) STP T: When this option is selected, press PUSH and turn CLARIFIER knob to change transmitting frequency. When pressing this key, This menu is to set tuning step when "3" icon will display on the far left of the LCD. Under this condition, adjusting frequency by CLARIFIER knob rotate the CLARIFIER knob to change the transmitting frequency Options: 10Hz、100Hz、1KHz、10KHz...
- Page 14 (19) TSR TF: When TF is selected,LCD would display transmitting frequency when transmitting. This menu is to choose whether to enable SR: When SR is selected, LCD would display SWR value of antenna Transmitting SWR Protection function or when transmitting, for example: "1.2" on the LCD. not.
-
Page 15: Specifications
SPECIFICATIONS Frequency Response AM and FM: 450 to 2500Hz General Output impedance 50ohms, unbalanced Frequency Range 28.000MHz-29.700MHz SSB: 0.25μV for 10dB(S+N)/N at greater Frequency Band A/B/C/D/E/F than 1/2-watt of audio output. Channel 60 channels (programmable) in each band AM:1.0μV for 10 dB(S+N)/N at greater Sensitivity Frequency Control Phase-Locked-Loop Synthesizer... - Page 17 Qixiang Electon Science & Technoloyg Co.,Ltd. www.anytone.net...
Need help?
Do you have a question about the AT-5555 PLUS and is the answer not in the manual?
Questions and answers
vysilačka AT ANYTONE 5555N PLUS. Uzamkl jsem si displej a tlačítka zámkem. Bohužel odemknout to již nelze. Zkoušel jsem dvojklik FUNC +LOCK a spustit POWER, měl se bjevit UNLOCK, ale vše zůstalo zamčeno..Děkuji za info.
To unlock the display and buttons on the AnyTone AT-5555 PLUS, press the FUNC key followed by the NB/ANL key. This will toggle the keyboard lock function on or off. When unlocked, all keys become active again except during locked mode, where only PTT, BAND SWITCH, and MODE SWITCH work.
This answer is automatically generated