Advertisement
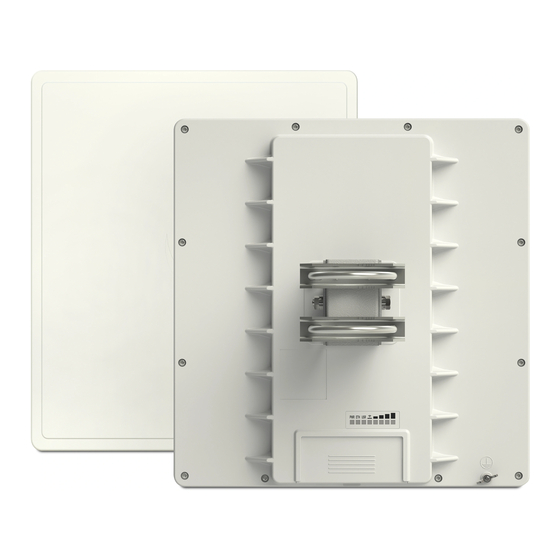
QRT 5
Model: RB911G-5HPnD-QRT
Safety Warnings
Before you work on any equipment, be aware of the hazards involved with electrical circuitry, and be familiar with standard practices for preventing
accidents.
Ultimate disposal of this product should be handled according to all national laws and regulations.
All installation methods for mounting an access point on any wall surface is subject to the acceptance of local jurisdiction.
The Installation of the equipment must comply with local and national electrical codes.
This product is intended to be mounted outdoors on a pole. Please read the mounting instructions carefully before beginning installation. Failure to use the
correct hardware and configuration or to follow the correct procedures could result in a hazardous situation for people and damage to the system.
Use only the power supply and accessories approved by the manufacturer, and which can be found in the original packaging of this product.
Read the installation instructions before connecting the system to the power source.
We cannot guarantee that no accidents or damage will occur due to the improper use of the device. Please use this product with care and operate at your
own risk!
In the case of device failure, please disconnect it from power. The fastest way to do so is by unplugging the power plug from the power outlet.
It is the customer's responsibility to follow local country regulations, including operation within legal frequency channels, output power, cabling
requirements, and Dynamic Frequency Selection (DFS) requirements. All Mikrotik radio devices must be professionally installed.
This is a class A device. In a domestic environment, this product might cause radio interference in which case the user might be required to take adequate
measures.
Exposure to Radio Frequency Radiation: This MikroTik equipment complies with the FCC, IC, and European Union radiation exposure limits set forth for an
uncontrolled environment. This MikroTik device should be installed and operated no closer than 20 centimeters from your body, occupational user, or the
general public.
Quickstart
Please follow these quick steps to set up your device:
Mount the unit in your desired place, please see
Slide off latch to access Ethernet port. Please see the
Connect your PoE cable to the Ethernet port, please see the
Mounting
paragraph.
Opening latch
section.
Powering
section.
Advertisement
Table of Contents

Related Manuals for MikroTik QRT 5


Summary of Contents for MikroTik QRT 5
- Page 1 Exposure to Radio Frequency Radiation: This MikroTik equipment complies with the FCC, IC, and European Union radiation exposure limits set forth for an uncontrolled environment. This MikroTik device should be installed and operated no closer than 20 centimeters from your body, occupational user, or the general public.
- Page 2 Set your computer IP configuration to automatic (DHCP). From your PC connect to the wireless network name which starts with "MikroTik". Once connected to the wireless network, open https://192.168.88.1 in your web browser to start configuration, since there is no password by default, you will be logged in automatically.
- Page 3 RouterOS allows configuring each LED's activity the way that the user wishes. It is possible to configure the LEDs to display wireless strength, blink the LEDs on interface traffic activity, and many other options. For further information please visit https://wiki.mikrotik.com/wiki/Manual:System/LEDS Default factory configuration for this device: Solid Blue – The device is powered on.
- Page 4 Attach the two brackets (A) to the swivel adjuster (B), by using the four provided screws (use a PH1 screwdriver). Place the two U-bolts (C) around the mast or pole, and guide them through the holes on the swivel adjuster (D). Then, tighten the U-bolts, each with one regular washer, one spring washer, and one nut, as shown in the image to the right.
- Page 5 Use the mounting bracket (E), and put it on to the back of the antenna. Install with one rubber ring, one washer, and one nut for each of the built- in bolts (in that order). Attach the swivel adjuster to the mounting bracket. Use the long bolt in the position (F). Put one regular washer, and one spring washer onto the shorter screws, then put them in positions (G).
-
Page 6: Specifications
The device supports RouterOS software with the version number 6.44.5 at or above what is indicated in the RouterOS menu /system resource. Other operating systems have not been tested. Specifications For more information about this product, specifications, pictures, downloads and test results please visit our web page: https://mikrotik.com/product /RB911G-5HPnD-QRT MikroTik mobile app... -
Page 7: Federal Communication Commission Interference Statement
Use the MikroTik smartphone app to configure your router in the field, or to apply the most basic initial settings for your MikroTik home access point. To avoid pollution of the environment, please separate the device from household waste and dispose of it in a safe manner, such as in designated waste disposal sites. - Page 8 Информация о дате изготовления устройства указана в конце серийного номера на его наклейке через дробь. Первая цифра означает номер года (последняя цифра года), две последующие означают номер недели. Изготовитель: Mikrotikls SIA, Aizkraukles iela 23, Riga, LV-1006, Латвия, support@mikrotik.com. Сделано в Китае, Латвии или Литве. Cм. на упаковке.
-
Page 9: Ce Declaration Of Conformity
MikroTik è conforme ai limiti massimi di potenza di trasmissione WLAN in conformità con le normative ETSI. Per ulteriori informazioni, consultare la dichiarazione di conformità sopra / Este dispositivo MikroTik cumple con los límites máximos de potencia de transmisión WLAN de acuerdo con las regulaciones ETSI.
Need help?
Do you have a question about the QRT 5 and is the answer not in the manual?
Questions and answers