Table of Contents
Advertisement
Quick Links
NetBox 5
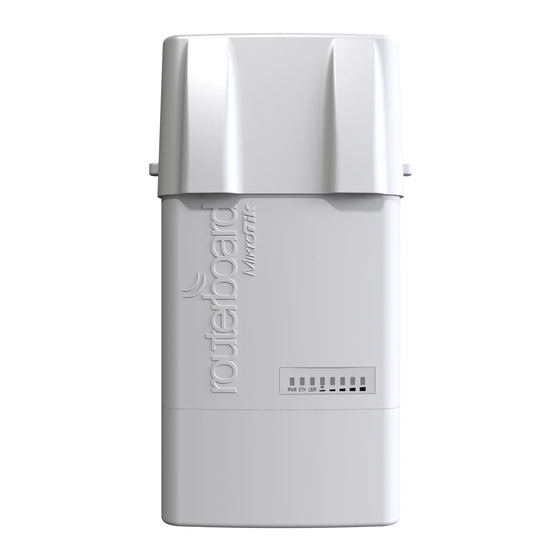
RB911G-5HPacD-NB
This device needs to be upgraded to RouterOS v6.46 or the latest version to ensure compliance with local authority regulations.
It is the end users responsibility to follow local country regulations, including operation within legal frequency channels, output
power, cabling requirements, and Dynamic Frequency Selection (DFS) requirements. All MikroTik radio devices must be
professionally installed.
Quickstart
Please follow these quick steps to set up your device:
Remove the upper cover (see "
Connect an external antenna to the SMA connector (see "
Open the bottom cover (see "
Connect the device to the power source (see "
Open network connections on your PC, mobile phone or other device and search for MikroTik wireless network and connect to it.
Recommended using the WinBox configuration tool
Default IP for the device is 192.168.88.1, user name: a
Depending on the antenna used, you must set its gain in the RouterOS software to ensure that EIRP meets the limit set by the local authorities.
This is done in the Wireless menu.
Click the "Check for updates" button and update your RouterOS software to the latest version to ensure the best performance and stability.
Choose your country, to apply country regulation settings and set up your password in the screen that loads.
Powering
The device accepts power in the following ways:
Ethernet port accepts Passive PoE 8-30 V DC .
The power consumption under maximum load can reach 11.5 W.
Connecting to a PoE Adapter:
1.
Connect the Ethernet cable from the device to the PoE+DATA port of the PoE adapter.
2.
Connect an Ethernet cable from your local network (LAN) to the PoE adapter.
3.
Connect the power cord to the adapter, and then plug the power cord into a power outlet.
Removing upper cover
NetBox 5#Removing upper cover
NetBox 5#Antenna usage
NetBox 5#Opening bottom cover
NetBox 5#Powering
https://mt.lv/winbox
dmin
").
").
").
").
.
and there is no password.
Advertisement
Table of Contents

Related Manuals for MikroTik NetBox 5


Summary of Contents for MikroTik NetBox 5
- Page 1 Connect the device to the power source (see " NetBox 5#Powering "). Open network connections on your PC, mobile phone or other device and search for MikroTik wireless network and connect to it. Recommended using the WinBox configuration tool https://mt.lv/winbox Default IP for the device is 192.168.88.1, user name: a...
- Page 2 To remove the upper cover, press both side clips. Pull cover to the side while holding the body. When assembling please not mark on the top cover or reference. Opening bottom cover To open the bottom cover, press clip upwards to release. Pull cover slightly from the device body.
- Page 3 The Netbox 5 is designed to be used outdoors and mounted on pole or DIN rail. When mounting, please ensure that cable feed is pointing downwards. The IP rating scale of this device is IP54. We recommend using Cat6 shielded cables.
- Page 4 The installation infrastructure (towers and masts), must be properly grounded. Please secure all loose Ethernet cables and antenna cables to the pole or mast approximately 30cm from the device, so that the cable weight is not pulling the ports and connectors. Mounting using DIN rail When mounting on DIN rail, please find a special bracket in the package and secure it with four screws to the back of the unit.
-
Page 5: Reset Button
For recovery purposes, it is possible to boot the device for reinstallation, see section NetBox 5#Buttons and Jumpers Reset button The reset button has three functions: Hold this button during boot time until LED light starts flashing, release the button to reset RouterOS configuration (total 5 seconds). -
Page 6: Antenna Usage
Compliance Information Safety Information: Before you work on any MikroTik equipment, be aware of the hazards involved with electrical circuitry and be familiar with standard practices for preventing accidents. The installer should be familiar with network structures, terms, and concepts. -
Page 7: Federal Communication Commission Interference Statement
. Made in China, Latvia or Lithuania Information on importers of MikroTik products to the Russian Federation: https://mikrotik.com/buy/europe/russia MikroTik products that are shipped to the Eurasian Customs Union are evaluated according to relevant requirements and are marked with the EAC mark, as below:... -
Page 8: Innovation, Science And Economic Development Canada
IMPORTANT: Exposure to Radio Frequency Radiation. This equipment complies with the FCC RF radiation exposure limits set forth for an uncontrolled environment. This equipment should be installed and operated with a minimum distance of 375 cm between the radiator and any part of your body. Antenna Installation. - Page 9 BG С настоящото Mikrotīkls SIA декларира, че този тип радиосъоръжение RouterBOARD е в съответствие с Директива 2014/53/ЕС. Цялостният текст на ЕС декларацията за съответствие може да се намери на следния интернет адрес: https://mikrotik.com/products CS Tímto Mikrotīkls SIA prohlašuje, že typ rádiového zařízení RouterBOARD je v souladu se směrnicí 2014/53/EU. Úplné znění EU prohlášení o shodě...
- Page 10 IS Hér með lýsir Mikrotīkls SIA því yfir að RouterBOARD er í samræmi við grunnkröfur og aðrar kröfur, sem gerðar eru í tilskipun 2014/53/EU. Fullur texti ESB samræmisyfirlýsingar er að finna á eftirfarandi veffangi: https://mikrotik.com/products LT Aš, Mikrotīkls SIA , patvirtinu, kad radijo įrenginių tipas RouterBOARD atitinka Direktyvą 2014/53/ES. Visas ES atitikties deklaracijos tekstas prieinamas šiuo interneto adresu:...
- Page 11 Operating Frequency and Power Frequency range (for applicable models) Channels used Maximum Output Power (EIRP) 5470-5725 MHz 100 - 140 27 dBm This MikroTik device meets Maximum transmit power limits per ETSI regulations. For more detailed information see Declaration of Conformity above.
Need help?
Do you have a question about the NetBox 5 and is the answer not in the manual?
Questions and answers