Table of Contents
Advertisement
Quick Links
Ridder Drive Systems B.V.
Lorentzstraat 32
3846 AX Harderwijk
PO Box 360
3840 AJ Harderwijk
the Netherlands
T +31 (0)341 416 854
F +31 (0)341 416 611
I ridder.com
E info@ridder.com
Ridder Motor Gearboxes RW 1-phase
RW800
RW45
RW70
RW140
RW240
RW400
RW600
Product Manual
Original product-manual
265001EN - 2021.12 - V01
Advertisement
Table of Contents

Related Manuals for Ridder RW800


Summary of Contents for Ridder RW800
- Page 1 3846 AX Harderwijk F +31 (0)341 416 611 PO Box 360 I ridder.com 3840 AJ Harderwijk E info@ridder.com the Netherlands Product Manual Ridder Motor Gearboxes RW 1-phase Original product-manual 265001EN - 2021.12 - V01 RW70 RW140 RW800 RW240 RW400 RW600...
-
Page 2: Table Of Contents
7.4 Installation covers 8. MAINTENANCE INSTRUCTIONS 8.1 Maintenance 9. SERVICE 9.1 Troubleshooting 9.2 Technical support 10. ENVIRONMENT 10.1 Decommissioning and removal 10.2 Waste disposal Ridder Drive Systems B.V. T +31 (0)341 416 854 - F +31 (0)341 416 611 - I ridder.com... -
Page 3: Guidelines, Standards And Conditions
1.4 Warranty provisions For the warranty period and conditions refer to the ‘Conditions’ section on our website at ridder.com, or in the Ridder catalog. Ridder Drive Systems B.V. T +31 (0)341 416 854 - F +31 (0)341 416 611 - I ridder.com... -
Page 4: Safety, Precautions And Symbols
Refer to the permitted mounting positions in the product manual.* * Not applicable to motor gearboxes filled with grease! Ê Ridder Drive Systems B.V. T +31 (0)341 416 854 - F +31 (0)341 416 611 - I ridder.com... -
Page 5: Precautions And Safety Instructions
RLS/RSU) during all work. There is a risk of short circuit, fire and corrosion. • Take sufficient precautions to prevent ElectroStatic Discharge (ESD). • Ridder is not responsible for injury, material damage or consequential damage if accessories are used that Ridder did not make. -
Page 6: Residual Risks
Persons can be in danger of life if they touch a system that is in operation. Forces Ridder cannot be sure that there will be no injury to persons or damage to the system because of the forces in the systems (in which the drive unit is installed). Ridder Drive Systems B.V. -
Page 7: Symbols And Abbreviations
Safety transformer (EN 61558) “normally closed” U1, U2 Motor connection “normally open” Motor connection Protective earth W1, W2 Motor connection Cross head “Phillips” Ridder Drive Systems B.V. T +31 (0)341 416 854 - F +31 (0)341 416 611 - I ridder.com... -
Page 8: Product Details
NOTE: Possibly the sequence of symbols is different and/or other symbols are included in the identification. Not all symbols and assembled configurations (such as LK, LD, ...) are included in the explanation. * K = Sprocket in an assembled configuration. Ridder Drive Systems B.V. T +31 (0)341 416 854 - F +31 (0)341 416 611 - I ridder.com... -
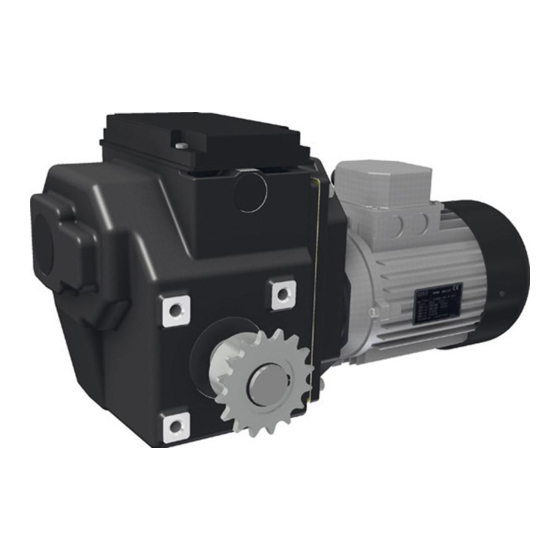
Page 9: Description
Optionally a 16-tooth 1⁄2”x5⁄16” zinc-plated sprocket for chain couplings is installed. The switching range of the limit-switch system is 86 revolutions of the drive shaft. Ridder Drive Systems B.V. T +31 (0)341 416 854 - F +31 (0)341 416 611 - I ridder.com... -
Page 10: Application
• The RW45D\RW400/600D motor gearboxes are drive units to operate ventilation systems and hoisting systems in greenhouses and livestock houses or crop-storage buildings. • The RW240–600\RW800 motor gearboxes are drive units to operate ventilation systems, screen systems and hoisting systems in greenhouses and livestock houses or crop-storage buildings. -
Page 11: Dimensions
RW45: RW-L Ø15 H1 = 53–56 mm RW-TRA H2=170–175mm L1 = 157–168 mm RW-D L2 = 167–204 mm 70.5 Ridder Drive Systems B.V. T +31 (0)341 416 854 - F +31 (0)341 416 611 - I ridder.com... - Page 12 L2 = 148–225 mm RW800: H1 = 72.5–75.5 mm 62.5 H2 = 213–262 mm L1 = 217–235 mm L2 = 215–232 mm Ridder Drive Systems B.V. T +31 (0)341 416 854 - F +31 (0)341 416 611 - I ridder.com...
-
Page 13: Technical Specifications
With (electric) tools and a hexagon socket in the shaft of the Operate manually (externally): electric motor. Dimensions [mm] WxHxD Refer to §3.4 (minimum–maximum). 15.5–16.5 28.5–42.8 31–37 Weight [kg] Ridder Drive Systems B.V. T +31 (0)341 416 854 - F +31 (0)341 416 611 - I ridder.com... -
Page 14: Install Instructions
(installation options). • Information about the different operated systems is not (or not fully) given or gives only general information. Ridder Drive Systems B.V. T +31 (0)341 416 854 - F +31 (0)341 416 611 - I ridder.com... -
Page 15: Special Tools And Equipment
• After installation interchange the plug in the highest position with the vent plug! This is not applicable to motor gearboxes that are filled with grease! RW45 [grease lubrication]: Ridder Drive Systems B.V. T +31 (0)341 416 854 - F +31 (0)341 416 611 - I ridder.com... - Page 16 RW240/400/600 [oil lubrication]: RW240 [grease lubrication]: Ridder Drive Systems B.V. T +31 (0)341 416 854 - F +31 (0)341 416 611 - I ridder.com...
- Page 17 RW800 [oil lubrication]: RW70/140-34 [oil lubrication]: Ridder Drive Systems B.V. T +31 (0)341 416 854 - F +31 (0)341 416 611 - I ridder.com...
-
Page 18: Sprockets
4.3 Sprockets • Usually Ridder installs sprockets onto the two basic output shafts (BOS) of most models (general designation: RW). • Some models (such as RW-LK, RW-D, RW-LD) have: • One special output-shaft (LK) plus one basic output shaft (BOS) •... -
Page 19: Installation
• With the supplied spring washers and bolts M10x25 (3x) for RW240–600 and RW70/140 drive units • With the supplied spring washers and bolts M12x25 (4x) for an RW800 drive unit. Refer to “Minimum Screw-in depth (SID)” which also shows the standard bolt-installation (SBI). - Page 20 C3. Do clamp mounting on lattices (different lattice widths and lattice heights possible). In this manual shown illustrations can be different than the components and/or systems. For more information on item numbers and models refer to the Ridder catalog or website at ridder.com. Ridder Drive Systems B.V.
- Page 21 ≥ 16 mm! ≥ 14 mm! M12 (4x) M10 (3x) M10 x 25 (3x) - 45 Nm M12 x 25 (4x) - 80 Nm Ridder Drive Systems B.V. T +31 (0)341 416 854 - F +31 (0)341 416 611 - I ridder.com...
- Page 22 Do the check of the minimum screw-in depth (SID) of the configuration that follows: SHEET THICKNESS and fixing-bolt LENGTH. This prevents damage or injury (breakage risk). Ridder Drive Systems B.V. T +31 (0)341 416 854 - F +31 (0)341 416 611 - I ridder.com...
-
Page 23: Installation Options A-F For Output Shafts
** D is supplied as two parts (chain, chain connector). In this manual shown illustrations can be different than the components and/or systems. For more information on item numbers and models refer to the Ridder catalog or website at ridder.com. 4.5.2 Special output-shafts (D, LD, LK ..) Installation options A–F are (possibly) also applicable, if necessary for the operated system, for... -
Page 24: Installation Chain (For A-D)
❻ Put the chain onto the sprockets with the chain ends at the top. Install the chain ❶–❽ Install the chain connector and chain (on the sprockets). Ridder Drive Systems B.V. T +31 (0)341 416 854 - F +31 (0)341 416 611 - I ridder.com... -
Page 25: Tra Drive-Unit Onto Rw45\240Tra Motor Gearbox
M12 fasteners (l or m) to install the TRA system onto the structure. Obey the instructions for installation of M12 fasteners (l or m). Ridder Drive Systems B.V. T +31 (0)341 416 854 - F +31 (0)341 416 611 - I ridder.com... - Page 26 In this product manual shown illustrations can be different than the components and/or systems. For more information on item numbers and models refer to the Ridder catalog or website at ridder.com. Ridder Drive Systems B.V.
-
Page 27: Belt Drum Onto Rw45\240/400L Motor Gearbox
HEX 3 mm - 10 Nm In this manual shown illustrations can be different than the components and/or systems. For more information on item numbers and models refer to the Ridder catalog or website at ridder.com. Ridder Drive Systems B.V. -
Page 28: Cable Drum Onto Rw45\240/400L Motor Gearbox
In this manual shown illustrations can be different than the components and/or systems. For more information on item numbers and models refer to the Ridder catalog or website at ridder.com. Note: Ridder does not supply steel cables and steel cable clamps. -
Page 29: Removal Covers
PH/PZ (4x) PH/(PZ) (4x) TX\SLOT (3x) * Alternatives: Metal cover In this manual shown illustrations can be different than the components and/or systems. Ridder Drive Systems B.V. T +31 (0)341 416 854 - F +31 (0)341 416 611 - I ridder.com... -
Page 30: Electrical Material
• 45 mA–130 mA at 24 V AC/DC • A maximum of 4 A at 115 V • A maximum of 2.25 A at 230/240 V. Ridder Drive Systems B.V. T +31 (0)341 416 854 - F +31 (0)341 416 611 - I ridder.com... - Page 31 * If your decision is not to use this cable gland, make sure to put the sealing plug back. Tighten the cable gland with the correct tool and tightening torque! - 5 Nm Ø6.0–12.0 mm - 2.5 Nm Ø5.0–10.0 mm M20x1.5/M16x1.5 Ridder Drive Systems B.V. T +31 (0)341 416 854 - F +31 (0)341 416 611 - I ridder.com...
-
Page 32: Protection - Conditions And Starting Points
Always make sure that the protections comply with the, local or national, laws and regulations of the country. Ridder Drive Systems B.V. T +31 (0)341 416 854 - F +31 (0)341 416 611 - I ridder.com... -
Page 33: Tightening-Torque Motor-Connections
Tighten the motor connections with the correct tightening torque! 2 Nm! M4 connections: 2 Nm • • M5 connections: 3 Nm. 3 Nm! Ridder Drive Systems B.V. T +31 (0)341 416 854 - F +31 (0)341 416 611 - I ridder.com... -
Page 34: Control-Circuit Connection - 3-Wire [Rls]
RW241/242 Connect all safety switches (ES21/22) and duty switches (ES11/12). This is necessary for safety and correct functional operation. RLS connections: 1–6 Ridder Drive Systems B.V. T +31 (0)341 416 854 - F +31 (0)341 416 611 - I ridder.com... -
Page 35: Motor-Current Connection - 3-Wire [Rls]
RLS limit-switch system, in PARALLEL. This prevents the risk of incorrect control, an incorrect direction-of- rotation or incorrect operation of limit-switch systems of different electric motors. Ridder Drive Systems B.V. T +31 (0)341 416 854 - F +31 (0)341 416 611 - I ridder.com... -
Page 36: Control-Circuit Connection - 5-Wire [Rsu]
RW70/140 Connect all safety switches (ES21/22) and duty switches (ES11/12). This is necessary for safety and correct functional operation. RSU connections: 1–12 Ridder Drive Systems B.V. T +31 (0)341 416 854 - F +31 (0)341 416 611 - I ridder.com... -
Page 37: Control-Circuit Connection - 5-Wire, Alternative [Rsu]
RW70/140 Connect all safety switches (ES21/22) and duty switches (ES11/12). This is necessary for safety and correct functional operation. RSU connections: 1–12 Ridder Drive Systems B.V. T +31 (0)341 416 854 - F +31 (0)341 416 611 - I ridder.com... -
Page 38: Change Direction-Of-Rotation - Switching Sense
Interchange 1 and 7 of the RSU. 5.10 OPTIONAL - Position Feedback You can connect a digital positioning-meter (RPU) or a Ridder Potentiometer installation set to the RW motor-gearbox. Refer to the product-manuals at ridder.com for the installation and connections. - Page 39 Make sure that the system can be safely operated. • If necessary: Adjust the end positions again. This prevents damage or injury. Ridder Drive Systems B.V. T +31 (0)341 416 854 - F +31 (0)341 416 611 - I ridder.com...
-
Page 40: Direction-Of-Rotation Rw Motor-Gearboxes
Direction-of-rotation A = Limit switch A = ES11/ES21 - Refer to §7.2 Direction-of-rotation B = Limit switch B = ES12/ES22 - Refer to §7.2 Ridder Drive Systems B.V. T +31 (0)341 416 854 - F +31 (0)341 416 611 - I ridder.com... - Page 41 Ridder Drive Systems B.V. T +31 (0)341 416 854 - F +31 (0)341 416 611 - I ridder.com...
-
Page 42: Operation
Operation is possible with a manual control (MC) and/or other Ridder control components, which are compatible with (if applicable) “Automatic Control-Systems” (ACS). Refer to the Ridder catalog or website ridder.com for more information. Always refer to the related information and manuals (ACS and control components). -
Page 43: Rls/Rsu Limit-Switch System
The switching range is 86, 120 or 860 revolutions of the drive shaft. RLS/RSU An RW motor-gearbox has a limit-switch system with connection nuts (4). Ridder does not lock the adjusting rings (3). The drive unit can turn freely (temporarily, until the end positions are adjusted) in the two directions. - Page 44 • If a failure of the duty switch occurs, the switching spring (5) operates the safety switch (ES21 or ES22). This makes sure the motor gearbox stops. It prevents consequential damage to the system. Ridder Drive Systems B.V. T +31 (0)341 416 854 - F +31 (0)341 416 611 - I ridder.com...
-
Page 45: Adjusting The End Positions
3. Tighten the long adjusting screw (a) again with a tightening torque of 0.5–0.6 Nm. The adjusting ring (3) cannot turn freely at this time. Ridder Drive Systems B.V. T +31 (0)341 416 854 - F +31 (0)341 416 611 - I ridder.com... -
Page 46: Installation Covers
TX\SLOT (3x) - 1.0 Nm * Alternatives: Metal cover In this manual shown illustrations can be different than the components and/or systems. Ridder Drive Systems B.V. T +31 (0)341 416 854 - F +31 (0)341 416 611 - I ridder.com... -
Page 47: Maintenance Instructions
• A problem is found with no solution. Refer to chapter 9 first. Refer to the Ridder catalog or the website at ridder.com for more information about spare parts (or accessories) that are available. Also refer to available documentation (maintenance instructions) at ridder.com of the Ridder products in the operated system. -
Page 48: Service
RLS: Interchange the connections 1 and 5 on the connection blocks. Solution 1 RSU: Interchange the connections 1 and 7 on the connection block. Ridder Drive Systems B.V. T +31 (0)341 416 854 - F +31 (0)341 416 611 - I ridder.com... -
Page 49: Technical Support
4. Make the product unserviceable and make a mark on the product. This prevents that the product is (accidentally) used again. 5. The permanent decommissioning is completed. Refer to §10.2 “Waste disposal”. Ridder Drive Systems B.V. T +31 (0)341 416 854 - F +31 (0)341 416 611 - I ridder.com... -
Page 50: Waste Disposal
10.2 Waste disposal Discard products of Ridder Drive Systems after their lifespan and obey the applicable national and/ or local regulations. Make sure that after disassembly there is a separation of: • The collected operating materials (if applicable) such as oil, grease and such •... - Page 51 Ridder Drive Systems B.V. T +31 (0)341 416 854 - F +31 (0)341 416 611 - I ridder.com...
Need help?
Do you have a question about the RW800 and is the answer not in the manual?
Questions and answers