Table of Contents
Advertisement
Quick Links
Installation & Operation Manual
Gas Fired Steam Tilting Kettles
Improper installation, adjustment, alteration, service or maintenance can cause property damage, injury
or death. Read the installation, operating and maintenance instructions thoroughly before installing or
M
R
ANUAL 10325
EV 1 (11/21)
$21.00
GLT-80 and GLT-100
servicing this equipment.
CROWN FOOD SERVICE EQUIPMENT
70 Oakdale Road, Downsview (Toronto) Ontario, Canada, M3N 1V9
Telephone: 919-762-1000
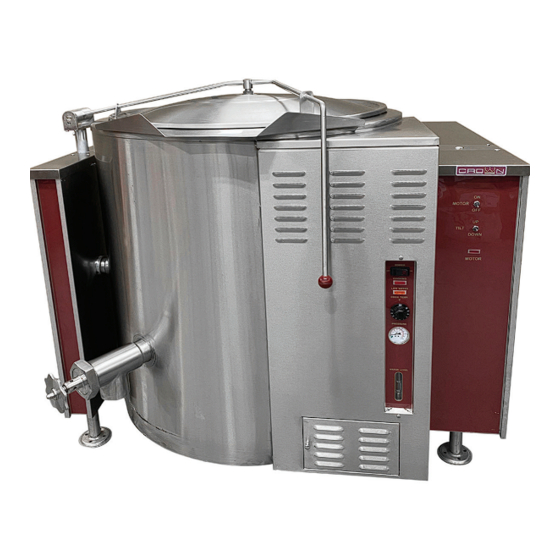
Model GLT-80
WARNING
A Middleby Company
www.crownsteamgroup.com
IMPORTANT FOR FUTURE REFERENCE
Please complete this information and retain this
manual for the life of the equipment:
Model #: ___________________________
Serial #: ___________________________
Date Purchased: _____________________
GAS FIRED STEAM TILTING KETTLES
M
ANUAL
S
CO
ECTION
Advertisement
Table of Contents

Related Manuals for Crown GLT-80


Summary of Contents for Crown GLT-80
- Page 1 Serial #: ___________________________ Date Purchased: _____________________ Installation & Operation Manual Gas Fired Steam Tilting Kettles GLT-80 and GLT-100 Model GLT-80 WARNING Improper installation, adjustment, alteration, service or maintenance can cause property damage, injury or death. Read the installation, operating and maintenance instructions thoroughly before installing or servicing this equipment.
-
Page 2: Important Notes For Installation And Operation
Contact the factory, the factory representative or a local service company to perform maintenance and repairs should the appliance malfunction. Refer to warranty terms. Copyright © 2021 by Crown. All rights reserved. Published in the United States of America. PAGE OF 32 INSTALLATION &... -
Page 3: Table Of Contents
Gas Fired Steam Tilting Kettles Table of Contents RETAIN THIS MANUAL FOR FUTURE REFERENCE. Table of Contents Important Notes For Installation and Operation ..............2 Service Connections ......................4 Installation ..........................5 Performance Check ......................8 Operation ..........................9 Maintenance ......................... 12 Cleaning .......................... -
Page 4: Service Connections
6”-14” (152-356 mm) 11”-14” (279-356 mm) * For use on non-combustible floors only. As continued product improvement is a policy of Crown, specifications are subject to changge without notice. PAGE OF 32 INSTALLATION & OPERATION MANUAL 10325 REV 1 (11/21) -
Page 5: Installation
Gas Fired Steam Tilting Kettles NSTALLATION Installation NPACKING IMMEDIATELY INSPECT FOR SHIPPING DAMAGE Immediately after unpacking the steamer, check for possible shipping damage. If the steamer is found to be damaged, save the packaging material and contact the carrier within 15 days of delivery. Prior to installation, verify that the type of gas supply (natural or propane) and electrical service agree with the specifications on the rating plate located on the left side panel as you face the front of the braising pan. - Page 6 Gas Fired Steam Tilting Kettles NSTALLATION To Install 1. Uncrate carefully. Report any hidden freight damage to the freight company immediately. 2. The pressure relief valve is located at the right rear of the unit. This area should be kept clear and should not be in an area where operators will normally stand.
- Page 7 Gas Fired Steam Tilting Kettles NSTALLATION Water Connection On units equipped with an optional water fill valve connect a water line (minimum 1/4”) to the valve with a 1/4” NPT female fitting. Units with dual (hot and cold) valves must have the hot water line connected to side with the hot water valve (red) and cold water line to the cold water valve (blue).
-
Page 8: Performance Check
Performance Check Gas Fired Steam Tilting Kettles Performance Check The following items should be checked before or within the first 30 days of operation by a qualified service technician. 1. Verify correct gas type. 2. Verify correct voltage, cycle and phase. 3. -
Page 9: Operation
Gas Fired Steam Tilting Kettles PERATION Operation NOTICE Contact the factory, the factory representative or a local service company to perform maintenance and repairs should the appliance malfunction. WARNING In the event you smell gas, shut down equipment at the main shut off valve and contact the local gas company or gas supplier for service. - Page 10 Gas Fired Steam Tilting Kettles PERATION B. Complete 1. Place main power switch and thermostat to “OFF” position. 2. Turn dial on gas combination control valve from “ON” position to “OFF” position. 3. Turn any main gas service valves supplying gas to “OFF” position. C.
- Page 11 Gas Fired Steam Tilting Kettles PERATION Daily Operation Daily operation should consist of turning on the main power switch and setting the thermostat for the desired temperature. It is recommended the kettle be preheated prior to use. Milk or egg based products should be placed in the kettle before heating, however, to prevent sticking.
-
Page 12: Maintenance
Maintenance Gas Fired Steam Tilting Kettles Maintenance NOTICE Contact the factory, the factory representative or a local service company to perform maintenance and repairs. WARNING Disconnect the power supply to the appliance before cleaning or servicing. Daily 1. Wash exposed cleanable areas. Monthly 1. -
Page 13: Cleaning
Gas Fired Steam Tilting Kettles Cleaning Cleaning WARNING Disconnect the power supply to the appliance before cleaning or servicing. WARNING Never spray water into electric controls or components! WARNING The equipment and its parts are hot. Use care when operating, cleaning and servicing. CAUTION Do not use cleaning agents that are corrosive. - Page 14 Cleaning Gas Fired Steam Tilting Kettles 3. Use a soft cloth or soft brush and clean all surfaces. 4. Using both hands remove the valve from the soap and rinse well in another plastic pail that contains fresh water. 5. Wash out the kettle as normal. 6.
-
Page 15: Service
Wiring diagrams for the unit are located in a small envelope affixed to the side panel of left hand console. ORIFICE SIZE UNIT TOTAL INPUT NATURAL PROPANE GLT-80 150,000 BTU/Hour GLT-100 150,000 BTU/Hour Manifold Pressure Natural Gas - 4 inches W.C. - Page 16 Service Gas Fired Steam Tilting Kettles Adjustments Pilots The pilot adjustment is part of the combination control valve located just behind the lower front access door. It is located on the centre left side of the control just below the large slotted screw head. (See Figure 1). Remove the large slotted screw;...
- Page 17 Gas Fired Steam Tilting Kettles Service Thermostat The thermostat adjustment should not be changed. Check the following before changing the thermostat: 1. With kettle cool, the pressure reading on the pressure gauge should be in the green vacuum zone (below 0 psi). If not, see “Re-establishing Vacuum”...
- Page 18 Amount of Water to be Added Model Total Amount of Distilled Water in a Low Water Condition GLT-80 16.3 Gallons (61.71 L) 721 Fluid Ounces (21.32 L) GLT-100 16.3 Gallons (61.71 L) 721 Fluid Ounces (21.32 L)
- Page 19 Gas Fired Steam Tilting Kettles Service Converting Between Natural and Propane Gas To convert the kettle from natural gas to LP or LP to natural gas use OEM Conversion Kits. Contact manufacturer or your authorised service company for the kits part numbers. To convert gas combination control from one gas to another: FIGURE 3 1.
-
Page 20: Troubleshooting
Troubleshooting Gas Fired Steam Tilting Kettles Troubleshooting NOTICE Loose, broken or grounded wiring may cause many of the symptoms listed. Check all wiring and make sure it is intact. PROBLEM PROBABLE CAUSE Main power switch is off. Unit not plugged in. Main power supply off. -
Page 21: Appendix A, Material Safety Data Sheet
Gas Fired Steam Tilting Kettles Material Safety Data Sheets Appendix ‘A’ INSTALLATION & OPERATION MANUAL 10325 REV 1 (11/21) PAGE OF32... - Page 22 Material Safety Data Sheets Gas Fired Steam Tilting Kettles PAGE OF 32 INSTALLATION & OPERATION MANUAL 10325 REV 1 (11/21)
- Page 23 Gas Fired Steam Tilting Kettles Material Safety Data Sheets INSTALLATION & OPERATION MANUAL 10325 REV 1 (11/21) PAGE OF32...
- Page 24 Material Safety Data Sheets Gas Fired Steam Tilting Kettles PAGE OF 32 INSTALLATION & OPERATION MANUAL 10325 REV 1 (11/21)
- Page 25 Gas Fired Steam Tilting Kettles Material Safety Data Sheets INSTALLATION & OPERATION MANUAL 10325 REV 1 (11/21) PAGE OF32...
- Page 26 Material Safety Data Sheets Gas Fired Steam Tilting Kettles PAGE OF 32 INSTALLATION & OPERATION MANUAL 10325 REV 1 (11/21)
- Page 27 Gas Fired Steam Tilting Kettles Material Safety Data Sheets INSTALLATION & OPERATION MANUAL 10325 REV 1 (11/21) PAGE OF32...
- Page 28 Material Safety Data Sheets Gas Fired Steam Tilting Kettles PAGE OF 32 INSTALLATION & OPERATION MANUAL 10325 REV 1 (11/21)
- Page 29 Gas Fired Steam Tilting Kettles Material Safety Data Sheets INSTALLATION & OPERATION MANUAL 10325 REV 1 (11/21) PAGE OF32...
- Page 30 Material Safety Data Sheets Gas Fired Steam Tilting Kettles PAGE OF 32 INSTALLATION & OPERATION MANUAL 10325 REV 1 (11/21)
- Page 31 Gas Fired Steam Tilting Kettles Notes Notes INSTALLATION & OPERATION MANUAL 10325 REV 1 (11/21) PAGE OF32...
- Page 32 Gas Fired Steam Tilting Kettles A product with the Crown name incorporates the best in durability and low maintenance. We all recognize, however, that replacement parts and occasional professional service may be necessary to extend the useful life of this appliance.
Need help?
Do you have a question about the GLT-80 and is the answer not in the manual?
Questions and answers