Electric leg-mounted tilting mixer kettle (2 pages)
Summary of Contents for Crown GLT-20
Page 1
Serial #: ___________________________ Date Purchased: _____________________ 
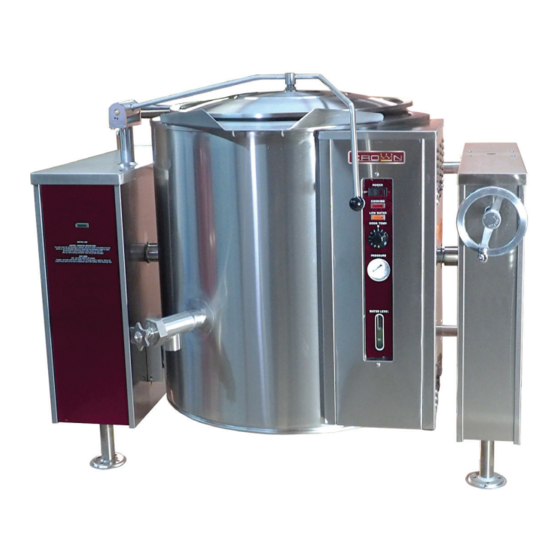
Installation & Operation Manual Gas Fired Steam Tilting Kettles GLT-20, GLT-30, GLT-40 & GLT-60 Model GLT-40 WARNING Improper installation, adjustment, alteration, service or maintenance can cause property damage, injury or death. Read the installation, operating and maintenance instructions thoroughly before installing or servicing this equipment.
Gas Fired Steam Tilting Kettles Table of Contents RETAIN THIS MANUAL FOR FUTURE REFERENCE. Table of Contents Important Notes For Installation and Operation ..............2 Service Connections ......................4 Installation ..........................5 Operation ..........................8 Cleaning ..........................11 Maintenance ......................... 14 Service ..........................
120,000 35.2 1142 lbs. [51 kg] * For use on non-combustible floors only. As continued product improvement is a policy of Crown, specifications are subject to changge without notice. PAGE OF 32 INSTALLATION & OPERATION MANUAL 10070 REV 0 (04/21)
Gas Fired Steam Tilting Kettles NSTALLATION Installation NPACKING IMMEDIATELY INSPECT FOR SHIPPING DAMAGE Immediately after unpacking the steamer, check for possible shipping damage. If the steamer is found to be damaged, save the packaging material and contact the carrier within 15 days of delivery. Prior to installation, verify that the type of gas supply (natural or propane) and electrical service agree with the specifications on the rating plate located on the left side panel as you face the front of the braising pan.
Page 6
Gas Fired Steam Tilting Kettles NSTALLATION To Install 1. Uncrate carefully. Report any hidden freight damage to the freight company immediately. 2. The pressure relief valve is located at the right rear of the unit. This area should be kept clear and should not be in an area where operators will normally stand.
Page 7
Gas Fired Steam Tilting Kettles NSTALLATION Water Connection On units equipped with an optional water fill valve connect a water line (minimum 1/4”) to the valve with a 1/4” NPT female fitting. Units with dual (hot and cold) valves must have the hot water line connected to side with the hot water valve (red) and cold water line to the cold water valve (blue).
Gas Fired Steam Tilting Kettles PERATION Operation NOTICE Contact the factory, the factory representative or a local service company to perform maintenance and repairs should the appliance malfunction. CAUTION If you smell gas during the lighting procedure, immediately shut off the gas supply until the leak has been corrected. WARNING In the event of main burner ignition failure, a 5 minute purge period must be observed prior to re-establishing ignition source.
Page 9
Gas Fired Steam Tilting Kettles PERATION Daily Shutdown 1. Turn power switch “OFF.” 2. Turn thermostat “OFF.” Complete Shutdown 1. Turn power switch “OFF.” 2. Turn thermostat “OFF”. 3. Turn power supply to unit “OFF”. 4. Remove front access panel on left side and turn dial on combination valve to “OFF”. 5.
Page 10
Gas Fired Steam Tilting Kettles PERATION Daily Operation Daily operation should consist of turning on the power switch and setting thermostat for the desired temperature. It is recommended the kettle be preheated prior to use. Milk or egg based products should be placed in the kettle before heating however, to prevent sticking.
Gas Fired Steam Tilting Kettles Cleaning Cleaning WARNING Disconnect the power supply to the appliance before cleaning or servicing. WARNING Never spray water into electric controls or components! WARNING The equipment and its parts are hot. Use care when operating, cleaning and servicing. CAUTION Do not use cleaning agents that are corrosive.
Page 12
Cleaning Gas Fired Steam Tilting Kettles Dairy Draw-Off Valve Cleaning 1. Remove the plug by first removing the handle, then turn the plug to line up with the pin and pull with both hands. It is important to use both hands because the plug is heavy. 2.
Page 13
Gas Fired Steam Tilting Kettles Cleaning Stainless Steel To remove normal dirt, grease or product residue from stainless steel, use ordinary soap and water (with or without detergent) applied with a sponge or cloth. Dry thoroughly with a clean cloth. Never use vinegar or any other corrosive cleaner.
Maintenance Gas Fired Steam Tilting Kettles Maintenance NOTICE Contact the factory, the factory representative or a local service company to perform maintenance and repairs. WARNING Disconnect the power supply to the appliance before cleaning or servicing. Daily 1. Wash exposed cleanable areas. Monthly 1.
Wiring diagrams for the unit are located in a small envelope affixed to the side panel of left hand console. ORIFICE SIZE UNIT TOTAL INPUT NATURAL PROPANE GLT-20 80,000 BTU/Hour DMS # 19 (0.166") DMS # 30 (0.125") GLT-30 100,000 BTU/Hour DMS # 13 (0.185")
Page 16
Service Gas Fired Steam Tilting Kettles Pressure Switch The pressure switch should not be adjusted until it is determined to be the cause of an operating pressure difficulty. See “Thermostat” section to determine if the source of difficulty is the pressure switch or thermostat. The major difficulties caused by pressure switch mis-adjustment are: 1.
Page 17
Gas Fired Steam Tilting Kettles Service Re-Establishing Vacuum Periodically check pressure gauge when kettle is cold. Reading should be in green vacuum zone (below 0 psi). Otherwise air is present and proper heating will not occur. Use the following procedure to remove air and re-establish vacuum: With the kettle empty, turn the thermostat knob to the highest temperature.
Troubleshooting Gas Fired Steam Tilting Kettles Troubleshooting NOTICE Loose, broken or grounded wiring may cause many of the symptoms listed. Check all wiring and make sure it is intact. PROBLEM PROBABLE CAUSE No current. Check that power is being supplied to the unit. Defective thermostat or pressure switch.
Page 32
Gas Fired Steam Tilting Kettles A product with the Crown name incorporates the best in durability and low maintenance. We all recognize, however, that replacement parts and occasional professional service may be necessary to extend the useful life of this appliance.
Need help?
Do you have a question about the GLT-20 and is the answer not in the manual?
Questions and answers