
Related Manuals for Jacuzzi J - 200 J - 230


Summary of Contents for Jacuzzi J - 200 J - 230
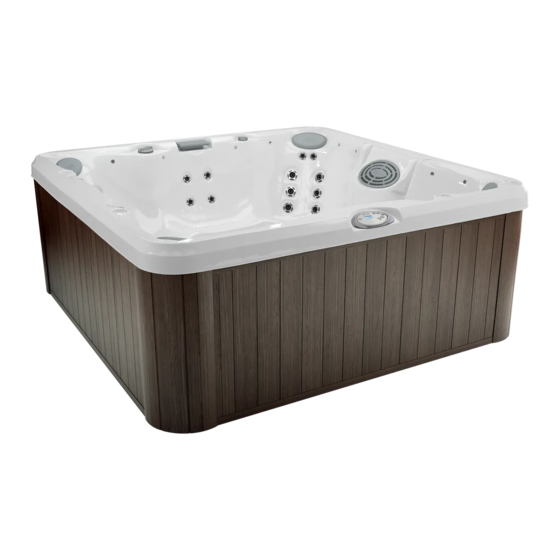
- Page 1 owner’s manual J - 2 0 0 ™ C o l l e c t i o n J - 280 J - 270 J - 230 J - 210 2530-277w rev. B...
- Page 2 Congratulations on the purchase of your new Jacuzzi is a list of automated functions performed by your spa. These functions are listed below in an attempt to alleviate any operational concerns you may have during the first 24-hours of ownership! Also listed below are important maintenance recommendations you should observe on a regular basis to protect your new investment.
-
Page 3: Table Of Contents
Selecting The Filtration/Heating Mode... 29 11.6 Filtration Modes for Spas Without Circulation Pump Option (All Models) ... 29 11.7 Filtration Modes for Spas With Circulation Pump Option (J-230, J-270 and J-280 Only) ... 30 © Jacuzzi Hot Tubs, Inc. All Rights Reserved J-200... - Page 4 J-200 12.0 Spa Maintenance ... 32 12.1 Cleaning The Filters... 32 12.2 Draining and Refilling... 35 12.3 Pillow Care... 35 12.4 Cleaning The Spa Interior ... 36 12.5 Vinyl Cover Care and Maintenance ... 36 12.6 Maintaining The Synthetic Cabinet ... 37 12.7 Winterizing ...
-
Page 5: Important Spa Owner Information
Jacuzzi premium insulating cover in place at all times when the spa is not in use. Read and carefully follow the requirements for your spa’s support base found in Section 4.0 titled,... -
Page 6: Important Safety Instructions For All Spa Owners
J-200 Important safety Instructions for all spa owners reaD anD Follow all InsTruCTIons CareFullY! This spa was manufactured to meet the standards and specifications outlined in the “Virginia Graeme Baker Pool and Spa Safety Act” (VGB Safety Act). When installing and using this spa, basic safety precautions should always be followed, including: DanGer: •... - Page 7 • A grounding wire connector is provided on this unit to connect a minimum No. 8 AWG (8.4 mm²) solid copper conductor between this unit and any metal equipment, metal enclosures of electrical equipment, metal water pipe, or conduit within 5 feet (1.5m) of the unit. •...
- Page 8 J-200 warnInG: • Since excessive water temperatures have a high potential for causing fetal damage during the early months of pregnancy, if pregnant or possibly pregnant, consult your physician before using a spa. • Pregnant or possibly pregnant women should limit spa water temperatures to 100°F (38°C).
- Page 9 warnInG: chemistry, proper ventilation is recommended to reduce the risk of contracting a waterborne illness (e.g. an infection, bacteria or virus) and/or respiratory ailments that could be present in the air or water. Consult a licensed architect or building contractor to determine your specific needs if installing your hot tub indoors.
-
Page 10: Entrapment Risk
J-200 entrapment risk The Consumer Products Safety Commission/USA has reported that users of pools and spas have become entrapped (stuck) to drain and/or suction fittings causing death, drowning, or serious injury (see diagram below). This spa was manufactured to meet the standards and specifica- tions outlined in the “Virginia Graeme Baker Pool and Spa Safety Act”... -
Page 11: Hyperthermia
For additional or replacement Warning Signs please contact your local Jacuzzi dealer and reference item number #6530-082. rIsK oF severe InJurY or DrownInG! rIsK oF severe InJurY or DrownInG! -
Page 12: Important Csa Safety Instructions (Canada Only)
No. 6 AWG (10 mm²). 5. save THese InsTruCTIons. General electrical safety Instructions Your new Jacuzzi spa is equipped with a “state-of-the-art” equipment system. It contains the most advanced safety and self-protective equipment in the industry. Nonetheless, this spa must be installed properly to ensure dependable usage. -
Page 13: Choosing A Location
Choosing a location ImporTanT: Because of the combined weight of the spa, water and users, it is extremely important that the base upon which the spa rests be smooth, flat, level and capable of uniformly supporting this weight, without shifting or settling, for the entire time the spa is in place. If the spa is placed on a surface which does not meet these requirements, damage to the skirt and/or the spa shell may result. -
Page 14: Outdoor Location
J-200 outdoor location In selecting the ideal outdoor location for your spa, we suggest that you take into consideration: • The proximity to changing area and shelter (especially in colder weather). • The pathway to and from your spa (this should be free of debris so that dirt and leaves are not easily tracked into the spa). - Page 15 • proper ventilation: an engineer or authority competent enough to understand the necessary provisions needed to vent moist or heated air and air associated with chemical odors outdoors. When the spa is in use considerable amounts of moisture will escape, potentially causing mold and mildew over time which can damage certain surfaces and/ or surroundings.
-
Page 16: General Electrical Safety Instructions
Please contact your dealer or local building department should you have any questions regarding your installation. Proper grounding is extremely important. Jacuzzi spas are equipped with a current collector system. A pressure wire connector is provided on the... -
Page 17: Power Requirements
Jacuzzi spas are designed to provide optimum performance and flexibility of use when connected to the maximum electrical service listed below. Minor circuit board modifications can be performed to allow your new spa to accept an electrical service other than the factory operation setting. - Page 18 J-200 all north american J-210 Convertible Models (60 hz) Circuit Breaker: Number of Wires: Frequency: Current Draw: * all Canadian spas must be hard wired per Csa Canadian standards (page 8). † In 15A/30A configuration, the heater will not operate while the jets pump is running in high speed.
- Page 19 export J-210 and J-230 models (50 Hz) Circuit Breaker: Number of Wires: Frequency: Current Draw: In 20A configuration, the heater will not operate while the jets pump is running in high speed. This is the factory setting ** In 30A configuration, the heater will operate while the jets pump is running in high speed.
-
Page 20: Electrical Wiring Instructions
J-200 electrical wiring Instructions ImporTanT noTICe: The electrical wiring of this spa must meet the requirements of the National Electrical Code/USA (NEC) and any applicable state or local codes. The electrical circuit must be installed by a qualified electrician and approved by a local building/electrical inspection authority. - Page 21 8. Select the power supply inlet you want to use (Figure A). Feed power cable to control box, then install it through the large opening provided in the bottom side of the box. 9. Connect wires, color to color, on terminal blocks TB1 and TB3 (Figure C, page 18).
- Page 22 240 VAC, 3-Wire Connection 60 Hz Congratulations! You are now all set to get your new spa ready to use. Simply follow the step-by-step procedure in Section 8.0, before long, you will be enjoying your first glorious experience in your Jacuzzi J-200 Collection spa. Figure-D...
-
Page 23: Spa Fill Up Procedure
Clear all debris from the spa. (Although the spa shell has been polished at the factory, you may want to treat it with a specially formulated spa cleaner.) Consult your authorized Jacuzzi dealer for additional information prior to filling spa. - Page 24 J-200 5. add start-up Chemicals Add the spa water chemicals as recommended by your authorized Jacuzzi dealer. See Section 13.0 “Water Quality Maintenance” (page 38) for general guidance. warnInG: Never leave chemicals opened and accessible to anyone. Use chemicals according to the vendors instructions. Always store chemicals in a safe and/or locked location.
- Page 25 8. place Cover on spa • ping the insulating cover in place anytime the spa is not in use will reduce the time required for heating, thereby minimizing operating costs. • The time required for initial heat-up will vary depending on the starting water temperature.
- Page 26 Water that is too soft can be corrosive to metal components. 13. Consult your authorized Jacuzzi dealer for chemical recommendations, then add chemicals to spa water to achieve a constant sanitizer reading within the levels recommended by the Association of Pool and Spa Professionals/USA printed on the inside cover of this manual.
- Page 27 warnInG: • To decrease the risk of injury, entrapment or drowning, never leave your hot tub unattended for any reason, especially if while the cover is open and accessible to small children and animals! • To decrease the risk of (e.g.
-
Page 28: Control Functions
J-200 Control Functions Control panel A. leD Display: Can display current water temperature (de- fault display), water temperature set point, selected filtration/ heating mode, and error messages. B. Heat Indicator: Lit when heater is on. C. Jets 1 Button: Turns jets pump #1 on and off. Press once for low speed;... -
Page 29: General Spa Features And Controls
General spa Features and Controls J-280 model illustrated - Jet locations and features will vary by model. Control Panel Headrest Pillows (4 ea.) Air Controls (4 ea.) Cup Holders (4 ea.) Massage Selector (1 ea.) Lighting System Options: • Standard Underwater light system includes incandescent light (6a) •... -
Page 30: Operating Instructions
J-200 10.0 operating Instructions The spa control system has automatic functions that operate upon start-up and normal operation to protect the system. Upon power up, the readout displays the following information: 1. Control panel displays current software release (3.57 or 5.57 depending on spa model) then;... -
Page 31: Standard Light Operation
The first press activates high speed, the second press turns jets pump 2 off. When manually activated, either pump will automatically turn off after 20 minutes. 10.3 standard light operation The light button activates the footwell light in the spa when pressed. -
Page 32: Air Controls
10.8 optional audio system (J-230 to J-280) Spas equipped with the optional Jacuzzi audio system offer enhanced enjoyment. These models include an integrated AM/FM/CD receiver with high-quality marine speakers for unsurpassed sound quality and long-life. -
Page 33: Economy Filtration/Heating Modes (All Models)
11.3 economy Filtration/heating Modes (all Models) Economy filtration/heating modes (F4-F6) are typically selected by customers in warm climates where heat up times are minimized due to higher ambient temperatures. In either of these modes, the water temperature is regulated by the set temperature, low-speed pump or optional circulation pump, and heater only while a programmed filtration/ heating cycle is running. -
Page 34: Filtration Modes For Spas With Circulation Pump Option (J-230, J-270 And J-280 Only)
J-200 lock modes (l1-l2) Lock Out (disables all spa functions to permit filter cleaning) Lock Mode (disables the jets and light buttons to prevent unauthorized use of spa). Filtration/heating cycle will continue to operate as programmed in this mode. The temperature display flashes when this function is enabled. - Page 35 lock modes (l1-l2) Lock Out (disables all spa functions to permit filter cleaning). Lock Mode (disables the jets and light buttons to prevent unauthorized use of spa). Filtration/heating cycle will continue to operate as programmed in this mode. The temperature display flashes when this function is enable.
-
Page 36: Spa Maintenance
12.0 spa maintenance Proper and regular maintenance of your spa will help it retain its beauty and performance. Your authorized Jacuzzi dealer can supply you with all the information, supplies, and accessory products you will need to accomplish this. DanGer: rIsK oF severe InJurY or DrownInG BY enTrapmenT! •... - Page 37 To ensure optimum performance, clean and reuse the skimmer bag and filter cartridge once a month or as necessary, depending on use. J-210 models include filters on their footwell suction covers (shown right) that prevent debris from entering the pump and the massage selector(s), when operating.
- Page 38 “F”, followed by soaking the filter overnight in a plastic container filled with a solution of water and specially formulated filter cleanser available from your authorized Jacuzzi dealer. The average life expectancy of each filter is approximately two years with proper care and water quality maintenance.
-
Page 39: Draining And Refilling
12.2 Draining and refilling About every 3 months, you will want to replace the spa’s water. The frequency depends on a number of variables including the amount of use, attention paid to water quality maintenance, etc. You will know it is time for a change when you cannot control sudsing and/or you can no longer get the normal feel or sparkle to the water even though the key water balance measurements are all within the proper parameters. -
Page 40: Cleaning The Spa Interior
This could cause severe sudsing when the spa is refilled. 12.5 vinyl Cover Care and maintenance Your Jacuzzi cover has a vinyl encasement. This vinyl encasement is attractive and durable. Monthly cleaning and conditioning is strongly recommended to maintain and increase the longevity of your cover. -
Page 41: Maintaining The Synthetic Cabinet
12.7 winterizing Your Jacuzzi spa is designed to automatically protect itself against freezing when operating properly. During periods of severe freezing temperatures, you should check periodically to be certain that the electrical supply to the spa has not been interrupted. In extreme, bitter cold weather less than -20°F (-29°C), choose the F3 “Standard”... -
Page 42: Restarting Your Spa In Cold Weather
9. Re-install synthetic cabinet side panel and cover spa so that no casual moisture can enter into it. Consult your authorized Jacuzzi dealer if you have any questions regarding winter use or winterizing. 12.8... -
Page 43: Sanitizing
Some are necessary to compensate for out-of-balance water, some aid in cosmetic water treatment and others simply alter the feel or smell of the water. Your authorized Jacuzzi dealer can advise you on the use of these additives. When adding spa shock (chlorine or non-chlorine) or pH balancing chemicals activate the jets pump(s) and leave the spa cover open for a minimum of 20 minutes. -
Page 44: Error Conditions/Error Messages
14.4 panel Displays sn1 Open sensor (heater is disabled) or shorted sensor (spa is deactivated). The high-limit temperature sensor is not functioning. Contact your authorized Jacuzzi dealer or qualified service technician. 14.5 panel Displays sn2 Open or shorted sensor (heater disabled). The temperature sensor is not functioning. -
Page 45: Panel Flashes Fl1 Or Fl2 (Spas Without Circulation Pump Option)
Purge “air lock” from jets pump 1 by loosening the upper pump head drain screw (Figure A, page 17) for a few seconds to release trapped air, then retighten drain screw. FINGER TIGHT ONLY! If problem persists, contact your authorized Jacuzzi dealer. 14.7 panel Flashes Fl1 or Fl2 (spas with Circulation pump option) A flashing “FL1”... -
Page 46: Panel Displays Oh
15.0 troubleshooting Procedures In the event your Jacuzzi spa is not working the way it should, please first review all the installation and operating instructions in this manual and check the message on the panel display. If you are still not satisfied it is working properly, please follow the appropriate troubleshooting instructions below. -
Page 47: Pump Does Not Operate But Light Does
Nonetheless, we are always striving to improve the quality and features of our products. Your input as a Jacuzzi spa owner is a cherished part of this process. If you have any comments or suggestions, or if you wish to be informed on any new products for your spa, please write to us. -
Page 48: Circuit Board Diagrams
J-200 16.0 Circuit Board Diagrams 16.1 north american J-230, J-270 and J-280 Models This wiring diagram is used for all J-230, J-270 and J-280 240V 60 Hz North American spa models With or Without the Circulation Pump Option. -
Page 49: North American J-210 Convertible Models
16.2 north american J-210 Convertible Models This wiring diagram is used for all J-210 120/240V 60 Hz North American convertible spa models. J1 Logic Jumper Settings (Factory Defaults Shown) JP1 1-2 ON = 30A Logic (4-wire 120/240 VAC operation only) JP1 1-2 OFF = 40A Logic (4-wire 120/240 VAC operation only) JP1 7-8 ON = °C Temperature Display... -
Page 50: Export 50 Hz J-230, J-270 And J-280 Models
J-200 16.3 export 50 hz J-230, J-270 and J-280 Models This wiring diagram is used for all J-230, J-270 and J-280 230V 50 Hz Export spa models With or Without the Circulation Pump Option. -
Page 51: Export 50 Hz J-210 Models
16.4 export 50 Hz J-210 models This wiring diagram is used for all J-210 230V 50 Hz Export spa models. J1 Logic Jumper Settings JP1 1-2 ON = 20A Logic (Factory Setting) JP1 1-2 OFF = 30A Logic JP1 7-8 ON = °C Temperature Display (Factory Setting) JP1 7-8 OFF = °F Temperature Display Spa Light... -
Page 52: Optional Stereo Receiver Functions
J-200 17.0 optional stereo receiver Functions 17.1 stereo receiver Control Functions BAND SUBW ZONE AQ-CD-3 models equipped with the stereo option only: To start enjoying your new Stereo Receiver, please read the following operation instructions in their entirety. 1. power Button: Press PWR (Power) to turn stereo on or off. 2. - Page 53 D. To adjust the selected menu item, press the VOLUME Up (7) or Down (8) buttons. E. After the selected menu item(s) has been changed and no other buttons have been pressed within the 5-second time-out, the unit will resume to the previous operation. •...
- Page 54 J-200 BAND SUBW ZONE AQ-CD-3 • volume (volume level) button to adjust the desire volume level, the volume level will be shown on the LCD display ranging from 00 (lowest) to 46 (highest). • subwooFer (sub-woofer level) Volume Up or Down button to adjust the Sub-woofer lever from “00” to “12”. note: The Sub-woofer level control is only applicable if the unit is equipped with the optional subwoofer line out, and only if the unit is connected to an optional sub-woofer speaker.
- Page 55 • Bass-Q: (Bass Quality Factor) Volume Up or Down button to adjust the desired Bass Quality Factor to 2N, 1N, 1W or 2W. See Figure 1. Shows the Bass Quality factor (Curve characteristics) of each step 15.0 12.5 10.0 Level (dB) •...
- Page 56 J-200 BAND SUBW ZONE AQ-CD-3 • FaDer: User has 5 seconds to use Volume Up or Down button to adjust the Fader between the front and rear speakers from R12 (full rear) to F12 (full front). “C00” represents an equal balance between the front and rear speakers.
- Page 57 14. as/Ps (automatically store/Preset scan) button: While in seek mode the stereo unit will automatically select 6 strong stations and store them in the current band. Select a band (if needed). • preset scan: Scan stations stored in the current band. Select a band, press AS/PS button for less than 3 seconds.
- Page 58 J-200 BAND SUBW ZONE AQ-CD-3 21. Tuning up Button: Press and hold Track Up for more than 3 seconds to manually adjust station frequency up, Auto Seek is shown on the display panel. Short press Track Up to scan/seek for next higher station, Manual Seek is shown on the display panel.
-
Page 59: Stereo Receiver Specifications
24. Playback order of CD with MP3 Files: • A directory that does not include an MP3 file is skipped. • We recommend that you make no more than two levels for each disc. • Maximum number of folders: 255 •... -
Page 60: Cd/Mp3/Wma Folder/File Hierarchy
J-200 17.3 CD/MP3/wMa folder/file hierarchy When selected for play, folder search, file search or folder select, files and folders are accessed in the order in which they were written. Because of this, the order in which they are expected to be played may not match the order in which they are actually played. - Page 61 A. CD/MP3/wMa File/folder play 1. There are three different play methods as following: • Press the M2 button more than 3 seconds during playing an MP3/ WMA disc for “intro play” to all files of the current folder. Intro play should restart from the first song of the current folder, after all files in the current files have been intro-played.
-
Page 62: Stereo Receiver Troubleshooting
J-200 C. ID3 information display • For any MP3/WMA file recording with ID3 Tag information. The ID3 information such like Album title, Track title, Artist Title will be displayed and automatic scrolling through the LCD while the file is playing. User also allows pressing the AS/PS button repeatedly to view the ID3 tag information manually. - Page 63 The installation angle is more than 30 degrees Sound skips. The disc is extremely dirt or defective disc The radio does The antenna cable is not work. The not connected radio station automatic The signals are too selection does weak not work.
Need help?
Do you have a question about the J - 200 J - 230 and is the answer not in the manual?
Questions and answers
My Jacuzzi J225 has been put into lockout mode. How do I cancel that?