Table of Contents
Advertisement
Quick Links
Advertisement
Table of Contents

Related Manuals for ATC iLifestyle


Summary of Contents for ATC iLifestyle
- Page 1 Wifi smart fluid electric thermal radiator INSTRUCTIONS FOR INSTALLATION AND USE...
- Page 2 THIS PAGE INTENTIONALLY LEFT BLANK...
- Page 3 IMPORTANT: - In order to avoid overheating, do not cover the radiator. The radiator itself is marked with the standard “Do not cover” symbol. - Do Not sit on the radiator. - This appliance is not intended for outdoor use. - If the power cord is damaged, it must be changed by the manufacturer, their after-sales service or persons qualified to do so, to avoid possible danger.
- Page 4 been given supervision or appropriate training regarding the use of the device in a safe way and they understand the dangers involved. Children must not play with the appliance. Cleaning and maintenance must not be performed by unsupervised children. - Children under 3 years should be kept out of reach of the appliance unless they are constantly supervised.
- Page 5 Locking Plastic Covers Grey Wall Plugs Hex-Head Fixings Instruction Manual Quick Start Guide Quick Start guide for WiFi connection Quick Start Guide for Voice Assistants Please contact Sales@ATC.ie if any of the above are missing DESIGNED AND MADE IN SPAIN A73023520...
- Page 6 INDEX 1. INTRODUCTION ........................7 2. LOCATION ..........................7 3. ELECTRICAL CONNECTION ....................8 4. MOUNTING ..........................9 5. OPERATION ..........................11 CONTROL PANEL ......................11 TURNING THE RADIATOR ON AND OFF ............... 11 LINKING THE RADIATOR TO THE WiFi NETWORK ............. 12 5.3.2.1 Linking a radiator to a WiFi network ..............
- Page 7 WiFi SMART FLUID ELECTRIC THERMAL RADIATOR 1. INTRODUCTION Before switching the radiator on, carefully read these instructions which will help to ensure correct operation of the device. Keep the instructions for future reference 2. LOCATION It is recommended to locate the radiator as close as possible to the coldest wall in the room. however it is not recommended to install the radiator on external walls without any insulation.
-
Page 8: Electrical Connection
Note: If the window sill protrudes less than 20 mm, the gap above the radiator can be disregarded. 3. ELECTRICAL CONNECTION The iLifestyle WiFi radiator must be connected to the mains supply (230V~50Hz.). It is recommended to install a switched spur for each radiator. In addition, the following warnings must be taken into... - Page 9 Ensure the MB stamp on the metal bracket is at the top. 2. Check Table 1 for the “A” distance between the brackets for your iLifestyle WiFi model. 3. Mark the small hole in the metal brackets on the wall with a pencil. These two marked points determine the position of the two lower drill holes.
- Page 10 7. Attach the plastic pieces to the top and bottom of the metal brackets as shown in images 3 and 4 8. Hang the radiator as shown below and in image 5 9. To detatch the radiator from the bracket: 1) Push the plastic bracket away from the metal bracket 2) Lift the plastic bracket and pull the base of the radiator forward away from the metal bracket...
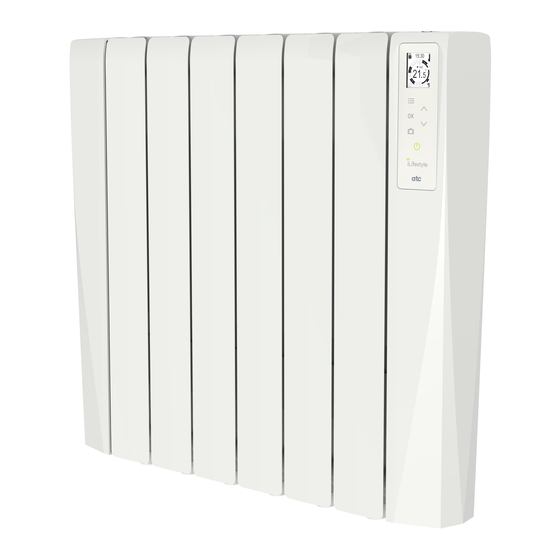
- Page 11 5. OPERATION 5.1 CONTROL PANEL The control panel is made with a large TFT-LCD screen with white backlight and black images for ease of legibility. There are six touch sensitive keys, the fuctions are outlined below: Multi-Function, selection of mode, temperatures, TFT-LCD screen.
- Page 12 27 of this manual for details. If the battery is depleted and the iLifestyle WiFi radiator is linked to a WiFi Network and is online (i.e. router turned on and radiator is connected), the day and time of the radiator will always be automatically updated based on the radiator’s configured time zone (in the ATC CALA App).
- Page 13 Link the radiator to the WiFi network Note: For the first iLifestyle WiFi radiator acquired, the process must always follow this order. Once the App is setup and running, additional iLifestyle WiFi radiators can be set up or connected to WiFi in any order.
- Page 14 5.3.2.1 Linking a radiator to a WiFi network There are two steps in this process, 1 link the radiator directly to the mobile device, and 2 Link the radiator to the local WiFi netwok, In step 1 the procedure to Once registered or when the camera on the Mobile activate the inbuilt WiFi is...
- Page 15 Control of the radiator through Virtual Assistants Once the ATC CALA App is installed and a user registered with the App, is is possible to control the App and therefore the iLifestyle WiFi radiators with Google assistant or Amazon Alexa...
- Page 16 5.3.4.3 Link WiFi During registration of the ATC CALA App the first iLifestyle WiFi radiator is normally linked to the network. When further iLifestyle WiFi radiators are added, they must be linked to a WiFi network to be able to be managed remotely.
- Page 17 Once the radiator is connected to a WiFi network and for as long as it is connected, the WiFi symbol will appear on all operating screens. 5.3.4.4 WiFi Network This menu will only appear when the WiFi radiator already has been linked to a WiFi network. It will continue to be selectable provided it is linked to a WiFi network.
- Page 18 Every time the iLifestyle WiFi radiator sends any data or status to the WiFi network, to be shown in the ATC CALA App (e.g: The initial data at the time it is linked to the WiFi network), as well as each time the network WiFi sends data to the iLifestyle WiFi radiator from the App (e.g: when it is...
- Page 19 30 seconds, the radiator will return to the last operating mode. 5.3.4.6 Firmware Update The iLifestyle WiFi radiator allows the remote update of the firmware for the electronics, this is configurable through the last menu within the WiFi menu.
-
Page 20: Selecting The Operating Mode
If the radiator is linked to a WiFi network, and it cannot find any upgrades for the current firmware version of the iLifestyle WiFi radiator, the screen “NO FIRMWARE UPDATES FOUND” will appear and the radiator will return to the Firmware Update menu. - Page 21 In each of the operating modes the screen will automatically switch the display between the current time and the day of the week. 5.4.1 COMFORT In Comfort mode the temperature is directly selected using the p and q keys, available setpoints are between 12 °C and 30 °C in steps of 0.5 °C.
- Page 22 (see page 31 for details of Adaptive start control function). Program mode is the only mode in which this function operates. iLifestyle WiFi radiators come with the predetermined program of Anti-frost for all half-hour sections of all days. EDIT PROGRAM: Selection of the day to be set...
- Page 23 It contains 4 types of Energy Meters, each different depending on the selected period of time. Note: In the ATC CALA App this feature is available but independently of the radiator, the settings on the radiator are not synchronized with the App.
- Page 24 (the count will restart if the battery is replaced). The registered values of each meter are not lost unless they are manually reset. Note: The App will only be able to correctly register the energy consumption that each iLifestyle WiFi radiator sends each hour.
- Page 25 When accessing the Rate menu with the OK key, the following screens appear: There are 4 options to configure; When q or p is touched, the option changes position and screen depending on whether switching between Standard Rate and Reduced Rate: Whenever changing between each of the 4 options, once in the required option, touch OK.
-
Page 26: Configuration Menu
Selecting the “Type of Meter” to reset, shows the DAILY total, however it is possible to select any of the other three available WEEKLY / MONTHLY / TOTAL meters. When the OK key is touched whilst the “Type of Meter” to Reset is selected, use p and q to select which one should be reset. - Page 27 If the iLifestyle WiFi radiator is registered in the ATC CALA App, the time will be updated to the Time zone of the Installation in which the radiator is installled. The Clock is updated each time information is sent to the radiator.
- Page 28 5.4.6.4 Power Limitation This function allows the reduction of the radiator’s average consumption manually. If there is radiator with a specific output for a room with a particular volume (m ), the radiator can be set to use less power if it is used in a smaller room that has less volume. The value will be a percentage of the full power of the radiator with regard to its normal full value: - Maximum value: 100 % (default value of the radiator)
-
Page 29: Heating And Temperature Display
• The radiator is unlinked from the WiFi network, its Name is removed from the screen and in the ATC CALA App it is removed from the user account to which it was registered, • Comfort set point is 20 °C, •... -
Page 30: Open Windows Function
It allows the user to manually operate the radiator and override the current setting. It is able to force the radiator to heat or not for a set amount of time. After the time expires, the radiator will return to the previous mode of operation. To enter Manual mode, touch the suitcase key and then use the p and q keys to enter the amount of time you want to force the radiator to heat or not. -
Page 31: Adaptive Start Control Function
Note: The keyboard lock and unlock actions can also be performed from the radiator is linked to a WiFi network. 5.10 INTERNAL PARAMETERS CONFIGURATION There are two user configurable internal parameters in the iLifestyle WiFi radiator. By design they are not meant to be changed often. A73023520... - Page 32 Although both are internal parameters of the radiator, they can also be configured through the CALA App if the radiator is connnected to an account. To access the parameter selection menu, touch and hold the OK and Mode keys for 5 seconds until the menu appears on the display.
-
Page 33: Easy Mode
Normal Mode again and then follow the required steps. Once the iLifestyle WiFi radiator has been linked to a WiFi network, it can be set into the Easy Mode and then be remotely controlled using the CALA App, but with the simple control options outlined previously. -
Page 34: Error Code Information
ERROR CODE INFORMATION There are 4 possible errors that the electronics of the iLifestyle WiFi radiator can detect; if an error is detected, one of the following codes will be displayed on the screen until it is resolved: ERROR CODE... -
Page 35: Characteristics Table
17.7 7. MAINTENANCE iLifestyle WiFi radiators require very little maintenance. In order to clean the radiator, it is recommended that the electric power is switched off. Wipe the outside of the product and clean the inside channels with an appropriate brush. Do not insert fingers the inside channels The surfaces of the radiator must not be cleaned with an abrasive product or those containing granular substances.We recommend regular cleaning with PH neutral products. -
Page 36: Ecodesign Table
With adaptive start control Other control options With remote control option ATC Electrical and Mechanical ATC House, Broomhill Drive, D24 EF99, Tallaght, IRELAND IE Tel.:+353 1 467 8301 - UK Tel.: +44 0203 564 9164 Fax: +353 1 452 0887 Email: sales@atc.ie, sales@atcelec.co.uk 9. -
Page 37: Ce Declaration Of Conformity
10. CE DECLARATION OF CONFORMITY ATC Electrical & Mechanical ATC House Head Office & Energy Showrooms Broomhill Drive ,Tallaght Dublin, D24 EF99 Declaration of Conformity We, the undersigned, certify and declare under our sole responsibility that the product designated in this Decla-... - Page 38 11. UKCA DECLARATION OF CONFORMITY ATC Electrical & Mechanical ATC House Head Office & Energy Showrooms Broomhill Drive ,Tallaght Dublin, D24 EF99 Declaration of Conformity We, the undersigned, certify and declare under our sole responsibility that the product designated in this Dec-...
-
Page 39: Warranty
- The warranty is valid provided that normal maintenance operations described above in the technical instructions provided with the equipment have been carried out. - The consumer must inform ATC of the lack of conformity of the goods, in a period of less than two months since they learned of it. -
Page 40: Correct Disposal Of This Product
Business users should contact their supplier and check the terms and conditions of the purchase contract. This product must not be mixed with other commercial wastes for disposal. ATC Electrical and Mechanical ATC House Broomhill Drive D24 EF99, Tallaght, IRELAND www.atc.ie www.atcelec.co.uk...
Need help?
Do you have a question about the iLifestyle and is the answer not in the manual?
Questions and answers