Advertisement
Quick Links
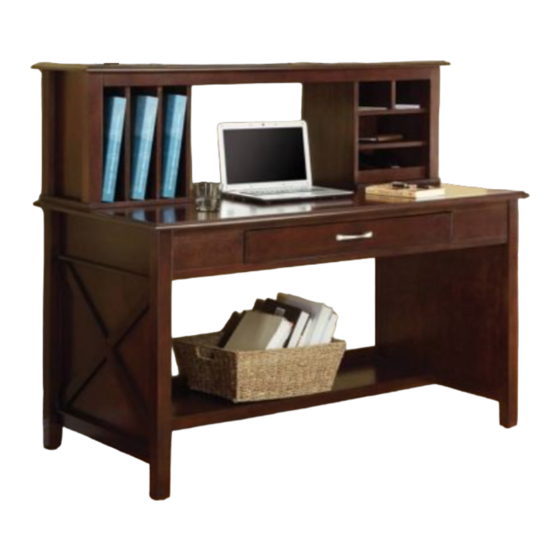
Item# BP-ALDH56-W9
ADELINE WRITING DESK & HUTCH
ASSEMBLY INSTRUCTIONS
IF PARTS ARE MISSING OR DAMAGED, DO NOT RETURN TO STORE
To order missing or replacement parts, contact us via e-mail parts@officestar.net, by Fax 1-909-930-5629, or toll free parts
number 1-800-950-7262, Monday through Friday 8:00 a.m. - 5:00 p.m. Pacific Time.
Advertisement

Related Manuals for Bassett Inspired BP-ALDH56-W9


Summary of Contents for Bassett Inspired BP-ALDH56-W9
- Page 1 Item# BP-ALDH56-W9 ADELINE WRITING DESK & HUTCH ASSEMBLY INSTRUCTIONS IF PARTS ARE MISSING OR DAMAGED, DO NOT RETURN TO STORE To order missing or replacement parts, contact us via e-mail parts@officestar.net, by Fax 1-909-930-5629, or toll free parts number 1-800-950-7262, Monday through Friday 8:00 a.m. - 5:00 p.m. Pacific Time.
-
Page 2: Limited Warranty
To make a warranty claim, contact Customer Service, provide model number, sales receipt and description of the problem. It is the customer’s responsibility to prepay freight on any components returned to the factory. INSPIRED by Bassett will pay return freight on ®... -
Page 3: Parts List
PARTS LIST Label Picture Description Hutch Top Panel Hutch Top Rail Hutch Left Side Panel Hutch Left Middle Panel Hutch Left Dividers Hutch Left Bottom Panel Hutch Left Back Panel Hutch Right Side Panel Hutch Right Middle Panel Hutch Right Divider... - Page 4 PARTS LIST Label Picture Description Hutch Right Upper Shelf Hutch Right Lower Shelf Hutch Right Bottom Panel Hutch Right Back Panel Charging Station Desk Top Desk Left Side Frame Desk Right Side Frame Desk Shelf...
-
Page 5: Hardware List
HARDWARE LIST Label Picture Description Size Cam Bolt 11 + 2 EXTRA Cam Lock 11 + 2 EXTRA Wooden Dowel 46 + 4 EXTRA 08 x 30 mm Bolt 5/16’’ x 1/2’’ 4 + 1 EXTRA 20 + 2 EXTRA Bolt 5/16’’... - Page 6 STEP 1: Insert two Wooden Dowels (H-3) into edges of Hutch Left Side Panel (C), Hutch Left Middle Panel (D) and both Hutch Left Dividers (E). STEP 2: Attach Hutch Left Bottom Panel (F) to panels (C, E & D) and secure using four Flat Washers (H-6), four Lock Washers (H-7) and four Bolts (H-5).
- Page 7 STEP 3: Insert two Wooden Dowels (H-3) into edge of Hutch Right Divider (J), attach Hutch Right Upper Shelf (K) to Hutch Right Divider (J). STEP 4: Insert two Wooden Dowels (H-3) into both edges of Hutch Right Upper Shelf (K) and Hutch Right Lower Shelf (L), attach Hutch Right Middle Panel (I) and Hutch Right Side Panel (H) to panels (K &...
- Page 8 STEP 5: Insert four Wooden Dowels (H-3) into bottom of Hutch Right Bottom Panel (M) and secure to H-6 H-7 assembly using four Flat Washers (H-6), four Lock Washers (H-7) and four Bolts (H-5). FULLY TIGHTEN ALL BOLTS (H-5) USING WRENCH (T-2). STEP 6: Slide Hutch Left Back Panel (G) into grooves of panels (C &...
- Page 9 STEP 7: Insert one Wooden Dowel (H-3) into panels (C & H). Attach Hutch Top Rail (B) and secure using two Cam Locks (H-2). FULLY TIGHTEN CAM LOCKS (H-2) USING WRENCH (T-1). STEP 8: Insert ten Cam Boots (H-1) into bottom of Hutch Top Panel (A). FULLY TIGHTEN CAM LOCKS (H-2) USING WRENCH (T-1).
- Page 10 STEP 9: Insert fourteen Wooden Dowels (H-3) into top of hutch assemblies. STEP 10: Attach Hutch Top Panel (A) to hutch assembly and secure using ten Cam Locks (H-2). FULLY TIGHTEN CAM LOCKS (H-2) USING WRENCH (T-1).
- Page 11 STEP 11: Insert two Wooden Dowels (H-3) onto both ends of Desk Top (P) and Desk Shelf (S). Attach Desk Right Side Frame (R) and Desk Left Side Frame (Q) and secure using four Flat Washers (H-9), four Lock Washers (H-7) and four Bolts (H-5). DO NOT FULLY TIGHTEN BOLTS (H-5).
- Page 12 STEP 13: Secure hutch assembly to desk assembly using two Metal Plates (H-8). Secure each Metal Plate (H-8) using two Flat Washers (H-6), two Lock Washers (H-8) and two Bolts (H-4) for each Metal Plate (H-8). FULLY TIGHTEN BOLTS (H-4) USING WRENCH (T-2). STEP 14: Slide Charging Station (O) into hutch assembly.
- Page 13 FUrnITUrE CarE: - Dust with a soft cloth following the grain pattern of the wood. - Dust often to remove the everyday abrasive particles from the wood surfaces. - Before dusting, moisten cloth lightly with a spray product. - Wood finishes also benefit from an occasional polishing. Contact us via e-mail parts@officestar.net, by Fax 1-909-930-5629, or toll free parts number 1-800-950-7262, Monday through Friday 8:00 a.m.
Need help?
Do you have a question about the Inspired BP-ALDH56-W9 and is the answer not in the manual?
Questions and answers