Advertisement
BP-4207-942T / BP-4207-942B / BP-4207-943T
BP-4207-943B / BP-4207-947T / BP-4207-947B
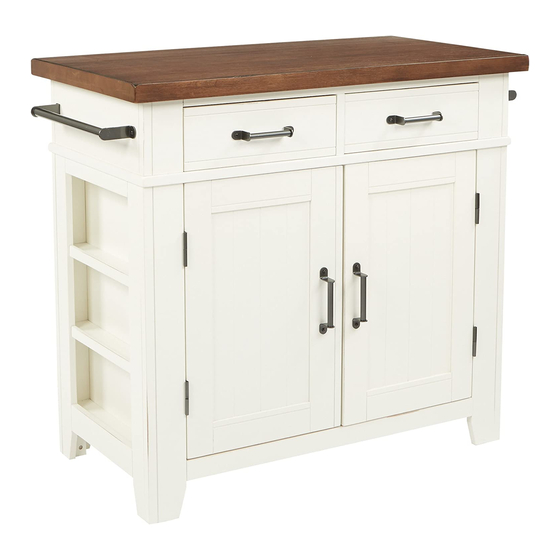
ISLAND WITH WOOD TOP
ÎLOT AVEC PLAN EN BOIS
ASSEMBLY INSTRUCTIONS / INSTRUCTIONS DE MONTAGE
IF PARTS ARE MISSING OR DAMAGED, DO NOT RETURN TO STORE
To order missing or replacement parts, contact us via e-mail parts@officestar.net, by Fax 1-909-930-5629, or toll free parts
number 1-800-950-7262, Monday through Friday 8:00 a.m. - 5:00 p.m. Pacific Time.
EN CAS DE PIÈCES MANQUANTES OU ENDOMMAGÉES, NE PAS RETOURNER AU MAGASIN
Pour commander des pièces de rechange ou manquantes, contactez-nous par courriel à parts@officestar.net, par télécopieur
au 1-909-930-5629 ou au numéro sans frais 1-800-950-7262 dédié aux pièces, du lundi au vendredi de 8 h à
17 h, heure du Pacifique.
Advertisement
Table of Contents

Related Manuals for Bassett BP-4207-942T


Summary of Contents for Bassett BP-4207-942T
- Page 1 BP-4207-942T / BP-4207-942B / BP-4207-943T BP-4207-943B / BP-4207-947T / BP-4207-947B ISLAND WITH WOOD TOP ÎLOT AVEC PLAN EN BOIS ASSEMBLY INSTRUCTIONS / INSTRUCTIONS DE MONTAGE IF PARTS ARE MISSING OR DAMAGED, DO NOT RETURN TO STORE To order missing or replacement parts, contact us via e-mail parts@officestar.net, by Fax 1-909-930-5629, or toll free parts number 1-800-950-7262, Monday through Friday 8:00 a.m.
-
Page 2: Limited Warranty
90 jours. Les défauts et les dégâts qui sont le résultat de la mauvaise utilisation, de la négligence, de modifications, d’accidents, du vandalisme, de la rouille, de catastrophes naturelles ou de tout autre événement indépendant de la volonté de INSPIRED by Bassett ®... -
Page 3: Parts List / Liste Des Pièces
PARTS LIST / LISTE DES PIÈCES (2) Left Drawer / tiroir gauche (1 PC) (1) Top / plateau (1 PC) (4) Divider / séparateur (1 PC) (3) Right Drawer / tiroir droit (1 PC) (5) Bottom Panel / panneau inférieur (1 PC) (6) Back Panel / panneau arrière (1 PC) (7) Left Side Panel / panneau latéral gauche (1 PC) (8) Right Side Panel / panneau latéral droit (1 PC) - Page 4 PARTS LIST / LISTE DES PIÈCES (10) Left Door / porte gauche (1 PC) (9) Shelf / tablette (2 PCS) (11) Right Door / porte droite (1 PC)
-
Page 5: Size /Taille
HARDWARE LIST / LISTE DU MATÉRIEL NO / ÉTQ. DRAWING / DESSIN DESCRIPTION SIZE /TAILLE QTY. / QTÉ. Long Bolt M6 x 40mm 6 PCS boulon longue Bolt M6 x 30mm 14 PCS boulon Screw M4 x 15mm 12 PCS Flat Washer M8 x 20mm 6 PCS... - Page 6 STEP 1: Attach Divider (4) to Bottom Panel (5) using two Flat Washers (D), two Lock Washers (E) and two Long Bolts (A). FULLY TIGHTEN LONG BOLTS (A). Fixez le séparateur (4) au panneau inférieur (5) à l’aide de deux rondelles plates (D), deux rondelles de blocage (E) ÉTAPE 1: SERREZ TOUTES LES BOULON LONGUES (A).
- Page 7 STEP 3: Attach Left Side Panel (7) and Right Side Panel (8) to Assembly, secure Side Panels (7 & 8) using five Bolts (B) for each FULLY TIGHTEN ALL BOLTS USING ALLEN WRENCH (I). panel. ÉTAPE 3: Fixez le panneau latéral gauche (7) et le panneau latéral droit (8) à l’assemblage, sécurisez les panneaux SERREZ TOUTES LES BOULONS AVEC LA CLÉ...
- Page 8 STEP 5: Carefully attach Top (1) to Assembly and secure to Side Panels (7 & 8) using four Flat Washers (D), four Lock Washers FULLY TIGHTEN ALL (E), and four Long Bolts (A). Secure Top (1) to Divider (4) and Back Panel (6) using three Long Bolts (A). BOLTS USING ALLEN WRENCH (I).
- Page 9 STEP 7: Place Shelf Pins (F) into desired positions. Slide Shelves (9) onto Shelf Pins (F). Insérez les supports de tablette (F) dans les positions souhaitées. Placez les tablettes (9) sur supports de tablette (F). ÉTAPE 7: STEP 8: Insert Drawers (2 & 3) into Island. ÉTAPE 8: Insérez les tiroirs (2 &...
- Page 10 STEP 9: Attach Left Door (10) to hinge on Left Side Panel (7). Attach Right Door (11) to hinge on Right Side Panel (8). NOTE: Align hinge dowel and slide down to secure door. Fixez la porte gauche (10) à la charnière sur le panneau latéral gauche (7). Fixez la porte droite (11) à la ÉTAPE 9: charnière sur le panneau latéral droit (8).
Need help?
Do you have a question about the BP-4207-942T and is the answer not in the manual?
Questions and answers