
Related Manuals for Reiner 880


Summary of Contents for Reiner 880
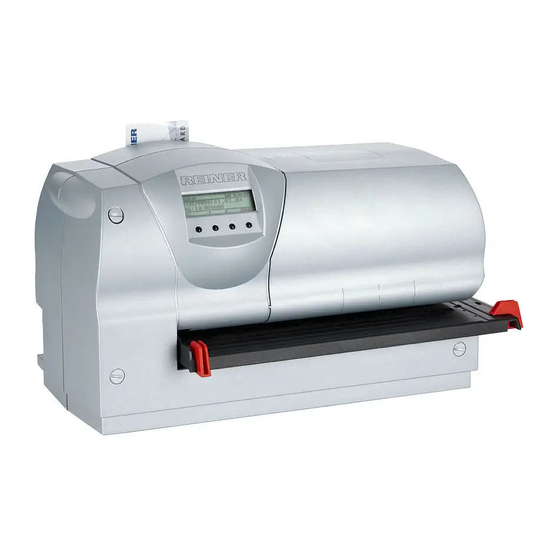
- Page 1 Service Manual Bearb. Datum Entw. Datum N/QS Datum Aend-Nr. Seite 12.05.2005 30.08.2005 26.08.2005 1 (102) 22.09.2005 medm 12.10.2005 7923 Dok.Art SERVICE-MANUAL 880 ENGLISH 888950...
- Page 2 © 2005 Ernst Reiner GmbH & Co. KG All rights reserved. Translations, reprints, or any other form of reproduction of this manual, even in part and regardless of form, require our prior written permission. We reserve the right to change the contents of this manual without prior notice.
- Page 3 Table of Contents service INTRODUCTION AND SAFETY INSTRUCTIONS NTRODUCTION YMBOLS USED AFETY INSTRUCTIONS ANUFACTURER S NOTES NVIRONMENTAL REGULATIONS TECHNICAL DATA TYPE OVERVIEW ACHINE VERSIONS NK RIBBONS AND INK RIBBON CASSETTES MACHINE FEATURES ENERAL NTERNAL IMPRESSIONS OLLER PRINTER OPTIONS AND ACCESSORIES CCESSORIES PTIONS Ausgabe:...
- Page 4 Table of Contents service CONSTRUCTION ENERAL NOTES FOR THIS SECTION ENERAL REMARKS ON CONSTRUCTION 880000-000 880 DISPATCH-READY 880100-000 EL. STAMPING MACHINE 880 CPTE. 882000-000 EL. STAMPING MACHINE 880 VM 883010-000 UPPER PART CPTE. 6-16 883800-000 PRINTING PLATE, BRASS 62X40 CPTE UNENGRAVED 6-18 883800-100 PRINTING PLATE, NYLONPRINT 62X40 CPTE.
-
Page 5: Table Of Contents
Table of Contents service TROUBLESHOOTING AULTS WITH AN ERROR MESSAGE AULTS WITHOUT AN ERROR MESSAGE 10 FURTHER DOCUMENTATION 10-1 11 SPARE PARTS LISTS 11-1 12 APPENDIX 12-1 Ausgabe: 888950 - 001 - A... - Page 7 Introduction and Safety service Instructions Introduction and Safety Instructions Introduction This technical manual describes REINER Electric Stamping Machines in the Model Range 880. Symbols used The following symbols are used to aid presentation in this manual: Indicates general instructions Note...
- Page 8 1.3.1 General safety instructions • The Reiner 880 complies with relevant safety regulations for information technol- ogy equipment, including those for electric office machinery. • Unauthorised opening of the machine and improper repairs can cause consider- able danger (fire hazard).
- Page 9 ESCs. 1.3.3 Hazards arising from working on the machine internals The Model 880 contains sub-assemblies that carry high voltages and electric charges, which could cause serious injury. Operations on the machine internals must therefore only be carried out by trained...
- Page 10 Environmental regulations What does REINER contribute to our mutual environment? The Model 880 Electric Stamp complies with all relevant safety standards. This means that, if the machine is used correctly, it does not pose any danger for the user. The noise emissions comply with workplace regulations for environments in which mainly intellectual work is carried out.
- Page 11 Introduction and Safety service Instructions 1.5.3 Ink ribbons Long-life ink-ribbon cassettes are used in Model 880 Electric Stamps The ink ribbons contain no carcinogenic substances. Do not throw used cassettes away, they can be recycled. 1.5.4 Packaging The package protects your machine during transport.
- Page 13 1.5 A AC Output voltage from mains unit 24 V DC / 3.0 A Noise level max. 65 dB(A) (workplace-related emissions to ISO 7779) Example of an impression Source: www.reiner.de Source: Bedienungsanleitung 880 / Version 2.0 Ausgabe: 888950 - 001 - A...
- Page 14 Technical Data service Impression position Source: Bedienungsanleitung 880 / Version 2.0 Ausgabe: 888950 - 001 - A...
- Page 15 880000-050 880-050 Stamp head Ink ribbons and ink-ribbon cassettes Model 880 stamps have ink-ribbon cassettes that are easy to replace, so that changing the ink ribbon is quick, clean and simple. All available ink-ribbon cassettes are shown in the table below.
- Page 17 Machine Features General REINER 880 Electric Stamps incorporate two different printing mechanisms, a single-line needle printer and a roller printer for individual impressions using a printing plate. For the needle printer, details of impressions are stored in the machine.
- Page 19 The USB interface (Version 1.1) enables connection of the machine to a PC. • The connection can be used as a printer interface. In such a case, data are transmit- ted form an application program to the REINER 880, which can then print them im- mediately. •...
- Page 20 Click & Stamp 789 WIN With this program, text from any desired application can be transmitted from the clipboard of the PC to the connected printer and printed. The product Click & Stamp 789 WIN can be obtained from REINER under Order No. 789105-000.
- Page 21 Options and Accessories service 2. Text characters and pictures in OUTLINE. Large surfaces reduce the surface pressure, resulting in an uneven impression. (This rule is particularly important when carbon copies are required.) Example: Favourable design Unfavourable design 3. Lines as fine as possible. Fine lines reduce the area, so that there is more pressure on the remaining surface.
- Page 22 (Sections 6.7 and 6.8) 5.2.4 Print rollers The Model 880 can be fitted with two different types of print roller: 882550-000: hard roller (standard) 882550-001: soft roller (for use depending on the printing plate design (Section 6.5.6)
- Page 23 Contents of Section 6 ENERAL NOTES FOR THIS SECTION ENERAL REMARKS ON CONSTRUCTION 880000-000 880 DISPATCH-READY 880100-000 EL. STAMPING MACHINE 880 CPTE. 882000-000 EL. STAMPING MACHINE 880 VM 883010-000 UPPER PART CPTE. 6-16 883800-000 PRINTING PLATE, BRASS 62X40 CPTE UNENGRAVED 6-18 883800-100 PRINTING PLATE, NYLONPRINT 62X40 CPTE.
- Page 24 Construction service General notes for this section Spare parts are in bold type and are marked with an E in the parts list. Example: Note 0030 887250-000 HOUSING, FRONT PART, CPTE. The latest spare-parts lists may differ from the parts lists included here; they can be btained separately from our Sales Department.
- Page 25 General remarks on construction Model 880 Electric Stamps are intended for stamping tasks in offices and commerce. Be- cause they are equipped with both a 9-needle printing head and a roller printer, they cover a wide range of applications in which documents and forms must be stamped.
- Page 26 DRG. Version : Mat No. : 880000-000 880 VERSANDF Pos. No.: Mat. No. : Designation Spare part 880100-000 EL STAMPING MACHINE 880 CPTE 883800-000 PRINTING PLATE BRASS 62X40 CPTE UNENGRAVED 883800-100 PRINTING PLATE NYLONPRINT 62X40 CPTE 885100-000 MAINS UNIT/PLUG 90...264VAC 24VDC 70W...
- Page 27 Construction service 6.3.2 Illustrations: Individual parts list positions are shown as accessories in the operating instructions. Ausgabe: 888950 - 001 - A...
- Page 28 Construction service 880100-000 EL. STAMPING MACHINE 880 CPTE. 6.4.1 Parts list 07.06.2005 DRG. Version : Mat. No. : 880100-000 EL STAMPING MACHINE 880 CPTE Pos. No.: Mat. No. : Designation Spare part 882000-000 EL STAMPING MACHINE 880 VM 883090-000 INSULATION...
- Page 29 Construction service 6.4.2 Illustrations: DRG. NO. 880100-000 EL. STAMPING MACHINE 880 CPTE. Ausgabe: 888950 - 001 - A...
- Page 30 Construction service 882000-000 EL. STAMPING MACHINE 880 VM 6.5.1 Parts list 01.06.2005 DRG. Version : B Mat. No. : 882000-000 EL STAMPING MACHINE 880 VM Pos. No.: Mat. No. : Designation Spare part 882120-000 SIDE PLATE REAR VM 882450-000 PUSHER CPTE...
- Page 31 Drawing 882410-000. Safety screw: 165120-000 SKT. HD CAP SCREW M4 x35 DIN 912 BLUED Position numbers 400 and 410 For safety reasons, dismantling sub-assembly 882410-000 PRINT UNIT CPTE. must only be carried out by REINER! Ausgabe: 888950 - 001 - A...
- Page 32 Construction service 6.5.2 Illustrations: DRG. NO. 882000-000 Sheet (1) EL. STAMPING MACHINE 880 VM 6-10 Ausgabe: 888950 - 001 - A...
- Page 33 Construction service 6.5.3 Illustrations: DRG. NO. 882000-000 Sheet 2 EL. STAMPING MACHINE 880 VM Ausgabe: 6-11 888950 - 001 - A...
- Page 34 Construction service 6.5.4 Illustrations: DRG. NO. 882410-000 PRINT UNIT CPTE. This sub-assembly contains elements with highly pre-loaded springs, and must therefore be replaced as a complete unit. Warning 6-12 Ausgabe: 888950 - 001 - A...
- Page 35 6.5.5 Illustrations: DRG. NO. 882550-000 DRG. NO. 882550-001 PRINT ROLLER UNIT CPTE., 93 SHORE The Model 880 can be fitted with two different types of print roller: 882550-000: hard roller (standard) 882550-001: soft roller (for use depending on the printing plate design)
- Page 36 Construction service 6.5.6 Illustrations: DRG. NO 378 002-200 PRINT ROLLER CPTE. 44.4 MM, 97 SHORE A, WHITE DRG. NO 378 002-201 PRINT ROLLER CPTE. 44.4 MM, 93 SHORE A, RED Drawing for information only. Print roller 378 002-20x is not available as a spare part. For replacement purposes, use Print roller unit cpte.
- Page 38 PAN-HD SCR TORX M4X12 TAPT DIN7985 ZN-PL 685244-241 PAN-HD SCR TORX M4X12 TAPT DIN7985 ZN-PL 571080-022 TIMING BELT MXL Z-184 B-6.35 886200-000 NEEDLE DRIVER 880 CPTE 685244-077 PAN-HD SCR TORX M2.5X8 TAPT DIN7985 ZN-PL 6-16 Ausgabe: 888950 - 001 - A...
- Page 39 Construction service 6.6.2 Illustrations: DRG. NO. 883010-000 UPPER PART CPTE. Ausgabe: 6-17 888950 - 001 - A...
- Page 40 Construction service 883800-000 PRINTING PLATE, BRASS 62X40 CPTE UNENGRAVED 6.7.1 Parts list 08.06.2005 DRG. Version : Mat. No. : 883800-000 PRINTING PLATE BRASS 62X40 CPTE Pos. No.: Mat. No. : Designation Spare part 883810-000 PRINTING PLATE CARRIER 883820-000 PRINTING PLATE BRASS 65X40 022031-000 TWO-COMPONENT ADHESIVE ARALDITE AY103 6-18...
- Page 41 Construction service 6.7.2 Illustrations: DRG. NO. 883800-000 PRINTING PLATE, BRASS 62X40 CPTE., UNENGRAVED Ausgabe: 6-19 888950 - 001 - A...
- Page 42 Construction service 883800-100 PRINTING PLATE, NYLONPRINT 62X40 CPTE. 6.8.1 Parts list 08.06.2005 DRG. Version : Mat. No. : 883800-100 PRINTING PLATE NYLONPRINT 62X40 CPTE Pos. No.: Mat. No. : Designation Spare part 883810-000 PRINTING PLATE CARRIER 8043200-214 NYLOPRINT PLATE WA II 175 240 X 320 22031-000 TWO-COMPONENT ADHESIVE ARALDITE AY103...
- Page 43 Construction service 6.8.2 Illustrations: DRG. NO. 883800-100 PRINTING PLATE, NYLONPRINT 62X40 CPTE. Ausgabe: 6-21 888950 - 001 - A...
- Page 44 Construction service 883900-000 PRINT SLIDE CPTE. 6.9.1 Parts list 06.06.2005 DRG. Version : Mat. No. : 883900-000 PRINT SLIDE CPTE Pos. No.: Mat. No. : Designation Spare part 883910-000 PRINT SLIDE MICROLYS K1200 572058-513 BALL BRG X 16 X 5 MM /2 SHIELDS 780850-102 PRINTER HEAD 9-NEEDLE 12V...
- Page 45 Construction service 6.9.2 Illustrations: DRG. NO. 883900-000 PRINT SLIDE CPTE. Ausgabe: 6-23 888950 - 001 - A...
- Page 46 HOUSING FRONT PART CPTE Pos. No.: Mat. No. : Designation Spare part 887251-000 HOUSING FRONT PART LASER-MARKED 790117-000 WINDOW 790119-880 CONTROL BUTTON 880 790119-880 CONTROL BUTTON 880 790119-880 CONTROL BUTTON 880 790119-880 CONTROL BUTTON 880 790122-000 LC-DISPLAY 122 X 32 DOT CPTE 685244-077 PAN-HD SCR TORX M2.5X8 TAPT DIN7985 ZN-PL...
- Page 47 Construction service 6.10.2 Illustrations: DRG. NO. 887250-000 HOUSING, FRONT PART, CPTE. Ausgabe: 6-25 888950 - 001 - A...
- Page 48 Construction service 6.11 887220-010 COVER CPTE., SPARE PART ONLY 6.11.1 Parts list 27.06.2005 DRG. Version : 887220-010 COVER CPTE SPARE PART ONLY Mat. No. : Pos. No.: Mat. No. : Designation Spare part 887221-000 COVER LASER-MARKED 887228-010 MASK FOR INK RIBBON 887226-000 ADHESIVE CUT-OUT DM30 STEIERF 87-60157 887226-000...
- Page 49 Construction service 6.11.2 Illustrations: DRG. NO. 887220-010 COVER CPTE., SPARE PART ONLY Ausgabe: 6-27 888950 - 001 - A...
- Page 50 Construction service 6.12 887320-000 TABLE CPTE. 6.12.1 Parts list 22.06.2005 DRG. Version : Mat. No. : 887320-000 TABLE CPTE Pos. No.: Mat. No. : Designation Spare part 887324-000 TABLE 887326-000 PIVOTED ARM 6-28 Ausgabe: 888950 - 001 - A...
- Page 51 Construction service 6.12.2 Illustrations: (DRG. NO. 887320-000 TABLE CPTE.) Fig. 2: Ersatzteil_887320-000_Tisch_kpl Source: ZN_887320_000_A_1 Ausgabe: 6-29 888950 - 001 - A...
- Page 52 Position: Needle driver 880 L-DKP: Photocell for detecting position of print-head drive Position: Needle driver 880 (flag direct on print head) L-DW1: Photocell for recording cycles of print-carriage drive Position: STP DWA (cycle disc direct on second end of motor shaft) L-DW2: Photocell for detecting forward or return motion (90°...
- Page 53 Construction service 6.13.2 Positions of sensors and actuators Fig. 3: Lage Sensor u Aktuator Bild2 Source: EZ_880650_000_A_1 Fig. Lage Sensor Aktuator Bild1 Ausgabe: 6-31 888950 - 001 - A...
- Page 54 Construction service Source: EZ_880650_000_A_1 Fig. 5: Lage Sensor u Aktuator Bild3 Source: EZ_880650_000_A_1 Fig. 6: Lage Sensor u Aktuator Bild1 Source: EZ_880650_000_A_1 6-32 Ausgabe: 888950 - 001 - A...
- Page 55 Construction service 6.14 Wiring diagram 880 Ausgabe: 6-33 888950 - 001 - A...
- Page 56 Construction service 6.15 Block diagram, Control Board 880 6-34 Ausgabe: 888950 - 001 - A...
- Page 57 Service Instructions service Service Instructions This section supplements Section 6 Construction. It gives information about the tools required, and explains the most important adjustments. The Service Instructions provide a rapid overview, and give instructions for dismantling in the event of a repair being necessary. Contents of Section 7 ERVICE TOOLS DJUSTMENT INSTRUCTIONS...
- Page 58 Further fasteners and related elements are given in the parts lists in Section 6. 7.1.3 Software tools For adjustments, analysis, and loading new firmware on to the 880, three software tools are available. 7.1.3.1 User interface (menu) User interface (menu) for customer-specific settings.
- Page 59 The dealer password is required to give access to the service functions . The password must be requested from REINER. Note The 880 PC Setup Module can be obtained from REINER under the following order number. Order No.: 889920-000 Note The 880 PC Setup Module is delivered by e-mail and includes: •...
- Page 60 Service Instructions service Adjustment instructions This section supplements Section 6 Construction. For safety reasons, the power supply must always be disconnected when working on parts inside the housing! Warning 7.2.1 Adjusting the document gap If the document gap is not correctly adjusted, the edges of documents snag on the support pad.
- Page 61 7.2.2 Adjusting the display The display contrast is set using a potentiometer on the 880 control board. This setting is car- ried out in our works and will normally not require adjustment during the life of the machine. Rules for setting: Turning anti-clockwise: reduces the contrast.
- Page 62 Service Instructions service 7.2.3 Adjusting the print roller Depending on the design on the printing plate, the print roller may need to be adjusted. When the machine is assembled, the print roller is set to give a uniform impression with an unengraved printing plate.
- Page 63 If, in spite of loosening/tightening the screws through several stages, you cannot achieve a successful result, the middle screw can be loosened slightly to provide more play. The Model 880 can be fitted with two different types of print roller: 882550-000: hard roller (standard)
- Page 64 Service Instructions service 7.2.4 Adjusting the needle-printer head If the printing head is defective, it must be replaced. This may make readjustment of the print head distance necessary. Readjustment in the machine is carried out as follows: Remove the base plate see Section 6.4) Tripping print unit By manually tripping the print unit, the spacing (A) is set between the needle head and the...
- Page 65 Service Instructions service 3. Checking spacing of needle head to pressure pad Measure the setting of the needle head in relation to the pressure pad using feeler gauges. The setting should be 0.35 to 0.4mm. If feeler gauges are not available, 4 thicknesses of copier paper can be used. Push the paper stack between the print head and the pressure pad.
- Page 66 Service Instructions service 4. Adjustment Adjusting screws: Pos 40 and Pos. 30 Tools required: TORX screwdriver T8 (long version) Fig. 15: Justage-Nadeldruckkopf_Bild3 Source: ZN_883010_000_D_1_13.06.2005 Adjustment of the needle printer head with housing: Fig. 16: Justage-Nadeldruckkopf_Bild4 Source: SD-880000-000 7-10 Ausgabe: 888950 - 001 - A...
- Page 67 Service Instructions service 7.2.5 Adjustment of table tripping If the table does not initiate printing from all positions, readjustment of table tripping may be necessary. To carry out readjustment of table tripping, the housing must be dismantled (see Section 6.4) 1.
- Page 68 Service Instructions service Table tripping, adjustment 1 Then the setting of the tripping lever to the table must be checked and readjusted if nec- essary. Adjustment is carried out with the aid of a screwdriver; the screwdriver is intro- duced into the slot provided and turned slightly to deform the tripping lever to achieve the correct setting.
- Page 69 Service Instructions service 7.2.6 Adjusting timing-belt tension (DKA) Fig. 20: Justage-Zahnriemen_Bild1 Source: ZN_883010_000_D_1_13.06.2005 Fig. 21: Justage-Zahnriemen_Bild2 Source: ZN_883010_000_D_1_13.06.2005 Ausgabe: 7-13 888950 - 001 - A...
- Page 70 Service Instructions service Dismantling and replacement instructions This section supplements Section 6, Construction. For safety reasons, the power supply must always be disconnected when working on parts inside the housing! Warning 7.3.1 Replacing the printing plate Fig. 22: Ersatzteil_883800_000 Source: ZN_883800_000_B For details of how to change the printing plate, please see the operating instructions.
- Page 71 Service Instructions service 7.3.3 Replacing the needle printer head Fig. 24: Ersatzteil_780102-102 Source: SD-880000-000 1. Remove cover, ink-ribbon cassette, and insulation (Section 6.4, 880100-000 2. Disconnect the printer head cable and undo the retaining screws Fig. 25: Replacing needle head Source: SD-880000-000 3.
- Page 72 Service Instructions service 7.3.4 Replacing control board 880 cpte. Fig. 27: Ersatzteil_886100-000 Source: ZN_882000_000_B_2 1. Remove the housing Remove the screw-head covers (3x). (The covers can be turned to remove them, like a screw) Remove the screws for rear part of housing (5x).
- Page 73 Service Instructions service 3. Undo control board fasteners Fig. 29: Austausch-Steuerkarte-Bild02 Source: SD-880000-000 4. Remove and replace control board Section 6.5 882000-000 Fig. 30: Austausch-Steuerkarte-Bild02 Source: ZN_882000_000_B_2 When removing the control board, there is a risk of deforming the table tripping mecha- nism.
- Page 74 Replacing the upper part Fig. 31: Ersatzteil_883010-000_OBERTEIL KPL. Source: SD-PKG-888950-000 See points 1 to 4 of Section 7.3.4 Replacing control board 880 cpte. 5. Removing housing (front part) (Section 6.4 880100-000 6. Undo retaining screws for upper part 8 screws Section 6.5 882000-000...
- Page 75 Replacing the needle driver 880 Fig. 33: Ersatzteil_886200-000_Nadeltreiber-880 Source: ZN_886200-000_C_1 See points 1 to 4 of Section 7.3.4 Replacing control board 880 cpte. See points 5 to 7 of Section 7.3.5 Replacing the upper part 8. Replacing the needle driver Section 6.6 883010-000...
- Page 76 Service Instructions service 7.3.8 Replacing the LC-display Fig. 34: Ersatzteil_790122-000_LC-Display Source: ZN_790122-000_B_1 1. Remove the housing Section 6.4 880100-000 2. Replace the display Section 6.10 887250-000 7-20 Ausgabe: 888950 - 001 - A...
- Page 77 Service Instructions service 7.3.9 Replacing the print unit Fig. 35: Ersatzteil_882410_000 Source: ZN_882410_000_B The print unit can only be replaced as a complete sub-assembly. The safety screws are to be fitted at assembly and removed again when the side plates have been installed.
- Page 78 Service Instructions service 7.3.10 Replacing the table Fig. 36: Ersatzteil_887320-000_Tisch_kpl Source: ZN_887320_000_A_1 Illustrations for changing the table (Pos. 10) are given in: Section 6.4 880100-000 Section 6.5 882000-000 When replacing the table, the safety screws for the print unit must be fitted. See Section 7.3.9 Replacing the print unit.
- Page 79 Service Instructions service 7.3.12 Replacing the drive cpte., timer Fig. 37: Ersatzteil_882300-210 Source: ZN_882000_000_B_1 When replacing the drive cpte., timer, the safety screws for the print unit must be fitted. see Section 7.3.9 Replacing the print unit. The safety screws are to be fitted when dismantling and removed again when the side Warning plates have been installed (165120-000...
- Page 80 Service Instructions service Function testing On completion of servicing work, a functional test must be carried out before the machine is returned to the customer. Functional testing must be carried out by trained, specialist personnel! The procedure for a functional test is specified in the Test Report in Section 12 Appendix.
- Page 81 Care and Maintenance service Care and Maintenance REINER Model 880 Electric Stamps are designed so that in normal operation a minimum of maintenance is required. No preventive maintenance is required. Care of the machine For cleaning the housing, we recommend use of a mild cleaning agent, methylated spirit (Order No.
-
Page 83: Troubleshooting
Press OK button. After Test (49), (results from either pressing the «Back» A reference run Mo-DKA will be carried Reset Mo- DKA button or from closing the sensor test on the PC = 880 PC Setup Module) 9.1.2 Warnings Display Cause Remedy... - Page 84 Insert chipcard correctly or use a Change chip- chipcard. valid chipcard. card Warning 16 Reiner PIN number not present on Remove chipcard and insert a Reiner No REINER chipcard. chipcard in reader slot. Remove chipcard and change its key Warning 17...
- Page 85 Device error 73 photocell L-DKP not reached - Check photocell L-DKP, if defective replace needle driver (Section 7.3.6 Replacing the needle driver 880) - Check Mo-DKA cycle station Print operation Mo- DKA: - Check crank Device error 77 Mo- DKA has not reached initial posi-...
- Page 86 Troubleshooting service Display Cause Remedy Device error 120 Mo-DWA position P10 not reached Check cycle station Mo-DWA Stamping not finished correctly Device error 121 Check cycle station Mo-DWA (Mo-DWA) L-DWP defective Replace control board Device error L-DW1 defective Replace drive cpte., timer Device error (Section 7.3.12 Replacing the drive L-DW2 defective...
-
Page 87: Faults Without An Error Message
4. Reconnect the mains cable. If there is still no display, repeat steps 2 and 3. If this is still not successful, replace the display and carry out a firmware update (check cur- rent firmware release with REINER). 9.2.2 Ink-ribbon mask is loose: The ink-ribbon mask can be secured with commercially-available fabric tape, as indicated in the drawing, or the complete cover must be replaced. -
Page 89: Further Documentation
888 910-002 Brief Instructions 880, Spanish Order No. 888 910-003 Brief Instructions 880, Italian Order No. 888 910-004 880 PC Setup Module (D / GB) Order No. 889 920-000 880 PC Update (D / GB) Order No. 889 910-000 Ausgabe:... -
Page 91: Spare Parts Lists
Spare Parts Lists service Spare Parts Lists The spare parts lists for the 880 are to be found, in so far as they are needed, in Section 6 Construction together with the description of the relevant sub-assembly. Ausgabe: 11-1 888950 - 001 - A... -
Page 93: Appendix
Appendix service Appendix Ausgabe: 12-1 888950 - 001 - A... - Page 95 TELEFAX REPLY +49 - 7723 / 657-200 ERNST REINER GMBH & CO.KG Frau Martina Eschle P. O. Box 1351 D-78115 Furtwangen For the Electric Stamp(s) Model(s): 880-050 880-___ Serial No.: we require the following spare parts: Customer no.: Quantity Part number Part name .
- Page 97 Spare Parts Service Service Report Report No.: ERNST REINER GMBH & CO.KG Quality Assurance Department P. O. Box 1351 D-78115 Furtwangen We have serviced and repaired the Electric Stamp Model: Serial No.: Date Customer no.: 3 Machine statistics Stat1 Stat4...
- Page 99 880 Functional Test Report Type of test: Functional test Date: Test object Tester Test of operation Test Comment Test - without ink ribbon, cover, base plate, housing-rear part Cable must be guided in the print carriage! 1.1 Print-head cable path 1.2 Distance: print head to pressure pad...
- Page 102 ERNST REINER GMBH & CO. KG P.O. Box 1351 D - 78115 FURTWANGEN Telephone 07723 / 657-0 Telefax 07723 / 657 200 E-mail: reiner@reiner.de Internet: http://www.reiner.de...
Need help?
Do you have a question about the 880 and is the answer not in the manual?
Questions and answers