
Related Manuals for Reiner 880


Summary of Contents for Reiner 880
- Page 1 Operating Instructions Electronic stamp with flexible imprint selection Version 2.3...
- Page 2 © 2011 Ernst Reiner GmbH & Co. KG All rights reserved. Translations, reprints, or any other form of reproduction of this manual, even in part and regardless of form, require prior written permission. These operating instructions are subject to change without prior notice.
-
Page 3: Safety Instructions
• Reiner 880 performs the radio noise limits of class A. In a living area may occure radio interferences. In this case from the user can be required to carry out adequate funds •... -
Page 4: Table Of Contents
Table of contents Safety instructions ..................Delivery includes the following: ............... Control elements ..................Commissioning ..................Removing the cover ................Removing the transport brace ............... Tensioning the ink ribbon ................ Inserting the ink-ribbon cassette ............. Fitting the batteries ................Replacing the cover ................Setting the paper stops ................. - Page 5 Menu item Date / Clock time ..............functional diagram ................Menu item Numberer / Fixed number ............ Descriptions of the Numberer ..............Start value, Minimum valuet, Maximum value, Mode ......Repetition factor, Pre zeros ON / OFF ..........Switch over of Numberer manually ............functional diagram 1 ................
-
Page 6: Delivery Includes The Following
Delivery includes the following : Mains cable Power supply 2 Batteries Type AAA Depth-stop contact Ink ribbon cassette Trip switch accessory set (Order No. 887 380 - 000) comprising: 2 Rails 1 Reset pin 1 Paper holder, short 1 Paper holder, medium 1 Paper holder, long... -
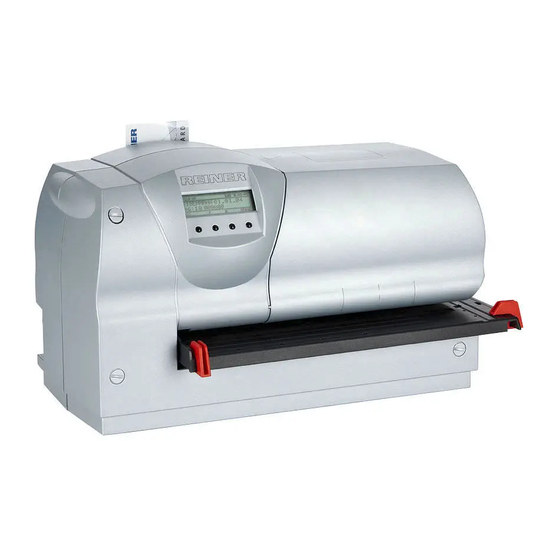
Page 7: Control Elements
Control elements Chipcard Casing, front part Paper stop Document table with triggering IMPRINT 01 RECVD Display 15. 12. 11 10:52 MENU Buttons Chipcard reader Folding rail USB connection Connection socket for mains unit Connection socket for stop contact Opening for reset button... -
Page 8: Commissioning
Commissioning remove the cover press grasp the front part of the casing with both hands and press down on the centre of it with both thumbs to unlatch it to remove the front part of the casing pull it towards to you remove the transport securing remove the safety carton upwards... -
Page 9: Inserting The Ink-Ribbon Cassette
insert the ink - ribbon cassette hold the ink-ribbon cassette by the knurled wheel, place it askew on the guide and push it in direction of the arrow to the stop insert the batteries • The batteries (Type AAA) are required for the date and time memory Note •... -
Page 10: Setting The Paper Stops
settings of the paper stops the purpose of the red paper stops is the accurate Note positioning of documents for printing. They can be freely - positioned on the document table. attach the paper stop to the folding rail a paper stop can also be fitted to the folding rail. -
Page 11: Fitting And Setting The Depth-Stop Contact
fitting and setting of the trip switch Using the depth-stop contact, printing is triggered when a piece of paper is Note pushed in. (see 'Menu item Settings’ on pages 38 and 39) unlock the folding rail on the rear side of the document table and turn it in the direction of the arrow... -
Page 12: Fitting The Paper Holder
fitting of a paper holder Fitting of the paper holder to the depth-stop contact makes it easier to feed Note paper into the machine. There are three different lengths of paper holders (short, medium and long) in selection. The best length depends on the distance from the depth-stop contact to the casing. -
Page 13: Connecting The Power Supply
plug in the power supply The power supply socket is located at the rear of the machine Note Follow the directions of sequence of connection! Do not plug in the power Warning supply in live wire! plug in the plug of the power supply at the lower round socket of the machine... -
Page 14: Printing
Printing There are three different ways of triggering printing. Note The mode required must be selected using the menu (see page 38 'Menu item Settings' / Trigger) triggering only by the document table : insert the print medium to the required position (for example to a stop) press down the document table... -
Page 15: Insert A Print Medium
Insert a print medium The different ways of introducing print media enable an imprint to Note be positioned almost anywhere on a form. Print medium inserted from the front Print medium inserted from the side Print medium inserted from the rear... -
Page 16: Precautions With The Stamping
Precautions with the stamping Pay attention to the following precautions: 123456 15.12.11 08:45 Don’t stamp at staples ! Stamping at staples may cause damages at the printing plate or at the 9 - pin dot matrix print head. By this means that the imprint may be incomplete. -
Page 17: User Level / Desktop
MENUE NUMBERER NUMBERER [ SWITCH ] = manual switch over 00011075 of the Numberer SWITCH MENU SUPPORT = Homepage in Internet SUPPORT www.reiner.de MENUE or service purposes, update and REINER Click&Stamp [ OK ] activates an online Online ? connection... -
Page 18: Description Of The Favourite List
Description of the favorite list • The favourite list contains five imprints Note • The lastly activated imprint will be stored automatically in the favorite list as FAVORITE 1 . By this, the previous FAVORITE 5 is signed over. • The content of the favorite list is changable. -
Page 19: Menu Overview
Menu overview IMPRINT 38 R: 01/01 Menu selection: Press [ MENU ] _ _ _ _ _ 000000 button, the display 15. 12. 11 14:36 will show ‘Imprint’ MENU • Change imprint (pages 21) • Inverted ON / OFF (page 21) Imprint •... -
Page 20: Description Of The Key Functions In The Menu
[ RETURN ] • return to the previous menu item Eventually press [ RETURN ] repeatedly to quit the menu or to quit the setting. The actually imprint will be displayed and 880 is ready to operate. -
Page 21: Menu Item Imprint
Menu item Imprint Imprint SELECT Imprint SELECT change Selection of a stored imprint, see page 22 ... 26 ‘Stored imprints’ ‘Date / Clock time’ Upside down SELECT ON / OFF Upside down imprint can be activated (ON) or deactivated (OFF) Centering SELECT change... -
Page 22: Stored Imprints No. 00 - 06
Stored Imprints Imprints who can be added with a pre-text are shown below with an example of a pre-text. The pre - texts and the names of the months depend on the selected language (see page 37) Note Operator Imprints identification possible Imprint can only be read... - Page 23 Operator Imprint identification possible free 12345678 RECVD 12345678 (Example with pre-text) 12345678 SENT 12345678 (Example with pre-text) 12345678 FILE 12345678 (Example with pre-text) 123456789012 INV. 123456789012 (Example with pre-text) 123456789012 INV. 123456789012 (Example with pre-text) 123456789012 ORDER 123456789012 (Example with pre-text) 12345678 15.
- Page 24 Operator Imprint identification possible 12345678 11 - 12 - 15 RECVD 12345678 11 - 12 - 15 (Example with pre-text) 12345678 DEC 15 11 SENT 12345678 DEC 15 11 (Example with pre-text) 12345678 2011 001 FILE 12345678 2011 001 (Example with pre-text) 12345678 15.
- Page 25 Operator Imprint identification possible 2011 001 12345678 RECVD 2011 001 12345678 (Example with pre-text) 15. DEC 2011 12345678 FAX 15. DEC 2011 12345678 (Example with pre-text) 15. DEC 2011 08:45 ORIG 15. DEC 2011 08:45 (Example with pre-text) 15. 12. 2011 08:45 FAX 15.
- Page 26 Operator Imprint identification possible free 123456 15. DEC 2011 08:45 (No pre-text possible) 123456 15. 05. 2011 08:45 (No pre-text possible) 123456 2011 - 12 - 15 08:45 (No pre-text possible) 123456 DEC 15 11 08:45 (No pre-text possible) 000000 2011 001 08:45 (No pre-text possible) 123456 15.
-
Page 27: Menu Item Date / Clock Time
Menu item Date / Clock time • Clock time 1 and will be used for the stored Date 1 imprints as well as can be used with chip cards Note • Clock time 2 and will be used for the imprints stored Date 2 on the chip card. -
Page 28: Functional Diagram
Date / Clock time SELECT Clock time 1 SELECT 14:36:33 setting of Clock time 1 Clock time 2 SELECT 14:36:33 ‘Numberer / setting of Time 2 fixed Number’ Date 1 SELECT 15.12.11 setting of Date 1 Date 2 SELECT 15.12.11 setting of Date 2 Split hour 60 min SELECT... -
Page 29: Menu Item Numberer / Fixed Number
Menu item Numberer / Fixed number • Numberer 1 six digit or eight digit (depending on the selected imprint) is used for the imprints stored in the machine Note • Numberer 2 is used for imprints stored on a chip card •... -
Page 30: Descriptions Of The Numberer
Descriptions of the Numberer Start value, Minimum value, Maximum value, Mode Minimum value Maximum value Example: 10 Example: 100 Mode: Increment Example: 11, 12, 13, Mode: Decrement Example: 100, 99, 98, Start value (can be set manual , e. g. for the model change) The Start value must be more or equal to the minimum value! -
Page 31: Repetition Factor, Pre Zeros On / Off
Repetition factor The Repetition factor is used to print several documents with the same number. The factory setting is 1 , this means the Numberer switches over with each print. By setting the value to 2 , the Numberer switches over with every second print. The Repetition factor is adjustable from 0 to 99 . -
Page 32: Switch Over Of Numberer Manually
Switch over of Numberer manually The Numberer can be switched over quickly and simply by using the menu item ‘Numberer’ at ‘User level / Desktop’ (see page 17, ‘User level / Desktop’) NUMBERER 00110756 SWITCH MENU For an exclusive manually switch over of the Numberer the ‘Repetition factor’... -
Page 33: Functional Diagram 1
Numberer / SELECT Fixed number Numberer to zero set both numberers SELECT (Num. 1, 2) to zero Numberer 1 SELECT 000000 Numberer 1 SELECT change set start value for Numberer 2 Numberer 1 000000 Minimum SELECT Numberer 1 set minimum value- ‘... -
Page 34: Functional Diagram 2
Repetition SELECT Change (Num. 1, 2) Repetition factor setting for Numberer 1 and Numberer 2 Pre Zeros ON / OFF SELECT (Num. 1, 2) Pre Zeros switch on or off for Numberer 1 and Numberer 2 Fixed number 1 SELECT - - - - - - Fixed number setting for Numberer 1... -
Page 35: Menu Item Pre-Text / Chipcard Text With Functional Diagram
Menu item Pre - Text / Chipcard - Text Pre - Texts • These cannot be used with all imprints (see also pages 22 ... 26, 'Stored imprints’) Note • 12 stored pre-texts, each with a maximum of five characters, are available in each language •... -
Page 36: Stored Pre - Texts
Stored Pre - Texts: RECVD DRAFT SENT PAID FILE RECPT INV. ORDER ORIG ENT. D REG. D. - - - - - no Pre - Text... -
Page 37: Menu Item Language With Functional Diagram
Menu item Language Language • Presentation of the menu in the languages Menu • The following languages are available: Note German, French, English, Italian, Spanisch, Portuguese Language • Linguistic presentation of the dot-matrix Stamping imprints Note • There are 17 languages available •... -
Page 38: Menu Item Settings
Menu item Settings Chipcard • ON / OFF chipcard activated OFF = chipcard deactivated Note • Change chip card key number. This menu item is password-protected. Only the responsible dealer has access to it. Trigger Setting of the trigger mode There are three different ways of triggering printing: •... -
Page 39: Functional Diagram
Settings SELECT Chip card SELECT Chip card SELECT ON / OFF at first insert the chip card, then ON = activated ‘Software OFF = deactivated version’ Chip card SELECT key no. Change key no. of the chip card Trigger SELECT (password protected) Set type of trigger mode Password menu... - Page 40 Counter SELECT Counter to zero SELECT Password _ _ _ _ return to ‘Chipcard’ Counter to zero see page 39 Key OK Counter = 0 ! Counter to zero SELECT ON / OFF ON = Menu item ‘Counter to zero’ is selectable OFF = Menu item ‘Counter to zero’...
-
Page 41: Chipcard Functions
Chip card functions With the programmable REINER chip cards, the following functions are also available on the machine: Note • Key function • Key function + Print supplementary operator identification • Key function + Individual imprint on the chipcard •... -
Page 42: Key Function, Operator Identification On The Chip Card
Key function • Once the chipcard function has been activated, the machine will only print when a chipcard is inserted. If there is no chipcard in the machine, the display will show Note Insert chipcard . • ‘Password Menu’ should be activated to prevent the deactivation of the chipcard by unauthorized persons Operator identification on the chip card •... -
Page 43: Changing The Ink-Ribbon Cassette
Replacement of the ink - ribbon cassette A replacement of the ink-ribbon cassette is necessary when the imprint of the printing plate or the dot-matrix imprint is faint or incomplete. Note press remove the cover Grasp the cover with both hands and press down on the centre of it with both thumbs to unlock it. -
Page 44: Replacement Of The Printing Plate
Replacement of the printing plate • With a few simple operations a different printing plate can be fitted Note • After a replacement of the printing plate it can be necessary to readjust the printing roller. In this case, please contact your specialised dealer press remove the cover... -
Page 45: Safety Lock Of The Printing Plate
Safety lock of the printing plate The attachment of the optional available safety lock (Order no. 736 071 - 000) prevents an unauthorized removing of the printing plate Note remove the cover see page 43 remove the ink - ribbon cassette see page 43 put in or remove the safety lock The safety lock is accessible at the rear side... - Page 46 Rear side of the machine...
-
Page 47: Usb Interface
• The connection can also be used as a printer interface. Data can be taken from an application program, transmitted to REINER 880, and be printed directly. • An interface description to develop an application program is available from REINER... -
Page 48: Cleaning Jobs At The Machine
Cleaning jobs at the machine Cleaning of the casing The casing parts are vanished. To clean thecasing parts, do not use abrasive cleaners or cleaning agents that attack plastic parts. Warning Take care that no liquid gets inside the machine. The casing surface of the machine can be cleaned with a soft cloth. -
Page 49: User's Hints And Error Codes
Insert chipcard completely or it was correctly or reinsert it inserted mirror-inverted the right way round Display is dark 880 is not connected to Connect 880 mains to mains Line 2 of chipcard 880 cannot use second Press [ OK ] , only... - Page 50 Change chipcard into the chipcard reader correctly or use a valid or chipcard is invalid chipcard Warning 16 not a REINER chipcard Use a REINER Not Reiner PIN chipcard Warning 17 Key number of the chipcard Correct the key Key error...
-
Page 51: Reset
Reset Use the reset button if 880 is in an undefined condition, or if there are confused characters in the display. Note With a reset, the machine restarts its program and the device will be set to a defined condition. -
Page 52: Technical Data
Technical data Dimensions (W x D x H in mm) 336 x 166 x 198 Weight approx. 6,9 Kg Printing system 9 - pin dot matrix print head and Roller printer Ink ribbon capacity approx. 800.000 characters approx. 16.000 imprints (with text plate) Stamping time approx. -
Page 53: Certifications
Reiner 880 complies with EC directive 2004 / 108 / EG ‘Electromagnetic compatibility’ Warning ! Reiner 880 is an establishment of class A This means class A may cause radio interferences in the living area. In this case, from the operating company can be demanded the adequate safety precautions. - Page 55 Ernst REINER GmbH & Co. KG Baumannstr. 16 D - 78120 Furtwangen Phone +49 7723 6570 +49 7723 657 200 E - Mail reiner@reiner.de Internet www.reiner.de 888 900 - 001 F 09 / 2012...
Need help?
Do you have a question about the 880 and is the answer not in the manual?
Questions and answers