Table of Contents
Advertisement
Available languages
Available languages
Quick Links
Advertisement
Table of Contents

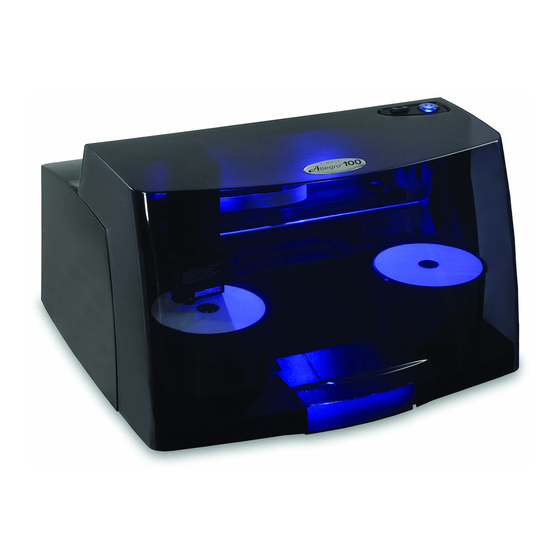
Related Manuals for Rimage Allegro 100


Summary of Contents for Rimage Allegro 100
- Page 1 服务手册 Allegro 100...
-
Page 2: Table Of Contents
Section 27 – 抓手控制板 ............................. 48 Section 28 – 抓手电磁阀 ............................51 Section 29 – 故障排除 ..............................54 Rimage® is a registered trademark of Rimage Corporation. Allegro™ is a trademark of Rimage Corporation. © 2017, Rimage Corporation A100SVC - 0917... -
Page 3: Section 1 - 外壳
Allegro 100 Disc Publishing System Service Manual Section 1 - Cover Loosen 4 screws securing back of cover. Remove 3 screws securing front of cover. Slide picker and carrier to middle of printer. Rimage Corporation Page 1... -
Page 4: Section 2 - 控制面板Control Panel
Allegro 100 Disc Publishing System Service Manual Unplug cable from control panel on underside of cover. While lifting cover off of printer, reach in and unplug blue LED board cable from mainboard. Remove cover. Section 2 - Control Panel Remove cover (see Cover). Remove 3 screws securing control panel. After replacing control panel, press buttons to verify they click properly. -
Page 5: Section 3 - Led板(蓝色
Allegro 100 Disc Publishing System Service Manual Section 3 - Blue LED Board Remove cover (see Cover). Remove 2 screws securing blue LED board. Unplug cable from end of board. Section 4 - USB3 Hub Remove 2 screws securing cover plate. Remove plate. - Page 6 Allegro 100 Disc Publishing System Service Manual Unplug any sata cables from hub. For 2 drive units, keep track of which cable is plugged into which port. Remove 3 screws securing hub. When replacing hub, be sure pins properly plug into connectors on mainboard. Plug any sata cables back in.
-
Page 7: Section 5 - 主板
Allegro 100 Disc Publishing System Service Manual Section 5 - Mainboard Remove USB3 hub (see USB3 Hub). Unplug all cables and flex cables from mainboard. Remove 4 screws securing mainboard. Lift mainboard out of unit. Rimage Corporation Page 5... - Page 8 Allegro 100 Disc Publishing System Service Manual Remove 2 screws securing static brush to mainboard. Remove 3 standoffs. Secure static brush and standoffs to new mainboard. When replacing mainboard, make sure hole in corner is resting on small post before replacing 4 screws.
-
Page 9: Section 6 - 打印机托盘
Allegro 100 Disc Publishing System Service Manual Section 6 - Print Tray Remove mainboard (see Mainboard). Remove 2 screws securing print tray guide to print tray. Lift guide up off of tray (leave attached to belt). Lift back end of print tray slightly and pull back against rear cover plate. - Page 10 Allegro 100 Disc Publishing System Service Manual Remove screw securing front tray guide. Lift guide out of base. Pull print tray out of printer. Rimage Corporation Page 8...
-
Page 11: Section 7 - 电源电阻器Power Resistor
Allegro 100 Disc Publishing System Service Manual Section 7 - Power Resistor Cut tie wrap securing power resistor cable to power supply cable. Unplug power resistor from mainboard. While holding resistor mount bracket with fingers or needle-nose pliers, remove 2 screws securing to rear cover plate. -
Page 12: Section 8 - 托盘进出编码轮传感器
Allegro 100 Disc Publishing System Service Manual Remove 2 screws securing power resistor to resistor mount bracket. Replace resistor. Section 8 - Encoder Wheel Sensor Cut tie wrap securing cables. Unplug encoder wheel sensor from mainboard. Rimage Corporation Page 10... - Page 13 Allegro 100 Disc Publishing System Service Manual Remove 2 screws securing sensor to bracket. When replacing sensor, be sure encoder wheel is centered in slot. Rimage Corporation Page 11...
-
Page 14: Section 9 - 托盘进出编码轮
Allegro 100 Disc Publishing System Service Manual Section 9 - Encoder Wheel Peel encoder wheel off of gear. Clean area with alcohol before adhering new encoder wheel. Be sure replaced encoder wheel is centered in sensor slot. Clean encoder wheel with alcohol after handling. -
Page 15: Section 10 - 光驱支架
Allegro 100 Disc Publishing System Service Manual Section 10 – 光驱支架 10.1 如下图将打印机朝上。 拧下下图标示的6颗螺丝。 10.2 向前倾斜光驱支架,将光驱支架的卡槽与后盖板上的卡舌对齐,然后卸下。 Rimage Corporation Page 13... -
Page 16: Section 11 - 电源
Allegro 100 Disc Publishing System Service Manual 10.3 拔下光驱背面的所有电缆,以从打印机上卸下光驱支架。 备注两组SATA电缆和光驱的位 置。 Section 11 - Power Supply 11.1 Remove drive mount (see Drive Mount). Unplug power supply from mainboard. Cut tie wraps securing power supply cable. Rimage Corporation Page 14... - Page 17 Allegro 100 Disc Publishing System Service Manual 11.2 Remove 5 screws securing power supply to rear cover plate. 11.3 Lift power supply out of printer. Pull drive power cable out through opening on bottom of base. Rimage Corporation Page 15...
-
Page 18: Section 12 - 光驱位置风扇
Allegro 100 Disc Publishing System Service Manual 11.4 When replacing power supply route drive power cable to underside of printer. Be sure it is not pinched beneath or on side of power supply. Section 12 - Drive Fan 12.1 Remove drive mount (see Drive Mount). - Page 19 Allegro 100 Disc Publishing System Service Manual 12.2 Remove 2 screws securing fan to inside of rear cover plate. 12.3 Tip printer up and remove drive fan, pulling cable out through opening on base. When replacing fan, be sure cable is oriented to lower left as shown.
-
Page 20: Section 13 - 光驱
Allegro 100 Disc Publishing System Service Manual Section 13 – 光驱 13.1 卸下光驱支架(see Mount)。 如下图标示,拧下固定要更换的光驱的4个螺钉。 Drive 13.2 从前面将光驱滑出。 将新的光驱滑入支架并用4颗螺钉固定(使用前组孔)。 Front Hole Rimage Corporation Page 18... -
Page 21: Section 14 - 废墨收集海绵
Allegro 100 Disc Publishing System Service Manual Section 14 - Maintenance Felt 14.1 Remove drive mount (see Drive Mount). Remove 4 screws securing maintenance felt cover. Remove old maintenance felt pads (wear gloves to avoid ink on fingers). 14.2 Stack new set of maintenance felt pads into base in sequence and orientation shown (1 on bottom, 7 on top). -
Page 22: Section 15 - 维护风扇
Allegro 100 Disc Publishing System Service Manual Section 15 - Maintenance Fan 15.1 Cut tie wrap securing fan and sata cables. Unplug maintenance fan from mainboard. 15.2 Remove maintenance felt (see Maintenance Felt). Remove 2 screws securing fan mount bracket. Remove fan, pulling cable out through opening. When replacing fan and bracket use a low torque as screws can easily strip. -
Page 23: Section 16 - 墨水车编码条
Allegro 100 Disc Publishing System Service Manual Section 16 - Encoder Strip 16.1 Unhook encoder fence spring from tab. 16.2 Pull left end of encoder strip off of tab first. Then rotate other end of strip 90° to remove from flared end of right tab (2 picture). -
Page 24: Section 17 - 墨水车马达
Allegro 100 Disc Publishing System Service Manual 16.3 Be sure new encoder strip is routed through sensor slot on back of carrier. Clean encoder strip with alcohol after handling. Through Slot Through Slot Behind Slot Section 17 - Carrier Drive Motor 17.1... - Page 25 Allegro 100 Disc Publishing System Service Manual 17.2 Loosen screw securing carrier belt tensioner. 17.3 Remove 2 screws (T8 driver) securing carrier drive motor to carrier frame. Remove motor. Rimage Corporation Page 23...
-
Page 26: Section 18 - 墨水车托架组件
Allegro 100 Disc Publishing System Service Manual 17.4 When installing new carrier drive motor be sure to include spacer between motor and carrier frame. Loop belt around motor pulley and retighten screw on carrier belt tensioner. Spacer Section 18 – 墨水车框架组件... - Page 27 Allegro 100 Disc Publishing System Service Manual 18.2 拧下框架背面标示的2个螺丝。 18.3 拧下架框架背面标示的2个螺丝。 从线夹上拆下控制面板电缆。 Rimage Corporation Page 25...
- Page 28 Allegro 100 Disc Publishing System Service Manual 18.4 松开下图皮带张紧器上的螺丝。 18.5 压入皮带张紧器以增加松弛度时,将皮带从托盘驱动轴(编码轮轴)上的皮带轮上 拉下。 从框架上卸下2个下图标示的螺丝。 Remove Belt Rimage Corporation Page 26...
- Page 29 Allegro 100 Disc Publishing System Service Manual 18.6 从框架上卸下标示的螺丝,最后从打印机上提起框架。 18.7 更换框架时,请确保在固定螺丝之前将其正确插入所有插槽和基座上的支柱。 重新拧 紧皮带张紧器之前,先将皮带环绕托盘驱动轴(编码轮轴)。 某些早期版本的托架和 底座之间需要使用不同的垫圈。 如果包括一个或多个垫圈,请确保将它们放回原处。 最近的型号不需要垫圈。 早起版本的垫圈位置 Fabric Steel Fabric Rimage Corporation Page 27...
-
Page 30: Section 19 - 打印机托盘马达
Allegro 100 Disc Publishing System Service Manual Section 19 – 托盘马达 19.1 移除墨水车框架组件(see Frame). 从托盘驱动轴(编码轮轴)的末端卸下螺丝 Carrier (T8)和垫圈。 将皮带轮和皮带从轴端拉出。 从轴上拆下固定环Ring。 Ring 19.2 将托盘驱动轴(编码轮轴)部分拉出,更换轴时,请确保轴承位于墨水车框架的外部, 并且垫圈位于框架内部和固定环之间。 Bearing Washer Rimage Corporation Page 28... - Page 31 Allegro 100 Disc Publishing System Service Manual 19.3 去掉固定托盘马达到框架上的2颗螺丝(T8) ,移除马达。 19.4 更换托盘驱动轴(编码轮轴)时,请确保编码器轮在传感器插槽内居中。 如有必要,请 拆下编码器轮传感器,并用插槽中的编码器轮重新固定。 Rimage Corporation Page 29...
-
Page 32: Section 20 -废墨区底座
Allegro 100 Disc Publishing System Service Manual Section 20 – 废墨区底座 20.1 从托盘驱动轴(编码轮轴)的末端卸下螺丝(T8)和垫圈。 将皮带轮和皮带从轴端拉 出。 从轴上拆下固定环Ring。 Ring 20.2 将托盘驱动轴(编码轮轴)部分拉出,更换轴时,请确保轴承位于墨水车框架的外部, 垫圈在框架内部和固定环之间,编码器轮在传感器插槽中(第二张图片)。 Washer Bearing Rimage Corporation Page 30... -
Page 33: Section 21 - 墨水车
Allegro 100 Disc Publishing System Service Manual 20.3 从框架上松开弹簧。如图示拉起维护底座左侧的立柱,同时推入右侧以将底座弹出框架。 Pull Push Section 21 – 墨水车 21.1 从托盘驱动轴(编码轮轴)的末端卸下螺丝(T8)和垫圈。 将皮带轮和皮带从轴端拉 出。 从轴上拆下固定环Ring。 Ring Rimage Corporation Page 31... - Page 34 Allegro 100 Disc Publishing System Service Manual 21.2 将托盘驱动轴(编码轮轴)部分拉出,更换轴时,请确保轴承位于墨水车框架的外部, 垫圈在框架内部和固定环之间,编码器轮在传感器插槽中(第二张图片)。 Washer Bearing 21.3 移除墨水车轴两端的螺丝。 Rimage Corporation Page 32...
- Page 35 Allegro 100 Disc Publishing System Service Manual 21.4 从主板上拔下两条柔性电缆。 如下图标示位置压入卡舌,使之脱离框架,最后从框架中 拉出柔性电缆。 21.5 松开皮带张紧器上的螺丝。从张紧器和墨水车马达上拉出皮带。 Rimage Corporation Page 33...
- Page 36 Allegro 100 Disc Publishing System Service Manual 21.6 稍微向下按编码条,将其从传感器插槽中拉出,并滑到传感器后面。 通过插槽 插槽后面 21.7 拉出墨水车框架轴的右端,将其弹出框架。 将墨水车从轴上滑出并卸下。 PS:这步之前,需要先移除机械臂。 Rimage Corporation Page 34...
-
Page 37: Section 22 - 墨水车位置对齐传感器
Allegro 100 Disc Publishing System Service Manual 21.8 更换墨水车时,请确保机械臂和墨水车已正确抓住框架的顶部边缘。 将墨水车框架轴按 回框架中,同时拧紧左右两个螺钉,以防止其旋转。 在固定柔性支架之前,请确保柔性 电缆与框架保持平直。确保皮带没有扭曲。将编码器条拉回到编码条传感器插槽中。 最 后安装托盘驱动轴(编码轮轴)。 Straight Flex Section 22 - 墨水车位置对齐传感器 22.1 从设备上卸下墨水车(see Carrier).移除两颗螺丝。 Rimage Corporation Page 35... - Page 38 Allegro 100 Disc Publishing System Service Manual 22.2 如图,轻轻向下压下弹簧,刚好可以松开螺钉(不要完全卸下弹簧和盖子)。 用T8 螺丝刀松开螺丝(不要完全卸下螺丝)。 Loosen Press 22.3 稍微撬开两个框架,使其刚好足以将对齐传感器导线从凸耳中拉出。 Rimage Corporation Page 36...
- Page 39 Allegro 100 Disc Publishing System Service Manual 22.4 拧下固定编码条传感器支架的螺丝。 22.5 从排线上拔下对齐传感器, 更换新的传感器。 Rimage Corporation Page 37...
-
Page 40: Section 23 - 墨水车排线总成
Allegro 100 Disc Publishing System Service Manual 22.6 重新安装支架时,请确保在安装后面的螺丝之前将传感器排线从槽中绕进去, 在安 装2颗螺丝并重新拧紧其中1颗之前,请确保将对齐传感器排线藏在后面。 绕线在 槽 排线藏在后面 sBehind Section 23 - Carrier Flex PC 23.1 取下墨水车(see Carrier). 去掉指示位置的3颗螺丝。 Rimage Corporation Page 38... - Page 41 Allegro 100 Disc Publishing System Service Manual 23.2 向上往下按,使其脱离墨水车。 将它提起,将皮带拉过开口。 小心保存掉出来的小弹 簧。 Press 23.3 拧下固定编码条传感器支架的螺钉,再拧下如图示2个螺钉(T8)。 当两个框架分 开时,提起支架使其脱离。 Rimage Corporation Page 39...
- Page 42 Allegro 100 Disc Publishing System Service Manual 23.4 使用一个平头螺丝刀将传感器撬出并将其从方形的支架中弹出来,Use a small flathead screwdriver to pry and pop sensor out of quad sensor carrier bracket. Press sensor from new carrier flex pc into bracket until it snaps into place. Be sure sensor is snapped properly in place so that both tiny round tabs are in notches on bracket (2 picture).
- Page 43 Allegro 100 Disc Publishing System Service Manual 23.6 When reassembling carrier be sure to snap end of quad sensor carrier bracket onto tab on frame before replacing screw. Be sure to route alignment sensor wires behind tab before replacing 4 screws securing both frames together. Be sure bottom corners of carrier flex pc are pinched between both frames.
-
Page 44: Section 24 - 机械臂
Allegro 100 Disc Publishing System Service Manual 23.8 Measure out 4 11/16 inches from carrier and place holder onto flex cables. 4 11/16” Section 24 – 机械臂 Picker 24.1 这里请注意,本文将机械臂总成称之为机械臂(Picker),它包含抓手(Arm)和底座 2部分。 从托盘驱动轴(编码轮轴)的末端卸下螺丝(T8)和垫圈。 将皮带轮和皮带从轴端拉 出。 从轴上拆下固定环。 固定 环 Rimage Corporation Page 42... - Page 45 Allegro 100 Disc Publishing System Service Manual 24.2 将托盘驱动轴(编码轮轴)部分拉出,更换轴时,请确保轴承位于墨水车框架的外部, 垫圈在框架内部和固定环之间,编码器轮在传感器插槽中(第二张图片)。 垫圈 轴承 24.3 去掉墨水车框架轴两端的螺丝。 Rimage Corporation Page 43...
- Page 46 Allegro 100 Disc Publishing System Service Manual 24.4 从主板上拔下机械臂电缆。将柔性电缆从双面胶带上剥下,然后从托架上的插槽中引出。 24.5 松开皮带张紧器上的螺丝(不用卸下皮带)。 Rimage Corporation Page 44...
- Page 47 Allegro 100 Disc Publishing System Service Manual 24.6 将墨水车框架轴的右端拉出,将其离开框架。 将机械臂从轴上滑出并卸下。 24.7 更换机械臂时,请确保机械臂和墨水车正确地卡在墨水车框架的顶部边缘。 将墨水车框 架轴按回框架中,同时拧紧两个螺钉,以防止其旋转。 更换两块双面胶带,并确保柔性 电缆与框架平行,然后再粘贴, 更换托盘驱动轴。 Tape Straight Flex Rimage Corporation Page 45...
-
Page 48: Section 25 - 机械臂马达
Allegro 100 Disc Publishing System Service Manual Section 25 – 机械臂马达 25.1 拧下固定机械臂马达和机械臂侧盖板的4个螺钉。 从机械臂控制板上拔下机械臂马达, 然后拆下。 25.2 通过控制板上的开口将新的机械臂马达插入板上,并将电缆布线到槽口(第1张图片)。 将马达向下扭转一次,避免多余的电缆松弛,然后再将马达向下放入开口中(第二张图 片)。 装回4个螺钉,固定马达和控制板。 手动上下移动拾取器,以验证齿轮是否对齐 并平滑旋转。 Notch Notch Rimage Corporation Page 46... -
Page 49: Section 26 - 机械臂控制板 & 柔性电缆
Allegro 100 Disc Publishing System Service Manual Section 26 – 机械臂控制板和柔性电缆 26.1 卸下机械臂马达和机械臂侧盖板(请参阅机械臂马达)。 从抓手上拔下柔性电缆。 26.2 去掉固定机械臂控制板的3颗螺丝,去掉控制板。 Rimage Corporation Page 47... -
Page 50: Section 27 - 抓手控制板
Allegro 100 Disc Publishing System Service Manual 26.3 更换机械臂控制板或柔性电缆时,请如图所示将柔性电缆穿过控制板上的插槽。确 保将电缆以正确的方向插入端口。 Slots Slot Section 27 - Arm Board 抓手控制板 27.1 移除机械臂(see Picker). 从抓手控制板拔掉线缆。 Rimage Corporation Page 48... - Page 51 Allegro 100 Disc Publishing System Service Manual 27.2 向外按压传感器位置支架的卡舌,向上滑过抓手控制板的边缘,将其从抓手上卸下。. Press 27.3 从抓手控制板上拔下电磁阀线缆。去掉固定控制板的螺丝和垫圈。撬开控制板的边缘, 将其从抓手中取出。 27.4 如图所示,在安装新的控制板前,在传感器附近涂上一条厚胶带。 Rimage Corporation Page 49...
- Page 52 Allegro 100 Disc Publishing System Service Manual Tape 27.5 更换抓手控制板的时候,将控制板底部的卡舌勾到插槽中,然后将顶端按入到位。用螺 丝和垫圈固定,最后连接电磁阀和线缆。 Press 27.6 装回传感器位置支架,垂直朝下,确保支架上的卡舌顺滑上下起落。 Rimage Corporation Page 50...
-
Page 53: Section 28 - 抓手电磁阀
Allegro 100 Disc Publishing System Service Manual Section 28 - Solenoid 28.1 Remove arm board (see Board). Pry pick finger cover off of tabs and remove. Rimage Corporation Page 51... - Page 54 Allegro 100 Disc Publishing System Service Manual 28.2 如图松开弹簧,然后收拾到一边。 28.3 拧下2个固定电磁阀的螺丝。 拆下电磁阀,从开口处拉出电缆。 Rimage Corporation Page 52...
- Page 55 Allegro 100 Disc Publishing System Service Manual 28.4 如图所示,更换电磁阀时,将一根电缆布线在柱子后面。 Rimage Corporation Page 53...
-
Page 56: Section 29 - 故障排除
Allegro 100 Disc Publishing System Service Manual Section 29 – 故障排除 初始化之前,请安装墨盒。 初始化期间的症状 可能的解决方案 墨水车或打印机托盘没有动作(抓手电磁阀咔嗒声和 墨水车马达 Carrier drive motor (see Carrier Drive Motor) 机械臂移动两次) J10 (see Mainboard) 控制面板闪烁 打印机托盘没有动作 (墨水车移动,电磁阀吧嗒声,然 托盘马达 Feed drive motor (see Feed Drive Motor) J11 (see Mainboard) 后机械臂移动) - Page 57 Allegro 100 Disc Publishing System Service Manual 初始化期间的症状 可能的解决方案 Picker arm sensor on arm board (see Board) 机械臂试图移动时发出刺耳的声音(抓手电磁阀有咔哒声, 墨水车或打印机托盘没有动作) 控制面板闪烁 Power supply (see Power Supply) Power 设备完全无法开机 resistor (see Power Resistor) 操作期间的症状 可能的解决方案 Solenoid (see Solenoid) 机械臂多次到光盘桶抓取但抓不到光盘 Arm board or sensor flag bracket (see Board) 机械臂抓住光盘但未放入打印机托盘中,移至home...
Need help?
Do you have a question about the Allegro 100 and is the answer not in the manual?
Questions and answers