Rimage Autostar II User Manual
Rimage autostar ii: user guide
Hide thumbs
Also See for Autostar II:
- Setup and installation manual (4 pages) ,
- Reference manual (2 pages) ,
- Specifications (1 page)
Table of Contents
Advertisement
Quick Links
Advertisement
Table of Contents

Related Manuals for Rimage Autostar II


Summary of Contents for Rimage Autostar II
- Page 1 Rimage Autostar II Protégé II User Guide...
- Page 2 ©2007, Rimage Corporation Rimage™ is a trademark of the Rimage Corporation. Autostar II™ and Protégé II™ are trademarks of the ® Rimage Corporation. Dell is registered trademark of Dell Computer Corporation. FireWire trademark of Apple Computer, Inc.
-
Page 3: Support Information
Rimage Autostar II and Protégé II Support information US, Asia/Pacific, Mexico/Latin America Rimage Corporation 7725 Washington Avenue South Minneapolis, MN 55439 Attn: Rimage Services Service: North America: 800-553-8312 Asia/Pacific, Mexico/ Latin America: 952-946-0004 FAX: 952-946-6956 Rimage Support Website http://www.rimage.com/support.html select the appropriate Product Family and then select your product. -
Page 4: Table Of Contents
Maintain the Producer II... 7 Maintenance schedule...7 Aligning the printer...7 Everest printer ... 7 PrismPlus! Printer... 9 Learn More ... 11 Autostar II and Protégé II Specifications...11 Technical support and product updates...12 Safety information...12 Safety precautions... 12 Safety Testing...13 110629_F... -
Page 5: Introduction
Introduction Introduction Note: The term Producer II applies to both the Autostar II and the Protégé II. Autostar II and Protégé II will be used only to refer to either Producer II specifically. This manual provides the information needed to operate the Autostar II or the Protégé II and identify the parts. -
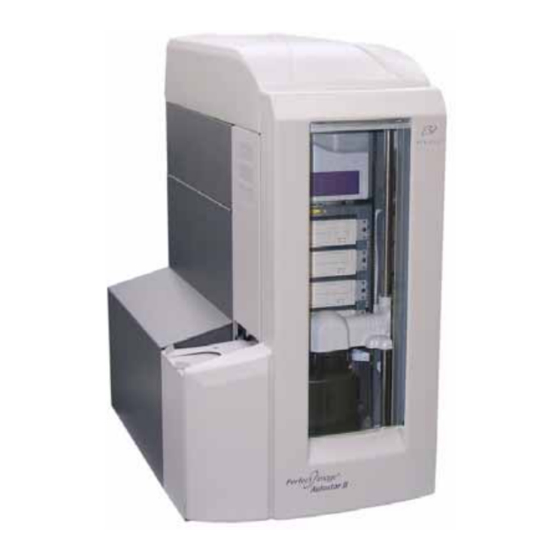
Page 6: Identify The Parts Of The Producer Ii
Rimage Autostar II and Protégé II Identify the parts of the Producer II Front view Disc Dispenser Operator Panel There are four LEDs and an operator button on the operator panel. The operator panel is located inside the Producer II front door. -
Page 7: Rear View
Status LEDs The status LEDs provide the following operational information. LED: Light-emitting diode. A type of diode that emits light when current passes through it. Name Carousel Present Active Power Fault Rear view USB Connection Serial Cable Connection Power Switch 110629_F Identify the parts of the Producer II Functionality... -
Page 8: Operate The Producer Ii
Rimage Autostar II and Protégé II Operate the Producer II This section provides the information that you need to produce CDs or DVDs with the Producer II. Powering on the Producer II Before you begin: The carousel must be installed before you power on the system. For more information about installing the carousel, refer to Installing the carousel on page 4. -
Page 9: Removing The Carousel
3. Close the front door. Removing the carousel Tip: You can remove the carousel from the Producer II to load or unload discs. Important! If software is currently running an operation on the Producer II, wait for the software to complete the operation or pause the software operation. 1. -
Page 10: Setting Up Your Printing Preferences
Setting up your printing preferences Printing Preferences allows you to set up and run your Producer II to produce the best possible label on your discs. Refer to your Everest Printer User Guide or PrismPlus! Printer User Guide for specific printing preferences instructions. -
Page 11: Maintain The Producer Ii
1. To power on the Producer II, press the Producer II power switch. 2. Wait until the unit completes the initialization. Tip: The Everest II Printer takes 1 to 2 minutes to complete the initialization. 3. Prepare the unit for alignment. - Page 12 Side to Side Alignment Print b. If the disc is not centered side to side on the print pad, align the printer side to side. Loosen the side to side screws. Slide the printer, not the print tray, until the side edges of the disc and printer pad are aligned.
-
Page 13: Prismplus! Printer
5/32” Allen wrench 1. Power on the Producer II. Note: If the PrismPlus power switch is in the on position, power on the both the printer and the Producer by pressing the Producer II power switch. 2. Wait for the unit to complete the initialization. - Page 14 Rimage Autostar II and Protégé II b. If the disc is not centered side-to-side on the print pad, align the printer side to side. Loosen the side to side screws. Slide the printer, not the tray, until the side edges of the disc and printer pad are aligned.
-
Page 15: Learn More
Learn More Autostar II and Protégé II Specifications Note: Specifications for the printer are in the printer user guide. Standard system Producer II, Everest II or PrismPlus Printer, 2 – 4 disc recorders, Rimage Producer Software Suite, and Control Center... -
Page 16: Technical Support And Product Updates
An authorized technician should perform all service procedures. Caution: Use only the supplied AC powe For applications outside North America, refer to the nearest Rimage office for assistance selecting a locally approved power cord. Caution: Use of controls or adjustments or performance of procedures other than those specified herein may result in hazardous radiant exposure. -
Page 17: Safety Testing
Safety Testing Model: Autostar II / Protégé II Product ID: • Autostar II: RAS7 • Protégé II: RAS8 Notice for USA Tested to Comply with FCC Standards FOR HOME OR OFFICE USE. NOTE: This equipment has been tested and found to comply with the limits for a Class B digital device, pursuant to Part 15 of the FCC Rules.
Need help?
Do you have a question about the Autostar II and is the answer not in the manual?
Questions and answers