Table of Contents
Advertisement
Quick Links
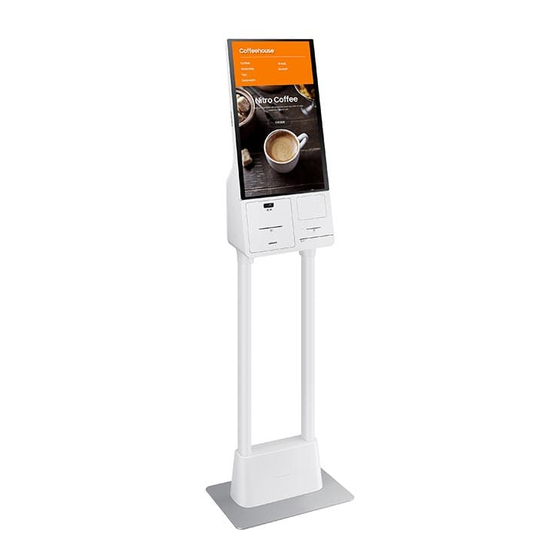
SAMSUNG KIOSK User Manual
KM24A
The colour and the appearance may differ depending on the product, and the content in the
manual is subject to change without prior notice to improve the performance.
Recommended hours of use per day of this product is under 16 hours. If the product is used for
longer than 16 hours a day, the warranty may be void.
[For India Only]
This product is RoHS compliant.
For more information on safe disposal and recycling visit our
website www.samsung.com/in or contact our Helpline numbers -
1800 40 SAMSUNG (1800 40 7267864) (Toll-Free)
1800 5 SAMSUNG (1800 5 7267864) (Toll-Free)
© Samsung
Samsung owns the copyright for this manual. Use or reproduction of this manual in parts or entirety without the authorization of Samsung is prohibited.
Trademarks other than Samsung are property of their respective owners.
Advertisement
Table of Contents

Related Manuals for Samsung KM24A


Summary of Contents for Samsung KM24A
- Page 1 1800 5 SAMSUNG (1800 5 7267864) (Toll-Free) © Samsung Samsung owns the copyright for this manual. Use or reproduction of this manual in parts or entirety without the authorization of Samsung is prohibited. Trademarks other than Samsung are property of their respective owners.
-
Page 2: Table Of Contents
Contents Before Using the Product Kiosk Home System 40 Support 46 Safety Precautions 4 Kiosk App 20 Safety symbols 4 App Management 21 Electricity and Safety 5 App Information 21 Installation 6 Connecting and Using Installing the Kiosk App 21 Operation 8 a Source Device Developer Mode 21 Cleaning... - Page 3 Connection 60 Control Codes 61 Prevention of Afterimage Burn-in 79 What is afterimage burn-in? 79 Using MDC 68 Recommended prevention practices 79 MDC Program Installation/Uninstallation 68 License 80 Troubleshooting Guide Requirements Before Contacting Samsung Customer Service Centre 69 Testing the Products 69 Check the followings. 70...
-
Page 4: Before Using The Product
Chapter 01 Before Using the Product Safety Precautions The following safety instructions are to ensure your personal safety and prevent property CAUTION damage. Please read the following to ensure the proper use of the product. RISK OF ELECTRIC SHOCK. DO NOT OPEN. Safety symbols CAUTION: TO REDUCE THE RISK OF ELECTRIC SHOCK, DO NOT REMOVE COVER (OR BACK). -
Page 5: Electricity And Safety
Electricity and Safety Insert the power plug all the way in so it is not loose. An unsecure connection may cause a fire. " The following images are for reference only. Real-life situations may differ from what is shown in the images. Clean any dust around the pins of the power plug or the power socket with a dry cloth. -
Page 6: Installation
An increased internal temperature may cause a fire. Only use the power cable provided with your product by Samsung. Do not use the power cable with other products. Do not install the product in a poorly ventilated space such as An electric shock or fire may result. - Page 7 If the product is installed in an unusual location, the surrounding environment may cause a serious quality problem. Therefore, be sure to contact Samsung Customer Service Centre before installation. (Places where many fine dusts are generated, places where chemicals are used,...
-
Page 8: Operation
If the product is dropped or its appearance is damaged, turn off the • Product failure, an electric shock or fire may result. power switch and disconnect the power cord. Then contact Samsung Customer Service Centre. During a lightning or thunderstorm, power off the product and Continued use can result in an electric shock or a fire. - Page 9 Use the product at the recommended resolution and frequency. • Contact Samsung Customer Service Centre for repairs. Your eyesight may deteriorate. • An electric shock or fire may result. Rest your eyes for more than 5 minutes for every 1 hour of product use.
-
Page 10: Cleaning
Cleaning Wipe gently with a soft and dry cloth such as superfine fibers or cotton flannels to prevent scratches because the surface of the product and the screen display are vulnerable to scratches. Warning • The product's surface may be damaged, or the markings may be erased. - Page 11 Due to the characteristics of high-glossy products, using a UV humidifier nearby may create white-coloured stains on the product. Contact Samsung Customer Service Centre if the inside of the product needs cleaning (service fee will be charged).
-
Page 12: Preparations
Chapter 02 Preparations Checking the Components Display " Contact the vendor where you purchased the product if any components are missing. " The pictures may look different from the actual components. Quick setup guide Warranty card Regulatory guide Power cord "... -
Page 13: Connection Box
Connection Box Power strip OCM cable Screw(M4, L12) x 7 Screw(M3, L5) x 11 Sheet cover x 2 EFT Terminal cover holder Screw(M3, L8) x 2 EFT Terminal holder guide... -
Page 14: Parts
An extra space for mounting optional payment module. Power button • EFT Terminal (Terminal cover holder is provided for this Optional module mounting space Optional module module) mounting space " Samsung does not provide or sell any optional modules. Receipt paper exit Receipt printer... - Page 15 Display " The colour and the appearance may differ depending on the product, and specifications are subject to change without prior notice to improve the performance. " This product does not support use of the remote control. Parts Description Turns the product on or off. Power button •...
-
Page 16: Ports
Ports Ports Description RS232C1 Connects to MDC using an RS232C adapter. TOUCH Connects to a PC using a USB cable (for TOUCH OUT) to enable touch functions. Display HDMI Connects to a source device using an HDMI cable. " The colour and the appearance may differ depending on the product, Connects to MDC and the Internet using a LAN cable. -
Page 17: Administrator Menu
Administrator menu Button Description You can turn off or restart the product. Power Off " Once the product turns on, tap and hold any of the spots indicated in • Power Off from the Administrator menu, and then select Power Off the following figure to open the Administrator menu. -
Page 18: Before Installing The Product (Installation Guide)
Minimum 15 mm Minimum 25 mm Minimum 25 mm This product can be installed and used with the exclusive Samsung stand sold separately by Samsung Electronics, and also can be wall-mounted. Minimum 0 mm " Do not use this model installed on a ceiling, floor, or table. -
Page 19: Installing The Wall Mount
We recommend you contact a technician for assistance when installing the wall mount bracket. • Samsung is not responsible for any damage or injury caused to the product, you or other people by installing the product without expert help. Wall Mount Kit Specifications (VESA) "... -
Page 20: Kiosk Home
Chapter 03 Kiosk Home You can tap and hold one of four corners of the display to open the Administrator menu, and then tap Home to access the Kiosk Home. Kiosk App Launch the installed Kiosk App. If you have not installed a Kiosk App, the App Management menu opens to proceed with the app installation. -
Page 21: App Management
App Management You can install or uninstall the Kiosk App, or check the app information. " For details on how to use the App Management function, contact the dealer from whom you purchased the product. Administrator menu → Home → App Management "... -
Page 22: Peripherals
Peripherals You can check the information of the devices connected to each USB port. " This function may not be supported depending on the model. Administrator menu → Home → Peripherals Peripherals " The displayed image may differ depending on the model. -
Page 23: Clone Product
Clone Product Export settings on the product to an external storage device. You can also import settings from an external storage device. This option is useful when assigning the same settings to several products. Administrator menu → Home → Clone Product When a duplicate file is not found on the external storage device Connect the external storage device, then run the Clone Product... -
Page 24: Network Status
Network Status Check the current network and Internet connection. Administrator menu → Home → Network Status Network Status " The displayed image may differ depending on the model. -
Page 25: On/Off Timer
On/Off Timer " You must set Clock Set before you can use this feature. On Timer Administrator menu→ Home → On/Off Timer On Timer so that your product turns on automatically at a time and on a day of your choice. The power is turned on with the specified volume or input source. -
Page 26: Off Timer
Off Timer Set the off timer (Off Timer) by making a selection from one of the seven options. (Off Timer 1 Off Timer • Setup: Select Off, Once, Everyday, Mon~Fri, Mon~Sat, Sat~Sun or Manual. If you select Manual, you can choose the days you want Off Timer to turn off your product. -
Page 27: All Settings
All Settings You can access the OSD menu to adjust functions and settings of the product. Administrator menu→ Home → All Settings All Settings " The displayed image may differ depending on the model. -
Page 28: Menu
Chapter 04 Menu Picture Description Backlight Brightness Your product has several options for adjusting picture quality. Contrast Sharpness " You can adjust and store settings for each external device you have connected to an input on the product. " Lowering picture brightness reduces power consumption. Colour Temperature It sets colour temperature. - Page 29 Description Advanced Settings White Balance Adjust the colour temperature of the picture so that white objects appear brighter. " This function may not be supported depending on the model. • 2 Point Adjust red, green, and blue luminosity levels in two sections for precise white balance optimization. •...
- Page 30 Description Advanced Settings Colour Space Settings Configure colour space settings to refine the spectrum of colours on your screen. • Colour Space Choose a colour space. " To adjust Colour, Red, Green, Blue and Reset, set Colour Space to Custom. Motion Lighting Reduces power consumption by reducing screen brightness when the picture on the screen is in motion.
-
Page 31: Onscreen Display
OnScreen Display Description Display Orientation Source Content Orientation Rotate the product screen. " This function may not be supported depending on the model. Aspect Ratio Set the rotated screen to be either full screen or original. " Available only when Source Content Orientation is set to Portrait. -
Page 32: Sound
Sound Description Sound Mode You can select a sound mode to suit your personal preferences. Equalizer Adjust the equalizer to customize the volume and pitch, and enhance the richness of the sound output. " Available only when Sound Mode is set to Standard. Auto Volume Automatically adjusts the volume level when you change video sources or content so the level remains the same. -
Page 33: Network
Network Description Network Status You can check the current network and Internet status. Open Network Settings Configure network settings to connect to an available network. Network Type " N etwork Type menu may not be available in Wired models. Configure the network connection mode. -
Page 34: Network Settings (Wired)
Network Settings (Wired) • Depending on how your network is configured, you may be able to attach your product to your LAN by connecting the LAN port on the back of your product directly to a network wall outlet using a LAN cable. See the diagram below. - Page 35 Set the network connection to use Internet services such as perform software upgrades. How to set up manually Network Type Wired from the Open Network Settings page. Automatic Open Network Settings (Wired) The network test screen appears and the verification process starts. Tap Cancel. The verification process stops.
-
Page 36: Network Settings (Wireless)
– Encryption Types: WEP, TKIP, AES process starts. In compliance with the Wi-Fi certification specifications, Samsung products do not support WEP or TKIP security encryption in networks running in the High-throughput(Greenfield) " A connection with the router is established, but the Internet cannot be accessed. In this 802.11n mode. - Page 37 Manual Network Setup (Wireless) How to set up manually Network Type Wireless from the Open Network Settings page. Offices may use static IP addresses. The Network function searches for available wireless networks. When done, it displays a list If this is the case, ask the network administrator for the address, Subnet Mask,...
-
Page 38: Use Wps
Use WPS " This function may not be supported depending on the model. How to set up using Use WPS If your router has a Use WPS button, follow these steps. Network Type Wireless from the Open Network Settings page. Select WPS. - Page 39 Use 7001 as the port number. (If you are unable to connect to the server using port number 7001, check with your server administrator to find the correct port number and then change the port number.) " For the MagicInfo Server user guide, visit the following website: http://displaysolutions.samsung.com → Support → Resources → MagicInfo Web Manual.
-
Page 40: System
System Description Accessibility High Contrast Set the background and font to high-contrast colours in Menu. Menu transparencies become opaque when the option is selected. Enlarge Enlarge the size of the Menu area. Start Setup Go through the initial setup steps like you did the first time you used this product. "... - Page 41 Description Eco Solution Power Saving Mode Reduce the power consumption by adjusting the screen brightness. Screen Lamp Schedule • Screen Lamp Schedule Enable or disable the lamp schedule. • Schedule1, Schedule2 – Time The panel brightness will change to the brightness set in Lamp at a specified time. –...
- Page 42 Description Security " Enter your 4 digit PIN number. The default PIN number is “0-0-0-0”. If you want to change the PIN number, use the Change PIN function. " Change the PIN to keep your device secure. Safety Lock On Turn Safety Lock On on or off.
- Page 43 Anynet+ is a function that enables you to control all connected Samsung devices that support Anynet+. The Anynet+ system can be used only with Samsung devices that have the Anynet+ feature. To be sure your Samsung device has this feature, check if there is an Anynet+ logo on it.
- Page 44 Troubleshooting for Anynet+ Problem Possible Solution • Check if the device is an Anynet+ device. The Anynet+ system supports Anynet+ devices only. • Check if the Anynet+ device power cord is properly connected. • Check the Anynet+ device’s Video/Audio/HDMI cable connections. Anynet+ does not work.
- Page 45 " You can download a custom logo into the product from an external USB device. " The file name of the custom logo you want to download must be saved as “samsung” in all small letters. " When there are multiple numbers of external USB connections, the product will attempt to download the custom logo from the last device that has been connected to the product.
-
Page 46: Support
This is the software version already installed in the product. Contact Samsung You can view the address of the Samsung website, the call centre phone number, your product's model number, software version, Open Source License and other information. " Go to... -
Page 47: Connecting And Using A Source Device
Chapter 05 Connecting and Using a Source Device Before Connecting Connecting to a PC • Do not connect the power cable before connecting all other cables. Pre-connection Checkpoints Ensure you connect a source device first before connecting the power cable. •... -
Page 48: Connection Using An Hdmi-Dvi Cable
Connecting to a Video Device Connection Using an HDMI-DVI Cable " The supported ports may vary depending on the model. • Do not connect the power cable before connecting all other cables. • The audio function is not supported if the PC and the product is connected using the HDMI- Ensure you connect a source device first before connecting the power cable. -
Page 49: Connection Using An Hdmi-Dvi Cable
Connecting the LAN cable Connection Using an HDMI-DVI Cable " The supported ports may vary depending on the model. " The supported ports may vary depending on the model. • The audio function is not supported if the video device and the product is connected using the HDMI-DVI cable. -
Page 50: Using A Touchscreen Monitor
Chapter 06 Using a touchscreen monitor Touchscreen monitor Read below before using the product • Take extra care to ensure an electrical substance does not contact the screen. The screen may not function properly if there is static. Control a PC by tapping the screen instead of using an input device such as a keyboard or •... -
Page 51: Requirements
Requirements Compatible operating systems Remark Windows Win10 / Win8.1 / Win8 / Win7 / Vista Some operating systems do not support the multi-touch feature. (e.g. Win7 Home Basic, Win7 Starter, Vista) Mac OSX 10.7 ~ 10.15 / and above A separate driver needs to be installed for touch input. (UPDD driver) Ubuntu 10.04 / 12.10 / 14.04 / 18.04 / Above ... -
Page 52: Connecting The Touchscreen Monitor
Connecting the touchscreen monitor Connect the power cable from the product to the power outlet. After connecting the power cable, tap Source on the Administrator menu. Connect the Touch Out USB cable to the TOUCH port of the product and the USB port of "... -
Page 53: Configuring The Touchscreen Monitor Settings
" The maximum number of touchscreen monitors that can be connected simultaneously varies, depending on the operating system and graphics card settings. " If Tablet PC Settings is not found in the Control Panel, search for Tablet PC Settings from Search Control Panel. " If used in a multi-screen setup, make sure you have configured KM24A as the main display. Calibration Tap the page displayed on the product with your finger. - Page 54 Select the product from Display under Display options. Next, select Calibrate. After calibration is complete, the message Do you want to save the calibration data? appears. Select Yes to save changes. Digitizer Calibration Tool Do you want to save the calibration data? The touchscreen monitor has been calibrated successfully.
-
Page 55: Controlling The Screen
Controlling the screen Drag Lightly touch and drag in any direction on the screen. Use this gesture to move in a specific direction on a web " The instructions in this section is for controlling the PC with the touchscreen. page, map or photo. -
Page 56: Notes
Flick Notes Flick your finger on the screen as shown in the image. • To increase the touch input accuracy, enlarge the font or icons. Use this gesture to go to the previous or next picture or • Use a mouse as an additional input method in touchscreen mode for more precise control. web page. -
Page 57: Multi Display Control
Chapter 07 Multi Display Control Control multiple display devices connected to a PC simultaneously. Cable Connection • Pin assignment 1 2 3 4 5 5 4 3 2 1 RS232C Cable Interface RS232C (9 Pins) TxD (No.2), RxD (No.3), GND (No.5) Bit rate 9600 bps 6 7 8 9... -
Page 58: Lan Cable
LAN cable • RS232C Cable Connector: 9-Pin D-Sub - Stereo Cable • Pin assignment 1 2 3 4 5 6 7 8 -P2- -P1- -P1- -P1- -P2- -P2- STEREO Connector PLUG Standard Colour Signal (3.5ø) White and orange Orange White and green Blue White and blue Green... - Page 59 Cross LAN cable (PC to LFD) • Connector: RJ45 Direct LAN cable (PC to HUB) Signal Signal Signal Signal...
-
Page 60: Connection
Connection • Connection 3 Kiosk 1 " Connect the cable to the RS232C IN ports of the PC and the product. " The supported ports may vary depending on the model. • Connection 1 Kiosk 1 RJ45 RJ45(LAN RS232C • Connection 2 Kiosk 1 Kiosk 2... -
Page 61: Control Codes
Control Codes • All communications take place in hexadecimals. The checksum is calculated by adding up all values except the header. If a checksum adds up to be more than 2 digits as shown below (11+FF+01+01=112), the first digit is removed. "... - Page 62 Power control Volume control • Function • Function A product can be powered on and off using a PC. The volume of a product can be adjusted using a PC. • Viewing power state (Get Power ON / OFF Status) •...
- Page 63 Input source control • Header Command Data length Ack/Nak r-CMD Val1 • Function Checksum The input source of a product can be changed using a PC. 0xAA 0xFF 0x14 "Input Source" • Viewing input source state (Get Input Source Status) "Input Source": An input source code to be set on a product.
- Page 64 Screen size control Video Wall Mode Control • Function • Function The screen size of a product can be changed using a PC. V ideo Wall mode can be activated on a product using a PC. This control is only available on a product whose Video Wall is enabled.
- Page 65 Safety Lock Video Wall On • Function • Function PC can be used to turn the Safety Lock On function on or off on a product. Turn Video Wall on or off on the product from your computer. This control is available regardless of whether or not the power is turned on. •...
- Page 66 Video Wall User Control Wall_SNo: Product Number code assigned to the product • Function 10x10 Video Wall Model: (1 ~ 100) Turn Video Wall on or off on the product from your computer. Set Number Data • Get Video Wall Status 0x01 Header Command...
- Page 67 Wall_Div: Video Wall Divider code assigned to the product 10x10 Video Wall Model 0x00 0x00 0x00 0x00 0x00 0x00 0x00 0x00 0x00 0x00 0x00 0x00 0x00 0x00 0x00 0x11 0x12 0x13 0x14 0x15 0x16 0x17 0x18 0x19 0x1A 0x1B 0x1C 0x1D 0x1E 0x1F...
-
Page 68: Using Mdc
“Finish" to run the MDC program immediately. For details on how to use the MDC program, refer to Help after installing the program. The MDC program can be downloaded from the website. (http://displaysolutions.samsung.com) The MDC Unified shortcut icon will be created on the desktop after installation. -
Page 69: Troubleshooting Guide
Chapter 08 Troubleshooting Guide Requirements Before Contacting Samsung Customer Service Centre Testing the Products " Follow the instruction on the right to test your product before Check if your product is operating normally by using the product test function. requesting for service. If the problem persists, contact Samsung If the screen remains blank while the power indicator blinks even when the product is correctly connected to a PC, perform product testing. -
Page 70: Check The Followings
Check the followings. Installation issue (PC mode) The screen keeps switching on and off. Check that the cable between the product and the PC is connected correctly. The blank spaces found on the screen have nothing to do with the product. Blank spaces on the screen are caused by the PC or graphics card. - Page 71 Check the cable connection. I see red, green, and blue. This issue may happen when the panel of the product is defective. Contact a Samsung Service Centre to resolve the issue. The screen may freeze when a resolution other than the recommended resolution is used or if The display looks unstable and then freezes.
- Page 72 Screen issues A scaled SD (4:3) content file can cause black bars on both sides of an HD channel screen. A video with an aspect ratio different from the product can cause black bars at the top and The screen cannot be displayed in full screen. bottom of the screen.
- Page 73 Touch function issues Check whether the TOUCH port on the product and the USB port on the PC is connected with Touching does not work when PC connection is used. a Touch Out USB cable. Make sure that there are no foreign substances on the screen surface. Touches break, reaction speed gets slow, and so on.
- Page 74 Other issue To use several external devices compatible with the HDMI-CEC feature that are connected to the HDMI IN ports on the product, turn off the HDMI-CEC features on all the external devices. External devices include Blu-ray and DVD players. HDMI-CEC does not work.
- Page 75 Payment module issue Make sure there is enough receipt paper in the printer. Make sure the receipt paper is properly inserted into the printer. Make sure the cover of the receipt paper is closed. Printer is not working. Check the power and signal cable connection status, and restart the product. Press the Self Test button to check if the printer works.
-
Page 76: Specifications
To avoid this, it is recommended that you select Humidity: 10 % ~ 90 %, non-condensing the optimum resolution specified for your product. Storage * Applicable before the product package is " For detailed device specifications, visit the Samsung website. unpacked. Wireless Network 802.11ac (2.4GHz & 5GHz) Type... -
Page 77: Preset Timing Modes
Preset Timing Modes Horizontal Frequency Vertical Frequency Pixel Clock Sync Polarity Resolution (kHz) (Hz) (MHz) (H / V) VESA, 1024 x 768 60.023 75.029 78.750 The screen will automatically be adjusted if a signal that belongs to the following standard signal modes is transmitted from your PC. -
Page 78: Appendix
External impact or drop. " When the service is requested, in spite of in warranty, we may charge you for a visit from a • Use of supplies or separately sold product unspecified by Samsung. service technician in the following cases. •... -
Page 79: Prevention Of Afterimage Burn-In
FLIGHT TIME Such a voltage difference between electrodes increases with time and makes the liquid crystals thinner. 20:30 20:30 SAMSUNG SAMSUNG When this occurs, a previous image can remain on the screen when the pattern changes. 21:10 21:10 SAMSUNG SAMSUNG This information is a guide to prevent afterimage burn-in. -
Page 80: License
BY THE OWNER OF THE PRODUCT. THIS PRODUCT MAY NOT BE USED IN CONNECTION WITH HEVC ENCODED CONTENT CREATED BY A THIRD PARTY, WHICH THE USER HAS For information on the Open Source License Notice, contact Samsung Open Source (http:// ORDERED OR PURCHASED FROM A THIRD PARTY, UNLESS THE USER IS SEPARATELY opensource.samsung.com)
Need help?
Do you have a question about the KM24A and is the answer not in the manual?
Questions and answers