Table of Contents
Advertisement
Advertisement
Table of Contents

Related Manuals for ZOJE ZJ-M3-S500-SF-V2


Summary of Contents for ZOJE ZJ-M3-S500-SF-V2
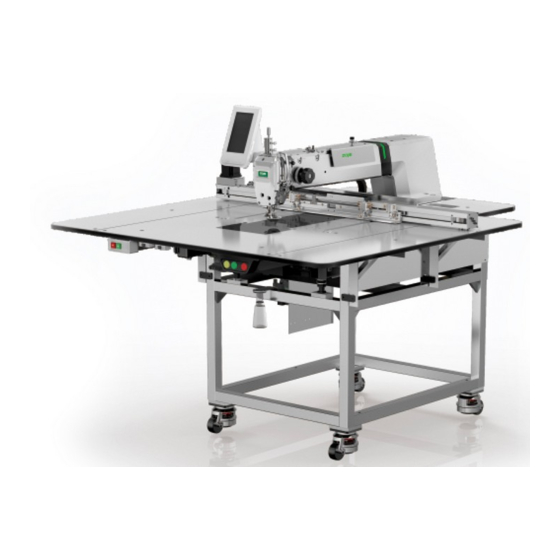
- Page 1 模板机-触摸屏 E2 Template machine - Touch screen E2 2019-01...
- Page 2 模板机-触摸屏 E2 前言 前 言 欢迎您使用本公司的特种缝纫机控制系统。 请您仔细阅读本操作手册,以确保正确的操作、使用特种缝纫机,请按照本手册内注明的方式进行操 作,否则,如违规操作所造成损失本公司不承担责任。此外,请将本用户手册妥善保存在安全地点,以便 随时查阅。若发生故障须由本公司指定的技术人员或专业人员进行维修。...
- Page 3 Foreword Template machine - Touch screen E2 Foreword Thank you for using our Computerized Control System for Special Sewing Machine. It is appreciated that you do read this manual carefully, so that you can operate the machine correctly and effectively. If the user operates the machine contrary to regulations herein, thus causes loss to user or third party, we will not take any responsibility.
- Page 5 模板机-触摸屏 E2 安全注意事项 安全注意事项 安全操作的标志及含义 使用说明书及产品所使用的安全标志是为了让您正确安全的使用产品,防止您及其他人受到伤害。标志 的图案和含义如下: 如果忽视此标记而进行错误的操作,会导致人员的重伤或死亡。 如果忽视此标记而进行错误的操作,会导致人员的受伤和设备的损坏。 该符号表示“应注意事项”。三角中的图案表示必须要注意的内容。(例如左边的图案表示: “当心受伤”) 该符号表示“禁止” 该符号表示“必须”。圆圈中的图案表示必须要做的内容。(例如左边的图案表示“必须接 地”) 安全注意事项 打开控制箱时,先关闭电源开关并将电源插头从插座上拔下后,等待至少 5 分钟后,再打开 控制箱盖。触摸带有高电压的区域会造成人员受伤。 使用环境 应避免在强电气干扰源(如高频焊机)的附近使用本缝纫机。 强电气干扰源可能会影响缝纫机的正常操作。 电源电压的波动应该在额定电压的±10%以内的环境下使用。 电压大幅度的波动会影响缝纫机的正常操作,需配备稳压器。 环境温度应在 0℃~45℃的范围内使用。 低温或高温会影响缝纫机的正常操作。 相对湿度应在 35%~85%的范围内,并且设备内不会形成结露的环境下使用。干燥、潮湿或结 露的环境会影响缝纫机的正确操作。 压缩空气的供气量应大于缝纫机所要求的总耗气量。压缩空气的供气量不足会导致缝纫机的 动作不正常。 万一发生雷电暴风雨时,关闭电源开关,并将电源插头从插座上拔下。雷电可能会影响缝纫 机的正确操作。 安装 请让受过培训的技术人员来安装缝纫机。 安装完成前,请不要连接电源。 如果误按启动开关,缝纫机动作会导致受伤。...
- Page 6 安全注意事项 模板机-触摸屏 E2 缝纫机头倒下或竖起时,请用双手操作。不要用力压缝纫机。 如缝纫机失去平衡,缝纫机滑落到地上会造成受伤或机器损坏。 必须接地。 接驳地线不牢固,是造成触电或误动作的原因。 所有电缆应固定在离活动部件至少 25mm 以外处。另外,不要过度弯曲或用卡钉固定得过紧。 会引起火灾或触电的危险。 请在机头上安装安全罩壳。 缝纫 本缝纫机仅限于接受过安全操作培训的人员使用。 本缝纫机不能用于除缝纫外的任何用途。 使用缝纫机时必须戴上保护眼镜。 如果不戴保护眼镜,断针时机针折断部分可能会弹入眼睛造成伤害。 发生下列情况时,请立即切断电源。否则误按下启动开关时,会导致受伤。 1.机针穿线时 2.更换机针时 3.缝纫机不使用或人离开缝纫机时 缝纫过程中,不要触摸任何运动部件或将物件靠在运动部件上,因为这会导致人员受伤或缝 纫机损坏。 如果缝纫机操作中发生误动作,或听到异常的噪声或闻到异常的气味,应立即切断电源。然 后请与购买商店或受过培训的技术人员联系。 如果缝纫机出现故障,请与购买商店或受过培训的技术人员联系。 维护和检查 只有经过训练的技术人员才能进行缝纫机的维修、保养和检查。 与电气有关的维修、保养和检查请及时与电控厂家的专业人员进行联系。 发生下列情况时,请关闭电源并拔下电源插头。否则误按启动开关时,会导致受伤。 1.检查、调整和维修 2.更换弯针、切刀等易损零部件 在检查、调整和修理任何使用气动设备之前,请先断开气源,并等压力表指针下降到“0”为 止。 在必须接上电源开关和气源开关进行调整时,务必十分小心遵守所有的安全注意事项。 未经授权而对缝纫机进行改装而引起的缝纫机损坏不在保修范围内。...
- Page 7 Template machine - Touch screen E2 Safety Matters for Attention Safety Matters for Attention Signs & Definitions of Safety Marks This User’s Manual and the Safety Marks printed on the products are to enable you to use this product correctly so as to be away from personal injury.
- Page 8 Safety Matters for Attention Template machine - Touch screen E2 If the sewing machine loses its balance, it will fall into floor thus causes the personal injury or mechanical damage. Grounding is a must. If the grounding cable is not fixed, it may cause the electric-shock and mistake-operation of machine The entire cables shall be fixed with a distance at 25mm away from the moving component at least.
-
Page 9: Table Of Contents
模版机-触摸屏 E2 目录 目录 1 概要说明..................................1 1.1 概述.................................1 1.2 功能和指标参数............................2 1.3 主界面................................3 1.4 操作方式.................................4 1.5 快速缝制入门..............................5 2 花样选择界面................................8 2.1 花样预览...............................10 2.2 检测功能...............................11 2.2.1 输入信号检测..........................12 2.2.2 输出信号检测..........................13 2.2.3 主轴电机校正..........................14 2.2.4 转速测试............................15 2.2.5 XY 电机原点检测..........................16 2.2.6 中压脚原点检测..........................18 2.2.7 剪线电机检测.......................... - Page 10 目录 模版机-触摸屏 E2 7.1 分期密码...............................61 7.2 穿线示意...............................69 7.3 打卡................................70 7.4 生产管理参数...............................70 7.5 加减计数器..............................70 7.6 运转记录...............................71 7.7 报警记录...............................72 7.8 错误上报...............................72 8 附录 1..................................74 8.1 报警信息一览表............................74 8.2 信息提示一览表............................76 9 附录 2..................................81 9.1 电控箱连接示意图............................81 9.2 操作箱示意图...............................82 9.3 系统框图...............................83...
- Page 11 Template machine - Touch screen E2 Contents Contents 1 General Introduction..............................1 1.1 General................................1 1.2 Functions & Specifications..........................2 1.3 The main interface............................3 1.4 Operation Method............................4 1.5 Quick introduction to sewing.........................5 2 Pattern selection interface............................8 2.1 Pattern preview............................. 10 2.2 Test Mode...............................
- Page 12 Contents Template machine - Touch screen E2 7.2 Threading motioned............................. 79 7.3 Clock in................................80 7.4 Production management parameters......................80 7.5 add-subtract counter............................ 80 7.6 Run Note.................................81 7.7 The alarm record............................82 7.8 Error reporting.............................. 82 8 Appendix 1................................84 8.1 List of alarm information..........................84 8.2 List of information tips..........................
-
Page 13: 概要说明
模板机-触摸屏 E2 概要说明 1 概要说明 1.1 概述 全自动模板机系列工业缝纫机电脑控制系统,主轴电机采用具有世界先进水平的交流伺服控制技术驱 动,具有力矩大、效率高、车速稳定和噪音低等特点。操作面板设计多样化可满足不同客户的配套要求; 系统采用德国式结构设计,安装和维修方便快捷,系统控制软件可通过远程通讯升级,方便用户不断提高 产品性能。... -
Page 14: 功能和指标参数
概要说明 模板机-触摸屏 E2 1.2 功能和指标参数 序号 控制器型号 全自动模板机 X(左右)方向 Y(前后方向) 缝制范围 1300 x 800 最高缝纫速度 3200rpm(针距不大于 3.0mm 时) 0.1~12.7mm(最小分辨率 0.05mm) 缝迹长度 压脚送布 间断送布(伺服驱动方式) 41.2mm 针杆行程 使用机针 DP×5、DP×17 外压脚上升量 最大 25mm(气动式最大 30mm) 标准 4mm(0~10mm) 中压脚行程 中压脚上升量 20mm 1.6 倍旋梭 旋梭 U 盘 花样数据的记忆... -
Page 15: 主界面
模板机-触摸屏 E2 概要说明 1.3 主界面 开机后将直接进入【花样选择】界面,单击 可进入【花样缝制】界面。 花样选择界面 花样缝制界面... -
Page 16: 操作方式
概要说明 模板机-触摸屏 E2 1.4 操作方式 触摸屏操作面板采用了业界先进的触摸操作技术,集合踏板的压框、启动和急停开关功能的实体按键, 友好的界面以及便捷的操控都给用户的日常使用带来革新性的变化。用户可以使用手指或者其他物体点触 屏幕,完成相应的操作。用户在使用过程中应该注意避免使用尖锐的物体触碰屏幕,以免对触摸屏造成永 久性损伤... -
Page 17: 快速缝制入门
模板机-触摸屏 E2 概要说明 1.5 快速缝制入门 开机将直接进入【花样选择】界面。 单击【花样选择】界面的“花样管理”键 ,进入【读 取花样】界面。 在【读取花样】界面,可选择想要缝制的花样。... - Page 18 概要说明 模板机-触摸屏 E2 在【读取花样】界面单击想要缝制的花样,选中该花样。 单击“回车” ,确认花样并自动返回到【花样选择】界 面。 在【花样选择】界面,单击 可进入【花样缝制】界面。...
- Page 19 模板机-触摸屏 E2 概要说明 在【花样缝制】界面,可对花样参数进行设置。 花样参数设置完成后,将对应模板放到位,先按下操作头上“压 框”按钮,再按一下“启动”按钮,确认起缝点位置无误后,按 第二下“启动”按钮,开始缝制。...
-
Page 20: 花样选择界面
花样选择界面 模板机-触摸屏 E2 2 花样选择界面 开机后将直接进入【花样选择】界面,显示花样基本参数。 序号 功能 内容 花样管理 可选择、设置花样参数等 RF 登记 可将当前花样写入到 RF 卡中 绕线 可进入绕线模式 信息 可查看操作头统计类信息 设置 可设置用户参数 花样号 显示当前花样号 花样名 显示当前花样名称 花样预览区 单击花样预览区,可查看花样基本信息和预览花样 X 方向范围 显示当前花样 X 方向范围 Y 方向范围 显示当前花样 Y 方向范围 针数值 显示当前花样落针点总数 中压脚值... - Page 21 模板机-触摸屏 E2 花样选择界面 移框 可移动压框 检测 可进入检测模式,检测输入输出和其他信号 切换 花样缝制界面和花样选择界面互相切换 中压脚 提升或者下降中压脚...
-
Page 22: 花样预览
花样选择界面 模板机-触摸屏 E2 2.1 花样预览 在【花样选择】或【花样缝制】界面,单击花样预览区,可进入 【花样预览】界面,显示如下信息: ① 花样名称 ② 花样号 ③ X 尺寸 ④ Y 尺寸 ⑤ 针数 ⑥ 中压脚高度 ⑦ 花样坐标... -
Page 23: 检测功能
模板机-触摸屏 E2 花样选择界面 2.2 检测功能 在【花样选择】界面,单击“检测” ,进入【检测】 界面,通过上 下 翻页键翻页。 1)输入信号检测 2)输出信号检测 3)主轴电机校正 4)转速检测 5)XY 电机原点检测 6)中压脚电机检测 7)剪线电机检测 8)连续运转 9)抓线电机检测 10)RFID 设置 11)扩展功能检测 12)多功能 IO 检测 13)触摸屏校正 14)液晶检测... -
Page 24: 输入信号检测
花样选择界面 模板机-触摸屏 E2 2.2.1 输入信号检测 在【检测】界面,单击“输入信号检测” ,进入【输入信 号检测】界面,可通过按下开关或者隔挡传感器,观察各种开关 和传感器的输入信号变化。 ON:表示开启 OFF:表示关闭 0:表示条码扫描输入的号码,默认为 0 可显示当前输入信号状态: (01)启动按钮 (02)压框按钮 (03)急停按钮 (04)断线检测 (05)X 原点传感器 (06)Y 原点传感器 (07)抓线原点传感器 (08)抓线位置传感器 (09)中压脚原点传感器 (10)安全开关 (11)三联踏板检测 (12)输入 1 (13)输入 2 (14)输入 3 (15)输入 4 (16)输入 5 (17)输入 6 (18)输入 7 (19)输入... -
Page 25: 输出信号检测
模板机-触摸屏 E2 花样选择界面 2.2.2 输出信号检测 在【检测】界面,单击“输出信号检测” ,进入【输出信 号检测】界面,在该界面下可以检测电磁铁和气阀的输出状态: (01)拨线 (02)气剪线 (03)电剪线 (04)压框 (05)中压脚 (06)松线 (07)辅助压脚 (08)气阀输出 1 (09)气阀输出 2 (10)气阀输出 3 (11)气阀输出 4 (12)气阀输出 5 (13)气阀输出 6 (14)翻转压脚 (15)辅助气阀... -
Page 26: 主轴电机校正
花样选择界面 模板机-触摸屏 E2 2.2.3 主轴电机校正 在【检测】界面,单击“主轴电机校正” ,系统将提示输 入密码,密码输入无误,则可进入【主轴角度安装测试】界面。 在【主轴角度安装测试】界面, 在当前界面下拆下主轴马达, 旋转手轮将缝纫机针杆摇到最高点, 重新装好主轴马达,确认显示的电气值在 0-30 度或 330-360 度范 围内,然后按下确定键 ;否则拆下主轴重复以上操作。... -
Page 27: 转速测试
模板机-触摸屏 E2 花样选择界面 2.2.4 转速测试 在【检测】界面,单击“转速测试” ,进入【转速测试】 界面。 可以显示当前主轴电机“目标转速”和“实际转速”。 ② 可以通过单击“转速减” 和“转速加” 设置 主轴电机转速,单击“开始” 后,主轴电机会以已设定 的转速运转。此时,实际测得的转速会显示在“实际转速”数值 栏。 单击“停止” ,则机器停止运转。 单击“退出” ,则返回到上一级界面。... -
Page 28: Xy 电机原点检测
花样选择界面 模板机-触摸屏 E2 2.2.5 XY 电机原点检测 在【检测】界面,单击“XY 电机原点检测” ,进入【XY 原点检测】界面,显示传感器状态和坐标信息: ① X 原点:根据 X 原点传感器状态,显示当前 X 原点传感器 ON/OFF 状态。 ② Y 原点:根据 Y 原点传感器状态,显示当前 Y 原点传感器 ON/OFF 状态。 ③ X 绝对坐标: 显示 X 绝对坐标值, 数值会根据电机移动而变化 ④ X 相对坐标: 显示 X 相对坐标值, 数值会根据电机移动而变化 ⑤... - Page 29 模板机-触摸屏 E2 花样选择界面 ⑫ X 步距角微调:显示当前 X 步距角微调值,可通过单击右侧 数值 ,进入【U40 X 步距角微调】参数设置界面: 通过界面下方数字键输入数值,单击“确认” 确认数值, 并返回【XY 原点检测】界面,单击“退回” 取消操作, 并返回【XY 原点检测】界面。 在 【XY 原点检测】 界面, 单击 X 步距角微调右侧 “还原” , 可还原数值。 ⑬ Y 步距角微调:显示当前 Y 步距角微调值,可通过单击右侧 ,进入【U41 Y 步距角微调】参数设置界面, 数值 参数设置方法同【⑫ X 步距角微调】。 【XY 原点检测】界面,单击“偏移”...
-
Page 30: 中压脚原点检测
花样选择界面 模板机-触摸屏 E2 ① X 轴原点偏移:显示当前 X 轴原点偏移值,可通过单击右侧 ,进入【K189 X 轴原点偏移】参数设置界面: 数值 通过界面下方数字键输入数值,单击“确认” 确认数值, 并返回【XY 原点检测】界面,单击“退回” 取消操作, 并返回【XY 原点检测】界面。 在 【XY 原点检测】 界面, 单击 X 轴原点偏移右侧 “还原” , 可还原数值。 ② Y 轴原点偏移:显示当前 Y 轴原点偏移值,可通过单击右侧 ,进入【K01 Y 轴原点偏移】参数设置界面, 数值 参数设置方法同【① X 轴原点偏移】。 2.2.6 中压脚原点检测... - Page 31 模板机-触摸屏 E2 花样选择界面 ⑤ 单击“原点” ,回到原点 在【中压脚原点检测】界面下,单击“位置” ,进入【位 置】界面,进入后图标显示为蓝色 ,界面显示内容如下: ① 中压脚原点状态: 根据中压脚原点状态, 显示当前中压脚原点 传感器 ON/OFF 状态 ② 单击“原点” ,回到原点 ③ 单击“基准点” ,下降到基准点 ④ 中压脚随动高度:显示当前中压脚随动高度,单击“上移” ,可加大中压脚随动高度值,单击“下移” , 可减小中压脚随动高度值,设置完成后,单击“确定” , 确定中压脚随动高度,单击“还原” ,还原默认中压脚随 动高度值。...
-
Page 32: 剪线电机检测
花样选择界面 模板机-触摸屏 E2 2.2.7 剪线电机检测 在【检测】界面,单击“剪线电机检测” ,进入【剪线电 机检测】界面。 在【剪线电机检测】界面下,可选择【检测】和【位置】界面。 系统默认进入界面为【检测】界面,该界面下“检测”图标显示 为蓝色 ,显示内容如下: ① 剪线原点状态: 根据剪线原点状态, 显示当前剪线原点传感器 ON/OFF 状态 ② 剪线电机正方向:单击右侧“正向” 或“反向” ,可切换剪线电机正方向的方向。 ③ 单击 “反转” , 电机进行反转, 单击 “正转” , 电机进行正转,单击“原点” ,电机回到原点。 在【剪线电机检测】界面下,单击“位置”,进入【位置】界面, 此时“位置” 图标显示为蓝色,显示内容如下: ① 剪线原点状态: 根据剪线原点状态, 显示当前剪线原点传感器 ON/OFF 状态 ②... - Page 33 模板机-触摸屏 E2 花样选择界面 ② 剪线电机行程: 显示当前剪线电机行程值, 可通过单击右侧数 值 ,进入【U19 剪线电机行程】参数设置界面: 通过界面下方数字键输入数值,单击“确认” 确认数值, 并返回【剪线电机检测】界面,单击“退回” 取消操作, 并返回【剪线电机检测】界面。 在 【剪线电机检测】 界面, 单击剪线电机行程右侧 “还原” , 可还原数值。 ③ 分 线 行 程 : 显 示 当 前 分 线 行 程 值 , 可 通 过 单 击 右 侧 数 值 ,进入【U20 分线行程】参数设置界面,参数设置...
-
Page 34: 连续运转
花样选择界面 模板机-触摸屏 E2 2.2.8 连续运转 在【检测】界面,单击“连续运转” ,进入【连续运转测 试】界面,界面显示内容如下: ① 动作间隔:显示当前动作间隔值,单位:×100ms,间隔值的 范围(0~99),可使用界面下方数字键输入数值,单击“确认” 确认数值,并返回【检测】界面,单击“退回” 取消操作,并返回【检测】界面。 ② 收针原点检测:显示当前收针原点检测值,范围(0~2),可 使用界面下方数字键输入数值,单击“确认” 确认数值, 并返回【检测】界面,单击“退回” 取消操作,并返回【检 测】界面。 2.2.9 抓线电机检测 在【检测】界面,单击“抓线电机检测” ,进入【抓线电 机/原点传感器检测】界面,界面显示内容如下: 传感器状态: 位置传感器: 根据抓线机构位置状态, 显示抓线位置传感器的 ON/OFF 状态。 原点传感器: 根据抓线原点传感器的状态, 显示抓线原点传感 器的 ON/OFF 状态。 ② 单击 或 ,抓线电机将单步进行移动。单击... -
Page 35: Rfid 设置
模板机-触摸屏 E2 花样选择界面 :线弯曲位置 :夹线位置 :退避位置(里侧) 检测完成后,单击“退出” ,退出【抓线电机/原点传感器 检测】界面。 通过启动 SW 进行抓线电机的原点检索。 注:用启动开关进行抓线电机原点检索之后,变为有效 2.2.10 RFID 设置 在【检测】界面,单击“RFID 设置” ,进入【RFID 设置】 界面,界面显示当前花样号,范围(1~999),可使用界面下方 数字键输入花样号码,单击“发送” ,将当前输入的花 样编号写入到 RF 卡中,单击“读取” ,可读取 RF 卡 中花样编号;单击“确定” 或 “返回” ,可返 回到【检测】界面。... -
Page 36: 扩展功能检测
花样选择界面 模板机-触摸屏 E2 2.2.11 扩展功能检测 在【检测】界面,单击“扩展功能检测” ,进入【自动换 梭/切刀检测】界面,可检测各扩展功能输入/输出信号: ① 激光电源 ② 激光压料气阀 ③ 激光切割信号 ④ 激光废烟气阀 ⑤ 激光安全开关 ⑥ 激光指示灯 ⑦ 换梭电机 ⑧ 抓臂气缸 ⑨ 夹紧气缸 ⑩ 抓臂气缸 ⑪ 换芯信号 ⑫ 换梭单步测试 ⑬ 换梭动作复位... - Page 37 模板机-触摸屏 E2 花样选择界面 ⑭ 旋转切刀电机 ⑮ 旋转切刀复位 ⑯ 提升气缸 ⑰ 压料气缸 ⑱ 切刀启动 ⑲ 切刀提升汽缸原点信号 ⑳ 直线切刀 ○ 直线切刀动作模拟 ○ 直线切刀原点传感器状态...
-
Page 38: 多功能 Io 检测
花样选择界面 模板机-触摸屏 E2 2.2.12 多功能 IO 检测 在【检测】界面,单击“多功能 IO 检测” ,进入【多功 能 IO 检测】界面。 在【多功能 IO 检测】界面下,可选择【Output】和【Input】界面。 系统默认进入界面为【Output】界面,该界面下可检测输入信号 状态,单击“Output” ,可进入【Input】界面。 单击“Input” ,可切换至【Output】界面。 在【Input】界面,可检测输出信号状态。... -
Page 39: 触摸屏校正
模板机-触摸屏 E2 花样选择界面 单击“输出测试” ,可测试输入信号。 2.2.13 触摸屏校正 在【检测】界面,单击“触摸屏校正” ,系统将提示输入 密码,密码输入无误,系统将继续提示[M-031]确定进入触摸屏校 正模式?... -
Page 40: 液晶检测
花样选择界面 模板机-触摸屏 E2 提示【[M-031]确定进入触摸屏校正模式?】界面,单击“是” ,则可进入【触摸屏校正】界面,单击“否” , 则退出触摸屏校正。 2.2.14 液晶检测 在【检测】界面,单击“液晶检测” ,可进入【液晶检测】 界面,进入后屏幕显示为蓝色,单击屏幕,颜色将以:蓝色→黑 色→红色→绿色→白色→蓝色……循环切换颜色,单击“退出” ,返回到【检测】界面。... -
Page 41: 花样缝制界面
模板机-触摸屏 E2 花样缝制界面 3 花样缝制界面 在【花样选择】界面,单击 ,进入缝制界面,可设置花样缝制参数。 序号 功能 描述 花样管理 进入【花样管理】界面 RF 登记 可将当前花样写入到 RF 卡中 绕线 可进入绕线模式 信息 可查看操作头统计类信息 设置 可设置用户参数 花样号 显示当前花样号 花样名 显示当前花样名称 花样预览区 单击花样预览区,可查看花样基本信息和预览花样 X 方向范围 显示当前花样 X 方向范围 Y 方向范围 显示当前花样 Y 方向范围 针数 显示当前花样落针点数值... - Page 42 花样缝制界面 模板机-触摸屏 E2 生产计数 显示生产计数器的当前值/设置值 底线计数 显示底线计数值 快捷花样列表 显示所有已存花样列表 翻页 可翻页快捷花样列表 各项功能参数编辑键 :按下后可进入跳转界面,输入跳转针数/段数,按下“确认” 键 ,模板可移动到所输入针数/段数位置。 : 锁定当前编辑花样, 防止当前花样被切换, 只可自动切换花样, 不可手动切换花样 :可手动切换花样,不可自动切换花样。 :可对花样中某段进行修改 :执行一次剪线动作 :可进入【快捷参数】设置界面 :移动起缝点位置 复位 回原点 切换到花样选择界面 切换到花样选择界面 中压脚 中压脚功能设置...
-
Page 43: 中压脚功能
模板机-触摸屏 E2 花样缝制界面 3.1 中压脚功能 在【花样缝制】界面,单击“中压脚” ,进入【中压 脚设置】界面,可设置如下参数: 中压脚基准值: 可设置中压脚基准值, 单击 “中压脚基准值” , 选中后左侧显示 , 参数选中状态下, 会显示当前参数范围, 该范围会根据所选参数自动更新,参数值可通过下方数字键 修改,修改完成后,单击“确定” ,确认修改并返 回【花样缝制】界面,单击“取消” ,取消操作并返 回【花样缝制】界面。 ② 中压脚随动高度: 可设置中压脚随动高度值, 操作方法同 “① 中压脚基准值” ③ 中压脚压布角度设置:可设置中压脚压布角度值,操作方法 同“① 中压脚基准值” ④ 辅助压脚抬起延时:可设置辅助压脚抬起延时值,操作方法 同“① 中压脚基准值” ⑤ 辅助压脚落下延时:可设置辅助压脚落下延时值,操作方法 同“① 中压脚基准值” ⑥... - Page 44 花样缝制界面 模板机-触摸屏 E2 ⑨ :设置单针中压脚高度 单击“设置单针中压脚高度” ,进入【设置单针中压脚 高度】界面,单击“ ”“ ”可选择需设置中压 脚高度的位置。 单击“单针中压脚设置”键 ,进入【单针中压脚设 置】界面,可更改中压脚高度,单击“保存”键,保存成功后单 击“关闭”,返回【中压脚设置】界面。...
-
Page 45: 修改起缝点
模板机-触摸屏 E2 花样缝制界面 3.2 修改起缝点 导入的花样如果位置与模板有差异,用户可以根据需要修改起缝 点。 在【花样缝制】界面,单击“修改起缝点”键 ,进入【修 改起缝点】界面,如图所示。 按下移动键 ,可以将起缝点移动到指定位置。 按“保存”键 ,完成操作,起缝点移动到指定位置。 可通过“”试缝按键确认上一次修改后的起缝点位置是否准确: 上一段,单击后,跳转到当前位置的上一段; 上一针,单击后,跳转到当前位置的上一针; 下一针,单击后,跳转到当前位置的下一针; 下一段,单击后,跳转到当前位置的下一段。 试缝到花样中任意一点都可以继续以此针为基准移动花样位置, 设置完成后,单击“保存”键 ,完成操作,起缝点移动 到指定位置;单击“退出” ,返回花样缝制界面。... - Page 46 花样缝制界面 模板机-触摸屏 E2 单击“退出” 后,返回花样缝制界面。...
-
Page 47: 花样管理
模板机-触摸屏 E2 花样管理 4 花样管理 在【花样缝制】或【花样选择】界面,单击“花样管理” ,可进入【读取花样】界面, 序号 功能 功能描述 花样列表 已存花样会显示花样、号码、名称,单击花样或者花样名称即可选中花样 花样预览 单击后可预览花样,祥见【2.1 花样预览】 单击后可将选中花样输出到 RFID 记忆卡中 翻页键 可上下翻页花样列表 功能键 :查找花样 :按照修改时间或号码大小进行排序重新显示花样列表 :删除花样 :将花样另存为... -
Page 48: 功能键
花样管理 模板机-触摸屏 E2 :可选择多个花样 :U 盘导入花样 :可编辑新花样,进入花样编辑界面 :可修改花样 4.1 功能键 在【读取花样】界面,单击“查找” ,进入【花样查找】 界面,可通过下方键盘输入花样号或花样名称中字符查找花样, 单击“中英文切换” 或 ,来切换输入英文或中文,选 中花样后,单击“确定” ,切换花样成功并返回到【读 取花样】界面,单击“取消” ,不切换花样并返回到【读 取花样】界面。... - Page 49 模板机-触摸屏 E2 花样管理 在【读取花样】界面,选中花样后,单击“删除” ,系 统将提示[M-044]是否删除选中的文件,单击“确定” , 删除花样并返回到【读取花样】界面,单击“取消” ,不 删除花样并返回到【读取花样】界面。 注:当前正在使用的花样,是不可删除的。 在【读取花样】界面,选中花样后,单击“另存” ,则 进入【花样另存】界面,可通过下方数字键输入另存为花样的名 称,单击“确定” ,花样另存成功并返回到【读取花样】 界面,单击“取消” ,取消花样另存并返回到【读取花样】 界面。 若输入的花样号已被占用,当前界面会显示该花样,单击“确定” 后,系统将提示[M-039]是否覆盖花样,单击“确定” ,花样另存成功并返回到【读取花样】界面,单击“取 消” ,取消花样另存并返回到【读取花样】界面。...
- Page 50 花样管理 模板机-触摸屏 E2 在【读取花样】界面,选中花样后,单击“多选” ,【读 取花样】界面中花样则可进行多选,对花样进行批量操作。 在【读取花样】界面,选中花样后,单击“新建” ,系 统将提示[M-065]是否编辑新花样?单击“确定” ,则进 入【花样编辑】界面,可编辑新花样,单击“取消” ,则 进入【花样编辑】界面,可编辑当前花样。...
- Page 51 模板机-触摸屏 E2 花样管理 在【读取花样】界面,选中花样后,单击“修改” ,可 进入【花样修改】界面,修改花样。...
- Page 52 设置 模板机-触摸屏 E2 5 设置 在 【花样选择】 界面或 【花样缝制】 界面, 按下 “设置” 键 , 进入【设置】界面。...
-
Page 53: 版本查询
模板机-触摸屏 E2 设置 5.1 版本查询 在【设置】界面,单击“版本查询”键 ,可以 查询系统软件版本。 :将当前版本信息保存至 U 盘根目录下。 5.2 传输与升级 在【设置】界面,单击“传输与升级”键 ,可 进入【通信界面】。 该界面下可选择的功能,分为四类: 花样传输 参数传输 软件升级 换机 点按相应的图标,进行功能操作。 单击“取消”键 ,返回【设置】界面。... -
Page 54: 伺服参数
设置 模板机-触摸屏 E2 5.3 伺服参数 在【设置】界面,单击“伺服参数”键 ,可进 入【伺服专用参数】界面。 伺服参数是直接关系机器缝纫性能的参数,正常出厂机器会存储 默认的伺服参数,仅在缝制要求出现变化时可以修改伺服参数, 修改前,需在 U212 缝纫模式参数中选择相应缝纫模式。 举例 SOF2 丝杠软模式: 在【伺服专用参数】界面,单击“U212”参数键,进入【U212 缝 纫模式】参数设置界面,选择缝纫模式:SOF2 丝杠软模式。 选中后,单击“确认”键 ,进入缝纫模式:SOF2 丝杠 软模式,单击“取消”键 ,则取消操作并返回【伺服专用 参数】界面。... - Page 55 模板机-触摸屏 E2 设置 进入缝纫 模式:SOF2 丝杠软模 式后,单击“还原所有 ”键 ,系统将会提示[M-067]是否还原所有设定,单击 “确认” 键 , 确认还原所有设定, 单击 “取消” 键 , 取消操作并返回【伺服专用参数】界面。 确认还原所有设定后,单击“发送”键 ,等待约 1s 后, 再单击“读取”键 ,确认伺服参数是否已发生变化。...
-
Page 56: 维护与保养设置
设置 模板机-触摸屏 E2 5.4 维护与保养设置 在【设置】界面,单击“维护与保养设置”键 , 可进入【维护与保养设置】界面,可设置 U12 参数,也可设置: 1)更换机针计数 2)更换机油计数 3)清扫时间计数 5.5 参数备份与还原 在【设置】界面,单击“参数备份与还原”键 , 系统将提示输入密码,密码输入成功后,将跳转至【参数备份与 还原】界面。 单击选中需设置的参数后,可通过界面下方按钮操作: :单击后,可删除参数 :单击后,可保存参数 :单击后,可恢复参数 :单击后,可清除全部参数... -
Page 57: 面板设置
模板机-触摸屏 E2 设置 :单击后,可更改已有参数名称 单击“切换参数”键 ,可切换【参数备份与还原】 和【伺服参数备份还原】界面 5.6 面板设置 在【设置】界面,单击“面板设置”键 ,可进 入【面板设置】界面,可设置 U13 参数,也可设置: 1)格式化 2)版本查询 3)网络设置... - Page 58 设置 模板机-触摸屏 E2 在【面板设置】界面,单击“格式化”键 ,可 进入【格式化操作】界面: 单击“USB”键 ,可格式化 U 盘; 单击“内存”键 ,可删除全部内存花样; 单击“P 和 C”键 ,可删除全部 P 花样和 C 花样。 在【面板设置】界面,单击“版本查询”键 , 可进入【版本查询】界面。 ,将当前版本信息保存至 U 盘根目录下。 单击“保存”键...
-
Page 59: U 参数更改方法
模板机-触摸屏 E2 设置 5.7 U 参数更改方法 举例选择型参数设定进行参考,如下: 按下“剪线设置”键 ,进入【剪线设置】 界面,通过“下一页”键 找到参数代码 A:U2-13,进行设 置参数,此时 C:【剪线电机正方向】状态为 B:【正向】。 按下“U2-13 参数”键 ,进入【剪线电机正方向】 参数设置界面,选择想要更改的模式键‘N’反向,按下“确认” 键 后,即可完成对相应参数的设定更改。... - Page 60 设置 模板机-触摸屏 E2 此时返回上一级界面后,【剪线电机正方向】的状态已更改 为【反向】,完成参数的设置。 举例输入型参数设定进行参考,如下: 按下“转速设置”键 ,进入到【转速设置】 参数设置界面,找到参数代码【U1-1】, 进行设置参数, 此时【最 高缝制速度】参数值为【2500】。...
- Page 61 模板机-触摸屏 E2 设置 按下“U1-1 参数”键 ,进入【最高缝制速度】参数 设置界面,通过小键盘 C 在数值 A 里输入希望的值,按下确认 键 后,即可完成对相应参数的设定更改。 注:B 为参数值的输入范围。 此时返回上一级界面后,【最高缝制速度】的参数值已更改 为【3000】,完成参数的设置。...
-
Page 62: 已修改参数
设置 模板机-触摸屏 E2 5.8 已修改参数 查询已修改参数 如果有参数修改,在【设置】界面右下角会显示“已修改参 数”键 。 在【设置】界面,按下“已修改参数键” ,可 进入【已修改参数查询】界面,查询已修改过的参数。 在【已修改参数查询】界面下,可以查询所有修改过的参数 列表。 还原已修改参数 按“还原所有”键 ,将修改参数全部恢复为出 厂值。 点 按 参 数 名 称 键 , 例 如 U8-7 “ X 轴 原 点 偏 移 ” , 再 按 “ 选 择 还 原 ” 键 将选中的参数恢复为出厂值,也支持复选操作。... -
Page 63: 参数定制
模板机-触摸屏 E2 设置 5.9 参数定制 举例“转速设置”参数定制: 在【设置】界面,单击“转速设置”键 , 进入【转速设置】界面,单击“定制”键 ,系统将提 示输入密码,密码输入成功后,将进入【定制转速设置参数】界 面,可进行参数定制。 通过单击参数后方方框, 表示未被定制为快捷参数, 表示被定制为快捷参数。 设置后单击“确认”键 确认定制,单击“取消”键 退出定制。 注:定制参数可以在主界面的快捷参数中打开。 5.10 用户参数表 U1 转速设置 代码 简述 初始值 范围 步长/单位 U1-1 最高缝制速度 3200 200-3200 U1-2 第一针启动速度(无抓线时) 200 200-1500 U1-3 第二针启动速度(无抓线时) 500 200-2700 U1-4 第三针启动速度(无抓线时)... - Page 64 设置 模板机-触摸屏 E2 U1-16 绕线速度设置 2500 200-3200 U2 剪线设置 代码 简述 初始值 范围 步长/单位 U2-1 是否允许剪线 允许 允许,禁止 U2-2 剪线速度 200-800 10/rpm MAG:电磁铁剪线 AIR:气动剪线 U2-3 剪线类型 CIR:圆刀电机剪线 CIR:圆刀电机剪线 EQU:平刀电机剪线 U2-4 剪线电机行程 0-250 U2-5 分线行程 0-250 U2-6 分线时间 0-200 1/ms U2-7 剪线时间 0-200 1/ms U2-8 分线角度...
- Page 65 模板机-触摸屏 E2 设置 OFF:关闭 U3-9 起缝前几针调整随动高度: 开关 关闭 ON:开启 U3-10 起缝前几针调整随动高度: 针数 1 1-15 起缝前几针调整随动高度: 新随 U3-11 0.1-7.0 动高度 U3-12 中压脚下降起始角度 0-359 U3-13 中压脚下降动作时间 0-63 U3-14 中压脚上升起始角度 0-359 U3-15 中压脚上升动作时间 0-63 0:关闭 U3-26 结束前几针降低基准高度: 开关 0:关闭 1:打开 U3-27 结束前几针降低基准高度: 针数 1 1-15 结束前几针降低基准高度:...
- Page 66 设置 模板机-触摸屏 E2 代码 简述 初始值 范围 步长/单位 U6-1 空送速度档位 U6-2 缝制结束回原点速度档位 U6-3 试缝速度档位 1-100 U6-4 X 轴起缝动框角度微调 -120-120 U6-5 Y 轴起缝动框角度微调 -120-120 U6-6 X 轴动框角度微调 -120-120 U6-7 Y 轴动框角度微调 -120-120 U6-8 X 轴动框时间微调 -100-100 U6-9 Y 轴动框时间微调 -100-100 U7 首尾加固与断线检测 代码...
- Page 67 模板机-触摸屏 E2 设置 NO:否 U8-5 缝制结束后是否回原点 是 YES:是 0:XY 都找坐标原点 1: X 通过传感器找原点, Y 通过传感器找原点 U8-6 缝制结束后回原点方式 XY 都找坐标原点 3: XY 都通过传感器找原 点 4:空送到传感器位置找 原点 U8-7 X 轴原点偏移 -3000-3000 U8-8 Y 轴原点偏移 -2.0 100.0-100.0 切换到缝纫状态时 XY 是否找传 0:否 U8-9 否 感器原点...
- Page 68 设置 模板机-触摸屏 E2 0-关闭: 压框抬起降下均 压框抬起降下均可 可识别 U10-3 压框降下后才允许识别模板 识别 1-开启: 压框降下后才能 识别 0:先回原点再抬起 U10-4 缝制结束后的压框动作 先回原点再抬起 1:先抬起再回原点 2:回原点后踩踏板抬起 OFF:禁止 U10-5 急停后是否允许压框抬起 禁止 ON:允许 U11 换梭与切刀 代码 简述 初始值 范围 步长/单位 OFF:关闭 U11-1 自动换梭使能 关闭 ON:打开 U11-2 梭盘电机零位补偿 -127-127 底线报警后手动换 0:底线报警后手动换梭...
- Page 69 模板机-触摸屏 E2 设置 U11-22 直线切刀同步延时 0-50 U12 维护与保养设置 代码 简述 初始值 范围 步长/单位 U12-1 缝制计数器计数单位 1-30 U12-2 注油间隔时间 0-65535 U12-3 注油工作时间 0-65535 1/ms OFF:允许修改 U12-4 禁止计数器被修改 允许修改 ON:禁止修改 计数器达到设定值时缝纫机的 OFF:停止缝纫 U12-5 停止缝纫 操作 ON:可继续缝纫 U12-6 油盒注油时间设置 0-9000 U12-7 保养油脂时间设置 0-9000 0:缝制中报警...
- Page 70 设置 模板机-触摸屏 E2 0xE000:917504 ICON:图标 U13-10 主界面图标文字模式切换 文字 WORD:文字 OFF:关闭 U13-11 网络设定 关闭 WLAN0:WIFI ETHO:有线 %:百分比 U13-12 尺寸变更单位 百分比 SIZ:实际尺寸 OFF:禁止 U13-13 放大缩小模式 间隔增减 PIT:间隔增减 STI:针数增减 ORI1.:以原点为基准点 ORI2.:以原点为基准点 U13-14 花样放大缩小方式 以原点为基准点 (忽略车缝前空送) CEN.: 以花样中心点为基 准点(忽略车缝前空送) OFF:否 U13-15 是否支持大针数花样 是 ON:是 OFF:关闭...
- Page 71 模板机-触摸屏 E2 设置 U14-7 移动界限+Y 方向 0-1000 1/mm U14-8 移动界限-Y 方向 0-1000 1/mm 出厂默认参数 U14-9 恢复出厂参数 整机出厂参数 01(有) NOR:普通启动 U14-10 启动方式设置 二次启动 TWO:二次启动 0:直线到起缝点 按花样空送路径到 U14-11 缝制开始时到起缝点路径设置 1:按花样空送路径到起 起缝点 缝点 NO:否 U14-12 开机是否直接进入可缝制状态 否 YES:是 U14-13 画笔 X 偏移 -500-500 1/mm U14-14 画笔...
- Page 72 绕线 模板机-触摸屏 E2 6 绕线 在【花样缝制】或【花样选择】界面,单击“绕线” , 可进入【绕线】界面。...
-
Page 73: 分期密码
模板机-触摸屏 E2 信息 7 信息 需在花样选择界面按下“信息”键 ,缝制状态下需退 出后才能进入。 可设置以下数值: 1)更换机针计数 2)更换机油计数 3)清扫时间计数 4)底线计数 5)累积缝纫件数 7.1 分期密码 (1)在 【信息】 界面下, 单击 “分期密码” , 首先会显示【输入用户 ID】界面,输入正确的厂家 ID 后即进入 密码管理模式,主要用于用户分期密码的设置和管理。 可以最多设置 10 个不同的密码发作日期。 系统可以显示厂家设置的密码信息。... - Page 74 信息 模板机-触摸屏 E2 (2)输入正确的厂家 ID 后,进入密码设置界面 设置密码前需要先设置板号和系统时钟,主要用于用户分期 密码的设置和管理。 (3)输入板号 按下“板号”键,进入【输入板号】界面,输入板号后,按 下确定键 完成输入。 ※ 板号为四位,范围 0~9999...
- Page 75 模板机-触摸屏 E2 信息 (4)输入系统时钟 按下“时钟”键,进入【系统时钟设置】界面,确定系统时 钟。 (5)输入超级密码 按下“超级密码”键,进入【超级密码设置】界面,输入超 级密码 ※ 最多可输入 9 位总密码 ※ 密码输入要求确认,两次密码必须一致...
- Page 76 信息 模板机-触摸屏 E2 (6)输入分期密码 按下【密码-1】键,进入第一期密码设置界面,要求输入第 一个有效日期,选择合适的日期后,按 确认。...
- Page 77 模板机-触摸屏 E2 信息 然后进入密码设置界面,输入密码。 ※ 日期不能小于系统日期 ※ 密码输入要求确认,两次密码必须一致...
- Page 78 信息 模板机-触摸屏 E2 1) 输入其他的分期密码 其他分期密码的设置和⑦相同,参考⑦的设置 ※ 下一个有效日期必须大于上一个有效日期 2) 保存密码 密码输入完成后,按确定键 保存。密码保存成功后, 会显示如右图所示提示信息。...
- Page 79 模板机-触摸屏 E2 信息 3) 主动清除密码 主动清除密码是指在分期密码发作前主动清除密码的设 置。 A、进入方法同密码设置 B、输入正确的厂家 ID 后,显示右边的界面 C、系统显示当前时钟和各个分期密码发作日期 D、按下 ,从前向后依次删除分期密码 输入正确的分期密码后清除当前期的密码,当输入是超级密 码时,则清除全部密码。 密码清除后会以红色文本形式显示,如果全部密码清除完 毕,则自动退出,返回到信息主界面。...
- Page 80 信息 模板机-触摸屏 E2 4) 密码发作 如果系统设置了密码,则使用至密码发作日期时,会遇到密 码发作。 此时若继续使用,必须输入有效密码。 A、有效密码包括当期提示的密码和超级密码。 B、若输入的是当期密码,则清除当期密码。清除当前密码 后,若后面没有密码,则机器不再会出现密码发作的问题。 C、若输入的是超级密码,则全部清除分期密码。...
-
Page 81: 穿线示意
模板机-触摸屏 E2 信息 .2 穿线示意 在【信息】界面下,单击“穿线示意” ,进入 【穿线示意】界面,穿线时,请参阅。... -
Page 82: 生产管理参数
信息 模板机-触摸屏 E2 .3 打卡 在【信息】界面下,单击“打卡” 可进入 智能打卡界面,如左图所示。 如果网络正常连接,员工可扫描图中二维码,进行打卡; 或者单击“切换”键 ,切换打卡方式,员工可录入自 己的工号,点击确定键可以将自己的信息发送给服务器。 如果智能工厂服务器保存有相关的员工信息,此时员工的相 关工作统计会记入服务器。 管理人员通过智能工厂客户端查询相关工作统计可以轻松 结算员工产量、工资等信息。 注意:带 WIFI 功能的面板才能正常使用该功能。 7.4 生产管理参数 详见 6.5 维护与保养设置 7.5 加减计数器... -
Page 83: 运转记录
模板机-触摸屏 E2 信息 在 【信息】 界面下, 按下 “加减计数器” 键 , 进入【计数器】设置界面。 缝制计数器:每缝制 1 件缝制物,计数器加/减 1。 计件计数器:每缝制 1 循环,计数器加/减 1。 计件计数器主要是针对 C 花样计数的, 如果使用其他缝纫类 型,计件计数器和缝制计数器作用相同。 1)计数器数值设置 :按下后可以设置计数器当前值。 : 按下后可以设置计数器设定值, 设定值为 0 时, 计数器不起作用。 2)计数器类型设置 :设置为加计数器类型,当当前值达到设定值时会 提示报警。 :设置为减计数器类型,当当前值为 0 时会提示报 警。 :关闭计数器功能。 注... -
Page 84: 报警记录
信息 模板机-触摸屏 E2 在【信息】界面下,按下“运转记录”键 , 进入【运转记录】界面。 累积运转时间:记录机器累积运转时间(小时单位) 累积缝纫件数:记录机器累积缝制件数 累积上电时间:机器累积上电时间(小时单位) 累积缝纫针数:机器累积针数(1000 针单位) 按下“清除”键 可以分别清除记录值。 7.7 报警记录 在【信息】界面下,按下“报警记录”键 , 进入【报警记录】界面。 界面中显示了系统发生的故障信息内容,序号越小表示该故 障信息发生的时间越新。 另外还记录了每次报警发生时的生产计数。 可以通过 键或 键进行翻页, 查看更多的报错 信息。 按下 键会清除掉全部故障信息记录。 7.8 错误上报... - Page 85 模板机-触摸屏 E2 信息 在【信息】界面下,按下“错误上报”键 , 进入【错误上报】界面。 可通过单击,选择机器状态: 1)设备故障 2)尺寸 3)接收物料 4)抛线 5)等待模板 6)跳针 7)等待物料 8)球线 9)换线调试 :上报机器状态 :错误解决后,可单击结案...
-
Page 86: 附录 1
附录 1 模板机-触摸屏 E2 8 附录 1 8.1 报警信息一览表 故障号 故障名称 复位方法 E001 踏板未在正确位置 请调整踏板位置 E002 机器进入急停状态 请检查急停开关状态 E003 确认机头放倒 自恢复错误 E004 主电压(300V)过低 请关闭电源,检查系统硬件 E005 主电压(300V)过高 自恢复错误 IPM 过压或过流 E007 请关闭电源,检查系统硬件 E008 辅助设备电压(24V)过高 请关闭电源,检查系统硬件 E009 辅助设备电压(24V)过低 请关闭电源,检查系统硬件 E010 气阀短路或风扇堵转 请关闭电源,检查系统硬件 E011 X 电机超速故障... - Page 87 模板机-触摸屏 E2 附录 1 故障号 故障名称 复位方法 E042 母线电压异常 请关闭电源 E043 Y 电机超速故障 请关闭电源,检查系统硬件 E044 Y 电机超差故障 请关闭电源,检查系统硬件 E045 底线计数不足 更换底线设定值已到达,请更换底线 E046 中压脚电机过流 请关闭电源,检查系统硬件 Y 电机过流 E047 请关闭电源,检查系统硬件 E048 气压不足 请检查气路是否正常 E049 换梭机械臂电机原点信号错误 请关闭电源,检查系统硬件 E050 梭盘电机原点信号错误 请关闭电源,检查系统硬件 E051 梭盘为空 检查梭盘检测器,装填梭盘 E052 步进驱动升级失败...
-
Page 88: 信息提示一览表
附录 1 模板机-触摸屏 E2 8.2 信息提示一览表 信息号 信息名称 子信息内容 M-001 花样数据不存在 请重新读取或打版输入 M-002 设置值太大 请输入范围内数值 M-003 设置值太小 请输入范围内数值 M-004 存储参数异常 请按下确定键恢复出厂设置 操作头与控制箱通讯异常 M-005 通讯错误 M-006 请退出缝制状态 请核对机型和软件版本 M-007 操作头与控制箱类型不符 M-008 超出最大针距 请重新输入 M-009 密码错误 M-010 硬件时钟故障 发现硬件时钟故障,请联系厂家维修 M-011 请解除锁定 清除掉 SRAM 中全部数据,请关电并将拨码开关位置还原 M-012 SRAM 初始化... - Page 89 模板机-触摸屏 E2 附录 1 M-039 是否覆盖花样 其否确定?是:enter 否:X P 花样打开失败 花样文件错误,将会被删除 M-040 C 花样打开失败 M-041 花样文件错误,将会被删除 不能执行覆盖操作 M-042 花样已存在 M-043 是否删除花样数据 按下确定键执行删除操作,按下取消键退出当前操作。 其否确定?是:enter 否:X M-044 是否删除选中的文件 请在 P 花样或 C 花样中解除引用 M-045 花样被引用,不能删除! M-046 请至少保留一个花样! 最后一个花样不能被删除 M-047 加载出厂花样 内存中没有花样,需要加载出厂花样 M-048 内存中没有花样...
- Page 90 附录 1 模板机-触摸屏 E2 M-081 转换花样格式错误 请确认花样文件 请确认花样文件 M-082 转换花样数据超长 M-083 升级成功 升级成功,请重新启动机器 U 盘中打开文件失败 M-084 打开文件失败 M-085 恢复参数成功 恢复参数成功,请重新启动机器 请选中要升级的条目,至少要选中一个条目 M-086 没有选中升级条目 不存在升级文件的条目返回后将会取消选中,如果要升级剩 M-087 选中的升级条目中有些不存在 下的条目,请再次确认 按下确定键执行格式化操作,按下取消键退出当前操作。格 M-088 是否格式化 U 盘 式化后会删除全部 U 盘文件! 按下确定键执行格式化操作,按下取消键退出当前操作。格 M-089 是否格式化内存 式化后会删除全部内存花样数据! M-090 内存空间不足...
- Page 91 模板机-触摸屏 E2 附录 1 是否删除全部 P 花样和 C 花样 M-119 按下确定键执行格式化操作,按下取消键退出当前操作。 M-120 超出设定值范围 M-121 外压脚在上 当前操作需要落下外压脚后执行! M-122 不能进行正确操作 请插入包含 mp3 文件的 USB 盘 M-123 USB 盘不存在 请将 video.avi 文件存放到盘的 update 目录,并进入到升级界 没有视频文件 video.avi M-124 面升级视频文件 更换底线设定值已到达,请更换底线。 M-125 更换底线 M-126 确定清除底线计数值? 是否确定?是:enter 否:X 请更换底线,按下确定键后重新计数...
- Page 92 附录 1 模板机-触摸屏 E2 M-154 面板未加密,主控加密 系统会锁机 确定键同步加密状态 M-155 面板加密,主控未加密 M-156 系统已经存在远程分期设置 确定键继续操作,取消键退出操作 无线模块 1 联接失败 系统转速降至最低,请联系厂家 M-157 M-158 系统已经设置为不联网模式 打开联网功能后可以进行检测 M-159 联接失败 M-160 不能执行换机操作 参数和花样至少需要选中一个 M-161 换机成功 参数或者花样已经成功覆盖本机,需要关机重启 花样使用后也会同时生成缩略图 M-162 是否立即更新花样缩略图? M-163 花样不存在,是否从服务器下载 是否确定? 是:Enter 否:X 请求花样不是标准 VDT 格式 M-164 M-165 服务器不存在请求花样...
-
Page 93: 附录 2
模板机-触摸屏 E2 附录 2 9 附录 2 9.1 电控箱连接示意图 图 1 电控箱连接示意图... -
Page 94: 操作箱示意图
附录 2 模板机-触摸屏 E2 9.2 操作箱示意图 图 2 操作箱示意图... -
Page 95: 系统框图
模板机-触摸屏 E2 附录 2 9.3 系统框图 MHSC4056-2E2/B-MBJ 三丝杠模板机... -
Page 97: General Introduction
General Introduction Template machine - Touch screen E2 1 General Introduction 1.1 General Automatic template machine series industrial sewing machine computer control system, spindle motor with the world's advanced level of ac servo control technology drive, with large torque, high efficiency, speed stability and low noise characteristics. -
Page 98: Functions & Specifications
Template machine - Touch screen E2 General Introduction 1.2 Functions & Specifications Type of Controller ASC400 Computerized Control System for Pattern Sewing Machine X(Left/Right) Y(Front/Back) Sewing Range 1300 Max Sewing Speed 3200rpm(when sewing pitch is below 3mm) Stitch Length 0.1~12.7mm(Min. Resolution : 0.05mm) Presser Feeding Motion Intermittent Feed (2-shaft drive by stepping motor) Stroke of Needle Bar... -
Page 99: The Main Interface
General Introduction Template machine - Touch screen E2 1.3 The main interface After starting up, the machine will directly enter the interface of pattern selection. Click to enter the interface of pattern sewing. Pattern selection interface Pattern sewing interface... -
Page 100: Operation Method
Template machine - Touch screen E2 General Introduction 1.4 Operation Method The touch screen operation panel adopts the advanced touch operation technology in the industry, integrates the pressing frame of the pedal, the solid buttons of the start and emergency stop switch functions, and the friendly interface and convenient control all bring revolutionary changes to the daily use of users. -
Page 101: Quick Introduction To Sewing
General Introduction Template machine - Touch screen E2 1.5 Quick introduction to sewing Boot will be directly into the [pattern selection] interface. Click the "pattern management" key in the interface of "pattern selection" to enter the interface of "pattern reading". In the "read pattern"... - Page 102 Template machine - Touch screen E2 General Introduction Click the pattern you want to sew in the "read pattern" interface and select the pattern. Click enter to confirm the pattern and return to the pattern selection screen automatically. In the "pattern selection" interface, click to enter the "pattern sewing"...
- Page 103 General Introduction Template machine - Touch screen E2 In the interface of pattern sewing, the pattern parameters can be set. After setting the pattern parameters, put the corresponding template in place, first press the "press box" button on the operation head, and then press the "start" button. After confirming the correct position of the sewing point, press the "start"...
-
Page 104: Pattern Selection Interface
Template machine - Touch screen E2 Pattern selection interface 2 Pattern selection interface After booting, it will directly enter the interface of pattern selection and display basic parameters of pattern. Function Description Design Can choose, set pattern parameters, etc management The RF The current pattern can be written to the RF card registration... - Page 105 Pattern selection interface Template machine - Touch screen E2 range Needle Displays the total number of current pattern drop points numerical Medium pressure foot Displays the height of the current pattern middle pressure foot value Production Displays the current/set value of the production counter count Bottom line Displays the bottom line count...
-
Page 106: Pattern Preview
Template machine - Touch screen E2 Pattern selection interface 2.1 Pattern preview In the interface of "pattern selection" or "pattern sewing", click the pattern preview area to enter the interface of "pattern preview" and display the following information: ① pattern name ②... -
Page 107: Test Mode
Pattern selection interface Template machine - Touch screen E2 2.2 Test Mode In the interface of "pattern selection", click "detect" to enter the interface of "detect" and turn the page through the up and down page turning key. 15)input signal detection 16)output signal detection 17)spindle motor calibration 18)speed detection... -
Page 108: Input Signal Detection
Template machine - Touch screen E2 Pattern selection interface 2.2.1 Input signal detection In the interface of "detection", click "input signal detection" to enter the interface of "input signal detection". You can observe the changes of input signals of various switches and sensors by pressing down the switch or blocking sensor. -
Page 109: Output Signal Detection
Pattern selection interface Template machine - Touch screen E2 (13) Enter 2 (14) Enter 3 (15) Enter 4 (16) Enter 5 (17) Enter 6 (18) Enter 7 (19) Enter 8 (20) barcode scanning and detection (21) self-starting signal 1 (22) self-starting signal 2 2.2.2 Output signal detection In the [detection] interface, click "output signal detection"... -
Page 110: Spindle Motor Correction
Template machine - Touch screen E2 Pattern selection interface (09) air valve output 2 (10) air valve output 3 (11) air valve output 4 (12) air valve output 5 (13) air valve output 6 (14) flip the foot (15) auxiliary air valve 2.2.3 Spindle motor correction Click "spindle motor correction"... -
Page 111: Speed Test
Pattern selection interface Template machine - Touch screen E2 Under the interface of spindle Angle installation and test, remove the spindle motor, rotate the hand wheel to swing the needle rod to the highest point, reinstall the spindle motor, confirm that the electrical value displayed is within 0-30 °... -
Page 112: Xy Motor Origin Detection
Template machine - Touch screen E2 Pattern selection interface Click exit to return to the previous interface. 2.2.5 XY motor origin detection In the "detection" interface, click "XY motor origin detection" to enter the "XY origin detection" interface and display the sensor status and coordinate information: ①... - Page 113 Pattern selection interface Template machine - Touch screen E2 Under the "XY origin detection" interface, the "detection" and "deviation" interfaces can be selected. The default interface of the system is the [detection] interface, and the "detection" icon in the interface is shown in blue , with the following contents: ⑨...
- Page 114 Template machine - Touch screen E2 Pattern selection interface In the "XY origin detection" interface, click "offset" enter the "offset" interface. The "offset" icon on the interface shows blue color , and the X-axis origin offset and Y-axis origin offset are displayed on the interface. The absolute value of X/Y and relative value of X/Y will be displayed along with the movement at the top.
-
Page 115: Origin Detection Of Middle Pressure Foot
Pattern selection interface Template machine - Touch screen E2 2.2.6 Origin detection of middle pressure foot In the [detection] interface, click "middle pressure foot origin detection" to enter the [middle pressure foot origin detection] interface. Under the interface of "origin detection of middle pressure foot", the interface of "detection"... - Page 116 Template machine - Touch screen E2 Pattern selection interface Under the interface of "middle pressure foot origin detection", click "position" to enter the interface of "position". After entering the interface, the icon is shown as blue The interface display is as follows: ①...
-
Page 117: Shear Line Motor Detection
Pattern selection interface Template machine - Touch screen E2 2.2.7 Shear line motor detection In the interface of "detection", click "detection of wire cutting motor" to enter the interface of "detection of wire cutting motor". Under the interface of "detection of wire cutting motor", the interface of "detection"... - Page 118 Template machine - Touch screen E2 Pattern selection interface Under the interface of "detection of wire cutting motor", click "position" to enter the interface of "position". At this time, the icon of "position" is displayed in blue , and the display content is as follows: ①...
- Page 119 Pattern selection interface Template machine - Touch screen E2 ② Stroke of cutting line motor: display the current stroke value of cutting line motor. Click the value on the right side to enter the parameter setting interface of [stroke of U19 cutting line motor] : Enter the value through the number key below the interface, click "confirm"...
-
Page 120: Continuous Operation
Template machine - Touch screen E2 Pattern selection interface 2.2.8 Continuous operation In the [detection] interface, click "continuous operation" to enter the [continuous operation test] interface, which displays the following contents: ① Action interval: display the current action interval value, unit: ×100ms, range of interval value (0~99), use the number key below the interface to enter the value, click "confirm"... -
Page 121: Catch Wire Motor Detection
Pattern selection interface Template machine - Touch screen E2 2.2.9 Catch wire motor detection Click "cable motor detection" on the interface of [detection] and enter the interface of [cable motor/origin sensor detection]. The interface displays as follows: ① Sensor state: Position sensor: according to the position state of the wire grasping mechanism, the ON/OFF state of the wire grasping position sensor is displayed. -
Page 122: Rfid Setting
Template machine - Touch screen E2 Pattern selection interface 2.2.10 RFID setting In the [detection] interface, click "RFID setting" to enter the [RFID setting] interface, and the interface displays the current pattern number and range (1~999). You can use the number key at the bottom of the interface to enter the pattern number, click "send"... - Page 123 Pattern selection interface Template machine - Touch screen E2 ⑦ shuttle changing motor ⑧ grab arm cylinder ⑨ clamping cylinder ⑩ Attend grasp arm cylinder ⑪ in core signal ⑫ shuttle changing step test ⑬ shuttle changing movement ⑭ rotary cutter machine ⑮...
-
Page 124: Multi-Function Io Detection
Template machine - Touch screen E2 Pattern selection interface ⑳ straight knife Simulation of linear cutter action ○ State of linear cutter origin sensor ○ 2.2.12 Multi-function IO detection In the "detection" interface, click "multifunction IO detection" to enter the "multifunction IO detection" interface. In the interface of "multi-function IO detection", you can select the interface of "Output"... - Page 125 Pattern selection interface Template machine - Touch screen E2 In the [Input] interface, the status of the output signal can be detected。 Click output test to test the input signal.
-
Page 126: Touch Screen Correction
Template machine - Touch screen E2 Pattern selection interface 2.2.13 Touch screen correction In the [detection] interface, click "touch screen correction" , and the system will prompt for entering the password. If the password is entered correctly, the system will continue to prompt [m-031] to enter the touch screen correction mode? Prompt [[m-031] confirm entering touch screen correction mode?] Interface. -
Page 127: Lcd Test
Pattern selection interface Template machine - Touch screen E2 2.2.14 LCD test In the [detection] interface, click "LCD detection" enter the [LCD detection] interface. After entering the screen, it will display blue. Click the screen and the color will be blue → black →... -
Page 128: Pattern Sewing Interface
Template machine - Touch screen E2 Pattern sewing interface 3 Pattern sewing interface In the "pattern selection" interface, click to enter the sewing interface to set pattern sewing parameters. Function description Design Enter the interface of pattern management management The RF The current pattern can be written to the RF card registration Winding. - Page 129 Pattern sewing interface Template machine - Touch screen E2 X-direction range Displays the current pattern X direction range Y-direction range Displays the current pattern Y direction range Pin number Displays the current pattern drop pin value Middle pressure Displays the height of the current pattern middle pressure foot foot height Production count Displays the current/set value of the production counter...
-
Page 130: Medium Pressure Foot Function
Template machine - Touch screen E2 Pattern sewing interface 3.1 Medium pressure foot function In the interface of "pattern sewing", click "medium pressure foot" to enter the interface of "medium pressure foot setting", and the following parameters can be set: Medium pressure foot: basic value can be set up medium pressure feet start points, click on the "benchmark"... - Page 131 Pattern sewing interface Template machine - Touch screen E2 number of retractable stitches after broken wire。 ⑧ Lock: lock the current edit state. After the lock, the parameter modification is invalid. When modifying the parameter, the state must be switched to unlock. :Middle pressure foot parameters can be modified.
-
Page 132: Modify The Seam
Template machine - Touch screen E2 Pattern sewing interface Click "setting of single pin medium pressure foot" to enter the interface of "setting of single pin medium pressure foot" and change the height of medium pressure foot. Click "save" and click "close" after saving successfully to return to the interface of "setting of medium pressure foot". - Page 133 Pattern sewing interface Template machine - Touch screen E2 Press the "save" button to complete the operation and move the seam starting point to the specified position. The seam test button can be used to confirm whether the position of the seam starting point after last modification is accurate: The previous paragraph, click, jump to the current position of the previous paragraph;...
-
Page 134: Design Management
Design management Template machine - Touch screen E2 4 Design management In the "pattern sewing" or "pattern selection" interface, click "pattern management" to enter the "read pattern" interface. Function description The saved pattern displays the pattern, number, and name. Click the pattern or Figure list pattern name to select the pattern Pattern... -
Page 135: The Function Keys
Design management Template machine - Touch screen E2 :Save the pattern as :Multiple options are available :U disk into the pattern :Can edit new pattern, enter pattern edit interface :Modifiable pattern 4.1 The function keys In "reading pattern" interface, click the "search" , enter the interface, the pattern search 】... - Page 136 Design management Template machine - Touch screen E2 In the [read pattern] interface, select the pattern and click "delete" , the system will prompt [m-044] whether to delete the selected file, click "ok" , delete the pattern and return to the [read pattern] interface, click "cancel" ,do not delete the pattern and return to the [read pattern] interface.
- Page 137 Design management Template machine - Touch screen E2 In the interface of "read pattern", select the pattern and click "multi-select" .In the interface of "read pattern", the pattern can be multi-selected for batch operation. In the "read pattern" interface, select the pattern and click "new"...
- Page 138 Design management Template machine - Touch screen E2 In the [read pattern] interface, select the pattern and click "modify" to enter the [pattern modification] interface and modify the pattern.
-
Page 139: Setting
Setting Template machine - Touch screen E2 5 Setting In the interface of "pattern selection" or "pattern sewing", press the "setup" button to enter the interface of "setup". -
Page 140: Version Of The Query
Setting Template machine - Touch screen E2 5.1 Version of the query [setting] interface, click "version query" key to query the system software version. :Save the current version information to the U disk root directory 5.2 Transmission and upgrade In the [setting] interface, click the "transmission and upgrade" to enter the [communication interface]. -
Page 141: Servo Parameters
Setting Template machine - Touch screen E2 5.3 Servo parameters [setting] interface, click "servo parameters" to enter the [servo special parameters] interface. Servo parameters are directly related to the sewing performance of the machine. Normally, the factory machine will store the default servo parameters. - Page 142 Setting Template machine - Touch screen E2 Enter sewing mode: after SOF2 screw soft mode, click "restore all" , the system will prompt [m-067] whether to restore all Settings, click "confirm" , confirm to restore all Settings, click "cancel" ,cancel the operation and return to the interface of [servo special parameters].
-
Page 143: Maintenance And Maintenance Settings
Setting Template machine - Touch screen E2 5.4 Maintenance and maintenance Settings In the [setting] interface, click "maintenance and maintenance setting" button to enter the [maintenance and maintenance setting] interface, U12 parameters can be set, or: 4)Change the needle count 5)Oil change count 6)Cleaning time count 5.5 Parameter backup and restore... - Page 144 Setting Template machine - Touch screen E2 :After clicking, you can modify the name of the existing parameter Click "switch parameters" to switch the interface of "parameter backup and restore" and "servo parameters backup and restore"...
-
Page 145: Panel Settings
Setting Template machine - Touch screen E2 5.6 Panel Settings [Settings] interface, click "panel Settings" to enter the [panel Settings] interface to set U13 parameters or: 4)formatting 5)Version of the query 6)Network Settings Click the "format" in the "panel Settings" interface to enter the "format operation"... -
Page 146: U Parameter Change Method
Setting Template machine - Touch screen E2 In the interface of "panel setting", click "version query" to enter the interface of "version query". Click the "save" to save the current version information to the U disk root directory 5.7 U Parameter change method For example, select type... - Page 147 Setting Template machine - Touch screen E2 Press the button of "u2-13 parameters" to enter the parameter setting interface of [positive direction of shear line motor], select the mode key 'N' reverse that you want to change, and press the button of "confirm" to complete the setting and change of the corresponding parameters.
- Page 148 Setting Template machine - Touch screen E2 Examples of input type parameter Settings for reference are as follows: Press the "speed setting" to enter the parameter setting interface of [speed setting], find the parameter code [u1-1], and set the parameters. At this time, the parameter value of [maximum sewing speed] is [2500].
-
Page 149: Modified Parameter
Setting Template machine - Touch screen E2 At this time, after returning to the previous interface, the parameter value of [maximum sewing speed] has been changed to [2500] to complete the parameter setting. 5.8 Modified parameter Query for modified parameters If there is any parameter modification, the "modified parameter"... -
Page 150: Parameters Of The Custom
Setting Template machine - Touch screen E2 restore" key to restore the selected parameter to the factory value, which also supports check operation Press the parameter number key, such as u14-5 key to enter the parameter setting interface and reset the parameter value. - Page 151 Setting Template machine - Touch screen E2 U1-1 Maximum sewing speed 3200 200-3200 100 U1-2 Start Speed of 1 Stitch(No string grab) 200-1500 100 U1-3 Start Speed of 2 Stitch(No string grab) 200-2700 100 U1-4 Start Speed of 3 Stitch(No string grab) 1000 200-2700 100 U1-5...
- Page 152 Setting Template machine - Touch screen E2 cutting MAN: hand cut U2-10 Electromagnet trimming Angle -20-20 U2-11 Fine adjustment of loose line Angle -50-50 when cutting line U2-12 Set the thread tension when cutting 0-200 the thread U2-13 Positive direction of wire cutting P: positive positive motor...
- Page 153 Setting Template machine - Touch screen E2 U3-11 Adjust the follow - up height before 0.1-7.0 seam - up: new follow - up height U3-12 The middle pressure foot drops at 0-359 the starting Angle U3-13 Middle pressure foot drop time 0-63 U3-14 The starting Angle of the middle 0-359...
- Page 154 Setting Template machine - Touch screen E2 U5-5 Delay in laser cutting section 1-30000 U5-6 Laser cutting first delay 1-30000 U5-7 Laser cutting total power hold time 0-100 U5-8 Whether the head of the laser section is raised ON : allow OFF :...
- Page 155 Setting Template machine - Touch screen E2 setting reinforcement three 1: reinforce one stitch pins at 0.1mm before the stitch type reinforcement pins type reinforcement three pins 4: at the end of N type reinforcement four pins 5: at the end of V - type reinforcement two pins...
- Page 156 Setting Template machine - Touch screen E2 U8-3 Dead point Angle on machine needle 0-80 U8-4 Machine needle position Angle 30-80 U8-5 Return to the original point after sewing YES : YES : YES : YES U8-6 Return to origin after sewing 3: XY all look for 0: x, y find the origin...
- Page 157 Setting Template machine - Touch screen E2 U9-4 The wire clamp is turned on to hold the 0-255 current U9-5 Whether to open the small sewing clamp 0 : Closed 0 : Closed 1 : Open 1 : Open U9-6 Type of line extractor blowing blowing...
- Page 158 Setting Template machine - Touch screen E2 down both and down open: the frame identified only after lowered U10-4 Frame pressing after sewing 0: return to return the origin and then lift origin and then lift 1: lift up first then return to the origin...
- Page 159 Setting Template machine - Touch screen E2 line alarm automatic shuttle change after baseline alarm U11-4 Change the shuttle stitch manual 0: manual start start automatic start U11-5 Shuttle stop position 0: side of the 0: side of shuttle disk shuttle disk nose...
- Page 160 Setting Template machine - Touch screen E2 U11-17 Operating current gear of cutter motor 1-10 U11-18 The linear cutter enables OFF : Closed OFF : Closed : enabled U11-19 Linear cutter origin compensation -127-127 1 U11-20 The straight cutter drops height 0-360 U11-21 Linear cutter swing amplitude 10-100...
- Page 161 Setting Template machine - Touch screen E2 sound+Alarm PAN : operation sound disc sound ALL : operation disc sound+Alarm sound U13-2 Backlight automatically turns off OFF: OFF: automatically automatically ON: auto off U13-3 Backlight automatically turns off wait time U13-4 LCD backlight brightness adjustment 20-100 U13-5 The volume size 30-63...
- Page 162 Setting Template machine - Touch screen E2 0xE000:917504 U13-10 Main interface icon text mode switch WORD : ICON : ICON WORD WORD : WORD U13-11 Network setting OFF : Closed OFF : Closed WLAN0 : WIFI ETHO : The cable U13-12 Dimension change unit % : percentage percentage...
- Page 163 Setting Template machine - Touch screen E2 ON : Open U14 Other Settings Description Range Step Default Value size/unit U14-1 Sewing patterns HAR2: lead SOF: soft belt mode screw hard DEF: belt anti-drilling mode fleece HAR: belt hard mode SOF2: lead screw soft mode HAR2: lead...
- Page 164 Setting Template machine - Touch screen E2 U14-11 Start sewing to start seam path set empty 0: straight line to start send seam point path to the 1: empty send the seam path to the seam starting starting point point according according to pattern...
-
Page 165: Winding
Winding Template machine - Touch screen E2 6 Winding In the interface of "pattern sewing" or "pattern selection", click "winding" to enter the interface of "winding". -
Page 166: Information
Template machine - Touch screen E2 Information 7 Information Press the "information" button in the pattern selection interface, and exit from the sewing state before entering. The following values can be set: 1) change the needle count 2) change the oil count 3) cleaning time count 4) bottom line count 5) cumulative number of sewing pieces... - Page 167 Information Template machine - Touch screen E2 (2)Enter the correct manufacturer ID, enter the password setting interface Before setting the password, user has to set board number and system clock, where user can set and manage the periodical passwords. (3)Enter the board number Press to enter the board number input interface.
- Page 168 Template machine - Touch screen E2 Information (4)Input System Clock Press the "clock" button to enter the interface of system clock setting to determine the system clock. (5)Input the super password Press the“Super Password” to enter the interface for setting super password.
- Page 169 Information Template machine - Touch screen E2 (6)Input periodical password Press “Password-1” to enter the first password date, where user can input the first date for activation. After selecting the proper date, user can press for confirmation.
- Page 170 Template machine - Touch screen E2 Information Then enter the password setting interface to input the password. ※ The date should not be earlier than the system date ※ Password input request confirmation, passwords must be consistent...
- Page 171 Information Template machine - Touch screen E2 5) Input other periodical passwords The setting of other periodical password is the same with Password-1. Please make reference to that. ※ The date should not be earlier than the system date 6) Save password After inputting the password, please press to save it.
- Page 172 Template machine - Touch screen E2 Information 7) Clear Password before Activation It is to clear the passwords before its activation. A、The method for entering the password interface is same to that of the password setting. B 、 Input the right manufacturer ID to activate the right interface.
- Page 173 Information Template machine - Touch screen E2 8) Password attack If the system sets a password, a password attack will occur when the password attack date is used. At this point, if continue to use, must enter a valid password. A.
-
Page 174: Threading Motioned
Template machine - Touch screen E2 Information .2 Threading motioned Under [information] interface, click "threading" to enter the [threading] interface. When threading, please refer to. -
Page 175: Clock In
Information Template machine - Touch screen E2 .3 Clock in [information] interface, click "punch" to enter the intelligent punch interface, as shown in the left picture. If the network is connected normally, employees can scan the qr code in the picture and punch in. Or click the "switch"... -
Page 176: Run Note
Template machine - Touch screen E2 Information Under [information] interface, press " add or subtract counter" button to enter the [counter] setting interface. Sewing counter: add/subtract 1 counter per sewing item. Piece counter: add/subtract 1 counter per sewing cycle. Piece counter is mainly for C pattern counting, if other sewing types are used, piece counter and sewing counter function the same. -
Page 177: The Alarm Record
Information Template machine - Touch screen E2 Under the [information] interface, press the "operation record" key to enter the [operation record] interface. Accumulated Running Time : Record total sewing time of machine(Unit: hour) Accumulated Sewing Pieces:Record the total number of the sewn patterns Accumulated Power-on Time :... - Page 178 Template machine - Touch screen E2 Information In the [information] interface, press the "error report" button to enter the [error report] interface. Click to select machine state: 1) equipment failure 2) size 3) receiving materials 4) casting 5) wait for the template 6) jump needle 7) waiting for materials 8) ball line...
-
Page 179: List Of Alarm Information
Appendix 1 Template machine - Touch screen E2 8 Appendix 1 8.1 List of alarm information Number Fault Name Solution The pedal is not in the correct position Please adjust the pedal position E001 Please check the status of emergency stop Machine is in emergency stop E002 switch... - Page 180 Template machine - Touch screen E2 Appendix 1 operation head and sewing machine IPM over current frequently 2 Please turn off the power E025 Motor is blocked 1 Please turn off the power E026 The origin of presser foot is abnormal Please turn off the power E027 Catch the origin of the line to detect Please turn off the power...
- Page 181 Appendix 1 Template machine - Touch screen E2 Thread-trimming motor over-current E054 Fast walk curve miscalculated E055 SPI communication end code exception E056 SPI communication verification failed E057 Fast walk receive data abnormal E058 X motor is blocked E059 Y motor is blocked E060 X motor instruction coverage E061...
-
Page 182: List Of Information Tips
Template machine - Touch screen E2 Appendix 1 8.2 List of information tips Name Content of Sub-information M-001 Pattern data not exist Please reload or input again M-002 Set value is too large Please input value within valid range M-003 Set value is too small Please input value within valid range M-004... - Page 183 Appendix 1 Template machine - Touch screen E2 M-028 Empty input invalid Please enter password M-029 Password not match Please re-enter your current password M-030 New password is different. Please re-enter your new password and confirm it again M-031 Enter touching panel correction mode? Yes: Enter No: X M-032...
- Page 184 Template machine - Touch screen E2 Appendix 1 M-057 Determine the cleaning time count Yes: Enter No: X Determine clear production management M-058 count Yes: Enter No: X M-059 Clear accumulated running time? Yes: Enter No: X M-060 Clear accumulated sewing pieces? Yes: Enter No: X M-061...
- Page 185 Appendix 1 Template machine - Touch screen E2 Press ok to perform the formatting operation, and press cancel to exit the current operation. All memory pattern M-089 Format memory or not data will be deleted after formatting! M-090 Insufficient memory space M-091 This feature cannot be selected M-092...
- Page 186 Template machine - Touch screen E2 Appendix 1 M-123 USB disk not exist Please insert USB disk containing mps files Please save the video.avi file into the update category of M-124 No video file video.avi the U disk and then update the video file The set value of changing the bottom line has reached, M-125 Replace the bottom line...
- Page 187 Appendix 1 Template machine - Touch screen E2 M-145 QR code display failed M-146 Grouping number invalid M-147 Current operation denied M-148 No parameter received M-149 Parameter not changed Operation panel main control There periodical password, please contact M-150 dismatch manufacturer to unlock.
-
Page 188: Connection Diagram Of Electric Cabinet
Template machine - Touch screen E2 Appendix 2 9 Appendix 2 9.1 Connection diagram of electric cabinet Figure 1 Connection diagram of electric cabinet... -
Page 189: Schematic Diagram Of Operation Box
Appendix 2 Template machine - Touch screen E2 9.2 Schematic diagram of operation box Figure 2 Schematic diagram of operation box... -
Page 190: Control System Diagram
Template machine - Touch screen E2 Appendix 2 9.3 Control System Diagram MHSC4056-2E2/B-MBJ...
Need help?
Do you have a question about the ZJ-M3-S500-SF-V2 and is the answer not in the manual?
Questions and answers