Table of Contents
Advertisement
Advertisement
Table of Contents

Related Manuals for ZOJE ZJW662


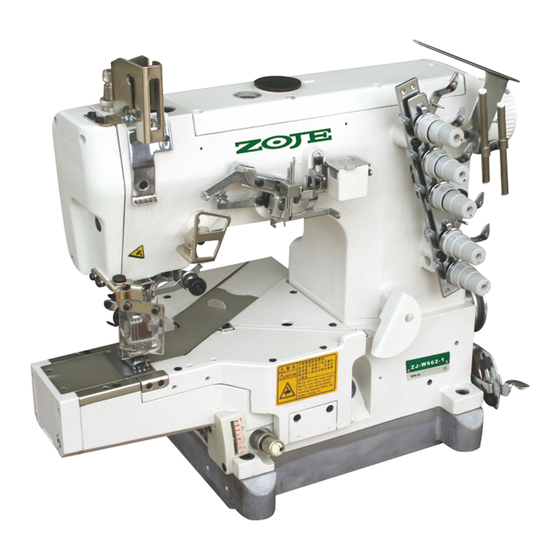
Summary of Contents for ZOJE ZJW662
- Page 1 INSTRUCTION MANUAL...
-
Page 2: Table Of Contents
Contents INSTRUCTION MANUAL Safety instruction 1 1 . . Machine specification 1.2. Installing the sewing machine 1.3. 1.4. Lubrication 1 5 . . Threading Adjusting the thread tension 1.6. Adjusting the presser foot pressure 1 7 . . 1.8. Adjusting the differential feed ratio Adjusting the stitch rength 1 9 . -
Page 3: Safety Instruction
1.1. ( Safety Instructions ) , 。 Before running the machine, make sure all relevant safety specifications are adequate to specifications and technical standards in your country. 。 The machine should not be run without its safety devices. 。 he machine should only be oper ated by properly trained personnel. - Page 4 1.1. ( Safety Instructions ) 。 The machine should only be run with the proper electric cable and connectors, and also the adequate grounding. 。 The machine should only be used to sew materials as indicated in its instruction manual, and indications of use should be followed. 。...
-
Page 5: Machine Specification
1.2. Machine Speci cation fi ( 3 / 5 ) [spm] [mm] [mm] [mm] 0.5 ~ 1.3 6,000 Table 1 – Machine Speci cation (3 Needles / 5 Threads) with Clutch Motor fi Needle Stitch Presser Differential Speed Attachment Foot Lift Gauge Length Application... -
Page 6: Installing The Sewing Machine
1.3. (Installing the sewing machine) Table Cut-Out Drawing, Clutch Motor Figure 1A... - Page 7 1.3. (Installing the sewing machine) Table Cut-Out Drawing, Motor only For ESDD Figure 1B...
- Page 8 1.3. (Installing the sewing machine) 。 Assemble the machine support components in Figure 2. D 。 For ESDD motor Install the control box ‘A’ by screw 'B', and the pedal con- troller ‘C’ by screw 'D'. Figure 2 。 20mm 。...
-
Page 9: Lubrication
1.4. ( Before operating ) Lubrication 。 , 。 , After filing the oil pan ,the oil surface 。 。 should lie between (H) and (L) lines. Add Apply 2 or 3 drops of oil by hand oil when the oil surface reaches or goes when the machine is used for the below (L). -
Page 10: Threading
1.5. ( Before operating ) Threading : 。 、 。 Refer to the sewing type you need for correct threading. Any incorrect threading CAUTION: may cause thread brake, uneven stitches or skip stitches. 。 。 Press down the lever, as indicated in Figure 14. Open the eye guard and the covers. - Page 11 。 , 。 Trim off the knots neatly before passing through the eye of the needle to thread. Trim off the knots neatly after passing through the eye of the loopers. Figure13 。 Be sure to thread the machine, correctly by referring to the threading diagram, as shown on figure14.
- Page 12 。 。 For standard threading, follow the solid lines of Figure 1 . 5 For more stretchable thread, follow the dashed lines indicated by ‘A’ . Figure15 。 , 。 If the top cover thread is too loose thread the guide by referring to line ‘B’.
-
Page 13: Adjusting The Thread Tension
(Adjusting the thread tension) : The following adjustments are re- lated to Figures Knob 1: Control the needles thread Knob 2: Controls the top cover thread Knob 3: Controls the looper thread to tighten To loosen Figure 19 (Adjusting the presser foot pressure) “... -
Page 14: Adjusting The Differential Feed Ratio
(Adjusting the differential feed ratio) 。 。 The differential feed ratio is the ra tio of movements between the main feed dog and diffe- rential feed dog. When the movement of main feed dog is bigger than the differential feed dog, the fabric is stretched at sewing. therwise the fabric will shrink. -
Page 15: Checking And Replacing The Oil Filter
1 10 (Checking and replacing the oil filter) , 。 。 This machine has an oil filter (figure10) which should be cleaned every month or replaced by a new one whenever is necessary. Figure 23 1 11 (Replacing the needle) Wrong Wrong 。... -
Page 16: Replacing The Oil
1.12. (Replacing the oil) 。 , 。 。 To preserve the machine, change the oil after the new machine has been operating over four weeks. Af- ter that, the oil should be changed every six months. To replace the oil, simply remove the screw indicated on Figure 9. -
Page 17: Troubleshooting
1.14 Troubleshooting 1 0 . -16-... - Page 18 1.14 Troubleshooting -17-...
- Page 19 1.14 Troubleshooting Problems Possible Causes Possible Solutions 1. Install needle correctly 1. Needle is installed wrong 2. Wrong needle type or size 2. Use proper needle for fabric and thread 3. Change the needle 3. Needle is bended Needle 4. Readjust the needle guard 4.
- Page 20 1.14 Troubleshooting Problems Possible Causes Possible Solutions 1. Thread tension is too strong 1. Readjust the thread tension unit 2. Readjust presser foot pressure 2.I nadequate pressure of presser foot 3.I nadequate height of feed dog 3. Readjust the feed dogs 4.
-
Page 21: Parts List
PARTS LIST... -
Page 22: Machine Bed Frame
2 1 . ( ) A Machine bed frame(A) -20-... - Page 23 2 1 . ( ) A Machine bed frame(A) PEF NO PART NO DESCRIPTION Q'TY 10042368 BED PIN 10042369 OIL LEVEL GAUGE 10042370 PLUG 10042371 PLUG 10008964 PLUG 10042684 Φ17 PLUG 10042685 Φ19 ▲ PLUG 10042390 PLUG 10042686 SCREW 10042687 PLUG 10003330 RING...
- Page 24 2 1 . ( ) B Machine bed frame(B) 16 17 -22-...
- Page 25 2 1 . ( ) B Machine bed frame(B) PEF NO PART NO DESCRIPTION Q'TY 10042389 ARM COVER (TOP) 10042390 PLUG 10042391 OIL SIGHT WINDOW 10042392 RING 10042387 SCREW 20014807 ARM COVER (LEFT) 10013170 PLUG 10042691 O RING 10042387 SCREW 10042406 SCREW 10042692...
- Page 26 2 1 . ( ) C Machine bed frame(C) -24-...
- Page 27 2 1 . ( ) C Machine bed frame(C) PEF NO PART NO DESCRIPTION Q'TY 10042702 TOP COVER 10042703 GASKET 10042440 SCREW 10042704 FLAT SPRING 10042440 SCREW 20014801 BED COVER 10042412 SCREW 10042705 NEEDLE PLATE BRACKET 10042404 CUSHION 10042412 SCREW 10042706 FLAT SPRING 10042377...
-
Page 28: Crank Shaft Drive Mechanism
2 2 . Crank shaft drive mechanism -26-... - Page 29 2 2 . Crank shaft drive mechanism PEF NO PART NO DESCRIPTION Q'TY 10043276 CRANKSHAFT ASSEMBLY 10042429 SCREW 10043278 CONNECTION ASSEMBLY 10042387 SCREW 10042717 CRANK 10042434 SCREW 20014788 BUSHING 10042438 SCREW 20014789 BUSHING 10042438 SCREW 10043275 GEAR(LOWER) 10042438 SCREW 20014766 BUSHING 10042437 SCREW...
-
Page 30: Arm Shaft Drive Mechanism
2 3 . Arm shaft mechanism -28-... - Page 31 2 3 . Arm shaft mechanism PEF NO PART NO DESCRIPTION Q'TY 20014767 MOTION ASSEMBLY 10042468 SCREW 10042469 SCREW 10042470 SCREW 10042471 CRANKSHAFT 20014768 CONNECTION ASSEMBLY 10042387 SCREW 10042472 CRANK 10042434 SCREW 10042473 BALANCE WEIGHT 10042418 SCREW 10042436 JOINT 10042437 SCREW 10042438 SCREW...
-
Page 32: Needle Bar Guard Mechanism
2 4 . Needle bar mechanism -30-... - Page 33 2 4 . Needle bar mechanism PEF NO PART NO DESCRIPTION Q'TY 10042733 NEEDLE BAR 10042488 NEEDLE BAR CLAMP 10042489 SCREW 10042734 LINK 10042491 10042492 NEEDLE BEARING 10042493 WASHER 10042494 BLOCK 10042735 GUIDE 10042387 SCREW 10042412 SCREW 10042736 LATCH 10042498 SPONGE 10042506 OIL STRING PETAINER...
-
Page 34: Looper Drive Mechanism
2 5 . Looper drive mechanism -32-... - Page 35 2 5 . Looper drive mechanism PEF NO PART NO DESCRIPTION Q'TY 10042747 ECCENTRIC 10042438 SCREW 10042748 NEEDLE BEARING 10042749 TYIU 10042750 PIN ASSEMBLY 10042540 10042234 WASHER 10042751 LOOPER SHAFT GUIGE 10042449 GUIDE 10042451 WASHER 10042738 SCREW 10042752 SHAFT 10042753 WASHER 10042754 SCREW...
- Page 36 2 6 . (A) Feed mechanism(A) -34-...
- Page 37 2 6 . (A) Feed mechanism(A) PEF NO PART NO DESCRIPTION Q'TY 10042773 ECCENTRIC 10042511 SCREW 10042774 NEEDLE BEARING 10042775 NEEDLE BEARING 10042776 RING 10042777 RING 10042778 10042779 CRANK 10042160 SCREW 10042780 WASHER 10042781 SCREW 10042782 10042783 LINK 10042784 LINK 10042429 SCREW 10042785...
- Page 38 2 6 . (B) Feed mechanism(B) -36-...
- Page 39 2 6 . (B) Feed mechanism(B) PEF NO PART NO DESCRIPTION Q'TY 10042809 CRANKSHAFT 10008090 OIL STRING 10042837 DIFF.FEED DOG 10042838 10042814 FELT 10042815 FELT 10042787 FELT 10042816 COLLAR 10042438 SCREW 10042817 OIL SEAL 10043614 CRANKSHAFT 10042818 OIL STRING 10042819 OIL SEAL 10042820 COLLAR...
- Page 40 2 6 . (C) Feed mechanism(C) -38-...
- Page 41 2 6 . (C) Feed mechanism(C) PEF NO PART NO DESCRIPTION Q'TY 10042605 BLOCK 10042606 GUIDE 10042607 FEED BAR PIN 10042608 SHAFT 10009653 RING 10042610 SCREW 10042611 LEVER 10042612 SHAFT 10042165 O RING 10009654 RING 10042614 SPRING 10042162 COLLAR 10042163 SCREW 10043609 LEVER SHAFT ASSEMBLY...
-
Page 42: Presser Foot Mechanism
2 7 . Presser feed mechanism -40-... - Page 43 2 7 . Presser feed mechanism PEF NO PART NO DESCRIPTION Q'TY 10042180 ADJUSTING BAR 10042181 10042182 SPRING 10042189 SPRING 10042634 PRESSER BAR 10011457 OIL GUARD 10042183 PRESSER BAR CLAMP 10042184 SCREW 10042487 DUIDE ASSY 10042188 SCREW 10042194 SCREW 10042195 WASHER 10042215 LEVER...
-
Page 44: Spreader Mechanism
2 8 . Spreader mechanism -42-... - Page 45 2 8 . Spreader mechanism PEF NO PART NO DESCRIPTION Q'TY 10042230 ECCENTRIC 10042418 SCREW 10042431 CONNECTION 10042432 CRANK 10042434 SCREW 10042433 SCREW 10042434 WASHER 10042540 10042227 SHAFT 10042228 WASHER 10042229 RING 10042225 CRANK 10042438 SCREW 10042226 BLOCK 10042637 CRANKSHAFT 10042787 FELT 10042517...
-
Page 46: Thread Tension Mechanism
2 9 . Thread tension mechanism -44-... - Page 47 2 9 . Thread tension mechanism PEF NO PART NO DESCRIPTION Q'TY 10042243 THREAD GUIDE 10042394 SCREW 10042244 PIPE 10042245 BRACKET 10003083 WASHER 10042241 CRANK 10042160 SCREW 10042242 WASHER 10042238 SHAFT 10042239 SPACER 10042240 SCREW 10042247 TENSION CONTROL MECHANISM 10042248 BRACKET 10042249 THREAD RELEASEA...
- Page 48 2 10 Needle spreader thread mechanism & 11 10 -46-...
- Page 49 2 10 Needle spreader thread mechanism & PEF NO PART NO DESCRIPTION Q'TY 10042263 COLLAR 10042264 SCREW 10042265 SHAFT 10042266 WASHER 10042267 WASHER 10042268 SCREW 10042532 OIL SEAL 10042519 RING 10042269 LEVER 10042478 SCREW 10042522 WASHER 10042270 THREAD TAKE-UP 10042394 SCREW 10042413 WASHER...
- Page 50 2 11 Looper thead mechanism -48-...
- Page 51 2 11 Looper thead mechanism PEF NO PART NO DESCRIPTION Q'TY 10043611 LOOPER THREAD TAKE-UP 10042429 SCREW 10042649 BRACKET(LOOPER THREAD TAKE-UP) 10042650 ( ) THREAD GUIDE 10042312 WASHER 10042524 SCREW 10042651 ( ) THREAD GUIDE 10042429 SCREW 10042652 SHAFT 10042653 COLLAR 10042500 SCREW...
-
Page 52: Lubrication Mechanism
2 12 (A) Lubrication mechanism(A) -50-... - Page 53 2 12 (A) Lubrication mechanism(A) PEF NO PART NO DESCRIPTION Q'TY 10042330 PIPE 10042331 JOINT SCREW 10007796 TUBE 10012103 JOINT 10011471 CLAMP 10042329 JOINT SCREW 10042316 OIL PIPE 10042317 FELT 10043139 SCREW 10051751 FELT 10042497 LATCH 10042377 SCREW 10011264 SCREW 10051752 TUBE 10007796...
- Page 54 2 12 (B) Lubrication mechanism(B) -52-...
- Page 55 2 12 (B) Lubrication mechanism(B) PEF NO PART NO DESCRIPTION Q'TY 10042669 OIL RESERVOIR 10042337 WASHER 10042336 SCREW 10042338 SCREW 10042670 O RING 10043623 OIL PUMP ASSY 10042146 SHAFT 10042147 TOTOR ..TOTOR 10042148 TOTOR 10042149 COVER 10042151 SCREW 10042150 SCREW 10042152 WORM WHEEL...
-
Page 56: Hr Device
2 13 HR device -54-... - Page 57 2 13 HR device PEF NO PART NO DESCRIPTION Q'TY 20014761 SILICONE OIL RESERVOIR(UPPER)ASSY 10042350 SILICONE OIL RESERVOIR(UPPER) 10042351 10044981 SPRING PIN 10010690 SCREW 10042349 FELT 20015168 SILICONE OIL RESERVOIR(LOWER)ASSY 10042440 SCREW 10042673 NEEDLE COOLER 10042394 SCREW 10042674 FELT 10042318 10007800 TUBE 10042676...
-
Page 58: Thread Stand
2 14 Thread stand -56-... - Page 59 2 14 Thread stand PEF NO PART NO DESCRIPTION Q'TY 10046021 10045996 THREAD BAR(UPPER) 10045997 THREAD BAR(LOWER) 10045998 JOINT 10045999 SCREW 10046000 10046001 BRACKET 10046002 BRACKET 10046003 HOLDER 10046004 SCREW 10046005 SPOOL PIN 10046006 SPRING WASHER 10046007 SPOOL TRAY 10046008 SPOOL MAT 10046009 SPOOL PETAINING...
-
Page 60: Machine Accessorise
2 15 Machine accessories For Clutch Motor For ESDD Motor -58-... - Page 61 2 15 Machine accessories PEF NO PART NO DESCRIPTION Q'TY 10042353 SCREWW 10042354 BOLT 10042355 WASHER 10042356 SPACER 10042357 SPACER 10042358 SUPPORTING BOARD 10042359 SCREW 10042360 RUBBER CUSHION 10042860 ESDD CONTROL BOX ASSEMBLY 10042950 PEDAL CONTROLLER ASSEMBLY 10009688 ALLEN KEY 6mm 10009689 ALLEN KEY 5mm 10009687...
-
Page 62: Esdd Motor Structure
2 16 ESDD Motor structure -60-... - Page 63 2 16 ESDD Motor structure PEF NO PART NO DESCRIPTION Q'TY 10042730 SHAFT 10042437 SCREW 10042438 SCREW 20014766 BUSHING ASEMBLY 10042439 SET PLATE 10042440 SCREW 10042861 MOTOR ASSEMBLY 10044437 SCREW 10042387 SCREW ..MOTOR COVER 10044562 SCREW 10044561 WASHER 10004949 M5×8 SCREW 10049601...
- Page 64 þ Regulatory standards and parts list Adjusting needle gauge Needle Needle Gauge Differential Needle Plate Main Feed Dog Model [mm] Holder Feed Dog 10042499 10042501 10043126 10043127 10042836 10042837 10042499 10042501 356 BD 10043127 10043126 Adjusting needle gauge Front Needle Rear Needle Looper Presser Foot...
Need help?
Do you have a question about the ZJW662 and is the answer not in the manual?
Questions and answers