Advertisement
Quick Links
General Introduction
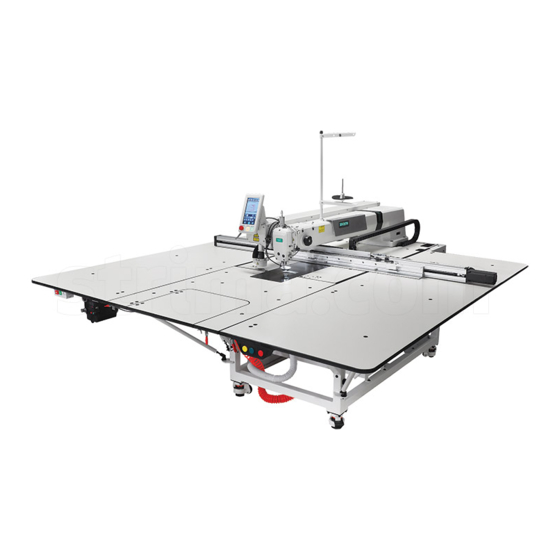
Template machine - Touch screen E2
1 General Introduction
1.1 General
Automatic template machine series industrial sewing machine computer control system, spindle motor
with the world's advanced level of ac servo control technology drive, with large torque, high efficiency, speed
stability and low noise characteristics. The diversified design of operation panel can meet the matching
requirements of different customers; The system adopts German structure design, easy to install and
maintain, the system control software can be upgraded through remote communication, convenient for users
to improve the product performance.
1
Advertisement

Subscribe to Our Youtube Channel
Related Manuals for ZOJE ZJ-M6-GS900-SF-LK2-V2


Summary of Contents for ZOJE ZJ-M6-GS900-SF-LK2-V2
- Page 1 General Introduction Template machine - Touch screen E2 1 General Introduction 1.1 General Automatic template machine series industrial sewing machine computer control system, spindle motor with the world's advanced level of ac servo control technology drive, with large torque, high efficiency, speed stability and low noise characteristics.
- Page 2 Template machine - Touch screen E2 General Introduction 1.2 Functions & Specifications Type of Controller ASC400 Computerized Control System for Pattern Sewing Machine X(Left/Right) Y Front/Back Sewing Range 1300 Max Sewing Speed 3200rpm when sewing pitch is below 3mm Stitch Length 0.1 12.7mm Min.
- Page 3 General Introduction Template machine - Touch screen E2 1.3 The main interface After starting up, the machine will directly enter the interface of pattern selection. Click to enter the interface of pattern sewing. Pattern selection interface Pattern sewing interface...
- Page 4 Template machine - Touch screen E2 General Introduction 1.4 Operation Method The touch screen operation panel adopts the advanced touch operation technology in the industry, integrates the pressing frame of the pedal, the solid buttons of the start and emergency stop switch functions, and the friendly interface and convenient control all bring revolutionary changes to the daily use of users.
- Page 5 General Introduction Template machine - Touch screen E2 1.5 Quick introduction to sewing Boot will be directly into the [pattern selection] interface. Click the "pattern management" key in the interface of "pattern selection" to enter the interface of "pattern reading". In the "read pattern"...
- Page 6 Template machine - Touch screen E2 General Introduction Click the pattern you want to sew in the "read pattern" interface and select the pattern. Click enter to confirm the pattern and return to the pattern selection screen automatically. In the "pattern selection" interface, click to enter the "pattern sewing"...
- Page 7 General Introduction Template machine - Touch screen E2 In the interface of pattern sewing, the pattern parameters can be set. After setting the pattern parameters, put the corresponding template in place, first press the "press box" button on the operation head, and then press the "start" button. After confirming the correct position of the sewing point, press the "start"...
- Page 8 Template machine - Touch screen E2 Pattern selection interface 2 Pattern selection interface After booting, it will directly enter the interface of pattern selection and display basic parameters of pattern. Function Description Design Can choose, set pattern parameters, etc management The RF The current pattern can be written to the RF card registration...
- Page 9 Pattern selection interface Template machine - Touch screen E2 range Needle Displays the total number of current pattern drop points numerical Medium pressure foot Displays the height of the current pattern middle pressure foot value Production Displays the current/set value of the production counter count Bottom line Displays the bottom line count...
- Page 10 Template machine - Touch screen E2 Pattern selection interface 2.1 Pattern preview In the interface of "pattern selection" or "pattern sewing", click the pattern preview area to enter the interface of "pattern preview" and display the following information: ① pattern name ②...
- Page 11 Pattern selection interface Template machine - Touch screen E2 2.2 Test Mode In the interface of "pattern selection", click "detect" to enter the interface of "detect" and turn the page through the up and down page turning key. 15 input signal detection 16 output signal detection 17 spindle motor calibration 18 speed detection...
- Page 12 Template machine - Touch screen E2 Pattern selection interface 2.2.1 Input signal detection In the interface of "detection", click "input signal detection" to enter the interface of "input signal detection". You can observe the changes of input signals of various switches and sensors by pressing down the switch or blocking sensor.
- Page 13 Pattern selection interface Template machine - Touch screen E2 (13) Enter 2 (14) Enter 3 (15) Enter 4 (16) Enter 5 (17) Enter 6 (18) Enter 7 (19) Enter 8 (20) barcode scanning and detection (21) self-starting signal 1 (22) self-starting signal 2 2.2.2 Output signal detection In the [detection] interface, click "output signal detection"...
- Page 14 Template machine - Touch screen E2 Pattern selection interface (09) air valve output 2 (10) air valve output 3 (11) air valve output 4 (12) air valve output 5 (13) air valve output 6 (14) flip the foot (15) auxiliary air valve 2.2.3 Spindle motor correction Click "spindle motor correction"...
- Page 15 Pattern selection interface Template machine - Touch screen E2 Under the interface of spindle Angle installation and test, remove the spindle motor, rotate the hand wheel to swing the needle rod to the highest point, reinstall the spindle motor, confirm that the electrical value displayed is within 0-30 °...
- Page 16 Template machine - Touch screen E2 Pattern selection interface Click exit to return to the previous interface. 2.2.5 XY motor origin detection In the "detection" interface, click "XY motor origin detection" to enter the "XY origin detection" interface and display the sensor status and coordinate information: ①...
- Page 17 Pattern selection interface Template machine - Touch screen E2 Under the "XY origin detection" interface, the "detection" and "deviation" interfaces can be selected. The default interface of the system is the [detection] interface, and the "detection" icon in the interface is shown in blue , with the following contents: ⑨...
- Page 18 Template machine - Touch screen E2 Pattern selection interface In the "XY origin detection" interface, click "offset" enter the "offset" interface. The "offset" icon on the interface shows blue color , and the X-axis origin offset and Y-axis origin offset are displayed on the interface. The absolute value of X/Y and relative value of X/Y will be displayed along with the movement at the top.
- Page 19 Pattern selection interface Template machine - Touch screen E2 2.2.6 Origin detection of middle pressure foot In the [detection] interface, click "middle pressure foot origin detection" to enter the [middle pressure foot origin detection] interface. Under the interface of "origin detection of middle pressure foot", the interface of "detection"...
- Page 20 Template machine - Touch screen E2 Pattern selection interface Under the interface of "middle pressure foot origin detection", click "position" to enter the interface of "position". After entering the interface, the icon is shown as blue The interface display is as follows: ①...
- Page 21 Pattern selection interface Template machine - Touch screen E2 2.2.7 Shear line motor detection In the interface of "detection", click "detection of wire cutting motor" to enter the interface of "detection of wire cutting motor". Under the interface of "detection of wire cutting motor", the interface of "detection"...
- Page 22 Template machine - Touch screen E2 Pattern selection interface Under the interface of "detection of wire cutting motor", click "position" to enter the interface of "position". At this time, the icon of "position" is displayed in blue , and the display content is as follows: ①...
- Page 23 Pattern selection interface Template machine - Touch screen E2 ② Stroke of cutting line motor: display the current stroke value of cutting line motor. Click the value on the right side to enter the parameter setting interface of [stroke of U19 cutting line motor] : Enter the value through the number key below the interface, click "confirm"...
- Page 24 Template machine - Touch screen E2 Pattern selection interface 2.2.8 Continuous operation In the [detection] interface, click "continuous operation" to enter the [continuous operation test] interface, which displays the following contents: ① Action interval: display the current action interval value, unit: ×100ms, range of interval value (0~99), use the number key below the interface to enter the value, click "confirm"...
- Page 25 Pattern selection interface Template machine - Touch screen E2 2.2.9 Catch wire motor detection Click "cable motor detection" on the interface of [detection] and enter the interface of [cable motor/origin sensor detection]. The interface displays as follows: ① Sensor state Position sensor: according to the position state of the wire grasping mechanism, the ON/OFF state of the wire grasping position sensor is displayed.
- Page 26 Template machine - Touch screen E2 Pattern selection interface 2.2.10 RFID setting In the [detection] interface, click "RFID setting" to enter the [RFID setting] interface, and the interface displays the current pattern number and range (1~999). You can use the number key at the bottom of the interface to enter the pattern number, click "send"...
- Page 27 Pattern selection interface Template machine - Touch screen E2 ⑦ shuttle changing motor ⑧ grab arm cylinder ⑨ clamping cylinder ⑩ Attend grasp arm cylinder ⑪ in core signal ⑫ shuttle changing step test ⑬ shuttle changing movement ⑭ rotary cutter machine ⑮...
- Page 28 Template machine - Touch screen E2 Pattern selection interface ⑳ straight knife Simulation of linear cutter action State of linear cutter origin sensor 2.2.12 Multi-function IO detection In the "detection" interface, click "multifunction IO detection" to enter the "multifunction IO detection" interface. In the interface of "multi-function IO detection", you can select the interface of "Output"...
- Page 29 Pattern selection interface Template machine - Touch screen E2 In the [Input] interface, the status of the output signal can be detected Click output test to test the input signal.
- Page 30 Template machine - Touch screen E2 Pattern selection interface 2.2.13 Touch screen correction In the [detection] interface, click "touch screen correction" , and the system will prompt for entering the password. If the password is entered correctly, the system will continue to prompt [m-031] to enter the touch screen correction mode? Prompt [[m-031] confirm entering touch screen correction mode?] Interface.
- Page 31 Pattern selection interface Template machine - Touch screen E2 2.2.14 LCD test In the [detection] interface, click "LCD detection" enter the [LCD detection] interface. After entering the screen, it will display blue. Click the screen and the color will be blue → black →...
- Page 32 Template machine - Touch screen E2 Pattern sewing interface 3 Pattern sewing interface In the "pattern selection" interface, click to enter the sewing interface to set pattern sewing parameters. Function description Design Enter the interface of pattern management management The RF The current pattern can be written to the RF card registration Winding.
- Page 33 Pattern sewing interface Template machine - Touch screen E2 X-direction range Displays the current pattern X direction range Y-direction range Displays the current pattern Y direction range Pin number Displays the current pattern drop pin value Middle pressure Displays the height of the current pattern middle pressure foot foot height Production count Displays the current/set value of the production counter...
- Page 34 Template machine - Touch screen E2 Pattern sewing interface 3.1 Medium pressure foot function In the interface of "pattern sewing", click "medium pressure foot" to enter the interface of "medium pressure foot setting", and the following parameters can be set: Medium pressure foot: basic value can be set up medium pressure feet start points, click on the "benchmark"...
- Page 35 Pattern sewing interface Template machine - Touch screen E2 number of retractable stitches after broken wire ⑧ Lock: lock the current edit state. After the lock, the parameter modification is invalid. When modifying the parameter, the state must be switched to unlock. Middle pressure foot parameters can be modified.
- Page 36 Template machine - Touch screen E2 Pattern sewing interface Click "setting of single pin medium pressure foot" to enter the interface of "setting of single pin medium pressure foot" and change the height of medium pressure foot. Click "save" and click "close" after saving successfully to return to the interface of "setting of medium pressure foot".
- Page 37 Pattern sewing interface Template machine - Touch screen E2 Press the "save" button to complete the operation and move the seam starting point to the specified position. The seam test button can be used to confirm whether the position of the seam starting point after last modification is accurate: The previous paragraph, click, jump to the current position of the previous paragraph;...
- Page 38 Design management Template machine - Touch screen E2 4 Design management In the "pattern sewing" or "pattern selection" interface, click "pattern management" to enter the "read pattern" interface. Function description The saved pattern displays the pattern, number, and name. Click the pattern or Figure list pattern name to select the pattern Pattern...
- Page 39 Design management Template machine - Touch screen E2 Save the pattern as Multiple options are available U disk into the pattern Can edit new pattern, enter pattern edit interface Modifiable pattern 4.1 The function keys In "reading pattern" interface, click the "search" , enter the interface, the pattern search can through the keyboard...
- Page 40 Design management Template machine - Touch screen E2 In the [read pattern] interface, select the pattern and click "delete" , the system will prompt [m-044] whether to delete the selected file, click "ok" , delete the pattern and return to the [read pattern] interface, click "cancel" ,do not delete the pattern and return to the [read pattern] interface.
- Page 41 Design management Template machine - Touch screen E2 In the interface of "read pattern", select the pattern and click "multi-select" .In the interface of "read pattern", the pattern can be multi-selected for batch operation. In the "read pattern" interface, select the pattern and click "new"...
- Page 42 Design management Template machine - Touch screen E2 In the [read pattern] interface, select the pattern and click "modify" to enter the [pattern modification] interface and modify the pattern.
- Page 43 Setting Template machine - Touch screen E2 5 Setting In the interface of "pattern selection" or "pattern sewing", press the "setup" button to enter the interface of "setup".
- Page 44 Setting Template machine - Touch screen E2 5.1 Version of the query [setting] interface, click "version query" key to query the system software version. Save the current version information to the U disk root directory 5.2 Transmission and upgrade In the [setting] interface, click the "transmission and upgrade" to enter the [communication interface].
- Page 45 Setting Template machine - Touch screen E2 5.3 Servo parameters [setting] interface, click "servo parameters" to enter the [servo special parameters] interface. Servo parameters are directly related to the sewing performance of the machine. Normally, the factory machine will store the default servo parameters.
- Page 46 Setting Template machine - Touch screen E2 Enter sewing mode: after SOF2 screw soft mode, click "restore all" , the system will prompt [m-067] whether to restore all Settings, click "confirm" , confirm to restore all Settings, click "cancel" ,cancel the operation and return to the interface of [servo special parameters].
- Page 47 Setting Template machine - Touch screen E2 5.4 Maintenance and maintenance Settings In the [setting] interface, click "maintenance and maintenance setting" button to enter the [maintenance and maintenance setting] interface, U12 parameters can be set, or: 4)Change the needle count 5)Oil change count 6)Cleaning time count 5.5 Parameter backup and restore...
- Page 48 Setting Template machine - Touch screen E2 After clicking, you can modify the name of the existing parameter Click "switch parameters" to switch the interface of "parameter backup and restore" and "servo parameters backup and restore"...
- Page 49 Setting Template machine - Touch screen E2 5.6 Panel Settings [Settings] interface, click "panel Settings" to enter the [panel Settings] interface to set U13 parameters or: 4 formatting 5 Version of the query 6 Network Settings Click the "format" in the "panel Settings" interface to enter the "format operation"...
- Page 50 Setting Template machine - Touch screen E2 In the interface of "panel setting", click "version query" to enter the interface of "version query". Click the "save" to save the current version information to the U disk root directory 5.7 U Parameter change method For example, select type...
- Page 51 Setting Template machine - Touch screen E2 Press the button of "u2-13 parameters" to enter the parameter setting interface of [positive direction of shear line motor], select the mode key 'N' reverse that you want to change, and press the button of "confirm" to complete the setting and change of the corresponding parameters.
- Page 52 Setting Template machine - Touch screen E2 Examples of input type parameter Settings for reference are as follows: Press the "speed setting" to enter the parameter setting interface of [speed setting], find the parameter code [u1-1], and set the parameters. At this time, the parameter value of [maximum sewing speed] is [2500].
- Page 53 Setting Template machine - Touch screen E2 At this time, after returning to the previous interface, the parameter value of [maximum sewing speed] has been changed to [2500] to complete the parameter setting. 5.8 Modified parameter Query for modified parameters If there is any parameter modification, the "modified parameter"...
- Page 54 Setting Template machine - Touch screen E2 restore" key to restore the selected parameter to the factory value, which also supports check operation Press the parameter number key, such as u14-5 key to enter the parameter setting interface and reset the parameter value.
- Page 55 Setting Template machine - Touch screen E2 U1-1 Maximum sewing speed 3200 200-3200 100 U1-2 Start Speed of 1 Stitch(No string grab) 200-1500 100 U1-3 Start Speed of 2 Stitch(No string grab) 200-2700 100 U1-4 Start Speed of 3 Stitch(No string grab) 1000 200-2700 100 U1-5...
- Page 56 Setting Template machine - Touch screen E2 cutting MAN: hand cut U2-10 Electromagnet trimming Angle -20-20 U2-11 Fine adjustment of loose line Angle -50-50 when cutting line U2-12 Set the thread tension when cutting 0-200 the thread U2-13 Positive direction of wire cutting P: positive positive motor...
- Page 57 Setting Template machine - Touch screen E2 U3-11 Adjust the follow - up height before 0.1-7.0 seam - up: new follow - up height U3-12 The middle pressure foot drops at 0-359 the starting Angle U3-13 Middle pressure foot drop time 0-63 U3-14 The starting Angle of the middle 0-359...
- Page 58 Setting Template machine - Touch screen E2 U5-5 Delay in laser cutting section 1-30000 U5-6 Laser cutting first delay 1-30000 U5-7 Laser cutting total power hold time 0-100 U5-8 Whether the head of the laser section is raised ON allow OFF forbid or not ON allow...
- Page 59 Setting Template machine - Touch screen E2 setting reinforcement three 1: reinforce one stitch pins at 0.1mm before the stitch type reinforcement pins type reinforcement three pins 4: at the end of N type reinforcement four pins 5: at the end of V - type reinforcement two pins...
- Page 60 Setting Template machine - Touch screen E2 U8-3 Dead point Angle on machine needle 0-80 U8-4 Machine needle position Angle 30-80 U8-5 Return to the original point after sewing YES YES YES YES U8-6 Return to origin after sewing 3: XY all look for 0: x, y find the origin origin of the...
- Page 61 Setting Template machine - Touch screen E2 U9-4 The wire clamp is turned on to hold the 0-255 current U9-5 Whether to open the small sewing clamp Closed Closed 1 Open 1 Open U9-6 Type of line extractor blowing blowing line line electromagnet...
- Page 62 Setting Template machine - Touch screen E2 down both and down open: the frame identified only after lowered U10-4 Frame pressing after sewing 0: return to return the origin and then lift origin and then lift 1: lift up first then return to the origin...
- Page 63 Setting Template machine - Touch screen E2 line alarm automatic shuttle change after baseline alarm U11-4 Change the shuttle stitch manual 0: manual start start automatic start U11-5 Shuttle stop position 0: side of the 0: side of shuttle disk shuttle disk nose...
- Page 64 Setting Template machine - Touch screen E2 U11-17 Operating current gear of cutter motor 1-10 U11-18 The linear cutter enables OFF Closed OFF Closed enabled U11-19 Linear cutter origin compensation -127-127 1 U11-20 The straight cutter drops height 0-360 U11-21 Linear cutter swing amplitude 10-100 U11-22 Synchronous delay of linear cutter 0-50...
- Page 65 Setting Template machine - Touch screen E2 sound+Alarm PAN operation sound disc sound operation disc sound+Alarm sound U13-2 Backlight automatically turns off OFF: OFF: automatically automatically ON: auto off U13-3 Backlight automatically turns off wait time U13-4 LCD backlight brightness adjustment 20-100 U13-5 The volume size 30-63...
- Page 66 Setting Template machine - Touch screen E2 0xE000:917504 U13-10 Main interface icon text mode switch WORD ICON ICON WORD WORD WORD U13-11 Network setting OFF Closed OFF Closed WLAN0 WIFI ETHO cable U13-12 Dimension change unit % : percentage percentage SIZ: actual size U13-13 Zoom in and out mode PIT:...
- Page 67 Setting Template machine - Touch screen E2 ON Open U14 Other Settings Description Range Step Default Value size/unit U14-1 Sewing patterns HAR2: lead SOF: soft belt mode screw hard DEF: belt anti-drilling mode fleece HAR: belt hard mode SOF2: lead screw soft mode HAR2: lead...
- Page 68 Setting Template machine - Touch screen E2 U14-11 Start sewing to start seam path set empty 0: straight line to start send seam point path to the 1: empty send the seam path to the seam starting starting point point according according to pattern...
- Page 69 Winding Template machine - Touch screen E2 6 Winding In the interface of "pattern sewing" or "pattern selection", click "winding" to enter the interface of "winding".
- Page 70 Template machine - Touch screen E2 Information 7 Information Press the "information" button in the pattern selection interface, and exit from the sewing state before entering. The following values can be set: 1) change the needle count 2) change the oil count 3) cleaning time count 4) bottom line count 5) cumulative number of sewing pieces...
- Page 71 Information Template machine - Touch screen E2 Enter the correct manufacturer ID, enter the password setting interface Before setting the password, user has to set board number and system clock, where user can set and manage the periodical passwords. 3 Enter the board number Press to enter the board number input interface.
- Page 72 Template machine - Touch screen E2 Information 4 Input System Clock Press the "clock" button to enter the interface of system clock setting to determine the system clock. 5 Input the super password Press the“Super Password” to enter the interface for setting super password.
- Page 73 Information Template machine - Touch screen E2 6 Input periodical password Press “Password-1” to enter the first password date, where user can input the first date for activation. After selecting the proper date, user can press for confirmation.
- Page 74 Template machine - Touch screen E2 Information Then enter the password setting interface to input the password. The date should not be earlier than the system date Password input request confirmation, passwords must be consistent...
- Page 75 Information Template machine - Touch screen E2 5) Input other periodical passwords The setting of other periodical password is the same with Password-1. Please make reference to that. The date should not be earlier than the system date 6) Save password After inputting the password, please press to save it.
- Page 76 Template machine - Touch screen E2 Information 7) Clear Password before Activation It is to clear the passwords before its activation. The method for entering the password interface is same to that of the password setting. Input the right manufacturer ID to activate the right interface.
- Page 77 Information Template machine - Touch screen E2 8) Password attack If the system sets a password, a password attack will occur when the password attack date is used. At this point, if continue to use, must enter a valid password. A.
- Page 78 Template machine - Touch screen E2 Information .2 Threading motioned Under [information] interface, click "threading" to enter the [threading] interface. When threading, please refer to.
- Page 79 Information Template machine - Touch screen E2 .3 Clock in [information] interface, click "punch" to enter the intelligent punch interface, as shown in the left picture. If the network is connected normally, employees can scan the qr code in the picture and punch in. Or click the "switch"...
- Page 80 Template machine - Touch screen E2 Information Under [information] interface, press " add or subtract counter" button to enter the [counter] setting interface. Sewing counter: add/subtract 1 counter per sewing item. Piece counter: add/subtract 1 counter per sewing cycle. Piece counter is mainly for C pattern counting, if other sewing types are used, piece counter and sewing counter function the same.
- Page 81 Information Template machine - Touch screen E2 Under the [information] interface, press the "operation record" key to enter the [operation record] interface. Accumulated Running Time Record total sewing time of machine Unit: hour Accumulated Sewing Pieces Record the total number of the sewn patterns Accumulated Power-on Time Record the total time of...
- Page 82 Template machine - Touch screen E2 Information In the [information] interface, press the "error report" button to enter the [error report] interface. Click to select machine state: 1) equipment failure 2) size 3) receiving materials 4) casting 5) wait for the template 6) jump needle 7) waiting for materials 8) ball line...
- Page 83 Appendix 1 Template machine - Touch screen E2 8 Appendix 1 8.1 List of alarm information Number Fault Name Solution The pedal is not in the correct position Please adjust the pedal position E001 Please check the status of emergency stop Machine is in emergency stop E002 switch...
- Page 84 Template machine - Touch screen E2 Appendix 1 operation head and sewing machine IPM over current frequently 2 Please turn off the power E025 Motor is blocked 1 Please turn off the power E026 The origin of presser foot is abnormal Please turn off the power E027 Catch the origin of the line to detect Please turn off the power...
- Page 85 Appendix 1 Template machine - Touch screen E2 Thread-trimming motor over-current E054 Fast walk curve miscalculated E055 SPI communication end code exception E056 SPI communication verification failed E057 Fast walk receive data abnormal E058 X motor is blocked E059 Y motor is blocked E060 X motor instruction coverage E061...
- Page 86 Template machine - Touch screen E2 Appendix 1 8.2 List of information tips Name Content of Sub-information M-001 Pattern data not exist Please reload or input again M-002 Set value is too large Please input value within valid range M-003 Set value is too small Please input value within valid range M-004...
- Page 87 Appendix 1 Template machine - Touch screen E2 M-028 Empty input invalid Please enter password M-029 Password not match Please re-enter your current password M-030 New password is different. Please re-enter your new password and confirm it again M-031 Enter touching panel correction mode? Yes: Enter No: X M-032...
- Page 88 Template machine - Touch screen E2 Appendix 1 M-057 Determine the cleaning time count Yes: Enter No: X Determine clear production management M-058 count Yes: Enter No: X M-059 Clear accumulated running time? Yes: Enter No: X M-060 Clear accumulated sewing pieces? Yes: Enter No: X M-061...
- Page 89 Appendix 1 Template machine - Touch screen E2 Press ok to perform the formatting operation, and press cancel to exit the current operation. All memory pattern M-089 Format memory or not data will be deleted after formatting! M-090 Insufficient memory space M-091 This feature cannot be selected M-092...
- Page 90 Template machine - Touch screen E2 Appendix 1 M-123 USB disk not exist Please insert USB disk containing mps files Please save the video.avi file into the update category of M-124 No video file video.avi the U disk and then update the video file The set value of changing the bottom line has reached, M-125 Replace the bottom line...
- Page 91 Appendix 1 Template machine - Touch screen E2 M-145 QR code display failed M-146 Grouping number invalid M-147 Current operation denied M-148 No parameter received M-149 Parameter not changed Operation panel main control There periodical password, please contact M-150 dismatch manufacturer to unlock.
- Page 92 Template machine - Touch screen E2 Appendix 2 9 Appendix 2 9.1 Connection diagram of electric cabinet Figure 1 Connection diagram of electric cabinet...
- Page 93 Appendix 2 Template machine - Touch screen E2 9.2 Schematic diagram of operation box Figure 2 Schematic diagram of operation box...
- Page 94 Template machine - Touch screen E2 Appendix 2 9.3 Control System Diagram MHSC4056-2E2/B-MBJ...
Need help?
Do you have a question about the ZJ-M6-GS900-SF-LK2-V2 and is the answer not in the manual?
Questions and answers