Table of Contents
Advertisement
Available languages
Available languages
Advertisement
Table of Contents

Related Manuals for ZOJE ZJ-M6-GS800-SF-V2


Summary of Contents for ZOJE ZJ-M6-GS800-SF-V2
- Page 1 全 自 动 模 板 机...
- Page 2 为了创造更加美好的环境 请您协作 首先对您使用中捷产品表示衷心的感谢! 中捷公司致力于关爱地球环境,制定了“智能制造、绿色制造” 的基本方针。当地的公民在环境保护活动中也应该对当地社会、环境 二方面尽每个人的微薄之力。 因此,希望您能配合这个计划,作为环境保护活动的一环,在平 时处理废弃物的时候能多加注意。 1.不用的包装材料,为了能再次回收利用,请交付给当地相关回收公 司进行处理。 2.使用完的润滑油、请根据相关的法律和规定进行妥善处理。 3.产品保养或修理需要更换零部件时,有不需要的电路板和电子零 件,以及产品废弃时,请作为电子废弃物处理。...
- Page 3 非常感谢您购买中捷牌工业缝纫机。 在使用缝纫机之前,请仔细阅读<为了您的安全使用>和使用说明。 工业缝纫机的特性之一, 因为要在机针和旋梭等运动零部件附近进行 操作, 而这些零部件很容易引起受伤的危险, 所以请在受过培训的人 或熟练人员的安全操作知识的指导下,正确地使用本缝纫机。 为了您的安全使用 [1] 安全使用的标记及其意义 本使用 说 明 书 及 产 品所使用的 标记 和 图 案 记 号是 为 了您的安全而正确地使用 产 品,防止您及其他人受到危害和 损 害。 表示方法及含意如下。 标记 危险 该内容表示如果忽视此标志而进行错误的操作,必将导致死亡或重伤。 警告 该内容表示如果忽视此标志而进行错误的操作,肯定会引起死亡或重伤。 注意 如果忽视此标志而进行错误的操作,有可能会引起受到轻微或中度伤害。 图案和符号 ……… 该符号(△)表示“应注意事项” 。 三角中的图案表示必须要注意的实质内容。...
- Page 4 [2] 安全注意事项 危险 在关闭电源开关并将电源插头从插座上拔下后,至少等待 5 分钟,再打开控制箱盖。触摸带有高电 压的区域将会造成人员伤亡。 警告 缝纫机内不允许进入任何液体,否则会引起火灾,电击或操作故障。 如果缝纫机内(机头或控制箱)进入任何液体,请立即关闭电源,并将电源插座头从插座上拔出, 然后联系销售商或资深技术人员。 注意 使用环境 请不要在有电源线干扰及静电干扰等有强 环境温度应再 5℃-35℃的范围内使用。 电气干扰源影响的环境下使用。 低温或者高温会影响缝纫机的正确操作。 强电气干扰源可能会影响缝纫机正确操作。 相对湿度应在 45%-85%的范围内,并且设备 电源电压的波动应该在额定电压的±10%以 内不会结露的环境下使用。干燥或多湿的环 内的环境下使用。 境和结露会影响缝纫机的正确操作。 电压大幅度的波动会影响缝纫机正确操作。 万一发生雷电暴风雨时,关闭电源开关,并 电源容量应大于缝纫机的消耗电量。电源容 将电源插头从插座上拔下。雷电可能会影响 量不足会影响缝纫机的正确操作。 缝纫机的正确操作。 请勿将 USB 存储器以为的设备连接到 USB 连 接端口上,否则有可能导致故障。 安装 请让受过培训的技术人员来安装缝纫机。 如果使用带小脚轮的工作台,则应该固定小 脚轮,使其不能移动。...
- Page 5 注意 缝纫 本缝纫机仅限于接受过安全操作培训的人 缝纫过程中,不要触摸任何运动部件或物件 员使用 靠在运动部件上,因为这会导致人员受伤或 缝纫机损坏。 本缝纫机不能用于除缝纫外的任何其他用 途。 缝纫机头倒下时,请一定要固定工作台,不 使用缝纫机时必须戴上保护眼镜。 可使其随意移动。 如果不戴保护眼镜,断针时就会有危险,机 工作台移动容易发生脚等被夹住的事故,是 针的折断部分可能会弹入眼镜并造成伤害。 导致人身事故的原因。 发生下列情况时,请切断电源。 缝纫机头倒下或竖起时,请用双手操作。 否则误按开关缝纫机动作会导致受伤。 单手操作时因缝纫机的重量万一滑落容易 机针穿线时 导致受伤。 更换机针或梭芯时 如果缝纫机操作中发生误操作,或听到异常 缝纫机不使用,或人离开缝纫机时 的噪音或闻到异常的气味,应立即切断电 如果使用带小脚轮的工作台,则应该固定小 源。然后请与购买商店或受过培训的技术人 脚轮,使其不能移动。 员联系。 为了安全起见,在使用本缝纫机之前,请安 如果缝纫机出现故障,请与购买商店或受过 装保护装置。如果未安装这些安全装置就使 培训的技术人员联系 用缝纫机,会造成人身伤害及缝纫机损坏。 清洁 在开始清洁作业前,请切断电源。 使用润滑油和黄油时,务必戴好保护眼镜和...
- Page 6 [3] 警告标签 产品上的所有的警告标签的含义及产品上警告标签的位置示意图...
- Page 7 使 用 说 明 INSTRUCTION MANUAL 为使您正确使用本机,须对本机的各种功能充分了解,以便安全操作。 To get the most out of the many functions of this machine and operate it in safety,it is necessary to use this machine correctly. 使用前请仔细阅读使用说明书,我们希望您能长期愉快地使用本机,请保存好说 明书,以备查阅。 Please read this Instruction Manual carefully before use.We hope you will enjoy the use of your machine for a long time.Please remember to keep this manual in a safe place.
- Page 8 This machine shall be operated by appropriately-trained operators. 6. 为了您的人身安全,我们建议您戴上防护上镜。 For your personal protection,we recommend that you wear safety glasses. 7. 下列情况下,请关闭电源开关或拔下电源插头: For the following, turn off the power switch of disconnect the power plug of the machine from the receptacle. 7-1 机针穿线和换梭心;...
- Page 9 General maintenance and inspection works have to be done by appropriately trained personnel. 12. 必须在专业电器人员或专业技术人员的指导下进行有关电器部件的维修, 任 何电器部件一经发现受损,立即停止机器运转。 Repair and maintenance works of electrical components shall be conducted by qualified electric technicians or under the audit and guidance of specially skilled personnel. Whenever your find a failure of any of electrical components, immediately stop the machine.
- Page 10 not allowed. 18. 两种警告提示符: Warning hints are marked with the two shown symbols. 操作人员或维修人员请注意 Danger of injury to operator or service staff 特别注意事项 Items requiring special attention...
-
Page 11: Table Of Contents
目录 Contents I、 规格 ........................1 Specifications......................1 II、 各部的名称 ......................3 Names of parts ...................... 3 III、拆箱........................4 Unpacking ......................4 安装........................5 IV、 Installation......................5 V、 模板的制作......................6 Making of Template ....................6 VI、缝纫准备 ....................... 6 Sewing Preparation ....................6 1、... -
Page 12: I、 规格
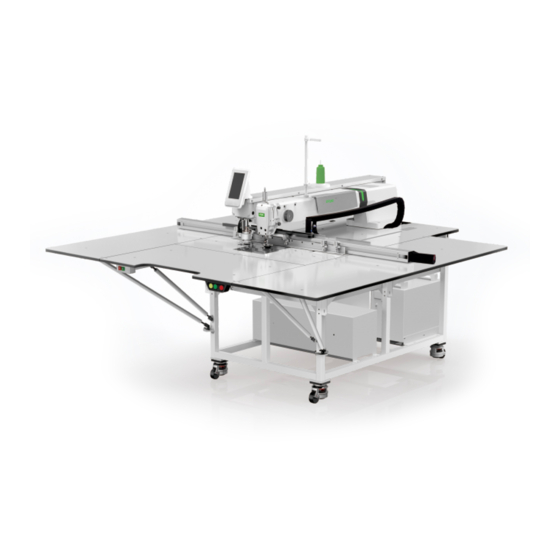
I、 规格 规格 ZJ-M6-GS800-SF-V2 ZJ-M6-GS900-SF-V2 缝制范围 X 向 1300mm,Y 向 800mm X 向 1300mm,Y 向 900mm 最高缝纫速度 3200 转/分(间距在 3.5mm 以内) 缝迹长度 0.1~12.7mm 压脚模板送布 间断送布(脉冲马达双轴驱动方式) 针杆行程 38mm 旋梭 1 倍旋梭和 1.6 倍旋梭 机针 DP×5 7#~10# 辅助压脚高度 10mm 中压脚行程 标准 3.5mm(0~7mm)... -
Page 13: Specifications
Specifications Specifications ZJ-M6-GS800-SF-V2 ZJ-M6-GS900-SF-V2 X direction 1300mm ,Y direction 800mm X direction 1300mm ,Y direction 900mm Sewing range Max. sewing speed 3200rpm(spacing within 3.5mm) Stitching length 0.1~12.7mm Presser-foot template Intermittent cloth feeding (double-shaft drive mode by pulse motor) cloth feeding... -
Page 14: 各部的名称
各部的名称 II、 Names of parts ⑧ ⑨ ⑦ ⑥ ⑤ ④ ③ ① ② ① 启动按钮 Start button ② 压框按钮 Pressure frame button ③ 启动按钮 Start button ④ 急停开关 Emergency stop switch ⑤ 辅助压脚 Auxiliary presser foot ⑥ 操作屏 Operation panel ⑦... -
Page 15: Unpacking
III、 拆箱 Unpacking ① ② 步骤 1、撬开板扣①,卸下 4 块围板②; Step 1: pry open board buckle ①, and remove 4 lateral plates ②; ⑦ ⑥ ⑤ ③ ④... -
Page 16: Installation
步骤 2、松开螺钉③及固定板④,敲出支撑条⑦; Step 2: Unclasp screw ③ and retaining plate ④, and knock out support rod ⑦; 步骤 3、将脚座⑤拧离托盘⑥,然后将机器推下托盘; Step 3: Screw off foot stand ⑤ on pallet ⑥, and move the machine out of the pallet; IV、 安装 Installation 1. -
Page 17: 模板的制作
Making of Template 1、 模板的制作尺寸/Template making size VI、 缝纫准备 Sewing Preparation 1、 机针的安装方法/ Attaching the needle 注意:为了防止缝纫机的意外启动,请关掉电源之后再进行操作。 Warning: Turn OFF the power before starting the work so as to prevent accidents caused by abrupt start of the sewing machine. 松开螺钉 1,把机针 2 的长沟朝向面前,放进针杆的深处,然后拧紧固定螺钉 1。 Loosen setscrew 1 and hold needle 2 with the long groove facing toward you. -
Page 18: 2、 上线的穿线方法
*注意:为了防止机器突然启动造成人身事故,请一定关掉电源后进行操作。 *WARNING: Turn OFF the power before starting the work so as to prevent accidents caused by abrupt start of the sewing machine. 2、 上线的穿线方法/ Threading the machine head 缝纫前请按图所示穿好线。 Before the machine work thread the machine head as shown in the figure. *注意:为了防止机器突然启动造成人身事故,请一定关掉电源后进行操作。... -
Page 19: 3、 梭芯的安装方式
3、 梭芯的安装方式/ Installing the bobbin 注意:为了防止缝纫机的意外启动,请关掉电源之后再进行操作。 Warning: Turn OFF the power before starting the work so as to prevent accidents caused by abrupt start of the sewing machine. 1) 把梭心 1 按图示的方向装入梭壳 3 中。 Set the bobbin 1 into bobbin case 3 in the direction shown in the figure. 2) 把线穿过梭壳... -
Page 20: 4、 线张力的调整方法
4、 线张力的调整方法/ Adjusting the thread tension 用 1 调节面线张力,用 2 调节底线张力。 Adjust needle thread tension with 1 and bobbin thread tension with 2. 5、 挑线弹簧的调节/Adjusting the thread take-up spring 1) 移动量的调节松开螺钉 1,转动夹线器向右转动,动作量变大,拉线量变多。 Adjusting the stroke loosen setscrew1,and turn thread tension asm 2. Turning it clockwise will increase the moving amount and the thread drawing amount will increase. -
Page 21: 6、 中压脚高度的设置
6、 中压脚高度的设置/Intermediate presser height 按中压脚设定按钮 ,使机针到达最低点时,请用十数字键把中压脚下端与布料的间隙调整为 0.5mm。(中压脚的设定最大范围标准为 7mm。) Press INTERMEDIATE PRESSER SETTING button and adjust with TEN keys so that the clearance between the button end of intermediate presser and the cloth is 0.5 mm (max. 7 mm). 7、辅助压脚的调节 Adjusting the auxiliary presser foot... -
Page 22: Vii、 保养方法
将辅助压脚的底部调整到能把夹有缝料的模板压实为宜。辅助压脚的气压调整到 0.2Mpa。 Adjust the bottom of auxiliary presser foot such that the template with clamped sewing materials may be held down securely. Adjust the air pressure of auxiliary presser foot to 0.2Mpa. VII、 保养方法 Maintenance Method 请定期(建议不超过 2 个月)向指定部位补充润滑脂。由于清扫缝纫机等原因造成润滑脂减 少时,请立即加以补充。 Regularly add grease to the designated site (usually no more than three months). -
Page 23: 2、 中压脚提升部润滑脂补充
④ ③ ② ⑤ ① 2、中压脚提升部润滑脂补充\Presser foot lifting parts grease replenishing 打开机头面板,请向毡垫部④(2 处) 及其四周的平头螺丝、支点里补充润滑脂。 Open head panel, add grease to the felt pad ④(2 part), the grub screws around and fulcrum. 3、X 向丝杠润滑脂补充\X to screw grease supplement 用针筒将润滑脂均匀补充到 X 向丝杠①上,保证 X 向丝杠①与油脂充分接触。 The lubricating grease is uniformly added to the X-wire rod ①... -
Page 24: 4、 Y向齿轮部润滑脂补充
① 4、Y 向丝杆与 Y 向齿轮润滑脂补充\Y wire bar and Y gear grease supplement 拧松螺钉①,卸掉挡板②,用针筒将润滑脂补充在 Y 向直线导轨③和 Y 向丝杠④上,前后移 动送料座时带动润滑脂涂抹在 Y 向直线导轨③和 Y 向丝杠④上。 Remove the screw ①, remove the baffle ②, adding the grease to the Y-straight rail ③ and Y-with ④... -
Page 25: Viii、 气路及机头扩展板图
VIII、 气路及机头扩展板图 Air circuit and machine head extend PCB board diagram 1、 气路图 Air circuit diagram ① 模板抓钩气缸 Template clamp cylinder ② 模板压紧气缸 Template compaction cylinder ③ 辅助压脚气缸 Auxiliary presser foot cylinder ④ 剪线气缸 Trimming cylinder ⑤ 吹气管 Blow pipe ⑥... - Page 26 2、 机头扩展板图 Machine head extend PCB board diagram...
- Page 27 插座号 标号 用途 备注 Plug Grade Remark 20P 白色插头 电控箱与机头板线缆 CZ131 20pin white plug Control box and machine head PCB board cable 16P 白色插头 连接 X9 信号线缆 CZ132 16 pin white plug Connect X9 signal cable X 原点(白色 3 针) X 原点传感器...
-
Page 28: Ⅸ、常见故障排除
插座号 标号 用途 备注 Plug Grade Remark 气阀 1(白色 2P) 抓紧电磁阀(第一路电磁阀) 1 红 2 黑 CZ1319 Air valve 1 (white 2 pin) Clamp solenoid valves(first solenoid valves) 1 red 2 black 输入 5(绿色 3 针) 抓线原点传感器 1 蓝 2 黑 3 褐 CZ1320 Input 5 (green 3 pin) Clamp thread origin sensor... - Page 29 high 气阀短路或风扇堵转 关机 E010 Valve short connection or fan blocks Turn Off Machine X 电机超速故障 关机 E011 Turn Off Machine X motor overspeed error X 电机超差故障 关机 E012 Turn Off Machine X motor overdistance error 编码器故障或未连 关机 E013 Encoder is error or unconnected. Turn Off Machine 电机运行异常...
- Page 30 Stepping driver communication abnormal Turn Off Machine 步进电机过流 关机 E031 Stepping motor over-current Turn Off Machine 步进驱动电源异常 关机 E032 Stepping driver power supply abnormal Turn Off Machine 异常电流 关机 E034 Abnormal current Turn Off Machine IPM 过流 1 关机 E035 Turn Off Machine IPM over-current 1 IPM 过流...
- Page 31 快走接收数据异常 关机 E058 Received data of move quickly error Turn Off Machine x 电机堵转 关机 E059 Turn Off Machine X motor block running y 电机堵转 关机 E060 Turn Off Machine Y motor block running X 电机指令覆盖 关机 E061 Turn Off Machine X motor command cover Y 电机指令覆盖...
Need help?
Do you have a question about the ZJ-M6-GS800-SF-V2 and is the answer not in the manual?
Questions and answers