Decon wheel Helium Assembly Instructions Manual
Std rear axle
Hide thumbs
Also See for Helium:
- Assembly instructions (3 pages) ,
- Assembly instructions (4 pages) ,
- Assembly instructions (4 pages)
Advertisement
Quick Links
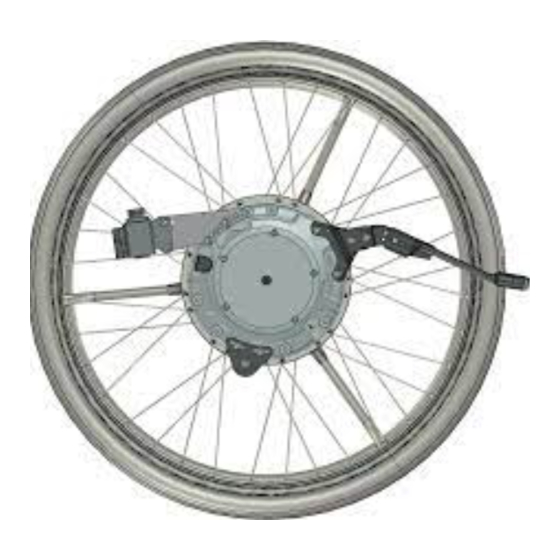
Assembly instructions for Helium, Nitrum (Not Pro rear axle)
1. Remove wheels on both sides.
2. Remove the sleeve buy loosen the screw 1 and pull out the sleeve 2.
5
MED1510
3. Check the correct placement for the stop pin and check that MED1510 is mounted.
MED3348
For Std rear axle
Only STD rear axle.
Not PRO rear axle or
short COG rear axle.
5
MED1510
2021-12-22
Advertisement

Related Manuals for Decon wheel Helium


Summary of Contents for Decon wheel Helium
- Page 1 Assembly instructions for Helium, Nitrum (Not Pro rear axle) MED3348 For Std rear axle 1. Remove wheels on both sides. 2. Remove the sleeve buy loosen the screw 1 and pull out the sleeve 2. Only STD rear axle. Not PRO rear axle or short COG rear axle.
- Page 2 Only STD rear axle. Not PRO rear axle or short COG rear axle. 4. Assembly the plate (right side) according to picture. Parts pair mountingset: Item No. Part Number Description HW087 Wheel Hub MED2000 Bracket XSM8X16 Screw Round - M8 x 16 XSTM6X12 Stop Screw - M6 x 12 MED1510...
- Page 3 Only STD rear axle. Not PRO rear axle or short COG rear axle. 6. Adjust the gap to 2-3 mm for the rear axle according to the picture above. When you have the right gap tighten the rear axle screw or screws 1 on both sides, when the hub sleeve is so far in as possible.
- Page 4 For Short COG rear axle 1. Remove wheels on both sides. 2. Remove the sleeve buy loosen the screw 1 and pull out the sleeve 2. Only short COG rear axle. Not PRO rear axle or STD rear axle. 3. Kontrollera att stopp pinnen sitter enligt bilder ovan. 2021-12-22...
- Page 5 Only short COG rear axle. Not PRO rear axle or STD rear axle. Montera nu fästet se bilderna ovan som visar montering av fästet på höger sida. För montering på en sida, så skall följande ingå. Item No. Part Number Description HW087 Sleeve...
- Page 6 MED1674 Item No. Part Number Description XOD-2612E-00 Clamp XA2-2612K-00 Clamp with thread XSM6X35 Screw Round M6 x 35 X0C-48160-D0 Swing Away Bracket 2021-12-22...
- Page 7 MED1675 Item No. Part Number Description XOD-2612E-00 Clamp XA2-2612K-00 Clamp with thread XSM6X30 Screw Round M6 x 30 MED1320 Bracket X0F-48160-D00 Parallel Bracket 2021-12-22...
- Page 8 MED1676 Item No. Part Number Description XSM6X16 Screw - Round - M6 x 16 XSM6ML Locknut M6 XSM6X12 Screw - Round - M6 x 12 XSM6BR Plain Washer M6 MED1500 Rev6 Bracket X0C-48160-D0 Swing Away Bracket 2021-12-22...
- Page 9 MED1677 Item No. Part Number Description XSM6X16 Screw Round M6 x 16 XSM6ML Locknut M6 XSM6X12 Screw Round M6 x 12 XSM6BR Plain Washer M6 MED1500 Rev6 Bracket X0F-48160-D00 Parallel Bracket 2021-12-22...
-
Page 10: Brake Adjustment
Brake adjustment Item No. Part Number Description XSM6X70 Screw Round M6 x 70 XSM6ML Locknut M6 100 400 044 Spacer QR-axle set for standard wheels (Not Included) Item No. Part Number Description QR1272 QR axle 100 400 113 Spacer 93440-120520 Circlip 2021-12-22... - Page 11 Om inget annat specificeras, använd följande åtdragningsmoment. Unless otherwise specified, use the following tightening torque. Metriska grovgängor, stål. Metric coarse threads, steel. Gänga / Thread Åtdragningsmoment / Tightening torque 1,2 Nm 3 Nm 6 Nm 10 Nm 25 Nm 50 Nm 85 Nm Navhylsor.
Need help?
Do you have a question about the Helium and is the answer not in the manual?
Questions and answers