Advertisement
Quick Links
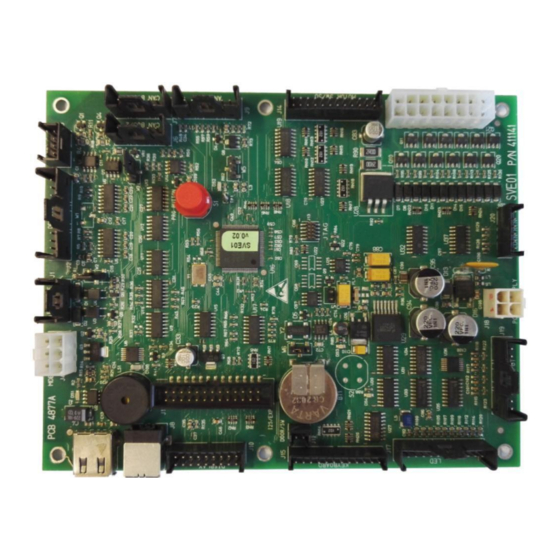
BOARD SVE01
Snack Safety Point
SVE SSP
SandenVendo Europe S.p.A.
Regione Cavallino, 2
15030 Coniolo (AL) - ITALIA
Tel.: +39 0142 335111 – Fax: +39 0142 562348
e-mail:
marketing@sandenvendo.it
website:
www.sandenvendo.com
PROGRAMMING MANUAL
VENDING MACHINE
Revision: 00
Date: 01/07/2020
Code: 416104
Advertisement

Related Manuals for SandenVendo Snack Safety Point SVE SSP


Summary of Contents for SandenVendo Snack Safety Point SVE SSP
- Page 1 PROGRAMMING MANUAL BOARD SVE01 VENDING MACHINE Snack Safety Point SVE SSP Revision: 00 SandenVendo Europe S.p.A. Date: 01/07/2020 Regione Cavallino, 2 Code: 416104 15030 Coniolo (AL) - ITALIA Tel.: +39 0142 335111 – Fax: +39 0142 562348 e-mail: marketing@sandenvendo.it website:...
- Page 2 Germany Tel.: + 49 211 740390 Fax: + 49 211 7488541 e-mail: info@sandenvendo.de SandenVendo Spain, Sucursal en Espana of Sanden International (Europe) Limited (SVS) Poligono Industrial la Almeda C/. Sant Ferrán, no. 92 E-08940 Cornella (Barcelona) - Spain Tel. : +34 (0)93 4741555...
- Page 3 4.3.9.4 ~ Cooling ..............................35 4.3.9.5 ~ Light ................................36 4.3.9.6 ~ Price bar (E-Label) ............................. 36 4.4 ~ Set Combi Product ..........................36 4.5 ~ Audit USB .............................. 37 Page 1 of 42 TRANSLATION OF THE ORIGINAL INSTRUCTIONS © SandenVendo Europe SpA...
- Page 4 Index 4.6 ~ EVA counters ............................37 4.6.1 ~ Events ............................. 39 4.6.2 ~ Read-Out Example ......................... 40 4.6.3 ~ Relazione Indice PA alla Selezione ....................41 Page 2 of 42 TRANSLATION OF THE ORIGINAL INSTRUCTIONS © SandenVendo Europe SpA...
- Page 5 This manual is an integral part of the machine and must therefore be kept intact and available for the machine’s entire productive life. Any other document sent by SandenVendo is to be attached to the manual to form a complete dossier of the automatic vending machine.
- Page 6 Instructions for programming 1.2 Recipients The manual contains the correct procedures for loading, use, routine extraordinary maintenance and installation of the Automatic Vending Machine. This manual is addressed to personnel in charge of the loading, cleaning and routine maintenance of the machine ( Operator), to the end user of the vending machine (User) and to personnel in charge of installation, adjustment, extraordinary maintenance...
- Page 7 Instructions for programming Operator The intervention of the operator on the vending machines is only intended for the loading and routine cleaning operations to be carried out in accessible areas with the sole use of the door opening key, and without the use of other tools. Maintenance Engineer / Skilled technician The intervention of the maintenance engineer is required for all operations that require the use of...
- Page 8 Instructions for programming 1.3 Manufacturer SandenVendo Europe in Europe has been making significant advancements in the vending industry for many decades and is a powerful partner for excellence in quality, reliability and service. SandenVendo Europe are a “one-stop shop supplier”, offering a wide variety of vending...
- Page 9 Instructions for programming 1.5 Warranty Warranty Vending Machine components, starting from the date shown on the delivery note, is for 12 months. The warranty includes exclusively the parts replaced, with labour excluded. Shipping cost of machines, defective parts and spare parts are always at the customer's expense. The Warranty does not include, damages to the vending machine caused by: ...
- Page 10 Instructions for programming "SandenVendo Europe S.p.A" declines responsibility for any damages caused to persons and/or things as the result of: - Incorrect installation - Use of non-original spare parts - Execution of changes unforeseen / unauthorized by the manufacturer - Improper use of the machine - Connection to inadequate supply systems and not in conformity with the regulations in force.
- Page 11 Instructions for programming To prevent hazards due to appliance instability, secure it according to the instructions. Install the appliance so that the electrical plug can be easily accessed afterwards. The use of adapters, multiple sockets and/or extensions is forbidden. ...
- Page 12 SandenVendo Europe S.p.A. recalls that the technical data and performance of the products can change without prior notice. “SandenVendo Europe S.p.A.”. reserves the right to make changes to their vending machines without prior notice; moreover they declare that the automatic vending machines listed in this manual are in conformity with the following directives: 2006/42/EC (CE markings) and 2004/1935/EC.
- Page 13 Instructions for programming 1.7 Safety symbols and Pictograms The SandenVendo automatic vending machines have a series of warning signs to make the user aware of the dangers that exist when handling the vending machine. Description Pictograms / Safety symbols Important safety information.
- Page 14 Instructions for programming 2 GENERAL INSTRUCTION 2.1 Software Features Service programming routine Credit Accumulation Interface with payment system Interface with Client and management of vend process Emptying tubes manually Filling tubes manually Audit functions Interface display Interface keyboard Payment system USB port to update master &...
- Page 15 Instructions for programming »If no credit has been entered, or a key, the price of the selection is shown on the display: » Selection price. » Selection number pressed » Errors » Date and Time » Closing the door, or activating the safety switch, the display will show a screen with the message “Machine initialisation PLEASE WAIT".
- Page 16 Instructions for programming 3 PROGRAMMING MENU STRUCTURE General Menu 1° Submenu 2° Submenu 3° Submenu Common settings ⤷ Sec. Machine* ⤷ Payment setting ⤷ Payment protocol ⤷ MDB ⤷ Executive ⤷ Executive Price Holding Executive Price Holding ⤷ Special ⤷ Max overpay value ⤷...
- Page 17 Instructions for programming General Menu 1° Submenu 2° Submenu 3° Submenu ⤷ Spiral ⤷ Keyboard ⤷ Outputs ⤷ Light ⤷ Temperatures ⤷ Optical barrier ⤷ Technician menu ⤷ Snack Options ⤷ Spiral detection ⤷ Syncro Spiral ⤷ SVE02 update* ⤷ Extra rotation ⤷...
- Page 18 Instructions for programming 3 Programming Menu 4.1 ~ Buttons and Menu Functioning Selection Button 1 Exit from the submenu, exit without saving the set values Increases values, or shifts to the next menu. Selection Button 2 Keeping pressed increases rapidly. Decrease values, or returns to the previous menu.
- Page 19 Instructions for programming 4.2 ~ General Menu » The programming menu of the vending machine is accessed by pressing the button on the transformer box area. After pressing the programming button, the display shows the programming menu. General Menu ⤷ Common settings ⤷...
- Page 20 Instructions for programming 4.4 ~ Common setting In this menu you can setup the parameters that are common with the Master and the Slave machine. By pressing the button on the menu "Common setting" prompt the display will show a screen that prompts you to enter the password.
- Page 21 Instructions for programming Name Submenu Description Default » The menu "Multi vend" must be set to YES » The menu "Force Vend" must be set to NO » "Forced Vend" normally work as follow: When a credit is introduced you are force to buy at least 1 product (no coin return possible until you buy 1 product).
- Page 22 Instructions for programming Name Submenu Description Default » If the "Separate cashless price" is enabled: The "coin" and "cashless" prices can be different. Example: If the selection 11 has the "coin" price set to 0.50 and the "cashless" price to 0.30, when you make a sale with cash the price will be 0.50 and when you make a sale with the cashless the price will be 0.30.
- Page 23 Instructions for programming 4.1.3 ~ SVE01 update General Menu ⤷ Common settings ⤷ SVE01 update It is possible to update the software of SVE01 using a USB key. Pressing the word "Continue ?" will appear on the display, press again to view the files within the USB stick.
- Page 24 Instructions for programming 4.1.5 ~ Save file to USB General Menu The vending machine can generate 2 files: ⤷ Common settings The full backup file that contain all the operation parameters, the price and various settings ⤷ Save file to USB ...
- Page 25 Instructions for programming 4.1.8 ~ Set Time Discount General Menu ⤷ The function can be enabled in 10 different periods, and will give a Common settings discount from the original price of the selection. ⤷ Set Time Discount Name Menu Description »...
- Page 26 Instructions for programming 4.1.10 ~ Set Time Inhibit General Menu ⤷ This function allows you to inhibit sales from the machine for maximum Common settings 10 different periods. ⤷ Set Time Inhibit Name Menu Description » YES enable the function. Enable * 10 periods are now shown in the programming menu.
- Page 27 Instructions for programming 4.1.12 ~ Reset Code General Menu ⤷ Common settings ⤷ Reset Code This function allows you to do a factory reset of the vending machine, setup the machine type and do a full backup of the machine. To start the reset function you have to: ...
- Page 28 Instructions for programming 4.1.16 ~ Age Force Setup General Menu This parameter can be used to force AGE System setup and ⤷ only with devices connected in MDB, if connected otherwise it is Common settings not necessary to set the age forced setup. ⤷...
- Page 29 Instructions for programming 4.2 ~ Tube fill/Payout This menu is visible only with MDB coin changer connected. This function allows you to check the tube status of the coin changer and do the tube filling/payout. 1.1. Tube fill/Payout General Menu Tube 0.00 x 0 ⤷...
- Page 30 Instructions for programming 4.3.1.1 ~ Errors List EVA-DTS Message Description No Error No errore EJB_AXX Column_xx error Error of a single motor, xx is the number of the motor Error of the optical barrier on the delivery eyelet. Check if the sensor of the EJL_A1 Optical barrier error optical barrier is covered, the connection of the connector or replace the...
- Page 31 Instructions for programming 4.3.4 ~ Coin / Key price General Menu ⤷ Main machine ⤷ Coin Price ⤷ Product xx = 0.00 This submenu allows you to set the cash prices of the selections. The prices are set by default to 1. When prices are set to 0 (zero), the machine is in “free vend”...
- Page 32 Instructions for programming 4.3.5 ~ Discount Value General Menu ⤷ Main machine ⤷ Discount Value ⤷ Product xx = 0.00 In this function you can set the discount value for each selection. Example: Coin price Discount price Product 11 = 1.00 Product 11 = 0.60 Final price = Coin price - Discount price = 1.00 - 0.60 = 0.40 If the discount price is higher than the coin price, the vending machine is in free vend.
- Page 33 Instructions for programming 4.3.8 ~ Test General Menu ⤷ Main machine ⤷ Test With this menu you can test various systems and components of the vending machine. Name Submenu Description » This function is used to test the operation of the vend motors installed in the machine. »...
- Page 34 Instructions for programming 4.3.8.1 ~ Numbering selections type During the first initialization, or after a reset as described on page 25, you can set the numbering scheme of the selections. Selection Mode 1: Classic (11 to 10 from bottom) 2: New (10 to 19) Snack from top Selections will be indicated as follows according to the type of numbering set: Classic mode: Selection / Shelf Columns...
- Page 35 Instructions for programming 4.3.9.1.2 ~ Syncro spiral General Menu ⤷ Main machine ⤷ Technician menu ⤷ Snack Options ⤷ Syncro Spiral In this submenu you can electronically connect 2 spirals together. The operation of this function is related to the configuration of the motors of the vending machine: -They must be connected as 1 equal and 1 odd.
- Page 36 Instructions for programming 4.3.9.1.4 ~ Extra rotation Menu is only visible when the optical barrier is enabled, as shown on page 34. General Menu ⤷ Main machine This parameter is used to activate an extra rotation (settable in ms) of ⤷...
- Page 37 Instructions for programming 4.3.9.3 ~ Group General Menu ⤷ Main machine ⤷ Technician menu ⤷ Group The Group function allows you to associate some selections loaded in a vending machine in order to group like products. The machine thereafter applies one price/group and to empty the group selections equally, by alternating the sales among the group.
- Page 38 Instructions for programming 4.3.9.5 ~ Light General Menu ⤷ Main machine ⤷ Technician menu ⤷ Light This function manage the lighting system operation. Always ON: The light stays always ON. Always OFF: The light stays always OFF. Use inhibit time: Use the inhibition time to turn OFF the light.
- Page 39 Instructions for programming 4.5 ~ Audit USB General Menu ⤷ Audit Usb Before selecting this item on the menu connect a USB stick in the port on the SVE01 board. After you connect a USB to the board press button the program writes a file "audit.txt"...
- Page 40 Instructions for programming VA101 Value of all paid vends since initialization VA102 Number of all paid vends since initialization VA103 Value of all sales vends since last reset VA104 Number of all paid vends since last reset ...
- Page 41 Instructions for programming PA206 Value of discounted paid vends since initialization PA207 Number of discounted paid vends since last reset PA208 Value of discounted paid vends since last reset PA701 Product number PA702 Payment device (CA,DA,DB,TA) ...
- Page 42 Instructions for programming 4.6.2 ~ Read-Out Example DXS*VND-411141*VA*V0/6*1 PA7*2*CA*0*50*0*0*0*0 ST*001*0001 PA1*2*50***** ID1*VND000908067379*G_LINE M/S*0221*** PA2*0*0*0*0*0*0*0*0 ID4*2 PA7*2*CA*0*50*0*0*0*0 ID6* PA7*2*TA*0*50*0*0*0*0 CB1*VND000908067379*SVE01*0221 PA7*2*DA*1*50*0*0*0*0 CA1*D606288 *SC5EMDBD *5301 PA7*2*DB*2*50*0*0*0*0 BA1*** PA1*3*50***** DA1*** PA2*0*0*0*0*0*0*0*0 DB1*** PA7*3*CA*0*50*0*0*0*0 VA1*1950*31*1950*31*0*0*0*0 PA7*3*TA*0*50*0*0*0*0 CA2*1950*31*1950*31 PA7*3*DA*1*50*0*0*0*0 CA3*2200*0*2200*0*2200*0*2200*0*0*0 PA7*3*DB*2*50*0*0*0*0 CA4*2800*350*2800*350*0***0 PA1*4*50***** CA10*0*0 PA2*0*0*0*0*0*0*0*0 CA15*0 PA7*4*CA*0*50*0*0*0*0 CA17*0*5*0***0...
- Page 43 Instructions for programming 4.6.3 ~ Relazione Indice PA alla Selezione Classic mode Numbering: SELECTION PA INDEX New mode Numbering: SELECTION PA INDEX Page 41 of 42...
- Page 44 Revisions manual Revision Date Changes 01/07/2020 Manual creation Page 42 of 42...
Need help?
Do you have a question about the Snack Safety Point SVE SSP and is the answer not in the manual?
Questions and answers