Table of Contents
Advertisement
Quick Links
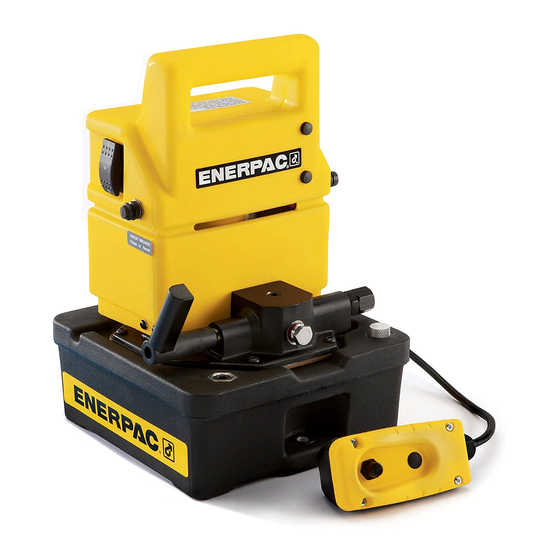
L1736
Rev. B
01/07
SERVICE INSTRUCTIONS: These Service Instructions are intended to be used by qualified personnel at Authorized
Enerpac Service Centers. Users of Enerpac equipment should see the pump Instruction Sheet for installation, operation,
and maintenance information.
IMPORTANT: This guide shows how to completely tear down the pump, which may not be required. The pump should be tested prior
to service to avoid unnecessary labor. Please refer to Pump Test Procedure on page 2 and Troubleshooting Guide on page 4.
YOU MAY NEED:
✔ test bench
✔ 0-10,000 psi hand pump
✔ 0-15,000 psi pressure gauge
✔ V-152 relief valve
DISASSEMBLY
WARNING: Be sure pump is disconnected from
power source before disassembling.
Shroud Removal
1.
Remove the six 1/8" socket head screws (item 18) from
bottom of yellow pump motor shroud.
2.
Remove shroud (item 16) from pump, making sure foam
baffle (item 19) stays on electric motor. Use care to not
disconnect or damage wiring in the shroud. NOTE: Foam
baffle may be glued to shroud.
Wire Removal
NOTE: Refer to wiring diagram on Repair Parts sheet. Mark wires
before removing to aid during re-assembly.
1.
Disconnect black power cord wire from thermostat (item 6).
2.
Disconnect black power switch jump wire from thermostat
(item 6).
3.
PUJ, 4001 only: Disconnect black pendant wire from
transformer (item 38) at connection #8.
4.
PUJ, 4001 only: Disconnect white pendant wire from relay
(item 39).
5.
PUJ, 4001 only: Disconnect transformer lead wire (item 45)
from white power cord wire and black motor wire by
unplugging connector.
6.
PUJ, 4001 only: Disconnect black motor wire from relay
(item 39) and power switch (item 20) by unplugging
respective flags.
7.
PUM, 4001 only: Disconnect black motor wire (item 22) from
power switch (item 20).
Shroud may now be removed from pump.
8.
Disconnect power cord (item 9) and pendant cord (item 41)
from the pump by removing their anchor screws.
9.
Remove foam baffle (item 19) from motor (item 102).
NOTE: Foam baffle may be glued to motor.
®
PUJ-1200, 4001B/E, PUM1200B/E
✔ torque wrench
✔ box end wrenches
✔ Allen wrenches (5/32" 7/32")
✔ roll pin punch (5/32")
Remove 2-Way Valve
1.
Remove the screw, valve handle, o-ring, washer, stem, and
5/16" ball (items 138, 139, 135, 132, 133, 134).
2.
Stem, ball and seat can now be inspected if
necessary.
Disassemble Pump
1.
To disassemble the adjustable relief valve, remove cap nut,
lock nut, gasket, adjusting screw, spring, ball guide, 3/16" ball,
seat, and gasket (items 131, 130, 129, 128, 126, 125, 124).
2.
Remove the 8 screws (item 5) and washers (item 4) that hold
the pump cover plate onto the reservoir (item 3).
3.
Remove pump unit from reservoir.
NOTE: Pump may need to be pried from reservoir and
gasket due to the RTV sealant on both sides of the gasket.
4.
Remove unloading valve assembly (items 150, 142, 143)
from the high flow, low pressure piston block (item 105).
5.
Remove check assembly from the high flow piston block by
removing the plug, spring and 1/4" ball (items 146, 147, 148).
6.
Remove the safety relief valve (item 121) from the pump
manifold.
Remove Piston Blocks
IMPORTANT: During removal of high and low pressure piston
block assemblies, hold piston block firmly against the
manifold when removing cap screws. This will help prevent
the plunger spring from cocking the block and causing
damage to the outlets.
1.
Remove high flow piston block (item 105, large .53 diameter
piston).
a. Remove the two 3/16" socket screws (item 109) that
2.
Remove high pressure piston block (item 107, small .24
diameter piston).
a.
b.
Service Instructions
Refer to Repair Parts Sheet L2071.
✔ snap-ring pliers
✔ O-ring pick
✔ RTV sealant
✔ roller bearing grease
✔ Enerpac hydraulic oil
anchor the piston block. Use care to prevent block from
cocking.
Remove the two 3/16" socket screws (item 109) that
anchor the piston block. Use care to prevent block from
cocking.
Remove o-ring between block and manifold.
Advertisement
Table of Contents

Related Manuals for Enerpac PUJ-1200


Summary of Contents for Enerpac PUJ-1200
- Page 1 01/07 SERVICE INSTRUCTIONS: These Service Instructions are intended to be used by qualified personnel at Authorized Enerpac Service Centers. Users of Enerpac equipment should see the pump Instruction Sheet for installation, operation, and maintenance information. IMPORTANT: This guide shows how to completely tear down the pump, which may not be required. The pump should be tested prior to service to avoid unnecessary labor.
- Page 2 Remove Motor (If necessary) b. Anchor piston block by compressing piston spring against eccentric bearing and hold firmly in place. Use care to Remove the two nuts and washers (items 15, 14) from the prevent block from cocking. Tighten the two 3/16" socket underside of the pump manifold and remove motor (item 102).
- Page 3 Attach shroud to manifold by tightening the six screws (item the leaking items. Once all leaks are corrected, the test must 18). Lubricate screws with one drop of Loctite #242 and be performed again to reach a maximum pressure of 10,000 torque screws to 12-18 in-lbs (1,4-2,0 Nm).
- Page 4 Tel: +1 262 781 6600 Fax: +1 262 783 9562 All Enerpac products are guaranteed against defects in workmanship and materials for as long as you own them. Inquiries/orders: For your nearest authorized Enerpac Service Center, visit us at www.enerpac.com...
Need help?
Do you have a question about the PUJ-1200 and is the answer not in the manual?
Questions and answers