Table of Contents
Advertisement
Quick Links
Advertisement
Table of Contents

Related Manuals for CORNING Matribot 6150


Summary of Contents for CORNING Matribot 6150
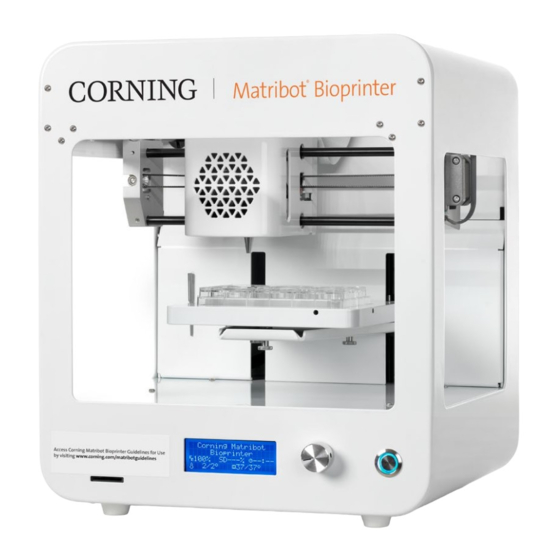
- Page 1 Corning ® Matribot ® Bioprinter Instruction Manual Catalog Number: 6150...
-
Page 2: Table Of Contents
5. LCD Interface ..............31 3.2 Contents of the box ..............8 5.1 Status screen ................31 3.3 Setting up the Corning Matribot Bioprinter ....... 8 5.2 Temperature control ..............31 3.4 Starting the Corning Matribot Bioprinter for the first time ................. 8 5.3 Attach the syringe to the syringe plunger holder ..31... -
Page 3: Safety Information
If the Corning Matribot Bioprinter acts in a way that is not described in this manual, turn it off and contact Corning. Use the Corning Matribot Bioprinter for its intended purposes only. Do not modify its instruments, subcomponents, or accessories. Do not open or disassemble the Corning Matribot Bioprinter or attempt any service other than those described in the manual. -
Page 4: Electrical Information
1.6 Electrostatic discharge (ESD) protection The Corning Matribot Bioprinter printbed and printhead are ESD sensitive. Use the following procedures to ensure that no ESD damage is caused to the printbed, printhead, or internal electronics. 1.6.1 Procedures Review the procedures to follow when using the Corning Matribot Bioprinter printbed and printhead. -
Page 5: Specifications
Corning DNA Studio translates your three-dimensional CAD models into coordinates and instructions for the Corning Matribot Bioprinter to precisely deposit your materials onto a Petri dish, well plate, or other vessel. The bioprinting and biodispensing processes work through the extrusion of a hydrogel biomaterial, such as Corning Matrigel® matrix, Collagen, or any basement membrane matrix combined with human cells in a bottom-up, layer-by-layer fashion until a 3D tissue model is built. -
Page 6: Technical Specifications
Resolution Z 10 µm Layer resolution 50 µm Display Smart LCD controller – 3" LCD User interface Integrated LCD display, Corning DNA Studio Connectivity Temperature Printbed temperature range Room temperature to 65°C Printhead temperature range 0°C to room temperature Operating temperature range 15°C to 30°C... -
Page 7: Getting Started
Always use a minimum of two people to unpack and move the Corning Matribot Bioprinter. The Corning Matribot Bioprinter should never be placed on wet, damp, moist, or humid surfaces. Do not force or tear anything during the unpacking or setup process as this may irreversibly damage your Corning Matribot Bioprinter. - Page 8 5. Remove the top protective shipping foam. 6. Use the Corning® Matribot® Bioprinter frame to grab the device. Be careful not to grab any movable parts or loose components. It is recommended to have 2 people lift from the sides of the frame at the indicated locations.
- Page 9 9. Remove the middle inner foam insert as shown. 10. Lift the printbed support located at the back of the printer to release the lower foam insert. Pull the foam insert from the front of the printer to remove as shown below. 11.
-
Page 10: Contents Of The Box
3.4 Starting the Corning Matribot Bioprinter for the first time The following steps should be followed the first time the Corning Matribot Bioprinter is used, as well as every time it is moved from one place of operation to another. -
Page 11: Overview Of The Printhead
3.5 Overview of the printhead Ensure you have correctly mounted print surfaces and bioink syringes before biodispensing. Syringe plunger holder Syringe plunger Temperature-controlled syringe-based extrusion printhead Nozzle/needle Surface probe... -
Page 12: Loading Of The Syringe
3.6 Loading of the syringe Pre-cool the printhead before loading of the syringe when using temperature-sensitive materials (see Section 4.5.2). Follow the steps below to load the syringe into the printhead. 1. Slide the syringe into the cooling block. 2. R otate the syringe by the tabs by 90˚ counterclockwise (looking from the top of the printhead) so that the tabs sit under the top of the block. -
Page 13: Mounting Of The Thermal Insulator
3.7 Mounting of the Thermal Insulator It is important to use the thermal insulator for temperature-sensitive materials to prevent the material from premature gelation. NOTE: It is recommended to attach a thermal insulator prior to loading a syringe. Follow the steps below to attach the thermal insulator. NOTE: Make sure to use the correct thermal insulator for your application. -
Page 14: Bioprinting With The Corning Matribot Bioprinter
4. Bioprinting with the Corning® Matribot® Bioprinter 4.1 Installing Corning DNA Studio Install the latest version of Corning DNA Studio. The latest version of Corning DNA Studio is available at www.corning.com/matribotguidelines. 4.2 Connecting the Corning Matribot Bioprinter To establish connection between the Corning Matribot Bioprinter and Corning DNA Studio follow the steps below. -
Page 15: Bioprinting From A 3D Model
4.3 Bioprinting from a 3D model 4.3.1 Start a Bioprint project Choose the Bioprint option to start a new bioprinting process using a 3D model. Corning® DNA Studio will guide you through the process of setting up your Bioprint. Select the desired supported file types by navigating to the appropriate folder and select the appropriate file. -
Page 16: Generate The Geometry
Instead of selecting the appropriate file, a simple geometry can be generated within Corning® DNA Studio. To generate the geometry, choose the Generate option to start a new bioprinting process using a generated geometry. Corning DNA Studio will guide you through the process of setting up your Bioprint. -
Page 17: Print Surface
4.3.3 Print surface Select the surface you wish to bioprint on. The Corning® Matribot® Bioprinter can bioprint on a variety of surfaces, including Petri dishes and well plates. Choose the surface you are using and indicate the surface size. 1. Select the type of the surface. -
Page 18: Printhead Settings
1. Bioink: Select the ink type from the drop- down menu labeled Bioink. This menu has many preset print parameters for common bioink types used in the Corning® Matribot® Bioprinter. 2. Nozzle: The size of the nozzle inner diameter. Changing the nozzle size will result in thinner or thicker printed lines. -
Page 19: Models Settings
16. Z-lift: The lowering of the printbed when performing non-print moves. Increase the z-lift if the nozzle is dragging in a previously printed filament during a non-print move. For more detailed information on how parameter selection impacts a print, please refer to the Corning® Matribot® Bioprinter Parameters (CLS-AN-648). -
Page 20: Layers Settings
9. Number of layers: Select the number of layers. Modify options to define the 3D model’s layers and how the Corning® Matribot® Bioprinter should bioprint the selected model. Use the predefined settings or create custom settings. Descriptions of the infill pattern options are included below. -
Page 21: Calibration And Automatic Bed-Leveling (Abl)
• Automatic bed-leveling probes the bed at three points to enable bed-leveling compensation. It uses a matrix to compensate for tilt in the bed or print surface. Corning recommends using Automatic bed-leveling if the layer height is visually different on one side of the bed than on the other side when inspecting a 3D printed construct. -
Page 22: Print Model
1. Select manual calibration mode. The default mode is recommended. 2. Plate layout: ‘X’ marks the location that the user needs to position the nozzle in. 3. Z axis command: Controls the position of the printbed along the Z axis. 4. -
Page 23: Biodispensing Droplets
Prior to printing, it is recommended to prime the nozzle. This can be done through the Extrusion button on the Printer model screen or through the Extrude Volume function in the Prepare Bioprint section of the LCD interface on the bioprinter. Press Start to start the bioprinting process. -
Page 24: Print Surface
4.4.2 Print surface Select the surface you wish to dispense droplets on. The Corning® Matribot® Bioprinter can dispense droplets on a variety of surfaces, including Petri dishes and well plates. Choose the surface you are using and indicate the surface size. Besides dispensing single droplets, the Corning Matribot Bioprinter can dispense droplet arrays. -
Page 25: Printer Settings
Press on the “Printer” icon on the bottom of the window to move to the next step of the process. The Corning® Matribot® Bioprinter is equipped with a heated bed and an LED photocrosslinking module. Enable and adjust the printbed temperature in the Printer settings. Use temperature control to keep the printbed at a certain temperature, or turn temperature control Off to print at room temperature. -
Page 26: Printhead Settings
13. Z-lift between wells: The lowering of the printbed when the nozzle moves to the next well. For more detailed information on how parameter selection impacts a print, please refer to the Corning Matribot Bioprinter Parameters (CLS-AN-648). -
Page 27: Calibration And Automatic Bed-Leveling (Abl)
• Automatic bed-leveling probes the bed at three points to enable bed-leveling compensation. It uses a matrix to compensate for tilt in the bed or print surface. Corning recommends using Automatic bed-leveling if the layer height is visually different on one side of the bed than on the other side when inspecting a 3D printed construct. - Page 28 1. Select manual calibration mode. The default mode is recommended. 2. Plate layout: ‘X’ marks the location that the user needs to position the nozzle in. 3. Z axis command: Controls the position of the printbed along the Z axis. 4.
-
Page 29: Print Model
4.4.6 Print model This screen summarizes the droplet dispensing process. You can monitor the activity of the device while dispensing. In addition, you can change the parameters such as printbed temperature and printhead temperature. 1. Printbed temperature: Allows you to activate/deactivate, change, and monitor the temperature of the printbed. -
Page 30: Utilities
4.5 Utilities To access the Utilities section, select Tools from the top bar of the software window and choose Utilities. 4.5.1 Extrusion tab Use this tab to extrude the bioink, prime the nozzle, or retract the plunger. 1. Extrusion: Set the extrusion rate. 2. -
Page 31: Miscellaneous Tab
4.5.3 Miscellaneous tab Use this tab to turn On/Off chamber lights. 1. Turn On/Off chamber lights. Consider using when working with photosensitive materials. 4.5.4 Movement test tab Use this tab to test the movement of the printhead and the printbed. 1. -
Page 32: Output Data Tab
4.5.5 Output data tab This tab presents output data for customer support. Corning uses this tab to perform sensor testing. 4.5.6 Update tab Download the firmware update onto your computer. Firmware updates are available at www.corning.com/matribotguidelines. Navigate to the Update tab in the utility’s menu. Press Browse and select the file from the list. Press Start Update to perform the update procedure. -
Page 33: Lcd Interface
5. LCD Interface The Corning® Matribot® Bioprinter can be used without a connection to the PC. Multiple options such as bioprinting, temperature control, and manual calibration can be accessed on the Corning Matribot Bioprinter’s LCD display. The following section describes main functions that can be accessed on the LCD display. -
Page 34: Maintenance
After using ethanol, wait at least 60 seconds before starting the Corning Matribot Bioprinter. Ethanol is flammable, and this ensures that all remaining ethanol vapor is ventilated. Failure to wait can cause equipment damage and personal injury. -
Page 35: Leveling The Printbed
6.3 Leveling the printbed It is important to ensure that the printbed is completely leveled relative to the internal axes of your Corning® Matribot® Bioprinter. 1. Verify that the Corning Matribot Bioprinter is disconnected from the power outlet and your computer. -
Page 36: Tensioning The Belts
You should see a frequency spike, and it should drop off slowly as the vibration of the belt decreases over time. For the Corning® Matribot® Bioprinter Y-Gantry belts the ideal frequency is 100Hz +/- 10%. Both of the Y-Gantry belts should be as close as possible in tension with each other. -
Page 37: Troubleshooting Guide
6.5 Troubleshooting guide Keeping your Corning® DNA Studio updated to the latest version is highly recommended and essential for taking advantage of the new features, while avoiding device malfunctions. Use the steps below to update your Corning DNA Studio to the latest software version available. - Page 38 Make sure the printer is properly connected to the computer via the supplied USB cable cannot find the and that the printer is turned on. printer. Autocalibration, Disable printing from SD card mode in utilities tab in the Corning Matribot® Bioprinter’s bioprinting, or LCD interface. biodispensing doesn’t start.
- Page 39 Corning® DNA Studio. broken. Corning Matribot® Disable printing from SD card mode in the utilities tab in the Corning Matribot Bioprinter’s Bioprinter SD card LCD interface. mode is enabled. The Bioprint is not showing SD card is not Verify that the SD card is properly inserted in the SD card reader.
-
Page 40: Limited Warranty
Corning is not in any way responsible for any consequential losses or downtime, including those caused by a problem in the performance of our products or a failure to conform to any warranty. Corning is not responsible for additional customs fees and tariffs. - Page 41 Not for use in humans. These products are not intended to mitigate the presence of microorganisms on surfaces or in the environment, where such organisms can be deleterious to humans or the environment. Corning Life Sciences makes no claims regarding the performance of these products for clinical or diagnostic applications. *For a listing of US medical devices, regulatory classifications or specific information on claims, visit...
Need help?
Do you have a question about the Matribot 6150 and is the answer not in the manual?
Questions and answers