Table of Contents
Advertisement
Quick Links
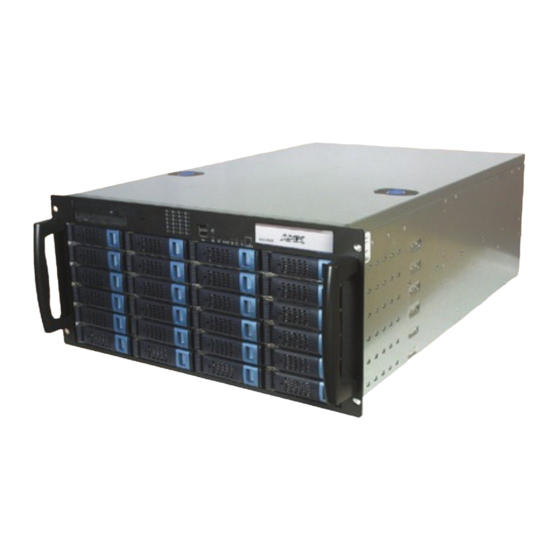
MAX-MMS400M Multimedia Server
The MAX-MSS400M Multimedia Server (FIG. 1) utilizes the RAID5 disk drive system
to keep an ever expanding library of DVDs and CDs well organized, simple to access,
and easy to use. Video is stored in native DVD quality, which captures the depth,
dynamics and sharpness of the original video. The MAX-MMS400M features a robust
internal hard drive system with Terabytes of space and allows you to efficiently
manage hundreds of DVDs/CDs, accommodate single and multi-room video
distribution, as well as search and select chapters, titles and tracks. The MAX-
MMS400M communicates via Ethernet to up to eight MAX-AVM Audio Visual Modules.
Power LED (green)
Bootup Disc LED (yellow)
Hard drive activity LEDs
Storage Disc Drives
DVD/CDRW tray
Power cable
connectors
Power Switches
Keyboard port
Mouse port
Note: All components that do not have a callout description
in this illustration are unused (see the MAX-MMS400M Specifications table).
FIG. 1
MAX-MMS400M MultiMedia Server (front and rear views)
The MAX-MMS Multimedia Servers are available in six storage capacities (125, 200,
300, 350, 400 or 900 DVDs); 25 CDs can be stored in place of 1 DVD.
Refer to the MAX-MMS125/200/300/350 and MAX-MMS900M Installation Guides
(both available on www.amx.com) for details on the 125/200/300/350- and 900-disc
MultiMedia Servers.
Note: Multiple MAX-MMS units can be joined together for more capacity or more
zones. Contact AMX Technical Support for details.
Product Specifications
MAX-MMS400M Specifications
Storage capacity
• 400 DVD (10,000 CD) capacity (FG2178-05
Power:
• 115 VAC/700W
Audio Specifications:
• Frequency Response: 20Hz to 20kHz
• Dynamic Range: 110dB
• Signal-to-Noise Ratio: 110dB
• D to A Conversion: AKM Semiconductor, 24-bit, 128X oversampling
Front Panel
• DVD/CDRW tray
Components:
• 3.5" Floppy disk drive
• Hard Drive LEDs: Bank of 16 LEDs indicate activity on the storage drives
• USB ports/LEDs: not used.
• Fan LED (red): lights to indicate failure of cooling fan(s)
• Bootup Disc LED (yellow): lights to indicate activity on the bootup drive
• Power LED (green): lights to indicate that the unit is on
• Reset button
• Power button
Fan LED (red)
Power button
Reset button
10/100 Ethernet
VGA (DB-15) port
RS-232
Gigabit Ethernet
(to MAX-AVM or
Gigabit Ethernet hub)
)
MAX-MMS400M
MAX-MMS400M Specifications (Cont.)
Rear Panel
Components:
Dimensions (HWD):
Weight:
Operating Temp:
Rel. Humidity:
Included
Accessories:
Optional
Accessories:
(front)
Connecting the MAX-MMS to Your PC via WinMAX
Use the WinMAX software application (available for download from www.amx.com) to
establish initial communications with the MMS server. You should install the WinMAX
application before connecting the MMS server to your PC.
Downloading WinMAX from www.amx.com
The WinMAX software application can be downloaded from www.amx.com as a self-
extracting executable. As part of the installation process, it automatically searches for
and replaces older versions of WinMAX. To download WinMAX:
1.
Go to www.amx.com and log in. You must be logged in as a dealer to download
AMX applications.
2.
Go to Dealers > Tech Center > Downloadable Files > Application Files.
3.
Scroll down in the list to select WinMAX.
(rear)
4.
Read the AMX License Agreement and click I Accept to continue.
5.
In the File Download dialog:
•
Click Save to save the WinMAX installation .EXE file to a local drive (or LAN).
•
Click Open to begin the installation immediately.
Once installed, by default the program resides in your Programs directory.
Note: For WinMAX to be viewed properly, the resolution of your PC must be set to
1024 x 768.
Connecting the MMS to your PC
Connect the Ethernet port to your PC
(either directly or through a LAN connection)
2
3
4
FIG. 2
Connecting the MAX-MMS400M to your PC
1.
If its not already installed, load the WinMAX application on your PC.
If you intend to connect to the MMS via a LAN connection, verify that the PC is
communicating properly with the network.
2.
Use an RJ-45 twisted pair cable to connect the Ethernet port on the MMS400M
to the LAN that your PC is on. Alternatively, you can connect the PC directly to
the MMS's Ethernet port using an Ethernet crossover cable.
Note: Optionally, at this point you can connect one or more MAX-AVM Audio
Video Modules to the MMS400M via the Gigabit Ethernet connector Refer to the
Installation Guide
MultiMedia Server
• 2 Power Cable connectors: IEC connectors for AC power cables.
• 3 Power Switches
• PS/2 Keyboard and Mouse ports (for troubleshooting only).
• RS-232 port: 9-pin (DB-9) serial port.
• Parallel port: not used.
• Video connector: DB15HD port provides VGA output (for troubleshooting
only).
• 10/100 Ethernet port: RJ-45 Ethernet port provides 10/100 network
connectivity between the MAX-MMS400M and the NetLinx Master or
PC.
• USB ports: not used.
• Mic In/Line Out/Line In: not used.
• RJ45 Gigabit Ethernet port: connects to MAX-AVM Audio Video Modules
to send media through a Gigabit Ethernet hub (not included).
• 6 7/8" x 18 7/8" x 27 5/8" (17.46 cm x 47.94 cm x 70.16 cm)
• 4 RUs (mounts in a standard 19" equipment rack)
90 lbs (40.82 kg)
0°C (32°F) - 50°C (122°F)
5% - 95% non-condensing
• 2 Power Cables
• 6' (1.83m) Ethernet Crossover Cable
• MAX-AVM Audio/Video Module (FG2178-50)
1
To MAX-AVM (Audio Video Module)
Plug in the power cables
Multiple AVM's require a Gigabit
Switch power supplies on
Ethernet Hub (see Fig. 3)
Switch power on (Power switch is on front panel)
Advertisement
Table of Contents

Related Manuals for AMX MAX-MMS400M


Summary of Contents for AMX MAX-MMS400M
- Page 1 As part of the installation process, it automatically searches for and replaces older versions of WinMAX. To download WinMAX: Go to www.amx.com and log in. You must be logged in as a dealer to download AMX applications. Go to Dealers > Tech Center > Downloadable Files > Application Files.
- Page 2 For full warranty information, refer to the AMX Instruction Manual(s) associated with your Product(s). 065-004-2779 3/04 ©2004 AMX Corporation. All rights reserved. The AMX logo is a trademark of AMX Corporation. 3000 RESEARCH DRIVE, RICHARDSON, TX 75082 • 800.222.0193 • fax 469.624.7153 • technical support 800.932.6993 • www.amx.com...
Need help?
Do you have a question about the MAX-MMS400M and is the answer not in the manual?
Questions and answers