Jamara Ultra BL 8 2,4 GHz Instructions Manual
Hide thumbs
Also See for Ultra BL 8 2,4 GHz:
- Instruction (24 pages) ,
- Instruction (24 pages) ,
- Instruction (24 pages)
Advertisement
Quick Links
No. 059730 BL Lipo
IT - Istruzioni di montaggio
GB - Instruction
IT - Informazioni generali
JAMARA e.K. non e´responsabile per danni, sostenute al prodotto stesso o attraverso questo, dovuti
ad una gestione non corretta del articolo. Solo il cliente si assume la piena responsabilità per la
manutenzione e l´utilizzo corretto dello stesso; questo include il montaggio, la ricarica, l´utilizzo, fi
no alla scelta della aerea di applicazione. Si prega di notare e rispettare le istruzioni d´uso, questi
contengono informazioni e avvertimenti molto importanti.
Questo modello non é un giocattolo!
Sconsiliato per persone inferiori di 14 anni.
Attenzione: Tenere sempre fuori dalla portata dei bambini.
Contiene piccoli pezzi che possono essere ingeriti.
RISCHIO DI SOFFOCAMENTO!
Non adatto a bambini di età inferiore a 36 mesi.
Questo prodotto è un articolo di modellismo. Ciò signifi ca che il veicolo deve essere sempre sotto-
posto a manutenzione (controllare eventuali danni, controllare i collegamenti a vite, pulire ecc...).
Le parti soggette ad usura come l'ingranaggio principale, il pignone del motore, bicchierino ecc.
si consumano nel tempo e devono pertanto essere sostituite. Non è sempre possibile evitare gli
incidenti, pertanto è necessario riparare o sostituire anche i danni causati dagli incidenti. Le parti
usurate o difettose a causa di urti o manutenzione insuffi ciente non sono coperte da garanzia, i
costi e le riparazioni sono a carico dell'acquirente stesso.
Konformitätserklärung
Con la presente JAMARA e.K. dichiara che il prodotto "Ultra BL8 2,4 GHz, No. 059730"
è conforme alla Direttiva 2014/35/UE, 2014/53/UE e 2011/65/UE.
Il testo integrale della dichiarazione di conformità UE è disponibile al seguente
indirizzo Internet www.jamara-shop.com/Conformity
Attenzione!
Prima dell'uso:
Accendete prima la trasmittente e poi il modello.
Dopo l'uso:
Spegnere prima il modello e poi la trasmittente.
● Non utilizzare il suo modello fuori della distanzia di vista. Sia la visibilità come la portata
massima del vostro modello dipendono da molti fattori, come il tempo, disturbo di
frequenza e il luogo di utilizzo. Eseguire un test prima di ogni utilizzo del modello con
una seconda persona che tiene fi ssato il modello. Con questa procedura potete testare
come reagisce il modello durante la perdita del segnale causato per esempio da una
batterie scarica oppure la radio spenta.
Accessori consigliati + Strumenti
No. 232060
No. 190065
Power Tape silicone
Misuratore convergenza
Doublesided power tape
Camber adjusting Tool
No. 15 3059
No. 281730
X-Peak 80 V2
Forbici per lexcarrozzeria
Caricatore
Lexan scissors
Charger
Prima di avviare il modello, leggere attentamente tutte le istruzioni per l'uso.
Attenzione! Leggere completamente le avvertenze / istruzioni di sicurezza, questi
sono per la vostra sicurezza può prevenire incidenti / infortuni.
Frequency bands: 2.4Ghz
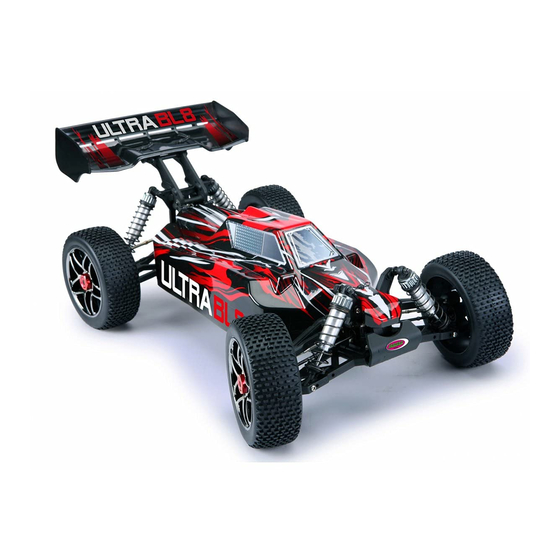
Ultra BL 8 2,4 GHz
No. 232423
medium
Lacca protezione
Nut lock
Frequency range: 2405,5 MHz - 2475,0 MHz
GB - General information
Jamara e.K. is not liable for any damage caused to the product itself or through this, provided this
is due to improper operation or handling errors. The Customer alone bears the full responsibility for
the proper use and handling, including without limitation, the assembly, the charging process, the
use and choice of the operation area. Please refer to the operating and user instructions, it contains
important information and warnings.
This model is not a toy!
Not suitable for people under 14 year.
Warning:
Keep away necessarily from children.
Contains small parts which can be swallowed.
RISK OF SUFFOCATION!
Not suitable for children under 36 months.
This product is a model building article. This means that the vehicle must always be serviced
(check for damage, check screw connections, clean etc...). Wear parts such as the main gear,
motor pinion, bone socket, etc. will wear out over time and must therefore be replaced. Crashes
cannot always be avoided, so crash damage must also be repaired or replaced. Wear parts or
defective parts due to crashes or insuffi cient maintenance are not covered by warranty, costs and
repairs must be covered by the buyer himself.
Certifi cate of Conformity
Hereby JAMARA e.K. declares that the products "Ultra BL8 2,4 GHz, No. 059730" comply with
Directives 2014/35/EU, 2014/53/EU and 2011/65/EU.
The full text of the EU Declaration of Conformity is available at the following Internet address:
www.jamara-shop.com/Conformity
Attention!
Before operating:
Switch the transmitter on fi rst then the model.
When fi nished:
First switch off the model then the transmitter.
● Never operate your model beyond sight. Both the maximum visibility as well as the max.
range of your model will depend on many factors such as weather, location and
interfering frequencies. Therefore, before each use perform a range test with a second
person securely holding the model and also check how the model reacts if there is a
signal failure e.g. when empty transmitter batteries are installed.
Recommended Tool + Equipment
No. 505401
No. 232423
medium
Graffette per carrozzeria
Protezione Vite
Body clips
Nut lock
Read the complete instructions and security instructions carefully before using the model.
Caution! Please fully and carefully read warnings/ safety instructions. These are for
our own security and can avoid accidents/injuries.
EIRP: 49,09 mW (max. power transmitted)
piccolo/small
No. 059273
Graffette per carrozzeria
Body clips
33/21
1:10
Advertisement

Related Manuals for Jamara Ultra BL 8 2,4 GHz


Summary of Contents for Jamara Ultra BL 8 2,4 GHz
- Page 1 JAMARA e.K. non e´responsabile per danni, sostenute al prodotto stesso o attraverso questo, dovuti Jamara e.K. is not liable for any damage caused to the product itself or through this, provided this ad una gestione non corretta del articolo. Solo il cliente si assume la piena responsabilità per la is due to improper operation or handling errors.
- Page 2 IT - Lieferumfang GB - Box contents 1. Modello 1. Model 2. Telecomando 2. Transmitter 3. Antenna 3. Antennas 4. Connettore di collegamento 4. Binding Plug 5. Batteria 5. Battery 6. Caricatore 6. Charger Accessories: Accessori: • Transmitter: 4 x AA 1,5V, •...
- Page 3 IT - Riconoscimento di una batteria carica. GB - Detecting a full battery. Quando si collega una batteria carica al caricatore, i LED diventeranno rossi per alcuni secondi e poi When you connect a full battery to the charger, the LEDs will turn red for a few seconds and then torneranno verdi.
- Page 4 IT - Attenzione! GB - Attention! I dadi devono essere controllati prima del primo utilizzo e perio- The wheel nuts must be checked and, if necessary, tightened dicamente (3 -5 inserimenti) eventualmente riserrati. Altrimenti, i before the fi rst use and at regular intervals (3-5 uses). Other- dadi possono allentarsi a causa del alto rendimento del motore wise, the wheel nuts can come loose by the high power output al asse della ruota e la ruota potrebbe staccarsi dal veicolo.
- Page 5 Allacciare la trasmittente alla ricevente Binding the receiver to the transmitter In un moderno sistema di 2,4 GHz, è indispensabile che la In the delivery state, the transmitter is already bound to the re- Fail Safe Setup trasmittente e la ricevente vengano connesse insieme a bordo ceiver.
- Page 6 Regolatore (installato) Versione BL Controller (installed) Version BL Dati tecnici: Technical data: Amperaggio 60 A Max. Current 60 A Mass. prestazione 390 A Burst Current 390 A Internal Resistance 0,0012 Ohm Resistenza 0,0012 Ohm For Use With Cars or Trucks scale RC-Cars Pacco batterie max.
- Page 7 Segnali e dispositivi di sicurezza LED’s, errors and protection Durante il normale funzionamento, i segnali LED hanno i seguenti signifi cati: In normal use the LED will illuminate as follows: Quando l‘acceleratore è in posizione neutra, non è accesa né la LED rossa né la LED verde. If the throttle control is in the neutral position, neither the red or green LED will illuminate.
- Page 8 IT - Struttura del menu del regolatore GB - Menu structure Accendere il trasmettitore Switch transmitter ON Accendere il regolatore, mentre si preme il tasto ‚SET‘. Press and hold the ‘SET‘ button down and switch the receiver on Il LED rosso lampeggia The red LED blinks Premere il Il LED rosso lampeggia una volta, cioè, signifi ca andare avanti con...
- Page 9 Montaggio differenziale 079989 Differential assembly 505074 505071 505071 505085 505085 505155 505085 505071 505071 079989 505073 505058 Montaggio di trasmissione anteriore Front gearbox assembly 059096 505078 059106 505075 505060 177463 059097 505072 079996 079996 505072 505075...
- Page 10 Montaggio sterzo anteriore a quadrilatero Prima dell’uso del prodotto si prega di verifi care tutti i destra bulloni ed i collegamenti della parte elettronica. Il veicolo right Steering hub and front suspension arm assembly disponedi una sospensione anteriore Pivot Ball. Questo ha numerosi vantaggi.
- Page 11 Montaggio di snodo e protezione dagli impatti Front suspension and Bumper assembly 059104 059107 059101 059086 177443 059100 059108 059070 177143 059080 177143 Montaggio ammortizzatore anteriore Front shock assembly 059075...
- Page 12 Montaggio Ammortizzatore posteriore Rear shock assembly 059075 Installazione Ammortizzatore anteriore Front shock installation 059083 059083 177443 059081 Montaggio servosaver Steering bell crank and servo saver assembly 059074...
- Page 13 Montaggio servo Servo assembly 177463 059073 506119 505058 177463 059113 Montaggio del motore e pignone Motor mount assembly 130158 505026 059085 505390 Montaggio frizione antisaltellamento Slipper set assembly 505388 505475...
- Page 14 trasmissione posteriore di montaggio Rear gearbox assembly 177463 059081 059090 059097 059082 505078 505075 079996 505075 Montaggio posteriore a quadrilatero 177443 Rear Suspension assembly 505028 059099 059108 177143 059080...
- Page 15 assemblaggio indietro Rear chassis area assembly 059106 070806 505386 059072 177143 059078 177143 177143 059078 Montaggio posteriore assale Rear hub assembly 505054 059101 059077 505054 Montaggio superiore posteriore a quadrilatero Rear upper rod set assembly 505057...
- Page 16 Montaggio Ammortizzatore posteriore Rear shock assembly 059083 177463 177443 059099 177463 Montaggio barre scanalate e servo 177443 Steering rod set and servo set assembly 177463 059079 177143 059081 L‘installazione della piastra radio Radio tray set assembly 505386 177463 177463 059081 059071 177143...
- Page 17 505058 ricevitore e controllore di montaggio Receiver box ESC set assembly 081448 505285 505032 505032 177143 059273 505032 505053 177143 505053 Montaggio corpo montaggio posteriore Rear body post mount assembly Cut off the pins on the body post set and insert it into the recess on the wing mount set. 505060 Secure the pins with the set screws.
- Page 18 IT - Punti impostazione GB - Setting points Suspensione molla (basso o meno clip) Angolo sospensione Precarico molla Inclinazione posteriore (meno o più clip) Inclinazione Inclinazione anteriore Suspensione molla (basso o meno clip) Angolo sospensione posteriore / sopra Spring tension (less or more clip) Toe, front Caster...
- Page 19 Inclinazione (Solo vite interna) Front camber (only inner screw) IT - Campanatura - Positivo / Negativo anteriore e GB - Negative / positive camber front and rear posteriore You can adjust the front camber by turning one of È possibile regolare la campanatura anteriore ruotan- the inner screws on the pivot front suspension.
- Page 20 IT - Pezzi di ricambio GB - Spare parts No. 05 9070 No. 05 9071 No. 05 9072 No. 05 9074 No. 505032 No. 05 9073 Chassis Piastra radio Albero motore centro Supporto servo Servo Saver Set Supporto batteria Chassis Radio tray Central drive shaft set Battery case...
- Page 21 IT - Pezzi di ricambio GB - Spare parts No. 07 9996 No. 07 0806 No. 05 9078 M3 x 8 No. 50 5057 M3 x 12 No. 50 5082 No. 50 5053 M3 x 6 Ø 5 x Ø 11 x 4 Ø...
- Page 22 Because of the high power compactivity (up to 150 Wh/kg) the cells are quite dangerous and need • Evitare l’uso del modello nei posti affollati. Mai usare il modello su luoghi e stradi special care! The company Jamara excludes explicitly, all types of liability for damages, that can occure when using the Lithium-Polymer- pubblichi.
- Page 23 IT - Soluzione dei problemi GB - Troubleshooting Dopo l‘accensione il motore non parte e non rilascia alcun segnale acustico. The motor will not rotate after switching on. No signal is present. 1. La batteria o il collegamento alla batteria non sono in ordine. 1.
- Page 24 S.E. & O. Copyright JAMARA e.K. 2021 Copia e la riproduzione totale o in parte, solo con il permesso di JAMARA e.K. All rights reserved. Copyright JAMARA e.K. 2021 Copying or reproduction in whole or part, only with the expressed permission of JAMARA e.K.
Need help?
Do you have a question about the Ultra BL 8 2,4 GHz and is the answer not in the manual?
Questions and answers