
Related Manuals for x-sense XS01-WR


Summary of Contents for x-sense XS01-WR
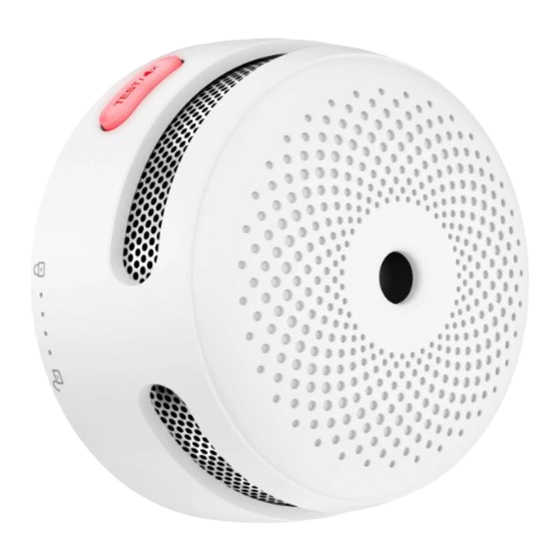
- Page 1 1008 User Manual X-Sense Innovations Co., Ltd. XS01-WR Email: support@x-sense.com Wireless Interlinked Smoke Alarm Conforms to EN 14604:2005+AC:2008...
- Page 2 English This user manual contains important information regarding the operation of your X-Sense smoke alarm. Ensure you read this user manual fully before installing and operating the alarm. If you are installing this smoke alarm for use by others, you must leave this manual (or a copy of it) with the end user.
- Page 3 HEAR THE SMOKE ALARM. combination smoke and carbon monoxide alarms. This model is designed to be wirelessly interlinked with other X-Sense Link alarms, but is not designed 3. FIRES IN CHIMNEYS, WALLS, ROOFS, DIFFERENT LEVELS OR BEHIND CLOSED to communicate with wireless interlinked alarms from other manufacturers.
- Page 4 NOTE: To turn on XS01-WR, remove the battery insulating lm from unit enters the pairing mode and the other unit enters the searching the battery compartment. To learn how to turn on di erent models of mode. wireless interlinked alarms, please refer to their speci c user manuals 6.
- Page 5 2. Test all wireless alarms to ensure they are interconnected before 2. If you have purchased the old version of the XS01-WR alarms, you can installation. add X-Sense Link wireless interlinked alarms into the existing XS01-WR 3. A maximum of 24 wireless alarms can be interconnected on the same interconnected network.
- Page 6 If your X-Sense Link XS01-WR is interconnected to other wireless smoke alarms, we recommend that every individual smoke alarm is tested during the weekly test.
- Page 7 Installation Positioning Indication • The alarm will sound • The initiating smoke alarm will 3 short quick beeps. beep continuously with the red LED fl ashing. • The red LED will • Other interconnected smoke alarms fl ash once every in the network will receive the second during the signal after 5 seconds, and they will...
- Page 8 1. Prioritize the installation of an alarm in the bedroom and walkways, and make sure you can hear the alarm from all sleeping areas. In a home with several bedrooms, install an alarm in every bedroom. If you install only one smoke alarm in your home, install the alarm near to all bedrooms where possible, and not in a basement or furnace room.
- Page 9 WARNING 1. THIS ALARM SHOULD BE INSTALLED BY A COMPETENT PERSON. 2. ALARMS SHOULD NOT BE USED AS A SUBSTITUTE FOR PROPER INSTALLATION, USE AND MAINTENANCE OF FUELBURNING APPLIANCES INCLUDING APPROPRIATE VENTILATION AND EXHAUST SYSTEMS. In stallation Method NOTE: Bef ore installation, it is recommended to test the interconnected smoke alarms in di erent rooms where you intend to install these alarms to ensure that they are within the transmission range.
- Page 10 Battery Replacement 1. To replace the battery, detach the smoke alarm from the mounting bracket by twisting counterclockwise. 2. Pull the battery removal tab to remove the battery, and then install a new battery, matching the correct polarity markings. 3. Test the alarm, and then mount the alarm onto the mounting bracket by twisting clockwise to lock the alarm.
- Page 11 LED Indicator and Audible Alarm Silence Mode Red LED None fl ashes once every 5 Status LED indicator Audible alarm Note seconds. Normal Red LED None fl ashes once every 60 Low Battery Red LED 1 beep every Each alarm seconds.
- Page 12 868 MHz mode. Maximum Number of 24 wireless units (only compatible with Technical Speci cations Interconnected Units X-Sense wireless alarms) Transmission Range Over 820 ft (250 m) in open air Power Supply Replaceable 3 V CR123A lithium battery Operating Life...
- Page 13 Maintenance Troubleshooting To keep your smoke alarm in good working order, follow these simple steps: PROBLEM SOLUTION 1. Verify the unit’s alarm sound and indicator are working properly by testing the unit once a week. Your smoke alarm does • Make sure you push the test/silence button 2.
- Page 14 Diese Gebrauchsanweisung enthält wichtige Informationen zur Bedienung household waste. Please recycle where facilities exist. Ihres X-Sense Rauchmelders. Vergewissern Sie sich, dass Sie diese Check with Local Authority or retailer for recycling advice. Gebrauchsanweisung vollständig gelesen haben, bevor Sie den Melder installieren und in Betrieb nehmen.
- Page 15 EBENEN ODER HINTER GESCHLOSSENEN TÜREN WERDEN verbundene Kombinierter Rauch- und Kohlenmonoxidmelder. Dieses MÖGLICHERWEISE NICHT ERKANNT. Modell ist so konzipiert, dass es drahtlos mit anderen X-Sense Link 4. DIESES GERÄT ERKENNT KEINE FLAMMEN, HITZE, KOHLENMONOXID ODER Melder verbunden ist und nicht für die Kommunikation mit miteinander ANDERE GEFÄHRLICHE GASE.
- Page 16 Verbindung sicherzustellen. die rote LED blinkt schnell, da es nach einem Netzwerk sucht, um sich HINWEIS: Um XS01-WR einzuschalten, entfernen Sie die Batterie-Isolierfolie zu verbinden. Nachdem die dritte Einheit erfolgreich dem miteinander aus dem Batteriefach. Weitere Informationen zum Einschalten verschiedener verbundenen Netzwerk beigetreten ist, piepen beide Einheiten einmal Modelle von drahtlos miteinander verbundenen Melder fi...
- Page 17 Drücken Sie Melder in das X-Sense XS01-WR Netzwerk hinzu schnell 4 Mal Das Modell XS01-WR hat 2 Versionen: die alte Version XS01-WR und die neue Drücken Sie Version X-Sense Link XS01-WR, die unterschiedliche Verbindungsmethoden schnell 2 Mal haben.
- Page 18 X-Sense Link drahtlose miteinander verbundenen Melder gehören. können so miteinander verbunden werden. Um sicherzustellen, dass 2. Wenn Sie die alte Version XS01-WR Melder erworben haben, können Sie X-Sense alle Melder in dasselbe vernetzte Netzwerk gelangen, stellen Sie sicher, Link...
- Page 19 Netzwerk eintritt. Indikation • Der Melder gibt • Der initiierende Rauchmelder piept HINWEIS: Die drahtlosen miteinander verbundenen X-Sense Link Melder 3 kurze schnelle kontinuierlich mit rot blinkender LED. in einem Multipack wurden bereits miteinander verbunden. Um ein neues Pieptöne von sich.
- Page 20 Installationsort 1. Priorisieren Sie die Installation eines Rauchmelders im Schlafzimmer und in den Gängen und stellen Sie sicher, dass Sie den Melder von allen Schlafbereichen hören können. In einem Haus mit mehreren Schlafzimmern, installieren Sie einen Melder in jedem Schlafzimmer. Wenn Sie nur einen Rauchmelder in Ihrem Haus installieren, installieren Sie den Melder möglichst in der Nähe aller Schlafzimmer und nicht in einem Keller oder Ofenraum.
- Page 21 8. Installieren Sie in mehrstöckigen Häusern oder Wohnungen mindestens einen Funk-Rauchmelder auf jeder Etage und halten Sie ihn in einer geraden vertikalen Linie (siehe Diagramm) damit wenige Hindernissen wie möglich zwischen den miteinander verbundenen Melder stehen, um eine optimale Signalübertragung zu gewährleisten. Orte vermeiden 1.
- Page 22 WARNUNG 1. DER RAUCHMELDER SOLLTE VON EINER KOMPETENTEN PERSON INSTALLIERT WERDEN. 2. DIE INSTALLATION DES MELDERS SOLLTE NICHT ALS ERSATZ FÜR DIE ORDNUNGSGEMÄSSE INSTALLATION, VERWENDUNG UND WARTUNG VON FEUERBETRIEBENEN GERÄTSCHAFTEN, EINSCHLIESSLICH GEEIGNETER BE- UND ENTLÜFTUNGSSYSTEMEN VERWENDET WERDEN. Installationsmethode HINWEIS: Vor der Installation wird empfohlen, die miteinander verbundenen Rauchmelder in verschiedenen Räumen zu testen, in denen Sie diese Melder installieren möchten, um sicherzustellen, dass Sie sich im Übertragungsbereich be nden.
- Page 23 LED-Statusleuchte und akustischer Alarm Batteriewechsel 1. Um die Batterie zu ersetzen, lösen Sie den Rauchmelder von der Halterung, LED- Akustischer indem Sie sich gegen den Uhrzeigersinn drehen. Status Hinweis Statusleuchte Alarm 2. Ziehen Sie an der Batterie Entfernungsklappe, um die Batterie zu entfernen Rote LED blinkt Keiner und setzen Sie dann eine neue Batterie ein.
- Page 24 HINWEISE Ruhemodus Rote LED Keiner blinkt 1. Sie können die miteinander verbundenen Einheiten zum stumm einmal alle 5 schalten, indem Sie eine der Stummschalt-Tasten der Rauchmelder in Sekunden. der Gruppe drücken. Wenn eine Einheit immer noch ertönt, kann dies der initiierende Rauchmelder (der Einheit, die den Rauch erkannt hat) sein;...
- Page 25 Melderabdeckung und die Lüftungsöff nungen mit Ihrem Staubsauger mit Maximale Anzahl 24 drahtlose Einheiten (nur kompatibel mit weichem Bürstenaufsatz, um Staub und Schmutz zu entfernen. der miteinander X-Sense Funk-Meldern) verbundenen Einheiten 3. Verwenden Sie niemals Reinigungs- oder Lösungsmittel, um den Melder Übertragungsbereich Über 250 m im Freien zu reinigen.
- Page 26 Hersteller- und Serviceinformationen während des Tests nicht. drücken. • Überprüfen Sie die Positionierung der X-Sense Innovations Co., Ltd. Installation. Das Funksignal kann blockiert Adresse: B4-503-D, Turm B, Kexing Science Park, Keyuan Road Nr. 15, oder außer Reichweite sein. Technologiepark Gemeinschaft, Yuehai Avenue, Distrikt Nanshan, Shenzhen, Fehlalarme werden •...
- Page 27 IMPORTANT Ce manuel contient des informations importantes sur le fonctionnement de votre détecteur de fumée X-Sense. Veuillez bien le lire complètement avant 1. LES INDICATIONS “DANGER”, “AVERTISSEMENT” ET “PRÉCAUTIONS” ATTIRENT d’installer et d’utiliser le détecteur. Si vous installez ce détecteur de fumée VOTRE ATTENTION SUR LES CONSIGNES IMPORTANTES D’UTILISATION OU...
- Page 28 Tous les détecteurs interconnectés sans fi l X-Sense Link contiennent REMARQUE: Pour activer le détecteur XS01-WR, ôtez le lm isolant du un module radiofréquence (RF) intégré qui vous permet de connecter logement des piles. Pour savoir comment activer di érents modèles sans fi...
- Page 29 puis appuyer rapidement 4 fois sur le bouton test/silence de l’un des deux détecteurs précédemment interconnectés. Ce détecteur va émettre Appuyez brièvement 4 fois 1 bip, et la LED rouge va clignoter lentement, indiquant qu’il est prêt à ajouter un nouvel appareil au réseau. Ensuite, appuyez rapidement 2 fois sur le bouton test/silence du nouvel appareil et sa LED rouge va clignoter Appuyez rapidement tandis qu’il cherche un réseau auquel se connecter.
- Page 30 4. Ce modèle ne peut être interconnecté qu'avec d'autres détecteurs sans l interconnectés X-Sense Link 2. Si vous avez acheté des détecteurs de l'ancienne version XS01-WR, vous pouvez ajouter des détecteurs interconnectés sans l X-Sense Link Comment ajouter les détecteurs interconnectés sans l X-Sense Link réseau précédemment interconnecté...
- Page 31 été interconnectés. Pour créer un nouveau réseau, un à la fois les détecteurs interconnectés sans fi l X-Sense Link vous devrez d'abord déconnecter chaque détecteur individuellement dans 5.
- Page 32 Positionnement de l’installation Tester un détecteur Tester tous les détecteurs de fumée individuel interconnectés Action Appuyer sur le Maintenez enfoncé le bouton test/ bouton test/silence. silence. Indication • Le détecteur • Le détecteur de fumée qui se déclenche émet 3 brefs bips émet un bip continu avec clignotement de son voyant LED rouge.
- Page 33 8. Dans les habitations ou dans les appartements à plusieurs étages, installez 1. Installez prioritairement un détecteur de fumée dans les chambres à au moins un détecteur de fumée sans fi l à chaque niveau et fi xez-le dans coucher et les corridors, et assurez-vous que le signal d’alarme est audible un axe vertical droit (voir plan) avec un minimum d’obstacles entre chaque de toutes les pièces où...
- Page 34 AVERTISSEMENT 1. CE DÉTECTEUR DOIT ÊTRE INSTALLÉ PAR UNE PERSONNE COMPÉTENTE. 2. L’INSTALLATION DU DÉTECTEUR NE DOIT PAS REMPLACER L’INSTALLATION, L’UTILISATION ET L’ENTRETIEN APPROPRIÉS DES APPAREILS DE COMBUSTION, EN CE COMPRIS LES SYSTÈMES DE VENTILATION ET D’ÉVACUATION. Méthode d’installation REMARQUE: Avant l'installation, il est recommandé de tester les détecteurs de fumée interconnectés dans différentes pièces où...
- Page 35 Remplacement de la pile 1. Pour remplacer la pile, détachez le détecteur de son socle en le tournant dans le sens anti-horlogique. 2. Tirez sur le languette pour faire sortir la pile et mettez une nouvelle à la place, en observant bien la polarité. 3.
- Page 36 Voyant LED et alarme sonore Mode Silence La LED rouge Aucune clignote 1 fois toutes les 5 Statut Voyant LED Alarme sonore Remarque secondes. Normal La LED rouge Aucune clignote 1 fois Pile faible La LED rouge 1 bip toutes les Chaque toutes les 60 clignote 1 fois...
- Page 37 24 détecteurs sans fi l (uniquement détecteurs interconnectés compatibles avec les détecteurs sans fi l de Spéci cations techniques X-Sense) Portée de transmission Plus de 250 m en espace ouvert à l’air libre Alimentation Pile au lithium remplaçable de 3 V CR123A Durée de vie...
- Page 38 2. Le détecteur de fumée fonctionne entre 4,4 et 37,8 °C. Une exposition 6. N’essayez jamais de démonter l’appareil ni d’en nettoyer l’intérieur. Cela prolongée à des températures en dehors de cette plage peut réduire la annulerait votre garantie. durée de vie de la pile et a ecter la précision. Nous ne recommandons 7.
- Page 39 émet immédiatement. 1 bip toutes les 60 secondes. X-Sense Innovations Co., Ltd. Adresse: B4-503-D, Tour B, Parc Scientifi que de Kexing, 15 route de Keyuan, Communauté du Parc Technologique, avenue de Yuehai, District de Nanshan, Shenzhen, 518057, CHINE Email: support@x-sense.com...
Need help?
Do you have a question about the XS01-WR and is the answer not in the manual?
Questions and answers