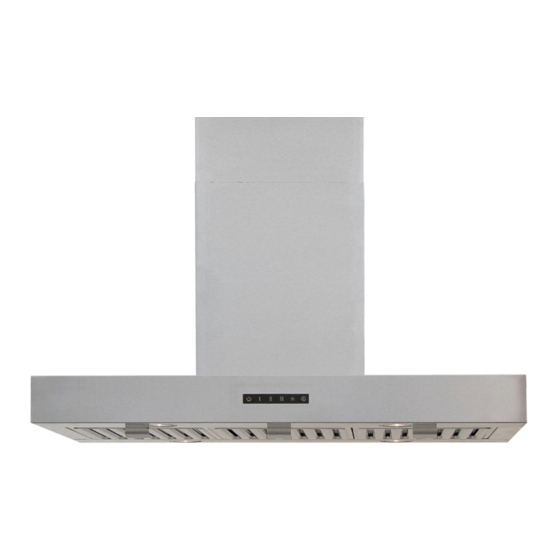
Table of Contents
Advertisement
Quick Links
User's Manual
R-18L36SS
R-18L42SS
NOTE: PLEASE INSPECT HOOD
IMMEDIATELY UPON RECEIVING.
CLAIM OF DAMAGE AFTER 7 DAYS
OF DELIVERY WILL BE DENIED.
This unit is designed for indoor
residential use only. DO NOT USE
OVER A WOOD GRILL OR MOUNT
IN OUTDOOR ENVIRONMENT.
Please read this operation manual thoroughly before
using your range hood. Store it in a safe location for
when you need to reference it in the future.
-
www.windsterhood.com
TABLE OF CONTENTS
Table of Contents
Safety Information .............................................................. 2 - 4
Content Checklist ..................................................................... 5
Measurements ........................................................................... 6
Preparation ................................................................................ 7
Installation ........................................................................... 8 - 9
Installation Diagram ................................................................ 10
Operation & Features ...................................................... 11 - 13
Cleaning & Maintenance ......................................................... 14
Troubleshooting ...................................................................... 15
Part List / Replacement .......................................................... 16
Warranty / Contact Us ..................................................... 17 - 19
1
Advertisement
Table of Contents

Subscribe to Our Youtube Channel
Summary of Contents for Windster ISLAND Series
-
Page 1: Table Of Contents
TABLE OF CONTENTS Table of Contents www.windsterhood.com Safety Information .............. 2 – 4 User’s Manual Content Checklist ..............5 Measurements ................6 R-18L36SS Preparation ................7 R-18L42SS Installation ................8 – 9 Installation Diagram ..............10 Operation & Features ............11 – 13 NOTE: PLEASE INSPECT HOOD IMMEDIATELY UPON RECEIVING. -
Page 2: Safety Information
SAFETY INFORMATION SAFETY INFORMATION SAFETY INFORMATION TO REDUCE THE RISK OF FIRE, OR ELECTRIC SHOCK, DO NOT USE THIS FAN WITH ANY SOLID-STATE SPEED CONTROL DEVICE. TO REDUCE THE RISK OF A FIRE, ELECTRICAL SHOCK, AND/OR INJURY OBSERVE THE FOLLOWING: Regardless of heat level, never leave any surface materials unattended while operating an open flame. -
Page 3: Content Checklist
SAFETY INFORMATION CONTENT CHECKLIST CONTENT CHECKLIST PROP. 65 WARNING FOR CALIFORNIA RESIDENTS: CONTENTS INCLUDED This product may contain chemicals known to the State of California to cause cancer, birth defects, or other reproductive harm. (1) R-18L series (36” or 42”) hood assembly (1) Lower duct cover (18-1/8”) (1) upper duct cover (19-1/4”) (1) User’s manual... -
Page 4: Measurements
MEASUREMENTS PREPARATION PREPARATION BEFORE YOU START **BE SURE YOUR UNIT WILL FIT YOUR CEILING HEIGHT** **DO NOT INSTALL IF DAMAGED** **RETURN OR EXCHANGE WILL BE DENIED IF INSTALLED** Be sure you have all the content of your purchase and required tools for this installation. -
Page 5: Installation
INSTALLATION INSTALLATION 2. EXTENSION / SHORT INSTALLATION (OPTIONAL) INSTALLATION AFTER COMPLETING STEP A – E OF STANDARD INSTALLATION, 1. STANDARD INSTALLATION replace the standard support frame and duct cover with either the Make sure all preparation steps are completed. extension set or the short duct cover set. -
Page 6: Installation Diagram
INSTALLATION DIAGRAM OPERATION & FEATURES INSTALLATION DIAGRAM OPERATION & FEATURES EASY ACCESS CONTROL SWITCH (from left to right) Button 1 – ON / OFF Button 2 – Light Button 3 – Speed OIL CUP FILTERS (2) Round oil cup filters INSTALLING THE CHARCOAL FILTERS **DO NOT WASH CHARCOAL FILTERS! IT WILL DISSOLVE!!** Remove both grills at the bottom of the hood. -
Page 7: Operation & Features
OPERATION & FEATURES OPERATION & FEATURES Using the light fixture tool provided, lineup each REPLACING LIGHT SET Light Fixture Tool Light Fixture Tool corner of the fixture tool in parallel with the notches **NOTE: BE SURE THE LIGHTS ARE NOT HOT located on the outer ring of the light fixture. -
Page 8: Cleaning & Maintenance
CLEANING & MAINTENANCE TROUBLESHOOTING CLEANING & TROUBLESHOOTING MAINTENANCE WARNING!!! WARNING!!! Check to make sure all power sources are disconnected before starting any troubleshooting. Safety gloves and glasses To prevent the possibility of a fire and explosion, do not use should be worn when working on the unit. -
Page 9: Part List / Replacement
For a period of (1) year from the date of purchase, if the product is determined to be defective, Windster will attempt to repair the product, at its option, at no charge. After the warranty period has expired, the consumer will be responsible for all labor fees. - Page 10 WARRANTY / CONTACT US WARRANTY / CONTACT US *Windster Hoods, Inc. reserves the right to determine the validity of your warranty claim. CONTACT US Windster Hoods, Inc. www.windsterhood.com WHAT IS NOT COVERED BY MANUFACTURER WARRANTY Information subject to change without notice...


Need help?
Do you have a question about the ISLAND Series and is the answer not in the manual?
Questions and answers