Advertisement
Quick Links
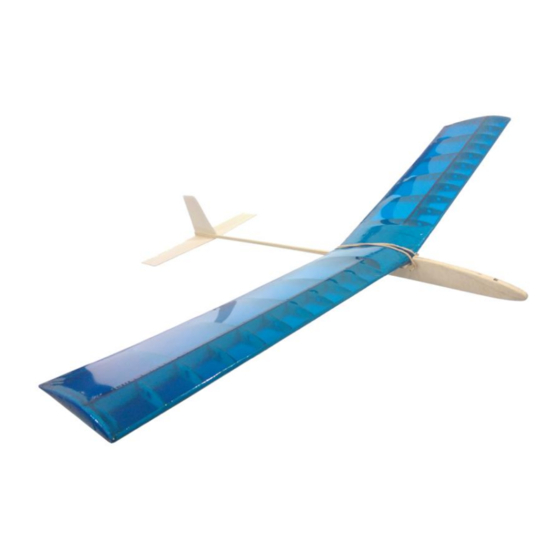
The Falcon is a high quality kit for the intermediate to advanced builder, featuring detailed built up wing
sections. Traditional covering skills are essential to apply the heat activated wing covering sheets. The relatively
thick wings produce a slow flight speed and give beautiful glide performance. With a mixture of balsa, harder
Paulownia wood and carbon fibre spars, this airframe is strong and designed to last yet very light weight.
Your kit contains the following items
* Pre- cut parts
* Sandpaper sheets
* Diagram sheets
* Heat activated Covering
* Base boards for building
Additional Items You May Need
* Cling Wrap
* Flat board (working surface)
* Hobby Knife
* Wood glue
* BlueTack or putty
* Pins
* Nail File
* Masking tape
* Covering iron (or regular household iron)
* Ballast weights
Advertisement

Related Manuals for MicronWings Falcon


Summary of Contents for MicronWings Falcon
- Page 1 The Falcon is a high quality kit for the intermediate to advanced builder, featuring detailed built up wing sections. Traditional covering skills are essential to apply the heat activated wing covering sheets. The relatively thick wings produce a slow flight speed and give beautiful glide performance. With a mixture of balsa, harder Paulownia wood and carbon fibre spars, this airframe is strong and designed to last yet very light weight.
-
Page 2: Build Procedure
Build Procedure This kit contains backing boards for you to build your wings on. These act as a guide for placing the ribs in the correct position. You will want to first cover these boards with some cling wrap to stop the wings from sticking to the boards. - Page 3 Do not use wood glue to glue on these carbon strips. It will not stick to the carbon. We recommend you to use UHU Por Expanded Polystyrene glue (product link) This is foam glue, but it dries very tacky and this is exactly what you need to attach the carbon to the wooden spar.
- Page 4 You will need to trim off the main spar to allow the two wings to come together neatly. Join the two wings together by gluing the wing joiner to the other wing. Next, glue in place the trailing section of the W0 rib as shown here.
- Page 5 Next glue in place the trailing edge spar and glue the two wing’s trailing edge spars together. Glue in place the leading edge spars and use some masking tape to pull them in onto the ribs. This spar continues to meet the wing tip ribs. Next you will need to fit the wing boxing.
- Page 6 Glue in place the cornice pieces in these positions on the trailing edge joints of the wings. Next, sand back the wing boxing to make a very flush curve on the leading and trailing edge of the wings. Sanding it down to almost nothing at the edges so it is perfectly flush with the leading and trailing edge spars.
- Page 7 Your finished wing should look like this. The body former which has been left off can be glued on after balancing the glider. However, you may wish to secure it with screws (not included) as shown here. Brace the airframe and glue in place the tailplane parts. Bend the wing support along the dotted (pre cut) line in the middle.
- Page 8 Glue in place the wing mount pegs, once again making sure that you wipe away any glue from the area where the outer body former will attach. You will also need to sand back the front “hook” on the wing mount to make it a bit more flat as shown here. This will allow the wings to sit flat up against the front of the wings mount.
- Page 9 Balanced! See a test flight on YouTube. Copyright © MicronWings 2015: All rights reserved. This manual is for personal use only. No unauthorized copying or digital distributing permitted without permission from MicronWings.
Need help?
Do you have a question about the Falcon and is the answer not in the manual?
Questions and answers