Advertisement
Quick Links
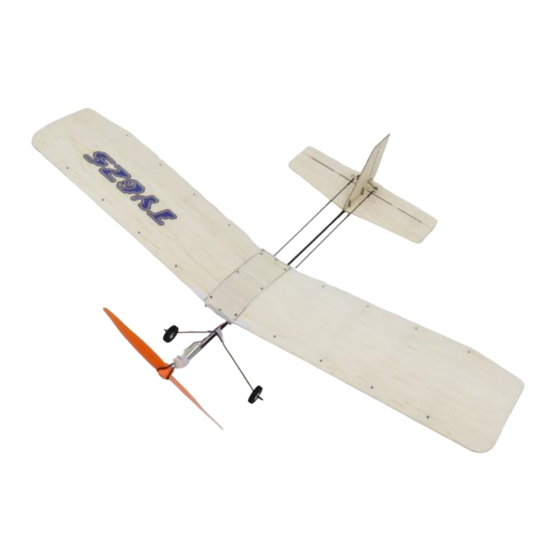
LiteStick
Before You Start
This airframe has been designed to fit together easily with all components precision drilled and
CNC cut from high quality balsa and paulownia wood. However, you will be working with very
small components, so you will need patience and keen eyesight. We recommend working in a very
well-lit area and taking a break between stages to rest the eyes and hands. Most of all, take your
time, enjoy the building experience and you will be proud of what you have produced in the end.
(Build Instructions)
Specifications
Wingspan: 37cm
Length: 27cm
Flying Weight: 24grams
Channels: 3 (Rudder Elevator Throttle)
Suggested Receiver: 3 - 4Ch Micro
Airframe Kit
(Included Contents)
* Airframe Surface Parts (balsa)
* Airframe Skeleton (hardwood)
* Carbon pushrods
* Control linkages
* Undercarriage with Wheels
* Fine sand paper
* Geardrive, Prop and Prop Saver
* Decal Stickers
Needed to Complete
* Thick CA Glue or UHU Hart Glue
* Micro Phillips Head Screwdriver
* Hobby Knife
* Ruler
* Hobby Masking or Other Tape
* Patience
* Keen Eyesight
* Steady Hands
* Receiver Transmitter Charger Battery
(see instructions for suggested RC gear setup)
Advertisement

Related Manuals for MicronWings Balsa Craft Kits LiteStick


Summary of Contents for MicronWings Balsa Craft Kits LiteStick
- Page 1 LiteStick (Build Instructions) Specifications Wingspan: 37cm Length: 27cm Flying Weight: 24grams Channels: 3 (Rudder Elevator Throttle) Suggested Receiver: 3 - 4Ch Micro Airframe Kit (Included Contents) * Airframe Surface Parts (balsa) * Airframe Skeleton (hardwood) * Carbon pushrods * Control linkages * Undercarriage with Wheels * Fine sand paper * Geardrive, Prop and Prop Saver...
- Page 2 First, refer to this and the following pages to ensure that you have all the required airframe components in your kit. Decal Stickers Airframe Wooden Parts and additional parts Carbon rod...
- Page 3 Carbon push rods Before starting you may wish to very lightly sand down all the flat surfaces of the parts if you want to have a smooth finish. It’s easier to do this initially, otherwise the ribs will get in the way of sanding when complete. When removing parts from the sheets, identify where the cut line is sectioned and cut that part with a sharp pointed hobby knife.
- Page 4 Remove the ribs from the hardwood sheet and glue these in place in the wings. Note: If you are choosing to put the war decals on your wings and in particular on the underside, it will be difficult to attach them once the ribs are glued in place. You may wish to attach the decals before you glue the ribs in place.
- Page 5 Glue these wing supports in place onto the carbon body spar and to the measurement and spacing guide shown below. Use the wooden spacer to get the spacing between them exact (image on right below). Also ensure it is flush with the end of the carbon rod. Make sure the cut- out gaps in the wing supports are facing in toward each other.
- Page 6 Remove the three left and right wing support pieces shown below. Sand a taper into the ends where they fit into the locating slots. This will allow them to slide into the locating slots easier later. Then glue the three wooden parts together. Finally, after allowing it to dry, glue this assembled part into the locating slots in the wing supports.
- Page 7 Attaching your control horns. Don’t glue anything until you sort out your control system. If using a brick type receiver you will have set elevator and rudder on specific sides and your control horns will need to match up with that configuration. Also, you may need to reverse servo directions and for that you will need a programmable transmitter.
- Page 8 See the connectors section on our website for various options. Link to Connectors page on MicronWings Rough up the carbon body former with some sandpaper and attach the motor by gluing it in place. Check it is straight with the motor above the carbon body former.
- Page 9 Battery Info: We recommend a small 100mah battery such as the one below. These are available on the MicronWings website for postage within Australia only. Product Link...
- Page 10 The kit is supplied with two types of control linkage connectors and you may choose which ones you want to use. The wooden type on the left screwed into the servo arms. However we suggest you use the linkages shown on the right which are a more reliable way to set up your control system.
- Page 11 Next we need to prepare the control surfaces. The kit comes with a pack of tape hinges as shown on the right below. These are stuck in place on the tail surfaces. Don’t stick them where the wood is joined – stick them over the gaps in the wood. Use three for the elevator – one on each side toward the tip and one on the inner part near the hinge.
- Page 12 Next attach the prop. If your kit contains a brass prop save then remove it from the shaft to attach the prop. If your geardrive has a plastic prop adapter then leave it on the shaft and attach the propeller to it. Additional O-rings can be purchased on the MicronWings website. Product Link Balance Point.
- Page 13 (V2) and the original LiteStick Sample Flight Video. A quick take-off and landing filmed outside in a slight breeze Copyright © MicronWings 2017: All rights reserved. This manual is for personal use only. No unauthorized copying or digital distributing permitted without permission from MicronWings.
Need help?
Do you have a question about the Balsa Craft Kits LiteStick and is the answer not in the manual?
Questions and answers