
Related Manuals for Game ready 550450


Summary of Contents for Game ready 550450
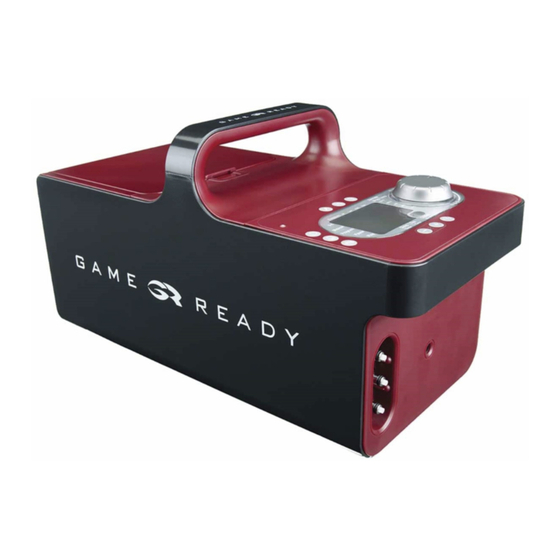
- Page 1 TECHNICAL MANUAL ® EADY HERAPY YSTEM Model Numbers: 550450 and 550550-X2 (GR2.0) 550450-X3 and 550550-X3 (GR2.1) Page 1 of 43 P/N 703073 Rev C CoolSystems, Inc. – Confidential & Proprietary...
-
Page 2: Table Of Contents
TECHNICAL MANUAL Table of Contents Contents INTRODUCTION ........................4 THEORY OF OPERATION ......................5 3.1. Self-Diagnostics Checks ....................5 3.1.1. LCD Display ........................ 5 3.1.2. Air Pressure Sensor “Zero” Check ................5 3.1.3. Air Pump Check ......................5 3.1.4. Fluid Pump Check ...................... 6 3.1.5. - Page 3 TECHNICAL MANUAL STORAGE ..........................32 Product Specifications ......................34 8.1. SAFETY INFORMATION ....................34 8.2. UL CLASSIFICATION ......................34 Troubleshooting ........................36 Contact Us .......................... 43 P/N 703073 Rev C CoolSystems, Inc. – Confidential & Proprietary Page 3 of 43...
-
Page 4: Introduction
Use of this manual assumes the user has read and understood the user manual(s) and is familiar with using the Game Ready system. If you do not have a User Manual for your system(s), contact your Game Ready distributor or Game Ready Customer Service at 1.888.426.3732 (from outside the US call +1.510.868.2100) or visit... -
Page 5: Theory Of Operation
TECHNICAL MANUAL THEOR O O ERATION The Game Ready System allows the user to adjust treatment time, temperature and air pressure as desired. Both Manual and “Program Modes” are offered for convenience. The Control Unit comprises a user interface “Control Panel”, a microprocessor, multiple sensors, Hose connection port, and a 12VDC power inlet. -
Page 6: Fluid Pump Check
TECHNICAL MANUAL 2.1.4. luid ump Check The coolant pump is turned on and monitored for a non-zero current. This is more of a continuity check than a performance check. If no current is sensed, this means that the fluid pump is not working and a “12 error” will occur. 2.1.5. -
Page 7: Fluid Flow
TECHNICAL MANUAL Air Pressure Errors During treatment, the Control Unit continuously monitors and adjusts air pressure. If the air pressure falls outside of certain parameters, air pressure alarms may occur: • 06: Over Pressure Error (sensed brief period of over pressure) •... - Page 8 TECHNICAL MANUAL Temperature Control for GR2.1 Control Units GR2.1 Control Units utilize a patented temperature control system. The temperature control knob is connected to a digital encoder and allows the user to set the desired temperature (Target Temp.). The Control unit will adjust the fluid pump speed to deliver water from the Control Unit at a temperature close to the Target Temp.
- Page 9 TECHNICAL MANUAL GR2.1 Temperature Control Block Diagram P/N 703073 Rev C CoolSystems, Inc. – Confidential & Proprietary Page 9 of 43...
- Page 10 TECHNICAL MANUAL Temperature Control for GR2.0 Control Units GR2.0 Control Units use a mixing valve connected to the temperature control knob. A ratio of cold water is mixed from the ice box and the warmer return water as shown below. At “Full Cold”, the pump is drawing 100% of its water from the ice box. At “Full Warm”...
- Page 11 TECHNICAL MANUAL GR2.0 Temperature Control Block Diagram P/N 703073 Rev C CoolSystems, Inc. – Confidential & Proprietary Page 11 of 43...
-
Page 12: Cleaning
TECHNICAL MANUAL CLEANING 3.1. Control Unit The exterior of the Control Unit and the visible interior surfaces of the ice box can be cleaned with warm water and mild soap, being careful to wipe with a damp cloth to remove any soap residue. Caution: The Control Unit is not waterproof. -
Page 13: Wraps (Heat Exchangers And Sleeves)
TECHNICAL MANUAL Do Not Use: • Quaternary Ammonium (such as Virex) • Phenolic-based disinfectants (such as Amphyl). • Any solvent-based cleaners on the Control Unit. Doing so will damage the plastics and will void the warranty. • Abrasive materials to clean the Control Unit. Doing so will damage the plastics and will void the warranty. -
Page 14: Connector Hose
Condensation occurs naturally on the cold surface of the heat exchanger. Constant use and immediate storage of the Game Ready Wraps can cause mildew growth in some circumstances. The Sleeve portion of the Wrap is meant to be a protective barrier for the Heat Exchanger that can be removed and discarded or cleaned (as described above). -
Page 15: Carry Bag
TECHNICAL MANUAL Do Not Use: • Quaternary Ammonium (such as Virex). • Phenolic-based disinfectants (such as Amphyl). • Any solvent based cleaners on the Connector. Doing so will damage the plastics and will void your warranty. • Abrasive materials to clean the Connector. Doing so will damage the plastics and will void your warranty. -
Page 16: Maintenance/ Repairs
TECHNICAL MANUAL MAINTENANCE / REPAIRS The following section contains certain maintenance and repairs that may be performed by users. While the maintenance and repair instructions are noted below, always be sure to use the instructions included with the replacement parts for additional information, cautions and warnings. -
Page 17: O-Rings
TECHNICAL MANUAL Replacement filters may be obtained by contacting Game Ready Customer Service. Refer to the “Replacement Parts” section and order the filter associated with your model number. 4.2. O-rings If the Hose or Wrap connections get “sticky” or hard to connect, they may require lubrication. -
Page 18: Door Lid
Other than those listed above, no product repairs should be performed by the user. If your Game Ready System requires repair service, please contact your Game Ready Distributor or Game Ready Customer Service. Opening the Control Unit case will void the warranty. -
Page 19: Replacement Parts
4.5. Replacement Parts The following is a list and description of replacement parts and test fixtures that may be purchased thru Game Ready. Please contact your Game Ready Distributor or Game Ready Customer Service for more information. Part # Description... - Page 20 TECHNICAL MANUAL 573209 Wrap Connector O-Ring Replacements without Tool 704094 573217 Hose Connector O-Ring Replacement Kit with Tool 704134 573218 Hose Connector O-Ring Replacements without Tool 704134 573214 3-Port Connector Replacement Kit (Blue Button) 702448 P/N 703073 Rev C CoolSystems, Inc. – Confidential & Proprietary Page 20 of 43...
- Page 21 TECHNICAL MANUAL 503339 3-Port Connector Replacement Kit (Gray Button) 702448 573216 GR 2.1 Replacement Filter 704132 573215 GR 2.0 Replacement Filter 704130 573219 Ice Box Lid Replacement Kit 703913 573201 Silicon Pump Spray Package 703512 P/N 703073 Rev C CoolSystems, Inc. – Confidential & Proprietary Page 21 of 43...
- Page 22 TECHNICAL MANUAL 503510 AC Adapter with Detachable Cord Set, GR 2.1 and 2.0 Models 303528 AC Adapter, GR 2.1 and 2.0 Models 302506 Power Supply Detachable Cord Set, US 303022 Power Supply Detachable Cord Set, EU 303199 Battery Charger with US cord 303529 EU Battery Charger Power Cord P/N 703073 Rev C...
- Page 23 TECHNICAL MANUAL 570700 Unit Diagnostic Tool 703440 502945 Drain Mode Connector 502844 In-Line Pressure Test Tool 703190 503511 Pressure gauge for In-Line Pressure Test Tool 703190 573222 Temperature Verification Assembly 704187 P/N 703073 Rev C CoolSystems, Inc. – Confidential & Proprietary Page 23 of 43...
-
Page 24: Calibration / Verification
The accuracy of the air pressure generated by the system can be verified periodically using a test fixture available from Game Ready (see Figure 1). To obtain a test fixture, call your Game Ready Distributor or To perform this test, the following equipment will be needed: Game Ready Customer Service. - Page 25 TECHNICAL MANUAL Figure 1 • Power the Control Unit on, and set it to the high pressure setting. • Press the Control Unit’s play button. • As the Control Unit generates pressure inside the Wrap, that pressure will be displayed on the pressure gauge. The Control Unit will cycle between 0 and 75 mmHg (0-1.45 psi) at the high pressure setting over a 3-4 minute period.
-
Page 26: Temperature Verfication
TECHNICAL MANUAL • The pressure at the top of the High pressure cycle pressure should be 75 mmHg, +/- 17mmHg (1.45 +/- 0.33 psi). If the pressure is outside of this range, refer to the “Troubleshooting” section. 5.2. Temperature Verification 5.2.1. - Page 27 TECHNICAL MANUAL Top Connector Bottom Connector • Turn on the Control Unit and set the unit to “No Pressure” and the Target Temperature to 45-46°F. • Press play. You will hear the pump flow at full speed until water circulates thru the Wrap and returns to the Control Unit. You will then P/N 703073 Rev C CoolSystems, Inc.
- Page 28 TECHNICAL MANUAL hear the pump slow down as it begins to deliver water at the set temperature. • Wait up to 5 minutes for the temperatures to stabilize. • You should be able to confirm that the temperature on the Reference Thermometer is similar to the Target Temperature.
-
Page 29: Gr2.0 Temperature Verification
• If the Reference Thermometer consistently reads more than 5 °F colder than the Target Temperature, consult the Troubleshooting section, or contact your distributor or Game Ready customer service. 5.2.2. GR2.0 Temperature Verification • Fill the ice box at least half full with ice and water. -
Page 30: Button Functionality
+/- 4°F. • If the Reference Thermometer consistently reads more than 5 °F colder than the displayed “Coldest Wrap Temperature”, consult the Troubleshooting section, or contact your distributor or Game Ready customer service. 5.3. Button Functionality The Control Panel may be functionally checked by pressing each button and observing proper response from the system. - Page 31 TECHNICAL MANUAL Older Encoder Knob Position °F °C 0 (Full Warm) 16 (Full Cold) P/N 703073 Rev C CoolSystems, Inc. – Confidential & Proprietary Page 31 of 43...
-
Page 32: Storage
TECHNICAL MANUAL STORAGE When you are done using the System for the day: • Unplug the AC Adapter and the Connector Hose from the Control Unit. • Push the door release button to open the door. • Carefully dump the ice and water into the sink or you may use the Drain Mode and the Drain Mode Connector to drain the water (see “Drain Mode”... - Page 33 TECHNICAL MANUAL To empty water from the system while in Drain Mode, attach the Drain Mode Connector to the Connector Hose, place the Hose over a sink, and press the play button. The Control Unit’s fluid pump will run for six minutes (long enough to fully empty the ice box). Once the pump stops, the Control Unit will beep once and return to Manual Mode.
-
Page 34: Product Specifications
UL CLASSIFICATION Protection against electric shock: The Game Ready System is considered to be Class I (Protective Earth) when connected to the FSP Model # FSP030-RCAM power supply. The Game Ready System is considered to be Class II (double insulated) when connected to the GlobTek Model GTM-21097-5012 power supply. - Page 35 TECHNICAL MANUAL Degree of safety in the presence of flammable anesthetics or oxygen: Not suitable for use in an oxygen enriched environment or in the presence of flammable anesthetics. Pollution degree classification: This product is classified as pollution degree 2. Electromagnetic interference: This equipment has been tested and found to comply with the limits for medical devices in IEC 60601-1-2:2001.
-
Page 36: Troubleshooting
TECHNICAL MANUAL TROUBLESHOOTING Error / Problem Possible Causes Action Air Pressure Sensor This may occur if a partially deflated Disconnect Hose from Wrap and power up the Wrap is attached to the system during Control Unit. power up. Air pressure sensor is malfunctioning With the Hose disconnected from the Wrap, This error occurs if the attempt to re-start the unit a few more times,... - Page 37 TECHNICAL MANUAL Error / Problem Possible Causes Action (GR2.0 only) Press play (the start button) and • allow to run for at least a minute. Clogged filter Clean or replace the Ice Box filter if dirty. Wrap folded or kinked during Disconnect the Hose from the Wrap to allow application the air to vent, lay Wrap flat on a table and...
- Page 38 TECHNICAL MANUAL Error / Problem Possible Causes Action in the Hose the problem. Air leak inside the Control Unit If all of the above does not resolve the issue, there may be an air leak inside the Control Unit and it will require service. Deflation Error This error could occur if the “vent”...
- Page 39 TECHNICAL MANUAL Error / Problem Possible Causes Action this point, the flow sensor will be monitored for a low flow condition. Self Test - Fluid Circuit: The continuity between the motor Try re-starting the Control Unit several times. brushes may be interrupted. If the problem persists, the Control Unit will require service.
- Page 40 TECHNICAL MANUAL Error / Problem Possible Causes Action Unit does not show an Orange or when plugged into the Control Unit? If so, this Green Light, there may be a problem likely means there is a short inside the Control with the Control Unit.
- Page 41 TECHNICAL MANUAL Error / Problem Possible Causes Action Hose, or try replacing the O-rings on the Control Unit. Reference O-Ring replacement in the Maintenance / Repair section. Wrap “not getting cold” Not enough ice in the Ice Box Make sure the Unit has both sufficient ice and water in the system.
- Page 42 TECHNICAL MANUAL Error / Problem Possible Causes Action zero offset is within tolerance. (If it is not within tolerance, the Control Unit will give an 01 error.) If you did not receive an 01 error, re- test the Control Unit. The unit fails the Mismatched units Check that the Control Unit and the Reference...
-
Page 43: Contact Us
Contact your Game Ready distributor or Game Ready Customer Service at 1.888.426.3732 (from outside the US call +1.510.868.2100). Before any Game Ready System or component can be returned for service, you must obtain a Returned Material Authorization (RMA) number. Game Ready Customer Service can provide that number or your Game Ready Distributor can assist with that process.
Need help?
Do you have a question about the 550450 and is the answer not in the manual?
Questions and answers