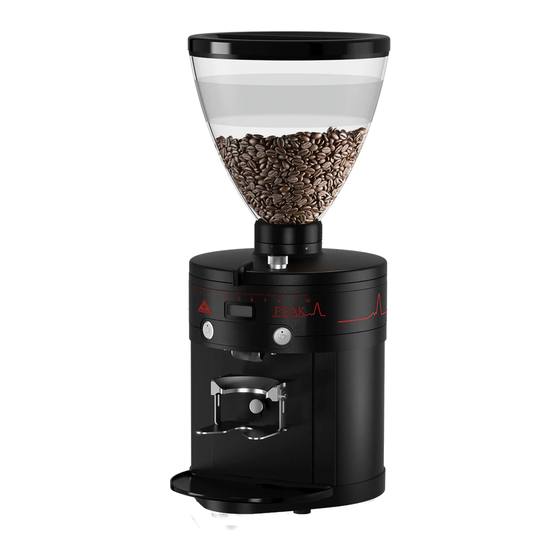
Mahlkonig PEAK Original Operating Instructions
Single espresso grinder
Hide thumbs
Also See for PEAK:
- Operating instructions manual (21 pages) ,
- Operating instructions manual (200 pages)
Table of Contents
Advertisement
Quick Links
Advertisement
Table of Contents

Subscribe to Our Youtube Channel
Related Manuals for Mahlkonig PEAK


Summary of Contents for Mahlkonig PEAK
- Page 1 Original opera ng instruc ons PEAK Single Espresso Grinder...
-
Page 2: Overview
PROFESSIONAL GRINDER Overview... - Page 3 PEAK...
-
Page 4: Table Of Contents
PROFESSIONAL GRINDER PEAK Single Espresso Grinder Contents Se ngs ....... 18 Show counter ........19 Overview ....... 2 Se ng the light ......20 Delivery contents ....5 Se ng the temperature display ...21 Se ng the alarm......21 General informa on ....6 Se ng the ven la on ....22... -
Page 5: Delivery Contents
PEAK Delivery contents Designa on Hopper (with lid) Grind lid Locking screw for hopper Unlocking screw for grind adjustment Grind scale “Double Shot” selec on bu on Portafi lter holder Screw for adjustment of the portafi lter fork (le and right), 2×... -
Page 6: General Informa On
Only then will you be able to operate and use the PEAK Single Espresso Grinder safely. The original opera ng instruc ons are based on the standards and rules that apply in the European Union. - Page 7 PEAK NOTICE! This signal word warns of poten al material damage. This symbol indicates useful ps on opera ng or handling the grinder. Declara on of Conformity (see the sec on “Declara on of Conformity”): Products marked with this symbol meet all of the applicable Community regula ons of the European Economic Area.
-
Page 8: Safety
PROFESSIONAL GRINDER Safety Proper use The grinder is suitable for grinding whole roasted espresso beans only. Do not use the grinder for grinding other products or objects. It is intended for commercial use and may only be serviced by trained personnel, although it may be operated by other persons at a loca on where its use is supervised. - Page 9 PEAK – Never pull the plug from the socket by the power cable, always hold the plug itself. – Never use the power cable as a carrying handle. – Keep the grinder, the power cable and the plug away from open fl...
- Page 10 PROFESSIONAL GRINDER – Do not leave the grinder una ended during opera on. – Do not allow children to play with the packaging fi lm. Children can become entangled when playing with it and suff ocate as a result. – Do not allow children to play with the small parts. They may be fatal if swallowed.
-
Page 11: Before Ini Al Use
PEAK Before ini al use Checking the grinder and delivery contents NOTICE! Risk of damage! If you open the packaging without due care with a sharp knife or other pointed object, the grinder may be damaged. – Proceed very carefully when opening the packaging. -
Page 12: Opera On
PROFESSIONAL GRINDER Adjus ng the portafi lter fork Set the portafi lter fork (10) to the size of the portafi lter on your espresso machine: 1. Ensure that the grinder is switched off and is not connected to the power grid. - Page 13 PEAK – To select Single Shot mode, press and release the “Single Shot” selec on bu on (13). – To select Double Shot mode, press and release the “Double Shot” selec on bu on (6). – To select Barista mode, press and release the two selec on bu ons (13) and (6) simultaneously.
-
Page 14: Se Ng The Grind
PROFESSIONAL GRINDER Se ng the grind 1. Release the unlocking screw for the grind adjustment (4) by turning it an -clockwise. 2. Set the grind by moving the locking slide (15) to the le or right. • The grind scale (5) indicates the grind selected. The fi nest se ng is “0”, the coarsest se ng is “10”. -
Page 15: Se Ng Grinding Me
PEAK Example of display – Press the “Single Shot” selec on bu on (13) to ac vate the symbols on the le of the display (14). – Press the “Double Shot” selec on bu on (6) to ac vate the symbols on the right of the display. -
Page 16: Grinding Espresso Beans
PROFESSIONAL GRINDER Se ng the grinding me for Double Shot mode 1. Press and hold the “Double Shot” selec on bu on (6) for two seconds. The set grinding me fl ashes. 2. Set the grinding me required by pressing the (13) or (6) selec on bu ons. 3. -
Page 17: Interrup Ng Grinding (Break Func On)
PEAK Interrup ng grinding (break func on) You can also switch off the break func on, see the sec on “Se ng the break func on”. The break func on automa cally interrupts grinding if you pull the portafi lter out of the portafi... -
Page 18: Se Ngs
PROFESSIONAL GRINDER Se ngs... -
Page 19: Show Counter
PEAK – Press and hold the (13) and (6) selec on bu ons simultaneously for 3 seconds un l the symbol appears on the display. You are now in the main menu and have the op on to adjust the counter, light, temperature, alarm, ven la on and break func on. -
Page 20: Se Ng The Light
PROFESSIONAL GRINDER hh:mm:ss 00:00:00 Opera ng me counter: In this sub-menu, the total opera ng me for the grinder is displayed. The counter cannot be reset. Total single shot counter: In this sub-menu, the number of all single shots ground up to that point is displayed. -
Page 21: Se Ng The Temperature Display
PEAK Se ng the temperature display Temperature display OFF In this sub-menu, you can switch off the temperature display for the inside temperature of the grinder. Temperature display ON In this sub-menu, you can switch on the temperature display for the inside temperature of the grinder. -
Page 22: Se Ng The Ven La On
PROFESSIONAL GRINDER Se ng the ven la on Ven la on AUTO ON In this sub-menu, you can switch on automa c opera on of the ven la on. The ven la on starts automa cally at an internal grinder temperature of 86 °F (30 °C). -
Page 23: Cleaning The Area Where The Grinder Is Posi Oned
PEAK NOTICE! Risk of damage! Improper handling can cause damage to the grinder. – Do not use caus c detergents or any sharp or metallic cleaning utensils such as knives, metal scouring pads or similar. These can scratch the surface. -
Page 24: Cleaning The Burr
PROFESSIONAL GRINDER Cleaning the burr • The manufacturer recommends using GRINDZ grinder cleaner. You can fi nd further informa on about GRINDZ www.mahlkoenig.de. • The burr should be cleaned every 2-5 days. 1. Close the hopper slide (16) by pushing it forwards and grind the espresso beans remaining in the grinder un l it runs empty. -
Page 25: Troubleshoo Ng
PEAK Troubleshoo ng Fault Cause Remedy Set the grind to “10” and start The grinder • The spout is makes a buzzing blocked. the grinding process. noise but does The grinder clears itself. not grind. Then put the grind se ng back to the grind you require while the grinder is running. - Page 26 PROFESSIONAL GRINDER Fault Cause Remedy Set the grind to “10” and • The grind is too fi ne. start the grinding process. The grinder clears itself. Then put the grind se ng back to the grind you require while the grinder is running.
- Page 27 PEAK Fault Cause Remedy Check if the release bu on • The overcurrent circuit-breaker has on the circuit-breaker has been tripped. popped out. If necessary, push it in again. If the bu on con nues to pop out, consult your dealer at the address given in the “Service”...
- Page 28 PROFESSIONAL GRINDER Fault Cause Remedy Consult your dealer at the • The fl apper is defec ve. address given in the “Service” sec on. Consult your dealer at the The grinder • The grinding discs does not grind have moved out of address given in the “Service”...
-
Page 29: Technical Data
PEAK Technical data Model: PEAK Voltage / frequency: 100–120 V / 50 Hz 100–120 V / 60 Hz 200–240 V / 50 Hz 200–240 V / 60 Hz Protec on type: IPX1 Protec on class: Fuse: 16 A-slow Idling speed:... -
Page 30: Disposal
PROFESSIONAL GRINDER Disposal Disposing of the packaging – Sort the packaging before disposing of it. Put the paper and cardboard in the paper recycling, put the fi lm in the bin for reusable materials. Disposing of the grinder – Should the cooler no longer be capable of being used at some point in me, dispose of it in accordance with the regula ons in force in your city or state. -
Page 31: Ce Declara On Of Conformity
PEAK CE Declara on of Conformity EC DECLARATION OF CONFORMITY The manufacturer: HEMRO AG Länggenstrasse 34, 8184 Bachenbülach, Switzerland Tel.: +41 44 864 18 00 Fax: +41 44 864 18 01 Hereby declares that the below mentioned product: Product: Device for food processing... - Page 32 HEMR O Ma nu facturing Germany GmbH Tilsite r Straße 1 42 22047 Ham burg, Germ any T: +4 9 40 6 9 6 9 4 0 -0 F: +49 40 696 940-45 off ic e@ mahlkoe nig .de www.
Need help?
Do you have a question about the PEAK and is the answer not in the manual?
Questions and answers