Thermador Professional Series Service Manual
Hide thumbs
Also See for Professional Series:
- Installation manual ,
- Recipes (148 pages) ,
- Use and care manual (104 pages)
Table of Contents
Advertisement
Quick Links
This manual contains information that is necessary for
S
M
ERVICE
ANUAL
servicing the following Thermador Professional Series
Rangetop:
PCG366G
Thermador
Professional Series
Rangetop
Due to the complexity and the risk of high-voltage
electrical shock, customers should not service their
appliances.
The information provided in this document is intended for
trained, qualified personnel only. The proper function and
the safety of the appliance can be affected by an
improper repair, and even serious threats to life or
physical condition may arise. BSH Home Appliances
Corporation is not liable for damages caused by improper
repairs performed by unauthorized parties. Local codes
and standards apply and must be observed. Contact
Technical Support for further assistance.
Model:
PCG366G/03
Advertisement
Table of Contents

Related Manuals for Thermador Professional Series


Summary of Contents for Thermador Professional Series
- Page 1 This manual contains information that is necessary for ERVICE ANUAL servicing the following Thermador Professional Series Rangetop: PCG366G Thermador Professional Series Rangetop Due to the complexity and the risk of high-voltage electrical shock, customers should not service their appliances. The information provided in this document is intended for trained, qualified personnel only.
-
Page 2: Table Of Contents
Service Manual for the Thermador Professional Series Rangetop, Model PCG366G TABLE OF CONTENTS 4.1.1 Removing Knobs, Grates and Burner Assemblies ..14 4.1.2 Removing the Maintop ..........16 General ..................3 4.1.3 Removing the Heat Shield ........... 16 Included with the Product ............3 Component Removal and Replacement ...... -
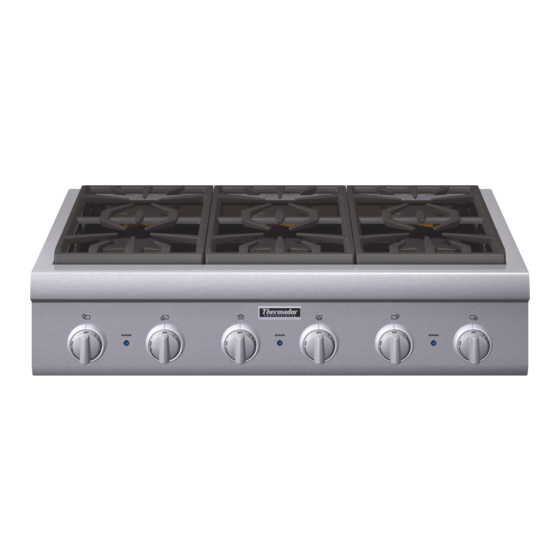
Page 3: General
Service Manual for the Thermador Professional Series Rangetop, Model PCG366G 1.3 Data Plate GENERAL The data rating plate showing the model, serial, and FD numbers is located on the underside of the rangetop chassis near the gas inlet The 36-inch Professional Series Rangetop features the pedestal connection and electric power cord, as shown in Figure 1. -
Page 4: Recommended Tools And Supplies
Service Manual for the Thermador Professional Series Rangetop, Model PCG366G 1.4 Recommended Tools and Supplies 1.5 Important Safety Information The following tools and supplies are recommended to use when Before starting to service an appliance, familiarize yourself with all servicing this appliance: safety information and precautions contained in this manual. - Page 5 Service Manual for the Thermador Professional Series Rangetop, Model PCG366G Replacement Parts Testing for Gas Leaks ■ Do not ever use a flame to test for gas leaks, as doing so may Use only authorized replacement parts per catalog for this appliance.
- Page 6 Service Manual for the Thermador Professional Series Rangetop, Model PCG366G In Case of Power Outage Prior to Returning Appliance to Service 1. If for any reason a control knob is on when there is any failure or Prior to returning the appliance to service, make sure that: removal of electrical power from the appliance (such as a power ■...
-
Page 7: Operation
Service Manual for the Thermador Professional Series Rangetop, Model PCG366G OPERATION 2.1.1 ExtraLow Feature When the knob is set to XLO - the very lowest setting, the flame 2.1 Control Knobs cycles on for approximately 8 seconds and then turns off for 52 seconds of each minute. -
Page 8: Operation During A Power Outage
Service Manual for the Thermador Professional Series Rangetop, Model PCG366G 2.3 Operation during a Power Outage 2.4 Main Components and Locations When there is a removal of electrical power, the XLO burners cannot 2.4.1 Burner Assembly and Maintop be used. Do not attempt to light them manually. -
Page 9: Components Under The Maintop
Service Manual for the Thermador Professional Series Rangetop, Model PCG366G 2.4.2 Components under the Maintop TESTING BURNERS AND IGNITION Servicing Burners and Ignition Burner and ignition servicing must be performed by a qualified technician. Improper adjustments may be dangerous, cause damage or harmful by-products, and may void the appliance warranty. -
Page 10: Burner Characteristics
Service Manual for the Thermador Professional Series Rangetop, Model PCG366G 3.2 Burner Characteristics If one or more burner blows out, the respective igniter electrode automatically re-ignites the flame. At each burner port the flame should burn completely around the burner cap. -
Page 11: Testing Burner Ignition
Service Manual for the Thermador Professional Series Rangetop, Model PCG366G 3.4 Testing Burner Ignition 3.8 Manually Setting Burner Valves - Natural Gas Units When using natural gas, although pre-adjusted, if you need to set the XLO valves and standard valves for the lowest possible flame setting, then manually adjust the bypass screws on all valves. -
Page 12: Burner, Flame, And Ignition Troubleshooting
Service Manual for the Thermador Professional Series Rangetop, Model PCG366G Burner, Flame, and Ignition Troubleshooting 3.9.1 Burner and Flame Diagnostics Gas Leaks If a burner clicks (sparks) constantly, or if burner doesn’t light correctly Carefully check for gas leaks at each gas component that was... - Page 13 Service Manual for the Thermador Professional Series Rangetop, Model PCG366G Figure 10: Ignition Diagnostics Flowchart Page 13 of 34 58300000151625_ARA_EN_B...
-
Page 14: Service And Repair
Service Manual for the Thermador Professional Series Rangetop, Model PCG366G SERVICE AND REPAIR 3. Remove all Star burner caps. 4. Remove and retain the two T-30 screws from each brass Star burner base (see Figure 11). 4.1 Preparing the Rangetop for Servicing... - Page 15 Service Manual for the Thermador Professional Series Rangetop, Model PCG366G 5. While lifting the brass burner base, carefully press the locking tab 6. If the electrode needs replacing, remove and retain the small T-10 on the female terminal of the igniter wire, and gently pull to detach screw to detach it from the brass burner base.
-
Page 16: Removing The Maintop
Service Manual for the Thermador Professional Series Rangetop, Model PCG366G 4.1.2 Removing the Maintop 2. Carefully place a tool such as a hook or non-straight Allen wrench in a circular receptacle on the maintop (not in a receptacle for the ... -
Page 17: Component Removal And Replacement
Service Manual for the Thermador Professional Series Rangetop, Model PCG366G 1. Carefully lift and remove the two heat shields (see Figure 17). 1. Follow all safety precautions and steps in the Preparing the Rangetop for Servicing, page 14. 2. Using a 9/16 inch wrench, unscrew the hex nuts to remove the gas tubes from the jet holder assemblies. - Page 18 Service Manual for the Thermador Professional Series Rangetop, Model PCG366G 4. Push each ignition wire downward through its respective receptacles in the burner support rail. 5. Make note of burner support rail placement on the rangetop chassis (before removing the rails) so you can re-install afterwards in the correct position.
-
Page 19: Jet Holder Assembly Removal And Replacement
Service Manual for the Thermador Professional Series Rangetop, Model PCG366G 4.2.2 Jet Holder Assembly Removal and Replacement Alignment boss This procedure is for removing the jet holder assembly from the burner support rail, in the event that a jet holder assembly needs replacing. -
Page 20: Manifold Removal And Replacement
Service Manual for the Thermador Professional Series Rangetop, Model PCG366G 5. Replace the jet holder assembly if needed. NOTE: If replacing the jet holder assembly, first install the jet holder assembly onto the burner support rail before attaching the wire guard clip. - Page 21 Service Manual for the Thermador Professional Series Rangetop, Model PCG366G 8. Now remove the manifold support brackets by removing and retaining the following screws with a T-20 driver: ■ The two screws holding the manifold support bracket onto the chassis base near the regulator (see Figure 26) ■...
-
Page 22: Standard Valve Removal And Replacement
Service Manual for the Thermador Professional Series Rangetop, Model PCG366G 4.2.4 Standard Valve Removal and Replacement The standard valves are for the right side burners only. 1. Follow all safety precautions and steps in the Preparing the Rangetop for Servicing, page 14. -
Page 23: Microswitch Removal And Replacement
Service Manual for the Thermador Professional Series Rangetop, Model PCG366G 4. Remove the burner support rail (with jet holder assemblies attached) by following the steps in the Jet Holder Assembly and Burner Support Rail Removal and Replacement section. 5. Using a ¼ inch socket wrench/ratchet, remove and retain the self-tapping screw located under the manifold that secures the standard valve onto the manifold (see Figure 28). -
Page 24: Solenoid Valve Removal And Replacement
Service Manual for the Thermador Professional Series Rangetop, Model PCG366G 4.2.6 Solenoid Valve Removal and Replacement The solenoid valves are for the two left-side (XLO) burners only. 1. Follow all safety precautions and steps in the Preparing the Rangetop for Servicing, page 14. -
Page 25: Xlo Valve Removal And Replacement
Service Manual for the Thermador Professional Series Rangetop, Model PCG366G 4.2.7 XLO Valve Removal and Replacement 7. Using a ¼ inch socket wrench/ratchet, remove and retain the self-tapping screw located under the manifold that secures the The XLO valves are for the two left-side burners only. In order to XLO valve onto the manifold (see Figure 28). - Page 26 Service Manual for the Thermador Professional Series Rangetop, Model PCG366G 9. Remove the white plastic side connector from the potentiometer by pressing on the connector’s tab. (see Figure 34). Side connector tab Figure 35: Removing the XLO Valve from the Potentiometer...
-
Page 27: Potentiometer Removal And Replacement
Service Manual for the Thermador Professional Series Rangetop, Model PCG366G 4.2.8 Potentiometer Removal and Replacement 7. Using a ¼ inch socket wrench/ratchet, remove and retain the self-tapping screw located under the manifold that secures the The potentiometers are for the left-side burners only. -
Page 28: Control Panel Removal And Replacement
Service Manual for the Thermador Professional Series Rangetop, Model PCG366G ■ Potentiometers (see Potentiometer Removal and 4.2.9 Control Panel Removal and Replacement Replacement, page 27) The following procedures for removal and replacement of the control ■ LED indicators (see LED Indicator Removal and Replacement, panel are provided primarily in the event the control panel is damaged page 31). - Page 29 Service Manual for the Thermador Professional Series Rangetop, Model PCG366G 9. Remove the two T-20 screws from the back panel (see Figure 37). Figure 38: Removing the Side Panel Figure 37: Removing Screws from Back Panel Sharp Components – Gloves Recommended ■...
-
Page 30: Regulator Removal And Replacement
Service Manual for the Thermador Professional Series Rangetop, Model PCG366G 12. Carefully lift the control panel slightly upward to detach from the lip 3. Detach the gas line from the 90° elbow connector. on the rangetop chassis (see Figure 40). -
Page 31: Ignition Device Removal And Replacement
Service Manual for the Thermador Professional Series Rangetop, Model PCG366G 4.2.12 LED Indicator Removal and Replacement 1. Follow all safety precautions and steps in the Preparing the Gas Leaks Rangetop for Servicing, page 14. Carefully check for gas leaks at each gas component that was 2. -
Page 32: Simmer Control Board Removal And Replacement
Service Manual for the Thermador Professional Series Rangetop, Model PCG366G Figure 45: Simmer Control Board Figure 44: LED Indicator Caution 4.2.13 Simmer Control Board Removal and Replacement Fragile Components 1. Follow all safety precautions and steps in the Preparing the Rangetop for Servicing, page 14. -
Page 33: Before Returning Appliance To Service
Service Manual for the Thermador Professional Series Rangetop, Model PCG366G BEFORE RETURNING APPLIANCE TO SERVICE TECHNICAL SPECIFICATION Approved certificates After you have finished all testing and servicing, always do the Gas connection rating 31620.0 following before returning the appliance to service:... -
Page 34: Additional References
Service Manual for the Thermador Professional Series Rangetop, Model PCG366G ADDITIONAL REFERENCES 8.1 QuickFinder For further information, please refer to the following documents on QuickFinder: Installation Instructions Care and Use Manual LP Gas Conversion Instructions PALPKITHC (649832) In addition, the following may be available on QuickFinder by visiting: http://portal.mch.bshg.com/portal...
Need help?
Do you have a question about the Professional Series and is the answer not in the manual?
Questions and answers