Table of Contents
Advertisement
Quick Links
INSTRUCTION MANUAL
Document version: EN.08 11.05
Product: RZ-104Rsp
Order: 110 231
Dehumidifier
RECUSORB RZ-104R
SPECIAL:
Energy saving step 2; 0-10VDC signal from external regulator
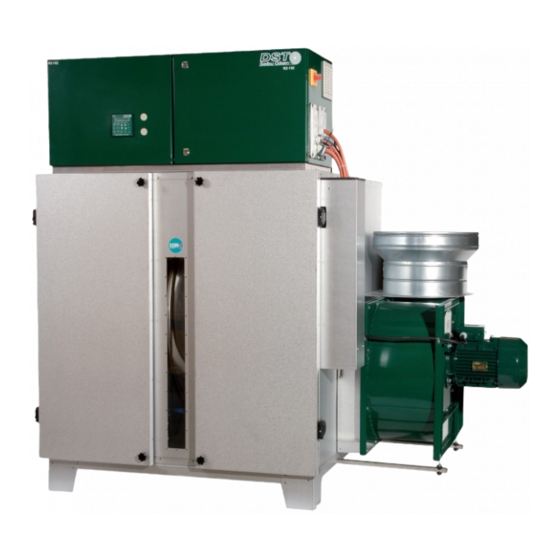
The product picture may differ from the actual product
Cooke Industries - Phone: +64 9 579 2185
Email: sales@cookeindustries.co.nz
Web: www.cookeindustries.co.nz
Advertisement
Table of Contents
Troubleshooting

Related Manuals for DST RECUSORB RZ-104R


Summary of Contents for DST RECUSORB RZ-104R
- Page 1 INSTRUCTION MANUAL Document version: EN.08 11.05 Product: RZ-104Rsp Order: 110 231 Dehumidifier RECUSORB RZ-104R SPECIAL: Energy saving step 2; 0-10VDC signal from external regulator The product picture may differ from the actual product Cooke Industries - Phone: +64 9 579 2185 Email: sales@cookeindustries.co.nz...
- Page 2 Cooke Industries - Phone: +64 9 579 2185 Email: sales@cookeindustries.co.nz Web: www.cookeindustries.co.nz...
-
Page 3: Table Of Contents
Contents 1. Safety ..........5 4.2.7 Energy saving ....... 11 4.2.8 Linear & binary control ....12 1.1 Aim of this Documentation ....... 5 4.2.9 Adjustable rotor speed ....12 1.2 Accentuations in the text ......5 4.2.10 Frequency converter ....12 1.3 Inspection of goods ......... 5 5. Installation ........13 1.4 Safety ............5 5.1 Duct-work ..........13 1.4.1 General advice ....... 5 5.2 ... - Page 4 Appendix Figures FIGURE 1: Principle of Operation..........8 1. Component list FIGURE 2: Rotor matrix .............9 2. Dimensions FIGURE 3: Principle function of the rotor .........9 FIGURE 4: Principle of design ...........9 3. Specification: TTC25X FIGURE 6: Standard process and regeneration fan* ....10 4. Specfication: Step controller SS-S4/D FIGURE 7: Electric regeneration *Heater*.......10 FIGURE 5: Rotor motor* ............10 5. Energy saving (option) FIGURE 8: Inside electric cabinet..........10 FIGURE 10: Pressure nozzles..........10 6. EC Declaration of conformity FIGURE 9: TH1 ...............10 FIGURE 11: ...
-
Page 5: Safety
1 Safety 1.1 Aim of this Documentation 1.4.2 Intended use This equipment is specifically designed for atmospheric This document is included at delivery and is therefore air drying. It is unsuitable for any other use. For further an integral part of the equipment. It describes the advice please contact your DST representative. machine’s design and configuration at the time of delivery. Unless specifically stated in this manual, the following applications are prohibited: In the interest of safety, please study this documentation before installing or operating the equipment. • Conditioning of gases (other than air). Instructions relating to safety, handling, operation and • Conditioning of air contaminated with chemicals ... -
Page 6: Safety Advice - Electrical
For your own safety, wear the appropriate Attention! Electrical parameters! personal protective equipment (PPE). Parameters used in the electrical protection and alarm circuits must not be modified or adjusted. 1.4.5 Safety advice - Electrical Factory (default) parameters are shown in the electrical wiring diagrams. Attention! This equipment will contain high voltage electrical components! Attention! Safety functions! Wherever possible, all electrical work must be The operation of all electric safety devices are carried out with the electric supply switched to be checked at commissioning and during off. It is recommended that electrical isolators ... -
Page 7: Hazardous Operating Conditions
Do not remove the warning notice on the • Use the machine as intended only. machine which alerts personnel to the dangers • Only use the machine if it is fully functional. of an automatic restart function. • Check the condition of the machine before Attention! Condensate in wet air outlet duct. using. Due to concentrated water content in the wet • Check the machine on operational efficiency at air outlet duct, incidental condensate may regular intervals. flow back into the machine and damage the • Carry out maintenance and testing at the equipment. To prevent this, install the wet air ... -
Page 8: General Description
2 General Description 2.1 Applications 2.3 Principle of operation DST desiccant type dehumidifiers are normally used It works on a continuous process with two air streams where dry air is essential to the various manufacturing of different flow rates, normally having a flow ratio of processes used in chemical, pharmaceutical, food or approximately 3 to 1. The greater flow, process air, confectionery industries, or where a dry environment is is dried as it passes through the dehumidifier, while required for storing and handling of moisture sensitive the smaller flow, regeneration air, is used to heat the products and raw materials. rotor material to drive the adsorbed moisture vapour from the desiccant. The moisture which is removed The well proven air drying technology using the from the process air, is transferred over to the other adsorption principle provides great flexibility in solving as the SSCR rotor turns slowly. humidity problems. It offers the user independent ... -
Page 9: Design
4. Reg filter 5. Process filters 3.2 Rotor 6. Process fan 12 4 7. Reg. fan, behind 10 The heart of a DST dehumidifier is the very efficient electric cabinet patented SSCR silica gel rotor. The rotor matrix 8. Regen. heater is manufactured from alternate layers of flat and 9. Process air in 10. Dry air out corrugated sheets of silica gel and metal silicates, 11. Regen. air in 6 ... -
Page 10: Components And Features
4 Components and features 4.1 Standard configuration 4.1.5 Electric box design The PLC control panel is located at the front of the 4.1.1 Rotor motor control box. Inside, the electric box houses multiples The rotor is driven by a single phase rotor motor with a electronic devices and control units, such as contactors, timing belt transmission. A belt tension device prevents fuses, motor protectors, relays, transformer. They are belt slipping and overload of the rotor motor. attached to the DIN-rails The rotor has both peripheral Possible remote ON/OFF control (for example and radial seals. humidistat) and potential free alarm contacts are to be connected on this fixed terminal, see wiring diagram The peripheral seals are for installation. mounted with hose clips. The radial seals are made ... -
Page 11: Special Configurations
4.2 Special configurations (Options) b) In AUTO-VENT mode - The heaters and reg. fan are turned off completely. Rotor motor and process fan will continue to run. 4.2.1 Filter guards Filter guards for process air and reg. air are available Full heater effect as an option. Humidistat 2 (CLOSE) Different types of filter guards and pressure gauges are available for installation. Such as, standard mechanical Humidistat 1 (CLOSE) differential U-tube manometers. Other option is a electronic filter guard with a warning Partial heater effect light. The warning light will turn on if the pressure has Humidistat 2 (OPEN) dropped below the pre-set value. The recommended pressure will decide when to Humidistat 1 (CLOSE) change filter (See technical data) No heater effect Humidistat 2 (OPEN) Humidistat 1 (OPEN) FIGURE 13: Humidistat 1 &... -
Page 12: Linear & Binary Control
4.2.8 Linear & binary control 4.2.9 Adjustable rotor speed The heating is a combination of binary and linearly Stepless variation of the rotor speed. Can be equipped control run by a 0-10VDC external signal. This allows with a manual control unit (potentiometer). the unit the micro manage and adjust the heating 4.2.10 Frequency converter output instantly which will dehumify with accuracy and improve the energy efficiency. Eletronic speed regulator for electric fans. The linear is heating is controlled by a TRIAC and is coupled to the first contactor, R1. The rest of the ... -
Page 13: Installation
5 Installation DST dehumidifiers are prepared for easy connection work is well insulated and installed at an angle so that to duct-work and electric supplies. condensate cannot flow back into the dehumidifier. If the duct must be installed higher than the outlet, a small drain hole is to be made for discharge of condensate The dehumidifier unit must not be used at the lowest point in the duct-work. in an area where there is a danger of explosion nor to treat air with dangerous 5.2 Electrical connection amounts of explosive substances. The terminal for connection of the supply cable is ... -
Page 14: Positioning
5.6 Positioning The unit can be lifted with a fork-truck between the units feet or. The weight of the unit is shown in the data sheet in appendix. To enable inspection and service of the unit, adequate working space must be left clear in front of the unit to allow access doors to be opened and the rotor to be removed. The free floor area in front of the inspection doors should be as wide as the unit itself. For more detailed information on working space and foot bolt- hole dimensions, see appendix. The standard unit is designed for indoor installation. Weatherproof units can be supplied as an optional extra. To allow securing of the dehumidifier to the floor or to a pedestal, four brackets with pre-drilled boltholes are delivered with the unit. -
Page 15: Operating
Jazz EN.04 11.03 - STD 6 Operating 6.1 Keys REMOTE / LOCAL Heater Info Temp Mode Hour Hour proc 6 7 8 10 11 FIGURE 18: PLC-keys [ON / 1] - Start Navigation keys [OFF / 2] - Stop [] - Present value, software version [Heater / 5] - S electing the active heater steps and browse up for electric heater. [] - Set points and browse down [] - Browse right [] - Browse left [Temp / 7] - Temperature setting for TH2 and ... -
Page 16: Start
- The ventilation mode can only be set when the unit is in OPERATING INSTRUCTION standby-mode and when the PLC displays: 1. Press [Hour-reg / 0] once to view run time for heater group 1 , Seibu Giken DST press the same key again to view the rest of the heater groups Start press 1 and to exit the menu. Heater... -
Page 17: Reset Buttons & Switches
When “Aut. Rest” is selected. The unit starts check the display for errors and correct it. automatically after electric failure. It is up to DST’s representatives to inform any parties - The unit can only start when the PLC displays: that are involved with installation, operation, Seibu Giken DST... -
Page 18: Remote Operation
Jazz EN.04 11.03 - STD 6.10 Remote operation OPERATION EH3 When the attached electric controller EH3 is giving off a A connected remote switch will act as a master switch signal of 0.5V or lower in a period 5 mins or more. and will shut down the unit (shutting down from remote will be the same as pressing [OFF / 2]). The dehumidifier REGFAN OFF DELAY cannot start-up on-site using the PLC or the control panel before the remote switch has been restored. #### C #### s During shut down or standby (if an external regulator is 6.11 Start-up procedure connected or humidistat 1 &... -
Page 19: Starting Up
7 Starting up 7.1 Pre-operation Checks 1. Inspect and clean the inside of the unit from foreign objects such as rags, tools, particles of metal, and the like. 2. Ensure that both air balance dampers, if any, are wide open and check that the air paths of the duct-work are not obstructed in any way. 3. Check that the filters are securely in place. 4. Inspect the wiring of incoming cable. 5. Check that the rating of the electrical supply fuses is correct, see wiring diagram. 7.2 Start-up 1. Close and secure all access doors and then switch the main switch to "1" ... -
Page 20: Troubleshooting
8 Troubleshooting 8.1 PLC-error codes During shutdown, the PLC will promptly display a code, If an error occurs, the dehumidifier will shut down, where the error is located. The table below displays but the reg. fan continues to operate in order to cool the frequent error codes for the CZ-series. down the regeneration heater for a preset time. See technical data for time setting. CODE EXPLANATION CAUSE SOLUTION Motorst. Q1 or Q2. Process fan overload Too high airflow. Readjust the airflow. (Q1). Motor failure. Reset Q1. Set point. Reg. fan overload (Q2). Too high airflow. Readjust the airflow. Motor failure. Reset Q2. Set point. Fuse F3-6 or TH1. -
Page 21: Capacity Troubleshooting
8.2 Capacity troubleshooting The dehumidifier performance can be checked very simply by feeling the temperature of the uninsulated duct- work near the unit. Normally with the unit working at nominal conditions (with process air at room temperature), the dry air duct should be warm (25-40°C) and the wet air duct should be warm or hot (30-60°C). If the unit does not maintain the required humidity look for the following causes: PROBLEM CAUSE SOLUTION The unit does not maintain the Dehumidification capacity is Check the real moisture load and compare to design data. The unit desired %RH humidity despite insufficient although both dry may be too small. operating at full capacity. and wet air ducts are warm Check the airflow volumes, filter and adjustment of dampers. Check the rotor for correct position and alignment to its panel, and ensure that there are no leakages. Both air ducts are cold Is the unit switched on? Is any of the motor protections alerted? Check that the wet air damper is not closed. Check the regeneration filter. -
Page 22: Maintenance
9 Maintenance Before dismantling the unit, for inspection or service, Before dismantling the unit, for inspection or service, the following precautions should be noted: the following precautions should be noted: DST dehumidifiers are designed to run for long periods When dismantling the main switch shall be with little maintenance requirements. The items listed turned to "0". below shall however be noted; 1. Let the dehumidifier be shut-off for at least an If the unit has been in operation it should hour. be left to cool off, for at least 30 minutes, before dismantling. -
Page 23: Figure 31: Correction Diagram
10 Technical data Dehumidifier model RZ- 081R 101R 104R Capacity [kg/h] 19 30 Nom dry air flow [m /h] 2800 4500 7000 External static pressure [Pa] 400 400 3) Nom wet air flow [m /h] 1000 1800 2500 2) External static pressure [Pa] 200 200 3) Nom heater power [kW] 24 ...
Need help?
Do you have a question about the RECUSORB RZ-104R and is the answer not in the manual?
Questions and answers