
Related Manuals for Leister WELDPLAST 600


Summary of Contents for Leister WELDPLAST 600
- Page 1 English WELDPLAST 600/605 WELDPLAST 600 WELDPLAST 605 Leister Technologies AG Galileo-Strasse 10 6056 Kaegiswil/Switzerland Tel. +41 41 662 74 74 +41 41 662 74 16 www.leister.com sales@leister.com...
-
Page 2: Table Of Contents
Setting the welding parameters Display symbols of the status display (Display 40) Display symbols of the work display (Display 35) 9 Settings and functions of the WELDPLAST 600/605 software Overview menu navigation basic settings Overview menu navigation Advanced Mode Recipes... - Page 3 10 Accessories 11 Maintenance 11.1 Lubrication axial groove ball bearing 11.2 Cleaning of the filters 12 Service and repair 13 Training 14 Declaration of Conformity 15 Disposal...
-
Page 4: Important Safety Instructions
We recommend that you always keep the instruction manual with the device. WELDPLAST 600/605 hot air welder extruder You can find more information on the WELDPLAST 600/605 at www.leister.com 1. Important safety instructions In addition to the safety instructions contained in the individual sections of this instruction manual, the following regulations must always be observed. -
Page 5: Intended Use
1.1 Intended use The WELDPLAST 600/605 is designed for professional welding of thermoplastic materials made from PE and PP in the fields of • Vessel construction • Pipeline construction • Equipment construction • Landfill construction • Repairs Use only original Leister spare parts and accessories; otherwise, any warranty or guarantee claims will be invali- dated. -
Page 6: Technical Data
2. Technical data WELDPLAST 600 WELDPLAST 605 230 V 230 V Voltage Power 3680 3680 Frequency 50/60 °C plastic Max. 260 Temperature °F Air Max. 300 Air volume 45 – 100 Drive 60 – 100 Noise level (dB) <70 (K = 3 dB) -
Page 7: Transport
3. Transport Comply with applicable national regulations regarding the carrying or lifting of loads. The weight of your WELDPLAST 600/605 including the transport box is 18 kg (14 kg without transport box). Use the hot air welder extruder’s transport box included with delivery only (see scope of delivery [4.2]). -
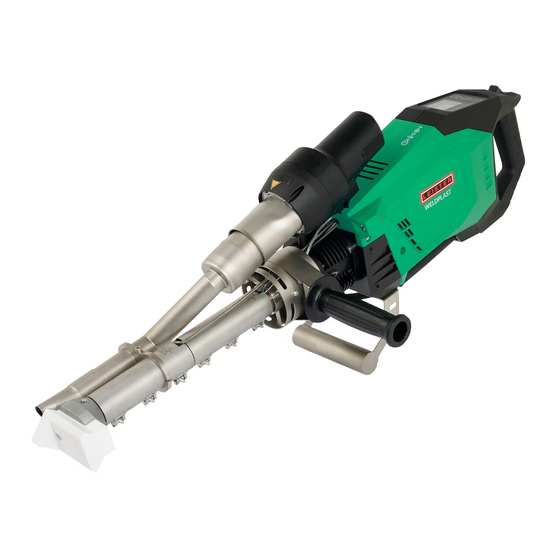
Page 8: Your Weldplast 600/605
The model and serial number are indicated on your device's type plate (20). Transfer this information to your operating instructions; in the event of any inquiries to our representatives or authorized Leister service center, please always refer to this information. -
Page 9: Overview Of Device Parts
4.3 Overview of device parts WELPLAST 600 WELPLAST 605 1. Mains connection cable 13. Pipe clamp 2. Control panel 14. Hot air duct 3. Housing 15. Hot air blower 4. Fixing thread (8 x M8) 16. Filter 5. Stand 17. Drive on/off switch 6. - Page 10 Figure 1/Control panel (2) 30. Button Work light On/50%/Off 31. Button Heating On/Off 32. Button Reduce/Increase 33. Button Confirm 34. Button Menu 35. Display...
-
Page 11: Settings On The Weldplast 600/605
5. Settings on the WELDPLAST 600/605 5.1 Adjusting the handle (7) 1:1 1:1 Loosen the adjustable handle (7) with a counterclockwise turn. Set the position of the adjustable handle (7) on the protective tube and fasten it again with a clockwise turn of the adjustable handle (7). -
Page 12: Commissioning And Operation/Operation
6. Commissioning and operation of the WELDPLAST 600/605 6.1 Work environment and safety Warning Hazardous voltage, danger to life There is a danger to life from electric shock due to electrical voltage. The extruder must therefore only be connected to sockets and extension cables with a protective earth conductor. Protect the extruder from moisture and wet conditions. -
Page 13: Prepare Device
• When using autonomous power generators, they must be grounded and equipped with residual current circuit breakers. To prevent possible damage to the electronics, Leister recommends power generators that have a maximum total harmonic distortion (THD) of 5% or less. -
Page 14: Welding Sequence
6.4 Welding sequence Preparing for welding As soon as you have switched on the heating (Button 31 Heating On/Off), you will see adynamic display of the current air and plastic temperature with a prog- ress bar (setpoint and actual values). The plastic drive is still locked. -
Page 15: Finishing Welding
6.5 Finishing welding • To stop the plastic output, press the drive on/off switch (16). Slowly swivel the welding shoe away from the welding seam. • Pull out any material left over in the welding shoe hole. 6.6 Switching off the device/Maintenance •... -
Page 16: Quick Reference Guide Weldplast 600/605
4. Switch off the main switch (18).Caution: Jacket heating remains hot for some time. 5. Pull out supply voltage plug WELDPLAST 600/605 Quick Guide User Manual: Download leister.com/DLP-Weldplast-605 myLeister App 10 min 6 min QG WELDPLAST 600/605 / Art. 170.895 / 06.2021... -
Page 17: The Control Panel Of The Weldplast 600/605
8. The control panel of the WELDPLAST 600/605 The control panel (2) is comprised of the function buttons with which you control the various menu functions, and the display where the respectively selected setting, menu options or the values valid for the running time are displayed. -
Page 18: Display
8.2 Display The display is subdivided into two display areas: 40 Status display 41 Working display 8.3 Setting the welding parameters To adjust a welding parameter before welding, proceed as follows: Example for setting the welding temperature • Press the Minus button (32) to select the plastic temperature, •... -
Page 19: Display Symbols Of The Status Display (Display 40)
• during the welding process, plastic extrusion can be adjusted at any time using the potentiometer (18) • between 60 and 100% to adjust other parameters during the welding process, press the Minus/Plus button (32) to select the parameters to be adjusted •... -
Page 20: Display Symbols Of The Work Display (Display 35)
Symbol for Cool-down mode Symbol for hardware error message • Device no longer ready for use • Contact your authorized Leister Service Center (note the respec- tive error code in the section Warning and error messages) Symbol for Hardware error message (heating element is defective). -
Page 21: Settings And Functions Of The Weldplast 600/605 Software
9. Settings and functions of the WELDPLAST 600/605 software 9.1 Overview menu navigation basic settings Pressing the Menu button (34) takes you to the Basic Settings menu items. From the default setting, use the Settings menus to access formulas, display set- points, Eco Mode, LQS and Advanced Mode. - Page 22 Switching off Target and Actual Value Display (see 9.4) Switching on ECO Mode (see 9.5) Switching on Data Recording (see 9.6) Switching on Advanced Mode Note: Pressing the Menu (34) button will return you to the working display in each menu item.
-
Page 23: Overview Menu Navigation Advanced Mode
9.2 Overview menu navigation Advanced Mode If you activate Advanced Mode, further information and setting options are available. WLAN, machine settings, info mode, counter, general info, warnings Switching on Advanced Mode Activate WLAN (see 9.7) Machine settings (see 9.8) Example: Setting the time... - Page 24 Switching on Info Mode (see 9.9) Counter (see 9.10) General info (see 9.11) Warnings (see 9.12) Note: Pressing the Menu (34) button will return you to the working display in each menu item.
-
Page 25: Recipes
9.3 Recipes Recipes saved recipes can be found under Select. To select a recipe, press the Confirm button (33). If no recipes are available, you can create recipes under New. Use the Minus/Plus buttons (32) to select the desired recipe Press the Confirm button (33) to accept the recipe Exit the menu by pressing the Menu button (34) Note for test welding appears You can create a recipe yourself under the New menu item. -
Page 26: Displaying Nominal Values (Set Values)
You can adjust the parameters of your own recipes at any time. To do this, in the menu Recipes select the submenu Edit by pressing the Minus (32) button. After pressing the Confirm button (33), all editable recipes are displayed. Use the Minus button (32) to select the recipe to be edited and press the Confirm button (33). -
Page 27: Eco Mode
9.5 Eco mode Switched off at the factory • Enable Eco Mode by pressing the Confirm button (33) The • time interval for the Eco and Standby timer can be individually configured by selecting the value to be edited with the Minus/Plus (32) buttons •... -
Page 28: Lqs Data Recording Settings
9.6 LQS Data Recording settings • In the menu, by pressing Minus button (32), select the menu item LQS, • then press the Confirm button (33), • to switch on the data recording, press the Confirm button (33). Monitored Welding •... - Page 29 Seam Naming • By pressing the Minus button (32), select Seam Naming, then press the Confirm button (33). Seam Name • By pressing the Minus button (32), select Seam Naming, then press the Confirm button (33). • To edit the name, press the Confirm button (33) •...
- Page 30 Number of Files • Select the Number of Files menu item in the menu by pressing the Minus (32) button. The number of recorded files is displayed. Free memory • Select the Free Memory menu item in the menu by pressing the Minus (32) button.
-
Page 31: Wlan Settings
9.7 WLAN settings Switched off at the factory • Select the WLAN menu item in the menu by pressing the Minus button (32), then press the Confirm button (33). • To switch on the WLAN, press Confirm (33) 9.8 Machine settings •... - Page 32 Unit • Select the Unit menu item in the menu by pressing the Minus (32) button. Press the Confirm button (33), • now select the unit of the display: set the metric or imperial • value by pressing the Confirm button (33) •...
- Page 33 LCD Backlight wh • Select the LCD contrast menu item in the menu by pressing the Minus button (32), then press the Confirm button (33), • press the Minus/Plus button (32), the contrast can be set • by pressing the Confirm button (33), then accept the set value LCD Backlight rd •...
- Page 34 Service Intvl. (h) • In the menu, by pressing the Minus button (32), select the menu item Service Intvl. (h), • then press the Confirm button (33) and the Plus button (32), • then press the Menu button (34), reset the hour counter for the Maintenance Servicing display to 0 Remote mode Remote mode is currently inactive.
-
Page 35: Info Mode
9.9 Info Mode Switched off at the factory • If Info Mode is activated, additional information is displayed at the work level. The following information is displayed: • Speed plastic motor in rpm • Blower heating; capacity of heating output in % as well as ACTUAL and TARGET temperature in °C •... -
Page 36: Warnings And Error Messages
9.12 Warnings and error messages • Select the Warnings menu item in the menu by pressing the Minus button (32), then press the Confirm (33) button All warnings are now displayed. In the case of a warning, you can continue to work without restriction. In contrast to the warning message, it is not possible to continue working once an error message has ap- peared. - Page 37 0002 Undervoltage/overvoltage 0004 Hardware error 0008 Thermoelement is defective 0100 Blower is faulty 0200 Communication module error Error (with address of Leister Service Center as needed)* 0400 Drive error *Contact Leister Service Center...
- Page 38 10. Accessories Use only original Leister spare parts and accessories; otherwise, any warranty or guarantee claims will be invali- dated. You can find more information at www.leister.com. 11. Maintenance Disconnect the device from the power supply and allow to cool before carrying out any maintenance or repair work.
- Page 39 12. Service and repair Repairs shall be performed exclusively by authorized Leister Service Centers. Leister Service Centers guarantee a professional and reliable repair service within 24 hours with original spare parts in accordance with circuit diagrams and spare parts lists.
- Page 40 • Heating elements are excluded from warranty obligations or guarantees. • Guarantee or warranty claims cannot be asserted for devices that have been converted or changed by the purchaser or for which non-original Leister spare parts have been used. Sales and service center...
Need help?
Do you have a question about the WELDPLAST 600 and is the answer not in the manual?
Questions and answers