VeEX VePAL TX300 Quick Reference Manual
Hide thumbs
Also See for VePAL TX300:
- User manual (421 pages) ,
- Quick reference manual (12 pages) ,
- Quick reference manual (12 pages)
Advertisement
Quick Links
Advertisement

Related Manuals for VeEX VePAL TX300


Summary of Contents for VeEX VePAL TX300
- Page 1 CPRI Testing VePAL TX300...
- Page 2 CPRI Testing VePAL TX300 Quick Reference Guide Introduction This document can be used as a reference guide for step-by- step testing of CPRI optical service. Always refer to your latest Methods & Procedures (M&P) for specific guidelines. The following steps will be described:...
- Page 3 CPRI Testing VePAL TX300 Quick Reference Guide Step 1 TX300 Test Set Operation...
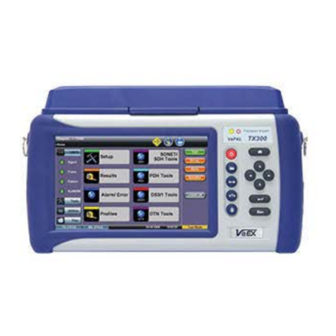
- Page 4 CPRI Testing VePAL TX300 Quick Reference Guide Step 1 TX300 Keypad Quick Keys Navigation Control TX300 Test Ports To access the test ports, remove the protective cover. Note: SFP must be MSA compliant and support rates up to 4G. For CPRI rate of 9.8G use XFP port.
- Page 5 CPRI Testing VePAL TX300 Quick Reference Guide Step 1 TX300 Screen The Home menu can be accessed at anytime during operation by pressing the Home key on the rubber keypad. The screen is divided into three presentation areas: LEDs: Displays soft LEDs associated with Errors...
-
Page 6: Test Mode Selection
CPRI Testing VePAL TX300 Quick Reference Guide Step 1 Test Mode Selection You can easily switch between testing modes by tapping on the button on the bottom right corner of the Home menu. When the Test Mode Selection window appears, select CPRI Testing and press YES to validate. - Page 7 CPRI Testing VePAL TX300 Quick Reference Guide Step 1 Link and Alarm Status Tap on the BERT icon to access the BERT menu. Link Status Laser enabled CPRI Home Menu LED Status Signal/Frame: Green LEDs indicate Link up Pattern/ALM/ERR:LEDs active during BERT...
-
Page 8: Bert Configuration
CPRI Testing VePAL TX300 Quick Reference Guide Step 1 BERT Configuration Press the Setup tab to access the BERT configuration fields. test Select CPRI rate that matches the circuit under Test Pattern Configuration Select the test pattern. Note: Use the test pattern recommended in the M&P. - Page 9 CPRI Testing VePAL TX300 Quick Reference Guide Step 1 Start the Test and Results Press the button to start the BERT. You will be automatically taken to the Results Summary screen. Results Summary: Verify that no errors are present. If errors are present, press the button.
- Page 10 CPRI Testing VePAL TX300 Quick Reference Guide Step 2 Verify Optical Power Signal Level results: Tap the Signal tab to view the Signal Level measurements. Client Host Inter CO LC connectors connection CO B CO A VeEX TX300 VeEX TX300...
- Page 11 CPRI Testing VePAL TX300 Quick Reference Guide Step 3 Verify End to End BER Errors screen: Tap the Errors tab to view the measurements. Client Host Inter CO LC connectors connection CO B CO A VeEX TX300 VeEX TX300 Note: Test should run for at least 6 minutes or the duration in your M&P.
- Page 12 CPRI Testing VePAL TX300 Quick Reference Guide Step 3 Verify End to End BER Alarms screen: Tap the Alarms tab to view the Loss of Signal (duration) and Pattern Loss (events) Events screen: Tap the Events tab to view the list of events...
- Page 13 CPRI Testing VePAL TX300 Quick Reference Guide Step 4 Round Trip Delay (RTD) Measurement Place a loopback at the far end, then tap the Summary tab. Press button to enable/disable the measurement. Loopback Client Host Inter CO LC connectors connection...
-
Page 14: Saving Test Results
CPRI Testing VePAL TX300 Quick Reference Guide Step 5 Saving Test Results At any time during the test or when the test is complete, you can press the Save key on the rubber keypad to save the test results. Type the name of the results file. - Page 15 CPRI Testing VePAL TX300 Quick Reference Guide Notes...
- Page 16 Quick Reference Guide Notes © 2013 VeEX Inc. All rights reserved. VeEX Inc. VeEX is a registered trademark of VeEX Inc. The 2827 Lakeview Court information contained in this document is accurate. Fremont, CA 94538 USA However, we reserve the right to change any Tel: +1.510.651.0500...
Need help?
Do you have a question about the VePAL TX300 and is the answer not in the manual?
Questions and answers