Table of Contents
Advertisement
Quick Links
Advertisement
Table of Contents

Related Manuals for Bosch HBA5570 0B Series


Summary of Contents for Bosch HBA5570 0B Series
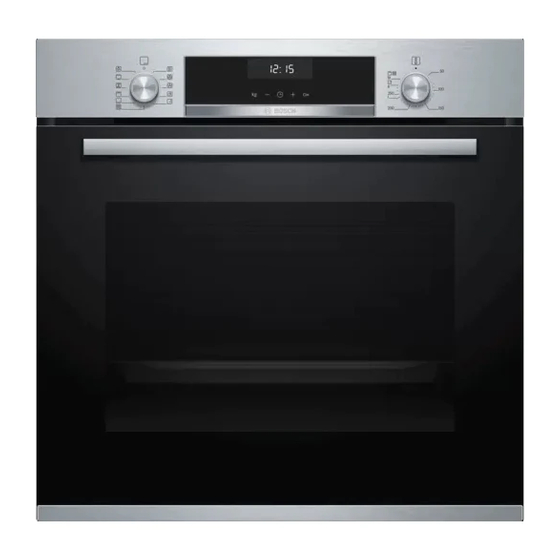
- Page 1 Oven HBA5570.0B User manual and installation instructions [en]...
-
Page 2: Table Of Contents
en Safety 1.2 Intended use Table of contents This appliance is designed only to be built into kitchen units. Read the special installation instructions. USER MANUAL Only a licensed professional may connect ap- Safety .............. 2 pliances without plugs. Damage caused by in- correct connection is not covered under the Preventing material damage ....... -
Page 3: Safety
Safety en ▶ If possible, wear protective gloves. Opening the appliance door creates a The hinges on the appliance door move when draught. Greaseproof paper may come into the door is opened and closed, which could contact with the heating element and catch trap your fingers. -
Page 4: Preventing Material Damage
en Preventing material damage ▶ Also unplug the appliance from the mains 1.5 Halogen bulb or switch off the circuit breaker in the fuse WARNING ‒ Risk of burns! box. The bulbs in the cooking compartment get 1.6 Cleaning function very hot. There is still a risk of burning for some time after they have been switched off. -
Page 5: Familiarising Yourself With Your Appliance
Familiarising yourself with your appliance en 3.2 Saving energy If the cooking time is relatively long, you can switch the appliance off 10 minutes before the cooking time If you follow these instructions, your appliance will use ends. less power. ¡ There will be enough residual heat to finish cooking Only preheat the appliance if the recipe or the recom- the dish. -
Page 6: Rapid Heating
en Familiarising yourself with your appliance Symbol Function Time-setting options Select the time , timer , cooking time and the end time . To select the individual time-setting options, press the button sev- eral times. The red bar above or below the respective symbol indicates the function to which the setting in the display corresponds. -
Page 7: Ecoclean
Familiarising yourself with your appliance en 4.4 Temperature and setting levels There are different settings for the types of heating and functions. Note: For temperature settings above 250 °C, the appliance reduces the temperature to approx. 240 °C after ap- prox. 10 minutes. If your appliance has the top/bottom heating or bottom heating types, this temperature reduction does not take place there. - Page 8 en Accessories To ensure that the appliance cools down more quickly ATTENTION! after operation, the cooling fan continues to run for a Do not cover the ventilation slot above the appliance certain period afterwards. door. The appliance overheats. Ensure that the ventilation slots are unobstructed. ▶...
- Page 9 Note: Take any accessories that you will not be using your appliance in our brochures and online: out of the cooking compartment while the appliance is www.bosch-home.com in operation. Accessories vary from one appliance to another. When purchasing accessories, always quote the exact Combining accessories product number (E no.) of your appliance.
- Page 10 en Basic operation 7 Basic operation When your food is ready, switch off the appliance. 7.1 Switching on the appliance Tips Turn the function selector to any position other than ▶ ¡ The most suitable type of heating for your food can the "Off"...
- Page 11 Time-setting options en Cancelling the cooking time Button Default value You can cancel the cooking time at any time. 5 minutes is highlighted on the display. Requirement: 10 minutes Reset the cooking time to zero using the button. ▶ The timer duration can be set in 30-second incre- a After a few seconds, the appliance applies the ments up to 10 minutes.
- Page 12 en Programme Tip: You can go to the basic settings → Page 14 to 9.5 Setting the time on the clock specify whether or not the time should be shown on Once the appliance has been connected to the mains the display. or following a power failure, the time flashes on the dis- play.
- Page 13 Programme en No. Food Cookware Weight setting Add liquid Shelf Information posi- tion Roasting dish with Weight of meat Almost cover Do not sear the meat 06 Pot-roasted beef E.g. prime rib, the meat with beforehand shoulder, rump or mar- liquid inated beef roast Roasting dish with Total weight of all...
- Page 14 en Childproof lock 11 Childproof lock You can secure your appliance to prevent children 11.1 Activating and deactivating the from accidentally switching it on or changing the set- childproof lock tings. Requirement: The function selector must be set to the Notes "Off" position . ¡...
-
Page 15: Appliance Door
Cleaning and servicing en 13 Cleaning and servicing Do not use cleaning products with a high alcohol To keep your appliance working efficiently for a long ▶ content. time, it is important to clean and maintain it carefully. Do not use hard scouring pads or cleaning ▶... - Page 16 en Cleaning and servicing Cooking compartment Area Suitable cleaning agents Information Enamel surfaces ¡ Hot soapy water Soak any heavily soiled areas and use a brush or steel wool. ¡ Vinegar water Leave the appliance door open to dry the cooking compartment after cleaning it.
- Page 17 EcoClean en 14 EcoClean Clean the cooking compartment regularly using the 14.2 Preparing the appliance for the cleaning function EcoClean to help retain the cleaning cleaning function ability of the self-cleaning surfaces and prevent dam- In order to achieve a good cleaning result, prepare the age.
- Page 18 en Cleaning assistance dish patches may be left over from salty food – the Attach the shelf supports. spots are not rust. These spots are not harmful. → "Shelf supports", Page 18 These marks do not impair the cleaning ability of the self-cleaning surfaces. 15 ...
- Page 19 Shelf supports en First, push the rail into the middle of the rear Keep the PUSH tab pushed back and swing the socket until the rail rests against the cooking rail outwards . compartment wall, and then push this back ...
- Page 20 en Appliance door Insert the pull-out rail between the two bars. Keep the PUSH tab pushed in and swing the pull- out rail inwards until the front retainer is located between the two bars . Release the PUSH tab. ‒ Push the retainer in between the lower and the upper bar.
- Page 21 Appliance door en Slide the appliance door straight onto the two WARNING ‒ Risk of injury! hinges . Slide the appliance door on as far as it When the hinges are not secured, they can snap will go. shut with great force. Open the appliance door fully. Make sure that the locking levers are always ▶...
- Page 22 en Appliance door Remove the door cover . WARNING ‒ Risk of injury! Scratched glass in the appliance door may develop into a crack. Do not use any harsh or abrasive cleaners or ▶ sharp metal scrapers to clean the glass on the oven door, as they may scratch the surface.
-
Page 23: Troubleshooting
Troubleshooting en Push the intermediate pane upwards until it is in the Push the inner pane upwards until it is in the left- left- and right-hand retainers . and right-hand retainers . Slide the inner pane into the left- and right-hand Put the door cover in position ... -
Page 24: Customer Service
en Troubleshooting Fault Cause and troubleshooting The appliance does At the end of a cooking time, the appliance stops heating up. The oven light and cooling fan not switch off fully at do not switch off. For types of heating with recirculation, the fan continues to run in the back the end of a cooking wall of the cooking compartment. -
Page 25: How It Works
Disposal en Connect the appliance to the power supply. 19 Disposal Find out here how to dispose of old appliances cor- This appliance is labelled in accord- rectly. ance with European Directive 2012/19/EU concerning used elec- trical and electronic appliances 19.1 Disposing of old appliance (waste electrical and electronic equip- Valuable raw materials can be reused by recycling. - Page 26 en How it works ¡ Depending on the size and type of the food to be Baking on three levels Height roasted, add up to 1/2 litre water to the universal Baking tray pan. Universal pan You can make a sauce from the juices that are Baking tray caught.
- Page 27 How it works en 21.4 Food selection Food Accessories/cookware Shelf pos- Type of Temperature Cooking ition heating in °C/grill time in mins setting Victoria sponge cake 2 pcs 150-170 15-25 Ø 20 cm cake tin Rich fruit cake Deep 23 cm diameter 140-150 180-210 Fruit pie 20 cm diameter plate or 160-170...
- Page 28 en How it works Cover the containers with foil, e. g. with cling film. 21.5 Yoghurt Place the containers on the cooking compartment You can use your appliance to make your own yoghurt. floor. Set the appliance according to the recommended Preparing yoghurt setting.
-
Page 29: Installation Instructions
Installation instructions en Food Accessories/cookware Shelf pos- Type of Temperature in Cook- ition heating °C ing time in mins Small cakes Baking tray 140-150 25-35 Small cakes, 2 levels Universal pan 3 + 1 140-150 25-40 Baking tray Small cakes, 3 levels Universal pan 5 + 3 + 1 30-40 Baking tray... - Page 30 en Installation instructions 22.3 Installation below a worktop Observe the installation dimensions and the installation instructions when installing below a worktop. ¡ Wear protective gloves so that you do not cut yourself. Parts that are accessible dur- ing installation may have sharp edges. ¡...
- Page 31 Installation instructions en ¡ To ensure that the appliance door can be opened, 22.5 Installing two appliances on top of you must take the minimum dimensions into consid- each other eration when installing in a corner. The dimension Your appliance can also be installed above or below is dependent on the thickness of the unit front and another appliance.
- Page 32 en Installation instructions 22.8 Installing the appliance Slide the appliance in fully and centre it. Screw the appliance into place. For handleless kitchens with vertical bar handle strips: Attach a suitable filling piece in order to cover ‒ any sharp edges and to guarantee a safe install- ation.
- Page 36 Expert advice for your Bosch home appliances, help with problems or a repair from Bosch experts. Find out everything about the many ways Bosch can support you: www.bosch-home.com/service Contact data of all countries are listed in the attached service directory.