Table of Contents
Advertisement
Owner's manual & Installation manual
Mode d'emploi et manuel d'installation
Benutzerhandbuch & Installationshandbuch
Manuale dell'utente e manuale di installazione
Gebruikershandleiding en installatiehandleiding
Manual de instrucciones y de instalación
A ¨ gar- & installationshandbok
Manual do utilizador e manual de instalaça ˜o
DVD MULTIMEDIA STATION WITH TOUCH PANEL CONTROL
STATION MULTIMEDIA DVD AVEC COMMANDE PAR ECRAN TACTILE
DVD-MULTIMEDIA-STATION MIT TOUCHSCREEN-STEUERUNG
STAZIONE DVD MULTIMEDIALE CON CONTROLLO A SFIORAMENTO
DVD MULTIMEDIA STATION MET TOUCH PANEL BEDIENING
EQUIPO DVD MULTIMEDIA CON PANEL DE CONTROL TÁCTIL
DVD MULTIMEDIESTATION MED PEKSKA ¨ RM
ESTAÇA ˜ O MULTIMÉDIA PARA DVD COM CONTROLO DE PAINEL DIGITAL
Advertisement
Table of Contents

Related Manuals for Clarion VRX578RUSB


Summary of Contents for Clarion VRX578RUSB
- Page 1 Owner’s manual & Installation manual Mode d’emploi et manuel d’installation Benutzerhandbuch & Installationshandbuch Manuale dell’utente e manuale di installazione Gebruikershandleiding en installatiehandleiding Manual de instrucciones y de instalación A ¨ gar- & installationshandbok Manual do utilizador e manual de instalaça ˜o DVD MULTIMEDIA STATION WITH TOUCH PANEL CONTROL STATION MULTIMEDIA DVD AVEC COMMANDE PAR ECRAN TACTILE DVD-MULTIMEDIA-STATION MIT TOUCHSCREEN-STEUERUNG...
-
Page 2: Table Of Contents
7inVRX578RUSB UserManual TABLE OF CONTENTS 1. DESCRIPTION 1-1 Features 1-2 Expanding System 2. PRECAUTIONS 3. CONTROL 3-1 Button Functions 3-2 Remote Control 4. BUTTON AND TOUCH KEy OPERATION 4-1 User Guide 4-1-1 Power On Mode 4-1-2 Tuner Mode 4-1-3 DVD Mode 4-1-4 Sound Mode 4-1-5 Adjust Mode : At Tuner, iPod, USB Mode 4-1-6 Adjust Mode : At AUX, DVD Mode... - Page 3 7. OPERATIONS 7-1 DCP 7-2 Basic Operations 7-2-1 Power On/Off 7-2-2 Mode Selections 7-2-3 LCP Operations 7-2-4 Audio Operations 7-2-5 Adjust Operations 7-2-6 2-ZONE Function 7-3 Radio 7-4 RDS 7-4-1 Feature Explanation 7-4-2 RDS Menu 7-5 DVD Video Player 7-5-1 Size of the Screen 7-5-2 Country Code 7-5-3 Parental Level 7-5-4 Disc Loading...
-
Page 4: Description
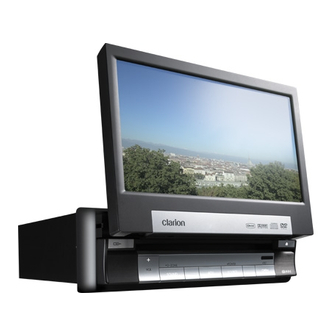
1. DESCRIPTION ※ This image is main body with open LCP(Liquid Crystal Panel). 1-1 Features •Automatic 7 ˝ Wide Screen LCD •Touch Panel Control •DVD Video / CD / MP3 / WMA / DivX Play Capability •RCA 6 (+2)-Channel (2-Zone) Output •Built-in 50 W x 4 Amplifier •CD-R/CD-RW/DVD±R/DVD±RW Compatible •2-ZONE Control... -
Page 5: Expanding System
1-2 Expanding System... -
Page 6: Precautions
2. PRECAUTIONS For your safety, the driver should not watch the DVD video/TV/VTR or operate the controls while driving. Please note that watching and operating the DVD video/TV/VTR while driving are prohibited by law in some countries. Also, while driving, keep the volume to a level at which external sounds can be heard. -
Page 7: Information For Users
INFORMATION FOR USERS CHANGES OR MODIFICATIONS TO THIS PRODUCT NOT APPROVED By THE MANUFACTURE WILL VOID THE WARRANTy AND WILL VIOLATE FCC APPROVAL. - Page 8 Handling Discs ‑•Handling - New discs may have some roughness around the edges. If such discs are used, the player may not work or the sound may skip. Use a ball-point pen or the like to remove any roughness from the edge of the disc. Ball-point pen Roughness - Never stick labels on the surface of the disc or mark the surface with a pencil or pen.
- Page 9 CAUTION With the screen open, a driver may not be able to see the disc insertion slot. For your safety, insert a disc with the screen closed. Even when the screen is closed, however, the recessed disc slot may be difficult for a driver to see, care is needed whenever inserting discs.
-
Page 10: Control
3. CONTROL ®Á 3-1 Button Functions : To remove the DCP (Detachable Control Panel) ① : To eject the disc (press this button more than a second if the unit is in middle of turning ② the power off) ③ [+ VOL -] : To increase/decrease the volume (in a range from 0min to 33max) ④... -
Page 11: Remote Control
3-2 Remote Control •Remote Control Unit (39 buttons) SCAN SETUP SLOW P.CH AUDIO SUB TITLE BAND SCAN P.TIME SEARCH MODE SETUP MENU ENTER TOP MENU SLOW PLAy/PAUSE MUTE P.CH VOLUME AUDIO SUB TITLE ANGLE 2-ZONE WIRELESS REMOTE CONTROLLER BAND 0 ~ 9 P.TIME SEARCH MODE MENU... -
Page 12: Inserting The Batteries
•Inserting the Batteries ① Open the rear cover, and remove it and insert the AAA (SUM-4, IEC LR03/1.5V) batteries bundled with the remote control unit in the directions shown in the figure and then, close the rear cover. ② Using batteries improperly can cause them to explode. Take note of the following points: •... - Page 13 ⑧ [P.TIME] : To turn on/off the playtime display in DVD mode ⑨ [SEARCH MODE] : To switch the search mode (keep pressing more than a second in DVD mode) ⑩ [SETUP] : To show the DVD SETUP screen while playing DVD ⑪...
-
Page 14: Button And Touch Key Operation
4. BUTTON AND TOUCH KEy OPERATION 4-1 User Guide 4-1-1 Power On Mode ENGINE ON SOURCE “Long press” Last mode screen... -
Page 15: Tuner Mode
4-1-2 Tuner Mode SOURCE [TUNER] BAND... -
Page 16: Dvd Mode
4-1-3 DVD Mode SOURCE [DVD] CONTROL 10KEy... -
Page 17: Sound Mode
4-1-4 Sound Mode SOUND CUSTOM CUSTOM DETAIL BACK... -
Page 18: Adjust Mode : At Tuner, Ipod, Usb Mode
BAL/FAD OTHERS 4-1-5 Adjust Mode : At Tuner, iPod, USB Mode... - Page 19 [ADJUST] BACK [ADJUST] BACK...
-
Page 20: Adjust Mode : At Aux, Dvd Mode
4-1-6 Adjust Mode : At AUX, DVD Mode [ADJUST] COLOR [ + ]... -
Page 21: Cautions
5. CAUTIONS 5-1 Liquid Crystal Panel/Generalities ※ For a longer service life, be sure to read the following cautions. • Be sure to house the liquid crystal panel inside the main unit when parking the car outdoors for long period of time. The liquid crystal panel will operate properly in a temperature range of 0 to 60°C. -
Page 22: Dvd Video System
6. DVD VIDEO SySTEM DVD video is a high-quality digital video source that provides crisp and clear images. One 12cm disc contains either one film or four hours of music. 6-1 DVD Video Features This unit provides the following functions in addition to the high image quality and sound quality of DVD video. -
Page 23: Discs
6-2 Discs 6-2-1 Playable Disc This DVD video player can play the following discs. 6-2-2 CD Extra Disc A CD Extra disc is a disc in which a total of two sessions have been recorded. The first session is Audio session and the second session is Data session. Your personally-created CDs with more than second data sessions recorded cannot be played on this DVD video player. -
Page 24: Divx Playback
6-2-7 DivX Playback This player can play back DivX format file recorded on DVD±R/RW and CD-R/RW discs. 6-2-8 Region Number The DVD video system assigns a region number to DVD video players and DVD discs by sales area. The DVD video region number is marked on the disc jacket as shown below. 6-3 Registered Trademark •This product incorporates copyright protection technology that is protected by U.S. -
Page 25: Operations
7. OPERATIONS 7-1 DCP The control panel can be detached to prevent theft. When detaching the control panel, store it in the DCP (Detachable Control Panel) case to prevent scratches. Please take the DCP with you when leaving the car. •Remove DCP ①... -
Page 26: Mode Selections
7-2-2 Mode Selections (1) When the LCP is open ① Press the [SOURCE] button to enter in the SOUCRE mode. ② Touch the desirable key. (2) When the LCP is closed ① Press the [SOURCE] button to change operation mode. ②... -
Page 27: Audio Operations
(3) Adjusting the angle of the LCP ① Every touching the [OPEN] key more than a second tilts LCP forward or backward. The angle is changed the following order: 110°(Default angle) → 100° → 90° → 80° → 70° → 80° → 90° → 100° → 110° → … ②... - Page 28 (1) Adjusting the Z-ENHANCER ① Press the [SOUND] button. (This button performs only when the panel is open.) ② Touch the desirable item key (Z-ENHANCER, BAL/FAD, OTHERS). ③ Perform the adjustment explaining in the following sections. ④ Touch the [BACK] key to return to the previous screen. ITEM Z-ENHANCER BASS BOOST...
- Page 29 ※ IMPACT - detail adjustments ※ EXCITE - detail adjustments •Custom Setting : Touch the [CUSTOM] key and then touch the [CUSTOM DETAIL] key. BASS controls low sound, TREBLE controls high sound. CUSTOM DETAIL BASS GAIN BASS FREQ BASS Q TREBLE GAIN TREBLE FREQ BASS...
- Page 30 (2) Adjusting the BAL/FAD •Touch the [BAL/FAD] key. •Touch the [FRONT] [LEFT] [RIGHT] [REAR] keys to control balance & fader. They control a location adjustment of the sound. Their default settings are “CENTER”. SETUP item FADER BALANCE (3) Adjusting the OTHERS •Touch the [OTHERS] key •Touch the value at right side to adjust the desirable function.
-
Page 31: Adjust Operations
7-2-5 Adjust Operations ※ item table MONITOR GENERAL (1) Adjusting the MONITOR (1-1) Default Screen ① Press the [ADJ] button. ② Perform the adjustment. ③ Touch the [BACK] key to return to the previous screen. (1-2) MONITOR ADJUST : At Tuner, iPod, USB Mode (1-2-1) Brightness •Touch the [ADJUST] key to adjust brightness for display image. - Page 32 [NIGHT] : Brightness of LCP is always set to user setting level in adjust mode. [AUTO] : According to the status of the car light, brightness of LCP is changed. (When the car light is off : Day color, when the car light is on : Night color, Only “NIGHT”...
- Page 33 (2-3) Color •To adjust the color depth. •If you touch the [ - ] key, the color depth will decrease. •If you touch the [ + ] key, the color depth will increase. (2-4) Hue •If you touch the [ - ] key, red is emphasized. •If you touch the [ + ] key, green is emphasized.
-
Page 34: 2-Zone Function
“OFF”, disconnect the mobile phone from the cable or turn off the power of the mobile phone.) •MUTE : To mute the sound during your telephone (This function is not compatible with all mobile telephones. Contact your local authorized Clarion dealer for information on proper installation and compatibility.) (3-6) TEL SPEAKER •To change the output speaker for the mobile phone when TEL SWITCH is “ON”... - Page 35 •The TUNER mode cannot be specified for the SUB zone. • The steering wheel remote control operations work upon the MAIN zone even when the SUB zone is selected. • If a mobile phone interrupt arises when an external equipment is specified for the SUB zone, the 2-ZONE function is automatically turned off, and it does not resume to the 2-ZONE ON status even when the interruption is finished.
-
Page 36: Radio
(3) Specification of conversion • When the 2-ZONE function turns on, the source of the main-zone and the sub-zone is made up by the mixture besides of the external source. • The source conversion of the main-zone is available when the 2-ZONE setting mode sets up to the main-zone. - Page 37 (2) Auto store ① The Auto Store is a function for storing up to 6 stations that are automatically tuned in sequentially. If 6 receivable stations cannot be received, a previously stored station remains at the memory position. ② Touch and hold the [AS] key more than 2 seconds. A beep sounds and the stations with good reception are stored automatically to the preset channels ※In case of AF ON MODE whichever TA ON or OFF stations will be stored in FM3.
-
Page 38: Rds
7-4 RDS 7-4-1 Feature Explanation This unit has a built in RDS decoder system that supports broadcast stations transmitting RDS data. This system can display the name of the broadcast station being received (PS), and can automatically switch to the broadcast station with the best reception as you move long distances (AF switching). - Page 39 (1) AF • The AF function switches to a different frequency on the same network in order to maintain optimum reception. • Touch the [ON] key to turn the function on, and touch the [OFF] key to turn off. • When the AF function is on, “AF” blinks on the screen if nothing is received. •...
- Page 40 (5) PTy • This function enables you to listen to a broadcast of the specified program type when the broadcast starts. • Default setting of “PTY SELECT” is “AFFAIRS”. In some countries, there is no PTY station. • If [PTY] key is selected at the FM mode, the unit starts to search PTY station that has the selected program type.
- Page 41 ※ The 29 Types of PTY list PRESET NUMBER ENGLISH NEWS AFFAIRS INFO SPORT EDUCATE DRAMA CULTURE SCIENCE VARIED POP M ROCK M EASY M LIGHT M CLASSICS OTHER M WEATHER FINANCE CHILDREN SOCIAL RELIGION PHONE IN TRAVEL LEISURE COUNTRY JAZZ NATION M OLDIES...
-
Page 42: Dvd Video Player
7-5 DVD Video Player 7-5-1 Size of the Screen To change the screen size, touch the [OPTION] key,-then touch the [SCREEN] key on the DVD mode screen. The [FULL], [NORMAL], [CINEMA] key is displayed on the screen. (1) Normal mode Touch the [NORMAL] key to change the screen. -
Page 43: Country Code
7-5-2 Country code COUNTRy ALBANIA ANDORRA AUSTRIA BAHRAIN BELGIUM BOSNIA AND HERZEGOWINA BULGARIA CROATIA(local name: Hrvatska) CYPRUS CZECH REPUBLIC DENMARK EGYPT FINLAND FRANCE (FRANCE,METROPOLITAN) GERMANY GREECE HUNGARY ICELAND IRAN(ISLAMIC REPUBLIC OF) IRAQ IRELAND ISRAEL ITALY JAPAN JORDAN KUWAIT LEBANON LESOTHO LIECHTENSTEIN LUXEMBOURG INPUT CODE... -
Page 44: Parental Level
7-5-3 Parental Level You can change the level of parental lock. This function allows cutting scenes that are unfavorable for children or replacing them automatically with other scenes prepared in advance. For example, by replacing scenes of radical violence or portrayals of sex with safe scenes, you can make a trouble- free story as if it were so from the beginning. -
Page 45: Setting The Dvd Video
7-5-5 Setting the DVD Video (1) Way of watching video Playing mode is revitalized automatically after the disc loading, or touch the [DVD] key in SOURCE mode to enter the DVD mode. Then, the following screen is displayed when you touch the display. - Page 46 (4) Chapter skipping •Touching the [▶▶|] key starts playback from the beginning of the next track. • Touching the [|◀◀] key starts playback from the beginning of the current track. When the key is touched again within about 2 seconds, playback starts from the beginning of the previous track. •...
- Page 47 (5) DVD SETUP MODE DVD SET UP (5-1) Lang • OSD LANG - To set up the OSD language. • Sub Title - To set up the subtitle language. • Audio - To set up the audio language. • Disc - To set up the disc language. •...
-
Page 48: Other Function
7-6 Other function 7-6-1 CDDA When playback is not started, press the [||▶] button or touch the [▶/||] key. (1) Touch the [▶/||] key to pause or resume the playback. Keep touching the [▶/||] key more than a second to stop during the playback. (2) Touching the [▶▶|] key starts playback from the beginning of the next track. - Page 49 ② Logical format(File System) Select the “ISO9660 level 1 or level 2” as a software format used in MP3 file of the CD-R disc. The normal playing may not be performed if it recorded by the other format. The name of the folder and file can be represented in title while MP3 is playing; however, the title is represented by the single byte alphabet and numbers of 31 and 27 to the name of the folder and file.
- Page 50 ② Touch the [CONTROL] key to select the file or folder. Touch the [◀] [▶] key to select the folder list or track list Touch the [▲] [▼] key to select the file in the selected folder Touch the [ENT] key to select the file Touch the [BACK] key to return to previous screen ③...
-
Page 51: Usage Of Peripheral Devices
8. USAGE OF PERIPHERAL DEVICES 8-1 Setting iPod This unit can be used to control a Connected Apple iPod(iPod Mini, fourth generation, iPod nano, iPod with video). The iPod versions higher than those noted in side may not be playable. This unit will not operate, or may operate improperly with unsupported versions. - Page 52 (4) Video mode You can view video data stored in the iPod. But you cannot control and navigate with a CLARION device on iPod video mode. It only allows you to control with the iPod device. To enjoy the video data, you must operate in following order: ①...
-
Page 53: Setting Usb
• Each time you touch the second key (AUX SENS MIDDLE), You can switch among (AUX SENS LOW, AUX SENS MIDDLE, AUX SENS HIGH) to change the AUX audio volume. •AUX SENS LOW : Low volume. •AUX SENS MIDDLE : Middle volume. •AUX SENS HIGH : High volume. - Page 54 •Touch the [FOLDER] figure to view the folder list, then [BACK] letters is displayed. Touch the [BACK] key to return to the previous screen. Touch the [ - ] or [ + ] key to display the track list of the previous or next folder. Touch the [▶/||] key to pause or resume the playback.
-
Page 55: Troubleshooting
9. TROUBLESHOOTING General PROBLEM No Power(no sound) No button activation Wrong Display Remote Controller is not working •DVD Player PROBLEM Another disk is already in the unit Unable to insert the disc Foreign elements are in the disc insertion hole Dirty CD Noise sound and sound skipping... -
Page 56: Specifications
10. SPECIFICATIONS Frequency range Quieting sensitivity Limiting sensitivity FM TUNER Stereo separation Frequency response Frequency range AM TUNER Usable sensitivity System Usable discs DVD PLAyER Frequency response Separation Distortion Sampling rate MP3 / WMA Bit rate Logical Format Maximum power output AUDIO Power output AMPLIFIER... - Page 57 Power source voltage Ground Current consumption GENERAL Auto antenna rated current Dimension of the Main Unit Weight of the Main Unit Dimension of the Remote Control Unit Weight of the Remote control Unit 172m m 178m m (Unit : mm) ※...
-
Page 58: Installation And Wire Connection
11. INSTALLATION AND WIRE CONNECTION 11-1 Cautions On Installation (1) BEFORE STARTING This set is exclusively for use in cars with a negative ground 12 V power supply. Read these instructions carefully. Be sure to disconnect the battery “ - ” terminal before starting. This is to prevent short circuits during installation. - Page 59 ① Do not open the case. There are no user serviceable parts inside. If you drop anything into the unit during installation, consult your dealer or an authorized CLARION service ② Use a soft, dry cloth to clean the case. Never use a rough cloth, thinner, benzine, or alcohol, etc.
-
Page 60: Main Unit Installation(Universal Mount)
Hole Screw Driver Outer escutcheon ※ Some car models require special mounting kits for proper installation. Consult your Clarion dealer for details. ※ Fasten the front stopper securely to prevent the main unit from coming loose. Rear lastening hole (of vehicle) -
Page 61: Removing The Main Unit
11-3 Removing The Main Unit (1) When the rear of the main unit has been secured with the method shown in the follow figure unfasten the special screw. (2) Remove the outer escutcheon. (3) Insert the hook plate into the universal mounting bracket, then pull the main unit out by the hook plate. -
Page 62: Main Unit Installation(Fixed Mount)
11-4 Main Unit Installation (Fixed Mount) (TOyOTA, NISSAN and other ISO/DIN equipped vehicles) This unit is designed for fixed installation in the dashboard. If the vehicle is equipped with a factory-installed radio, install the main unit with the parts and screws marked (*). -
Page 63: Cautions On Wiring
11-5 Cautions On Wiring Be sure to turn the power off before wiring. Be particularly careful where you route the wires. Keep them well away from the engine, and exhaust pipe, etc. Heat may damage the wires. If the fuse should blow, check to see if the wiring is correct. If it is, replace the fuse with a new one with the same amperage rating as the original. -
Page 64: Electrical Connection
11-6 Electrical Connection (1) Wire connection ※ Disconnect the Negative(-) power cable from the battery before installation. ※ RCA pins and connector cables are sold separately. Grey White Black White Blue White Yellow Green White Yellow White Black Black Grey Black Black Refer to the... - Page 65 (2) Power supply lead To activate “Auto Mute-On when receiving phone call”, connect right wire to the dedicated connector in the vehicle. POWER CONNECTOR (16P) PIN NO (ISO) NAME REAR RIGHT + REAR RIGHT - FRONT RIGHT + FRONT RIGHT - FRONT LEFT + FORNT LEFT - REAR LIGHT +...
- Page 66 NOTE When you detach the power supply connector, please pull it out after release the lock part with a minus driver etc. (3) Connecting the Accessories ① Connection to the external amplifier The external amplifier can be connected unless the MCP (Multiple Channel Processor) is connected.
- Page 67 (5) Sample System 4ch - RCA CAA-185 for Camera 2ch - Mini - Jack Steening Remocon CAA-691 sold separately 4ch - RCA CAA-185 for Camera 2ch - Mini - Jack Steening Remocon Audio/Memory 2ch - RCA Phone Mute iPod BLT370 3ch - RCA 4ch - RCA 4 - ch...
- Page 68 Clarion Co., Ltd. All Rights Reserved.Copyright ⓒ 2007:Clarion Co., Ltd. Printed in Korea / Gedruckt in Korea / Impreso en Corea / Imprimé en Corée Stampato in Corea / Gedrukt in Zuid-Korea / Impresso em Coreia / Tryckt i Sydkorea...
Need help?
Do you have a question about the VRX578RUSB and is the answer not in the manual?
Questions and answers