Makita HR2652 Instruction Manual
Combination hammer with self dust collection
Hide thumbs
Also See for HR2652:
- Instruction manual (89 pages) ,
- Instruction manual (69 pages) ,
- Instruction manual (52 pages)

Related Manuals for Makita HR2652


Summary of Contents for Makita HR2652
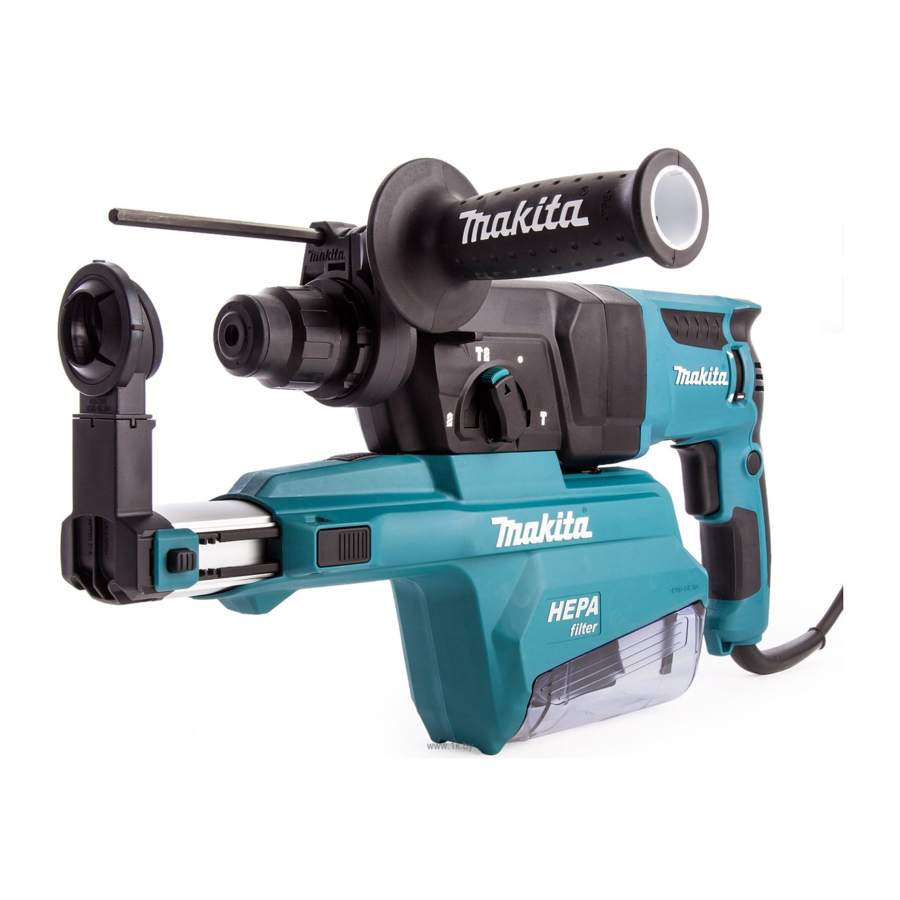
- Page 1 INSTRUCTION MANUAL Combination Hammer With Self Dust Collection HR2652 HR2653 HR2653T HR2663 DOUBLE INSULATION Read before use.
-
Page 2: Specifications
The followings show the symbols which may be used The typical A-weighted noise level determined accord- for the equipment. Be sure that you understand their ing to EN60745-2-6: meaning before use. Model HR2652 Sound pressure level (L ) : 91 dB(A) Read instruction manual. Sound power level (L... -
Page 3: Ec Declaration Of Conformity
WARNING: Be sure to identify safety measures Model HR2652 to protect the operator that are based on an estima- tion of exposure in the actual conditions of use (tak- Work mode... - Page 4 When operating a power tool outdoors, use an extension cord suitable for outdoor use. Use of a cord suitable for outdoor use reduces the risk of electric shock. If operating a power tool in a damp location is unavoidable, use a residual current device (RCD) protected supply.
-
Page 5: Functional Description
Service FUNCTIONAL Have your power tool serviced by a qualified repair person using only identical replacement DESCRIPTION parts. This will ensure that the safety of the power tool is maintained. Follow instruction for lubricating and chang- CAUTION: Always be sure that the tool is ing accessories. - Page 6 SDS-plus, be sure to remove the bit. side). Grasp the change cover of the quick change chuck For HR2652/HR2653/HR2653T for SDS-plus and turn in the direction of the arrow until the change cover line moves from the symbol...
- Page 7 Hammering only Selecting the action mode For chipping, scaling or demolition operations, rotate NOTICE: Do not rotate the action mode chang- the action mode changing knob to the symbol. Use a ing knob when the tool is running. The tool will be bull point, cold chisel, scaling chisel, etc.
-
Page 8: Torque Limiter
Install the side grip so that the grooves on the grip fit in Torque limiter the protrusions on the tool barrel. Turn the grip clock- wise to secure it. The grip can be fixed at desired angle. NOTICE: As soon as the torque limiter actuates, switch off the tool immediately. This will help pre- vent premature wear of the tool. NOTICE: Drill bits such as hole saw, which tend to pinch or catch easily in the hole, are not appro- priate for this tool. -
Page 9: Depth Gauge
To remove the drill bit, pull the chuck cover down all the NOTE: Make sure that the depth gauge does not way and pull the drill bit out. touch the main body of the tool when attaching it. Installing or removing dust collection system To remove the dust collection system, pull the tool while pressing the lock-off button. To install it, insert the tool... -
Page 10: Operation
Hold the root of dust cup and pull it out. Dust cup set Optional accessory Before installing the dust cup set, remove the bit from the tool if installed. Install the dust cup set on the tool so that the sym- bol on the dust cup is aligned with the groove in the tool. - Page 11 Set the action mode changing knob to the symbol. Set the action mode changing knob to the symbol. For HR2652/HR2653/HR2663 Position the drill bit at the desired location for the hole, then pull the switch trigger. Do not force the tool. Light Optional accessory pressure gives best results.
- Page 12 For HR2653T Use the quick change drill chuck as standard equip- ment. When installing it, refer to "changing the quick change chuck for SDS-plus". Hold the ring and turn the sleeve counterclockwise to open the chuck jaws. Place the bit in the chuck as far as it will go. Hold the ring firmly and turn the sleeve clock- wise to tighten the chuck. ► 1 .
-
Page 13: Maintenance
After drilling the hole, use the blow-out bulb to clean the To maintain product SAFETY and RELIABILITY, dust out of the hole. repairs, any other maintenance or adjustment should be performed by Makita Authorized or Factory Service Centers, always using Makita replacement parts. Replacing filter of dust case Remove the dust case while pressing down the lever of the dust case. - Page 14 Insert a flat-blade screwdriver between the filter Attach a new filter to the filter case, and then case and the cover of the dust case as shown in the attach them to the dust case aligning the protrusion on figure. While pressing and bending the sides of filter the filter case with the groove on the dust case. case, lift up the filter case with the flat-blade screwdriver and remove the filter case. ► 1 . Flat-blade screwdriver 2. Filter case 3. Cover of the dust case To remove the filter from the filter case, turn them upside down and push up the filter as shown in the ► 1 .
-
Page 15: Optional Accessories
OPTIONAL ACCESSORIES CAUTION: These accessories or attachments are recommended for use with your Makita tool specified in this manual. The use of any other accessories or attachments might present a risk of injury to persons. Only use accessory or attachment for its stated purpose. If you need any assistance for more details regard- ing these accessories, ask your local Makita Service Center. - Page 16 Makita Europe N.V. Jan-Baptist Vinkstraat 2, 3070 Kortenberg, Belgium Makita Corporation 3-11-8, Sumiyoshi-cho, Anjo, Aichi 446-8502 Japan 885675B220 www.makita.com 20210308...
Need help?
Do you have a question about the HR2652 and is the answer not in the manual?
Questions and answers