Table of Contents
Advertisement
Quick Links
Advertisement
Table of Contents

Related Manuals for Victron energy Multi RS Solar


Summary of Contents for Victron energy Multi RS Solar
- Page 1 ENGLISH Multi RS Solar Rev 02 01/2022...
-
Page 2: Table Of Contents
4.2. Battery and battery lead requirements ..................8 4.3. Solar array configuration ....................9 4.3.1. Multi RS Solar Example PV Configuration ..............9 4.4. MPPT grounding, detection of PV array insulation faults & Earth fault alarm notification ......10 4.5. Cable connection sequence ....................10 4.6. - Page 3 Multi RS Solar 6.3.1. Battery supply issue .................... 23 6.3.2. Reverse battery polarity ..................24 6.3.3. PV voltage too low ....................24 6.3.4. Reverse PV polarity ..................... 25 6.3.5. PV voltage too high ..................... 25 6.3.6. Battery full ......................26 6.3.7.
- Page 4 Multi RS Solar 8.5.16. Error 51 - Inverter temperature too high ..............45 8.5.17. Error 53, Error 54 - Inverter output voltage ..............45 8.5.18. Error 55, Error 56, Error 58 - Inverter self test failed ............45 8.5.19. Error 57 - Inverter ac voltage on output ..............46 8.5.20.
-
Page 5: Multi Rs Solar Product Manual
This manual applies to: • Multi RS Solar IMPORTANT - The Multi RS Solar has limitations and restrictions that are subject to change with updates to firmware - please contact your Victron Dealer or Victron Sales Manager prior to purchase to understand these limitations and if this product is suitable for your specific application. -
Page 6: Safety Instructions
Multi RS Solar 2. Safety Instructions ELECTRIC SHOCK HAZARD Please read this manual carefully before the product is installed and put into use. This product is designed and tested in accordance with international standards. The equipment should be used for the designated application only. - Page 7 Multi RS Solar Ensure that the equipment is used under the correct ambient conditions. Never operate the product in a wet or dusty environment. Never use the product where there is a risk of gas or dust explosions. Ensure there is adequate free space for ventilation above and below the product and check that the ventilation vents are not blocked.
-
Page 8: General Description
Multi RS Solar 3. General Description The Multi RS Solar is a combined inverter/charger and MPPT solar charger. It is designed to operate with a 48V battery bank and produces a pure AC sine wave at 230V. 3.1. Two AC outputs Besides the usual uninterruptible output (AC-out-1), an auxiliary output (AC-out-2) is available that disconnects its load in the event of battery-only operation. -
Page 9: Frequency Shift Function
VE.Direct port and two VE.Can ports The Multi RS Solar only supports a data connection to a GX device (i.e Cerbo GX) via the VE.Can port, and not the VE.Direct port. The VE.Direct port can be used to connect a GlobalLink 520 for remote data monitoring, or USB to VE.Direct dongle for VictronConnect access on a Windows computer. -
Page 10: Lead-Acid Batteries
Compatible BMS-Can lithium batteries can be used with Multi RS Solar however it is a requirement that those batteries to be connected via the BMS-Can port of the GX device (such as the Cerbo GX), and not to the Multi RS Solar communications interface directly. - Page 11 Multi RS Solar Absorption - When the battery voltage reaches the absorption voltage setting, the controller switches to constant voltage mode. When only shallow discharges occur the absorption time is kept short in order to prevent overcharging of the battery. After a deep discharge the absorption time is automatically increased to make sure that the battery is completely recharged.
-
Page 12: Installation
This product contains potentially dangerous voltages. It should only be installed under the supervision of a suitable qualified installer with the appropriate training, and subject to local requirements. Please contact Victron Energy for further information or necessary training. Excessively high ambient temperature will result in the following: ·... -
Page 13: Solar Array Configuration
4.3. Solar array configuration The Multi RS Solar contains seperate PV input connectors. However these are internally combined and connected to a single Maximum Power Point Tracker. So it is recommended that the connected strings be made of the same number and type of panels. -
Page 14: Mppt Grounding, Detection Of Pv Array Insulation Faults & Earth Fault Alarm Notification
Multi RS Solar 4.4. MPPT grounding, detection of PV array insulation faults & Earth fault alarm notification The RS will test for sufficient resistive isolation between PV+ and GND, and PV- and GND. In the event of a resistance below the threshold (indicating an earth fault), the unit will stop charging and display the error. -
Page 15: Connection Of The Ac Cabling
This can be used to connect a PC/laptop to configure the inverter with a VE.Direct to USB accessory. Can also be used to connect a Victron GlobalLink 520 to allow for remote data monitoring. Note the VE.Direct port on the Multi RS Solar cannot be used to connect to a GX device, and the VE.Can connection must be used instead. -
Page 16: Bluetooth
Multi RS Solar 4.10. Bluetooth Used to connect to the device via VictronConnect for configuration. Note that this Bluetooth interface is not compatible with VE.Smart Networking (i.e Smart Battery Sense). 4.11. User I/O 4.11.1. Remote on/off connector The remote on/off has two terminals: Remote L and Remote H. -
Page 17: User I/O Terminal Diagram
Multi RS Solar 4.11.6. User I/O terminal diagram Figure 1. User I/O Connector is located on bottom left side of connection area, diagram shows 3 perspectives. Left Side - Top - Right Side 4.11.7. User I/O functions Table 3. User I/O Functions - See Installation Section for more details. -
Page 18: Settings
Multi RS Solar 4.12.1. Settings The settings page is accessed by clicking on the Cog icon at the top right of the Home page. The settings page provides access to view or change the settings of the Battery; Load; Streetlight; and Port functions. From this page you can also view Product information such as the Firmware versions installed on the MPPT Solar Charger. - Page 19 Multi RS Solar User-defined presets will be stored in the preset library - in this way installers will not have to define all the values each time they are configuring a new installation. By selecting Edit Presets, or on the Settings screen (with expert mode on or not), custom parameters can be set as follows: Absorption voltage Set the absorption voltage.
- Page 20 Multi RS Solar When the Automatic equalization cycle has initiated, the charger applies an equalization voltage to the battery as long as the current level stays below the equalization current percentage setting of the bulk current. Duration of the Automatic equalization cycle In the case of all VRLA batteries and some flooded batteries (algorithm number 0, 1, 2 and 3) automatic equalization ends when the voltage limit (maxV) has been reached, or after a period equal to (absorption time/8) - whichever comes first.
-
Page 21: Connecting To Ac Pv Inverters
Multi RS Solar With a temperature sensor installed to the User I/O connection block; the actual battery temperature will be used for compensation; throughout the day. Low temperature cut-off This setting can be used to disable charging at low temperatures as required by Lithium batteries. -
Page 22: Operation
Multi RS Solar 5. Operation 5.1. Device display The inverter has an LCD screen that displays operational information. Inverter: Inverter state, Power output, Frequency and AC Voltage Battery: Battery Power (charging shows positive number, discharging shows negative number), Current, DC voltage, Temperature (*), State-of-charge (*) and Time-to-go (*). -
Page 23: History - Thirty-Day Graphic
Multi RS Solar Battery, fill corresponds with voltage, blinks when empty 5.2. History - Thirty-day graphic (The fragmented square icon (top left) allows you to toggle between 'portrait' and 'landscape' screen presentations.) A summary of activity for the last 30 days is presented graphically. Swipe the bar left or right to show any of the previous 30 days. -
Page 24: Protections And Automatic Restarts
Multi RS Solar This is an example of the exported data for 3 of 30 days: Days Yield Max. Max. Min. Max. Time in Time in Time Last (Wh) battery battery bulk(m) absorp. error last last last power voltage voltage... -
Page 25: High Battery Voltage
Multi RS Solar After three shut down and restarts, followed by a low battery shutdown within 30 seconds of restarting, the inverter will shut down and stop retrying based on the low battery restart level. To override this and restart the inverter, switch it Off, and then On, and limit loads to enable recharging of the battery with solar energy. -
Page 26: Troubleshooting Guide - Mppt
Multi RS Solar 6. Troubleshooting Guide - MPPT 6.1. Troubleshooting and Support Consult this chapter in case of unexpected behaviour or if you suspect a product fault. The correct troubleshooting and support process is to first consult the common issues as described in this chapter. - Page 27 Multi RS Solar • Issues with the battery, PV panels or system wiring. • Incorrect settings. • The solar charger is externally controlled. • Natural battery behaviour. In some of these cases the VictronConnect app will show, at the bottom of the status screen, a clickable link with the text “why is the charger off”.
- Page 28 Multi RS Solar Compare the two voltages. If the battery voltage and the controller voltage are not the same, then investigate why this is. Follow the path from the controller to the battery to investigate what could be the cause.
- Page 29 Multi RS Solar • Wiring problems. • Blown fuses. • Open or faulty circuit breakers. • Splitters or combiners issues, or these are used in an incorrect way. PV array design issues: • Solar array wiring configuration mistake - not enough panels in a series string.
- Page 30 Multi RS Solar 6.3.6. Battery full Once the battery is full the solar charger will stop charging or will greatly reduce the charge current. This is especially the case when at the same time the DC loads in the system are not consuming any power from the battery.
- Page 31 Multi RS Solar The current will continue to reduce during the float stage, when the battery is approximately 80 and 100% charged. The float stage starts when the batteries are 100% full. During the float stage the charge current is very low.
- Page 32 Multi RS Solar A voltage difference has the effect that the battery will be charged with voltages that are too low to. It will take longer to charge the batteries because the charge voltage is too low and there is a loss of charge power. The lost power is caused by heat dissipated over the battery cables.
- Page 33 Multi RS Solar 6.5.1. Battery charge voltages too high If the battery charge voltages are set too high this will cause the batteries to overcharge. Check if all the battery charge voltages (absorption and float) are set correctly. The charge voltages have to match the recommended voltages as stated in the battery manufacturers documentation.
- Page 34 Multi RS Solar To check if the battery has been misused: Check if the battery has been totally discharged at all. Total and very deep discharge will damage a battery. Check the battery monitor setting history on the VRM portal. Look for the deepest discharge, the lowest battery voltage and the number of full discharges.
- Page 35 Multi RS Solar VictronConnect history Pmax 6.6.3. Full rated output not reached There are a few reasons why the solar charger is not reaching its full rated output. Some of these reasons have already been explained in the the chapter: “The batteries take too long to charge, are undercharged or charge current less than expected”.
- Page 36 For more information on system grounding, see chapter 7.7: "System grounding" in the Wiring Unlimited book. The Multi RS Solar connection between PV DC and battery DC is fully galvanically isolated. The connection between PV DC and AC output is not isolated. 6.7. Communication issues This chapter describes issues that might arise when the solar charger is connected to the VictronConnect app, other Victron devices or third-party devices.
- Page 37 Note, unlike most other Victron products it is not possible to connect the Multi RS Solar to a GX device (i.e. Cerbo GX) using the VE.Direct interface. You must use the VE.Can interface to connect to a GX device.
- Page 38 Multi RS Solar • Click on the settings symbol • Click the option symbol • Go to product info. • Check if you are running the latest firmware and look for the text: “This is the latest version”. • If the controller does not have the most up to date firmware, perform a firmware update by pressing the update button.
- Page 39 Multi RS Solar • Via VictronConnect, status and history screen • Via a display • Via a GX device • Via VRM (GX device needed) 6.10.1. Error codes In case of an error, an error code will be displayed via VictronConnect, a display, a GX device or on VRM. Each number corresponds with a specific error.
- Page 40 Victron Energy to make such repairs. Non-compliance with the instructions in this manual will render the warranty void. Victron Energy is not liable for any consequential damages arising from the use of this product. The maximum liability of Victron Energy under this limited warranty shall not exceed the actual purchase price of the product.
- Page 41 Multi RS Solar 7. Technical Specifications Multi RS Solar 48/6000 INVERTER DC Input voltage range 38 – 64V Output Output voltage: 230 VAC ± 2% Frequency: 50 Hz ± 0,1% (1) Continuous output power at 25°C Increases linearly from 4800W at 46 VDC to 5300W at 52 VDC Continuous output power at 40°C...
- Page 42 Solar earth leakage 7) The Multi RS Solar is not currently compatible with VE.Smart Networks. Connection to a GX device (i.e. Cerbo GX) must be made via the VE.Can interface. The VE.Direct interface is for connection to the GlobalLink 520.
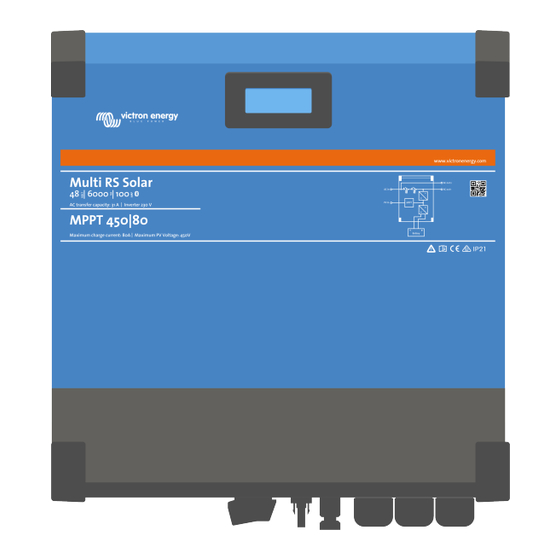
- Page 43 Multi RS Solar 8. Appendix 8.1. Appendix A : Connection Overview Figure 2. Multi RS Solar Front Page 39 Appendix...
- Page 44 Multi RS Solar Figure 3. Multi RS Solar Bottom Figure 4. User I/O User I/O Connector is located on bottom left side of connection area, diagram shows 3 perspectives. Left Side - Top - Right Side Table 4. User I/O Functions - See Installation Section for more details.
- Page 45 Multi RS Solar 8.2. Appendix B : Block Diagram Figure 5. Multi RS Solar AC input AC output 230VAC 230VAC PV input 80–450VDC Internal DC bus Battery 48 VDC Page 41 Appendix...
- Page 46 Multi RS Solar 8.3. Appendix C : Example Wiring Diagram Figure 6. Multi RS Solar Multi RS Solar Up to 4 kW 80 400V PV array GX device AC input grid connection VE.Can Connections AC2 loads AC1 loads 48V Battery...
- Page 47 Multi RS Solar 8.4. Appendix D : Dimensions Figure 7. Multi RS Solar Page 43 Appendix...
- Page 48 Multi RS Solar 8.5. Error Codes 8.5.1. Error 2 - Battery voltage too high This error will auto-reset after the battery voltage has dropped. This error can be due to other charging equipment connected to the battery or a fault in the charge controller.
- Page 49 Multi RS Solar 8.5.11. Error 27 - Charger short circuit This error will auto-reset. If the error does not auto-reset disconnect the charge controller from all power-sources, wait 3 minutes, and power up again. If the error persists the charge controller is probably faulty.
- Page 50 Multi RS Solar 8.5.19. Error 57 - Inverter ac voltage on output There is already AC voltage on the AC out terminal before switching on the inverter. Check that the AC out is not connected to a mains outlet or to another inverter.
- Page 51 Multi RS Solar 2. Disconnect the charge controller from all power-sources 3. wait 3 minutes, and power up again. 4. Reconfigure the charger. Please report this to your Victron dealer and ask them to escalate the matter to Victron; as this error should never happen.
Need help?
Do you have a question about the Multi RS Solar and is the answer not in the manual?
Questions and answers