Table of Contents
Advertisement
Quick Links
Advertisement
Table of Contents

Subscribe to Our Youtube Channel
Related Manuals for Riso VALEZUS T2100


Summary of Contents for Riso VALEZUS T2100
- Page 1 VALEZUS T2100 User's Guide T2_UG-EN_05...
- Page 2 After reading this guide, keep it in handy for future reference. VORSICHT Um Vorsichtsmasnahmen zu treffen, lesen Sie sich vor Gebrauch des Produkts das Handbuch durch. Halten Sie das Handbuch nach dem Durchlesen stets griffbereit. VALEZUS T2100 User’s Guide...
-
Page 3: About This Guide
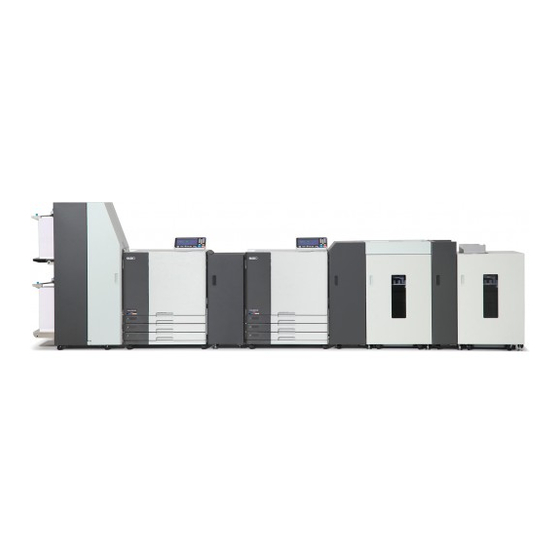
The system, which consists of two print units, a coupling unit, and dedicated paper feed/stack units, is referred to as VALEZUS T2100. The coupling unit is connected between two print units to efficiently perform duplex printing. In this guide, the VALEZUS T2100 is described as "the system" and the coupling unit is described as "JOINT UNIT". -
Page 4: Symbols, Notations, And Screenshots Used In This Guide
Functions Available by Connecting the Dedicated Equipment The various units can be used to extend functions of the system. Function to be extended Required unit High-capacity paper feed Double Tray Feeder High-capacity paper stack Double Tray Stacker VALEZUS T2100 User’s Guide... -
Page 5: Table Of Contents
Double Tray Stacker ......................28 Troubleshooting ......................34 Paper Jam ........................36 Precautions when Removing Jammed Paper ..............37 Error Message when Turning On the Power ..............37 Specifications ......................38 Consumables ......................40 Ink Cartridges ........................40 Vorsichtsmaßnahmen ....................42 VALEZUS T2100 User’s Guide... - Page 6 Masseanschluss ......................43 Behandlung ........................44 Vor Inbetriebnahme ....................45 Aufstellungsort ......................... 45 Netzanschluss ......................... 45 Abmessungen ......................... 46 Behandlung ........................47 Verwendbares Papier ...................... 47 Bedruckbarer Bereich ...................... 47 Technische Daten .......................48 Verbrauchsmaterial ....................50 Tintenkartuschen ......................50 VALEZUS T2100 User’s Guide...
- Page 7 VALEZUS T2100 User’s Guide...
-
Page 8: Safety Precautions
■ Place the system on a flat or stable surface. Otherwise, the system may tilt or collapse and cause human injury. ■ Do not place the system in a dusty or humid location. Otherwise, a fire or an electric shock might occur. VALEZUS T2100 User’s Guide... -
Page 9: Power Connection
■ Be sure to insert the power plug with a ground conductor into the wall outlet with a ground receptacle. Do not use the system if it is not grounded. It may result in fire or electric shock. VALEZUS T2100 User’s Guide... -
Page 10: Handling
Next, be sure to unplug all of the power cords and contact your dealer or authorized service representative. VALEZUS T2100 User’s Guide... -
Page 11: Before Use
Installation surface level: 2 degrees or less ■ Operate the system under the following environment conditions. Temperature range: 15 °C - 30 °C (59 °F - 86 °F) Humidity range: 40% - 70% RH (non-condensing) VALEZUS T2100 User’s Guide... -
Page 12: Required Spacing
The width is 4,955 mm (195 3/32") when the cover of each part and operation parts are open. Units: mm (inch) • As seen from the side 1,445 (56 7/8") 1,340 (52 3/4") 100 (3 15/16") Units: mm (inch) VALEZUS T2100 User’s Guide... -
Page 13: Handling
For more information, contact your dealer or authorized service representative. Printable Area Printing without margins cannot be performed. Margins are always added around the edges of the paper. 314 mm × 458 mm (12 3/8" × 18 1/32") Maximum Print Area VALEZUS T2100 User’s Guide... -
Page 14: Part Names And Functions
Transport the paper to the printer 2. c Reversing Part d Power cord Normally you leave it connected to an electrical outlet. • For information on the Double Tray Feeder and the Double Tray Stacker, see "Dedicated Equipment" (p. 21). VALEZUS T2100 User’s Guide... -
Page 15: Operation Panel
This lamp lights up when the main power is on. p Wake Up Key h Job Status Key It is not used in the system. Press this key to check jobs that are in progress or finished. VALEZUS T2100 User’s Guide... -
Page 16: Home Screen
The indicator starts flashing when the time to replace an ink cartridge comes close. Prepare a new ink cartridge for the color that flashes. • If you are not using RISO ink, the remaining amount of ink is not displayed. g [Job Status] Button Touch this button to check jobs that are in progress or finished. -
Page 17: What You Can Do With The System
High-Volume Printing High-speed duplex printing at a rate of 320 ipm is High-volume printing is possible by using two possible by synchronizing the print job between RISO printers connected with the Double Tray two printers. Feeder and Double Tray Stacker. Print... -
Page 18: System Configuration
• Be aware that you cannot make a copy with the system since it does not have the scan function. • The power consumption of the system may get high. Make sure to take power supply from multiple places instead of from one place. VALEZUS T2100 User’s Guide... - Page 19 • There are five color ink cartridges installed in each of the two printers. You cannot print if even one color out of the ten cartridges is indicating a message to replace the cartridge. Replace the cartridge of the color shown. VALEZUS T2100 User’s Guide...
-
Page 20: Paper Feed Path
• When operating the duplex printing with an odd number of pages, the blank page is automatically inserted by Print Controller for adjustment. • You can load the paper in Double Tray Feeder and paper tray of Printer 1. VALEZUS T2100 User’s Guide... -
Page 21: Preparations
Printer 2 turn off. Turn off the main power switch. All the [Main Power] lamps turn off. • Do not turn off the main power except in case of lightning or remaining unused for a long period. VALEZUS T2100 User’s Guide... -
Page 22: Printing
• Be sure to check the remaining amount of ink on the operation panel of their respective printer. • For more information on the printer settings, see the guides of the printer. VALEZUS T2100 User’s Guide... -
Page 23: Dedicated Equipment
A4 (Letter). from becoming misaligned. Turn the knob at the tip counter-clockwise to unlock the guide. Move the guide to align with the paper stack and turn the knob clockwise to fix the paper guide in position. VALEZUS T2100 User’s Guide... - Page 24 • The location of the label may be high temperature. Contact may result in burn. • Your fingers may become caught while the Double Tray Feeder moves or when you load paper in the standard tray. VALEZUS T2100 User’s Guide...
- Page 25 Spread the paper feed guide (end). Set the remaining paper. Turn the knob of the paper feed guide (end) counter- clockwise to unlock and spread the guide. VALEZUS T2100 User’s Guide...
- Page 26 Adjust the side air adjustment levers (both sides). For general use, set to "NORMAL". For thick paper and special paper, set to "CARD". NORMAL CARD VALEZUS T2100 User’s Guide...
- Page 27 • The position to which the standard tray is lowered when the standard tray descent button is pressed and quickly released or when paper runs out is set on "Admin Menu" (p. 32). VALEZUS T2100 User’s Guide...
- Page 28 Paper Tray Priority [Feed 1], [Feed 2] Specify the priority for the upper and lower standard trays when feeding paper. VALEZUS T2100 User’s Guide...
- Page 29 When [Paper out] is set to [1] or [2], the paper tray will stop before reaching the bottommost position and thus make it possible to load the paper while standing. VALEZUS T2100 User’s Guide...
-
Page 30: Double Tray Stacker
Double Tray Stacker. Connect the Double Tray Stacker power cord. The f Paper Guide socket is located on the back of the Double Tray Stacker. Use this guide to prevent printouts that have been output from becoming misaligned. VALEZUS T2100 User’s Guide... - Page 31 • If you accidentally press the stacking tray descent button while printing, be sure to remove the printouts. In a state where printouts exist on the tray, the unit will not be capable of raising the stacking tray to the position for output. VALEZUS T2100 User’s Guide...
- Page 32 In such case, close the right cover, press the stacking tray descent button, and remove the printouts after the stacking tray has been lowered. VALEZUS T2100 User’s Guide...
- Page 33 Align the end of the stacking tray with the two screws at the base of the handle on the carriage. Set the carriage by inserting its protrusions into the holes in the stacking tray. VALEZUS T2100 User’s Guide...
- Page 34 • When an equivalent of 3,200 to 4,000 sheets has been output to the stacking tray, the stacking tray will be lowered to the carriage regard- less of the setting of [Double Tray Stacker]. VALEZUS T2100 User’s Guide...
- Page 35 Output Tray Priority [Unit1], [Unit2] Specify the priority for the stacking trays when outputting paper. • When the output tray is specified on the print settings of the print con- troller, printouts are output to the specified tray. VALEZUS T2100 User’s Guide...
-
Page 36: Troubleshooting
Be sure to mention this error code when contacting your service representative. - The first letter of the error code indicates the type of problem. - The numbers vary depending on the location of the problem. VALEZUS T2100 User’s Guide... - Page 37 Touch the button indicating the location of the paper jam to display how to remove the jammed paper, and follow the procedure displayed on the touch panel to remove the paper. For more information, see "Paper Jam" (p. 36). VALEZUS T2100 User’s Guide...
-
Page 38: Paper Jam
When all of the jammed paper is removed and the cover is closed, the error screen closes and the previous screen is displayed. • As long as alphabet buttons are displayed on the screen, paper still remains in the indicated locations. Repeat Steps 1 to 3 to remove the jammed paper. VALEZUS T2100 User’s Guide... -
Page 39: Precautions When Removing Jammed Paper
You cannot turn on the power of the whole system by just pressing one [Power] key. Turn off the power of the operation panel on which the error is displayed, and press [Power] keys on the Operation Panel 1 and Operation Panel 2 at the same time again. VALEZUS T2100 User’s Guide... -
Page 40: Specifications
* The pollution degree of the usage environment due to dirt and dust in the air. Degree "2" corresponds to a general indoor environment. 1 Two RISO printers (2400 W) + JOINT UNIT (140 W) + Double Tray Feeder (180 W) + Double Tray Stacker (190 W) 2 Without printing operation ■... - Page 41 4955 mm × 1340 mm × 1445 mm (195 3/32" × 52 3/4 × 56 7/8") Tray Feeder 1 Height up to 110 mm (4 5/16") for A5, non-regular size paper 2 Not applicable to A5, non-regular size paper. 3 Without printing operation VALEZUS T2100 User’s Guide...
-
Page 42: Consumables
Use the ink cartridge within approximately 24 months from the date of manufacture (when preserved under room temperature). For optimal printing quality, we recommend that you use the ink cartridge as soon as possible after purchase. You can find the date of manufacture on the ink cartridge. VALEZUS T2100 User’s Guide... - Page 43 Consumables VALEZUS T2100 User’s Guide...
-
Page 44: Vorsichtsmaßnahmen
Der höchste Schalldruckpegel beträgt 70 dB(A) oder weniger gemäß EN ISO 7779. Hinweis: Das Gerät ist nicht für die Benutzung am Bildschirmarbeitsplatz gemäss BildscharbV vorgesehen. Copyright © 2020 RISO KAGAKU CORPORATION Dieser Abschnitt beschreibt Vorkehrungen, die zur sicheren Benutzung dieses Systems befolgt werden müssen. -
Page 45: Netzstecker
■ Das Spannungskabel darf weder beschädigt noch abgeändert werden. Werden schwere Gegenstände auf das Kabel gestellt, oder wird daran gezogen oder das Kabel geknickt, kann das Kabel Schaden erleiden, und dadurch einen Brand bzw. einen elektrischen Schlag verursachen. VALEZUS T2100 User’s Guide... -
Page 46: Behandlung
Drücken Sie sofort die [Netz]-Taste auf dem Bedienfeld, um die Antriebsenergie abzuschalten. Schalten Sie dann die Hauptschalter beider Drucker ab. Trennen Sie dann unbedingt alle Stromkabel und wenden Sie sich an Ihren Händler oder den Kundendienst. VALEZUS T2100 User’s Guide... -
Page 47: Vor Inbetriebnahme
■ Installieren Sie das System an einer ebenen Stelle, die folgenden Anforderungen entspricht. Oberflächenhöhe zur Installation: 2 Grad oder weniger ■ Betreiben Sie das System unter folgenden Umgebungsbedingungen. Temperaturbereich: 15°C bis 30°C Feuchtigkeitsbereich: 40% bis 70% RF (nicht kondensierend) VALEZUS T2100 User’s Guide... -
Page 48: Abmessungen
■ Doppelte Zufuhr, Druckeinheit, JOINT UNIT, Druckeinheit, und Doppelte Ablage • Von Vorne gesehen 1.445 4.765 Die Breite beträgt 4.955 mm mit offener Abdeckung aller Teile und Betriebsteile. Einheit: mm • Von Vorne gesehen 1.445 1.340 Einheit: mm VALEZUS T2100 User’s Guide... -
Page 49: Behandlung
Ausführliche Informationen, wenden Sie sich an Ihren Händler oder eine autorisierte Kundendienstvertretung. Bedruckbarer Bereich Es kann nicht ohne Ränder gedruckt werden. An den Seiten des Blattes werden stets Ränder gelassen. Maximaler 314 mm × 458 mm Druckbereich VALEZUS T2100 User’s Guide... -
Page 50: Technische Daten
* Grad der Umgebungsverschmutzung auf Grund von Schmutz und Staub in der Luft. Grad „2“ entspricht einer normalen Innenraumumgebung. 1 Zwei RISO-Drucker (2400 W) + JOINT UNIT (140 W) + Doppelte Zufuhr (180 W) + Doppelte Ablage (190 W) 2 Ohne Druckbetrieb ■... - Page 51 Drucker, JOINT UNIT, und Doppelte Position befindet: 4955 mm × 1340 mm × 1445 mm Zufuhr) 1 Höhe bis zu 110 mm für A5, Papier unregelmäßiger Größe 2 Nicht für A5, Papier unregelmäßiger Größe. 3 Ohne Druckbetrieb VALEZUS T2100 User’s Guide...
-
Page 52: Verbrauchsmaterial
Verbrauchen Sie die Tintenpatrone innerhalb von etwa 24 Monaten ab dem Herstellungsdatum (bei Aufbewahrung bei Raumtemperatur). Für ein besseres Druckergebnis empfehlen wir, die Tintenkartusche möglichst bald nach dem Kauf zu verwenden. Das Herstellungsdatum finden Sie an der Tintenkartusche. VALEZUS T2100 User’s Guide... - Page 53 ■ An wen kann ich mich wenden, wenn ich mehr über die WEEE-Verordnung wissen möchte? Für weitere Informationen sollten Sie sich an Ihren örtlichen RISO-Kundendienst wenden. RISO KAGAKU CORPORATION LONDON OFFICE, Avda. de les Garrigues, 38-44 planta 2a local B1 08820 Prat de Llobregat - Barcelona, Spain...
- Page 54 VALEZUS T2100 User’s Guide...
- Page 56 Please contact the following for supplies and service: 2021/2 © Copyright 2021 RISO KAGAKU CORPORATION...
Need help?
Do you have a question about the VALEZUS T2100 and is the answer not in the manual?
Questions and answers