GASLAND chef Pro Series Installation Instructions Manual
Hide thumbs
Also See for Pro Series:
- Instruction manual (89 pages) ,
- Installation instructions manual (56 pages) ,
- Installation instruction (49 pages)

Related Manuals for GASLAND chef Pro Series


Summary of Contents for GASLAND chef Pro Series
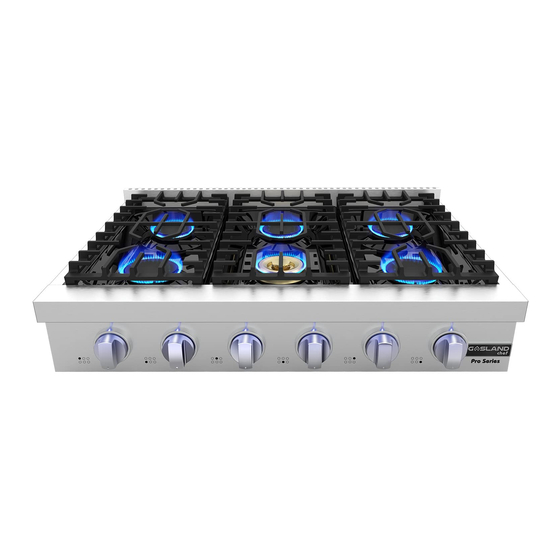
- Page 1 GAS RANGETOP Installation Instructions Available Models Pro RT3606/Pro RT4806 1 (844) 538-7890 www.gaslandchef.com support@gaslandchef.com 3330-A Marathon Ct Charleston, SC 29418...
-
Page 2: Welcome & Congratulations
Welcome & Congratulations Congratulations on your purchase of a Gasland gas rangetop! We are very proud of our products and are completely committed to provide you with the best cooking experience. Your satisfaction is our top priority. Please read through this manual prior to installation, it contains important infor- mation to help you properly use &... -
Page 3: Important Instructions
WARNING If the information in this guide is not followed exactly, a fire or explosion may result, causing property damage, personal injury or death. Important Instructions • Installation and service must be performed by a qualified installer, service agency or the gas supplier. •... - Page 4 Carefully read and follow all instructions prior using your new rangetop Be safety conscious. The preparation of food on a rangetop requires tempera- tures that could cause severe burns. Proposition 65 The California Safe Drinking Water and Toxic Enforcement Act of 1986 (Proposi- tion 65) requires the Governor of California to publish a list of substances known to the State of California to cause cancer or reproductive harm.
-
Page 5: Installation Instructions
WARNING! DO NOT TOUCH SURFACE BURNERS OR AREAS NEAR THESE BURNERS Surface burners may be hot after use, even though the flame is not visible or contact the surface directly. Areas near surface burners may become hot enough to cause burns during and after use. Do not let clothing or other flammable materials to contact with areas near surface burners until they have had sufficient time to cool down. - Page 6 The rangetop should be connected to the supply line with 1/2-inch black iron pipe or a certified flexible type stove connector. To prevent gas leaks, put an approved sealing compound which is resistant to liquefied petroleum gases on all threaded connections.
- Page 7 Gas line shut-off valve • To reduce the possibility of gas leaks, apply Teflon tape or a thread compound approved for use with LPG or NG to all threaded connections. • Install a manual gas line shut-off valve in the gas line in an easily accessed location outside the range in the gas piping external to the appliance for the purpose of turning on or shutting off gas to the appliance.
- Page 8 • Wall cabinets above the rangetop must be a minimum of 42″(106.7cm) above the rangetop cooking surface for the full width of the rangetop. This minimum height requirement does not apply if a range hood is installed over the cooking surface.
-
Page 9: Electrical Requirements
• Wall cabinets above the rangetop must be a minimum of 42″(106.7cm) above the rangetop cooking surface for the full width of the rangetop. This minimum height requirement does not apply if a range hood is installed over the cooking surface. -
Page 10: Product Dimension
Product dimension Make sure the counter top cut-out follow the dimensions given in the illustration below. The cabinetry material below rangetop must be non-combustible material. Pro RT3606 Pro RT4806 1 (844) 538-7890 www.gaslandchef.com support@gaslandchef.com 3330-A Marathon Ct Charleston, SC 29418... - Page 11 Rangetop installation • Installation and service must be performed by a qualified installer, service agency or the gas supplier. • Remove the rangetop from its package and set aside all burners, burner caps and cooking grates. Rubber Pad Installation On Back Panel. To Prevent the range too close to the wall, there are 2 plastic pads offered with the user's manual, please find the accessories and follow the below steps: 1.
- Page 12 Adjustable Leg Installation Your rangetop may have KD adjustable feet that need to be installed. Please follow up the procedures below for the feet installation. 1. Find the 4 pieces (36-inch) or 6 pieces (48-inch) of adjustable feet inside the package.
- Page 13 Slide In The Table Top • Gently slide the rangetop half into the cut-out, make sure your gas connection and electrical power plug are properly installed. The gas connection operation please see below picture: Pro RT3606 Pro RT4806 Rangetop gas connection Rangetop gas connection Rangetop Rangetop...
- Page 14 Gasland Rangetop Burners Installation 15K burner(s) is (are) located on middle front on Pro RT3606 and all back three burners on Pro RT4806 with a knocked down burner supporting tube, incorrect installation will affect the burner performance and cause potential service issues. 1.
- Page 15 • Check and confirm each part of the burner. For 15K BTU dual burner part (from left to right): burner cap / flame ring / flame ring base / burner base / supporting pipe • Screw the burner supporting pipe and tighten with the wrench. Making sure there’s no gap between the burner base and supporting pipe.
- Page 16 • Assemble the burner to the electrode and drip pan: A. Make sure the burner design is correct. Our current design for the burner is has the electrode on the left side (10 o’clock) and cross-over on the right side (2 o’clock). There are four parts for the dual burners. They are burner cap, flame ring base, flame ring and burner base.
- Page 17 3. Single Burner Installation • Check and confirm each part of the burner. For 18K BTU / 12K BTU single burner part (from left to right): burner cap / flame ring / flame ring base • Note the stationary positioning of the electrode. •...
- Page 18 Connecting gas to rangetop This rangetop is designed to operate at a pressure of 4″(10.2cm) of water column on Natural Gas (NG) or 10″(25.4cm) of water column on Liquid Propane Gas (LPG). This rangetop can be convert for use on Liquid Propane Gas (LPG). When using this rangetop on LPG, conversion must be made by a qualified installer before attempting to operate the rangetop on that gas.
- Page 19 3. When all connections have been made, be sure all rangetop controls are in the off position and turn on the main gas supply valve. Check for gas leaks by using a 75% water, 25% dish washing soap solution. If a gas leak is present, shut off gas immediately, tighten all connections, and retest for leaks.
- Page 20 Surface burner ignition To light the top burners, push and turn the appropriate control knob counter clockwise to the “HI” position. You will hear a clicking noise the sound of the electric spark igniting the burner. Once burner ignition has been achieved, then turn the burner control knob to adjust the desired heat setting.
-
Page 21: Troubleshooting Tips
Troubleshooting Tips Symptom Possible Cause Solution Check that the burner Burner parts or igniters parts are clean, dry and Burners will not light. may be wet, dirty or correctly assembled. misaligned. Check that the igniters are clean and dry. Top burner will not Failed thermocouple Replace thermocouple stay lit. -
Page 22: Warranty
Warranty Any question about the operation, maintenance service or warranty of this gas cooktop should be directed to GASLAND chef. You can contact GASLAND chef for after-sale service in the warranty period via following methods: Hotline: 1 (844)-538-7890 Email: support@gaslandchef.com... - Page 24 1 (844)538-7890 www.gaslandchef.com...
Need help?
Do you have a question about the Pro Series and is the answer not in the manual?
Questions and answers