Table of Contents
Advertisement
INSTRUCTION FOR INSTALLATION AND USE
Important! Read these instructions for installation and use carefully.
Keep these instructions for future reference.
Any questions regarding the operation, maintenance service or warranty
of the appliance should be directed to GASLAND, please contact us via
email at:
US market: Junskyamerica@outlook.com
AU market: aussiebestsell@outlook.com
UK market: campluxuk@outlook.com
ELECTRIC CERAMIC HOB
Model: CH30BF
Model: CH60BF
Model: CH77BF
Model: CH90BF
Advertisement
Table of Contents

Subscribe to Our Youtube Channel
Related Manuals for GASLAND chef CH30BF

Summary of Contents for GASLAND chef CH30BF
- Page 1 ELECTRIC CERAMIC HOB INSTRUCTION FOR INSTALLATION AND USE Model: CH30BF Model: CH60BF Model: CH77BF Model: CH90BF Important! Read these instructions for installation and use carefully. Keep these instructions for future reference. Any questions regarding the operation, maintenance service or warranty...
-
Page 2: Safety Warnings
Safety Warnings Your safety is important to us. Please read this information before using your cooktop. Installation Electrical Shock Hazard • Disconnect the appliance from the mains electricity supply before carrying out any work or maintenance on it. • Connection to a good earth wiring system is essential and mandatory. - Page 3 mains power supply (wall switch) and contact a qualified technician. • Switch the cooktop off at the wall before cleaning or maintenance. • Failure to follow this advice may result in electrical shock or death. Health Hazard • This appliance complies with electromagnetic safety standards. Hot Surface Hazard •...
- Page 4 the appliance should have a responsible and competent person to instruct them in its use. The instructor should be satisfied that they can use the appliance without danger to themselves or their surroundings. • Do not repair or replace any part of the appliance unless specifically recommended in the manual.
-
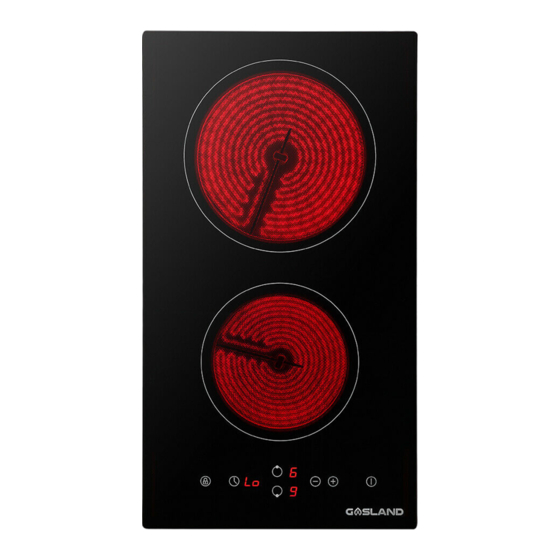
Page 5: Product Overview
For installation, please read the installation section. Read all the safety instructions carefully before use and keep this Instruction / Installation Manual for future reference. Product Overview Top View (CH30BF) 1. max. 2000 W zone 2. max. 1500 W zone 3. Glass plate 4. - Page 6 Top View (CH60BF) 1. max. 1800 W zone 2. max. 1200 W zone 3. max. 1800 W zone 4. max. 1200 W zone 5. Glass plate 6. Control panel Control Panel (CH60BF) 1. Heating zone selection controls 2. Power / Timer regulating controls 3.
- Page 7 Control Panel (CH77BF) 1. Heating zone selection controls 2. Timer control 3. Power / Timer regulating controls 4. Keylock control 5. ON/OFF control 6. Dual Zone Top View (CH90BF) 1. max. 1200 W zone 2. max. 2300/1600/800 W zone 3. max. 2000/1100 W zone 4.
-
Page 8: Product Information
Product Information The ceramic cooker hob can meet different kinds of cuisine demands because of resistance wire heating, micro-computerized control and multi-power selection. It’s an ideal really the optimal choice for modern families. Before using your New Ceramic Hob • Read this guide, taking special note of the ‘Safety Warnings’ section. •... -
Page 9: Using Your Ceramic Hob
• Make sure the bottom of the pan and the surface of the cooking zone are clean and dry. 3. For Model CH77BF-AU, CH77BF-US, CH60BF, CH30BF-US, touch Heating zone selection controls first, and select a heat setting by touching the “-“ or “+” control. -
Page 10: When You Have Finished Cooking
When you have finished cooking 1. For Model CH77BF-AU, CH77BF-US, CH60BF, CH30BF-US, touch heating zone selection controls first, and select a heat setting by touching the “-“ control, turn the cooking zone off by scrolling down to ”0”... -
Page 11: Locking The Controls
2. Turn the whole cooktop off by touching the ON/OFF control. 4. Beware of hot surfaces • “H” showing means the cooking zone is hot to touch. It will disappear when the surface has cooled down to a safe temperature. It can also be used as an energy saving function if you want to heat further pans, use the hotplate that is still hot. -
Page 12: Residual Heat Warning
Residual Heat Warning When the hob has been operating for some time, there will be some residual heat. The letter “ ”appears to warn you to keep away from it. Auto Shutdown Protection Another safety feature of the hob is auto shutdown. This occurs whenever you forget to switch off a cooking zone. -
Page 13: Setting The Timer To Turn One Cooking Zone Off
ON or OFF. Setting the timer to turn one cooking zone off 1.For CH77BF-AU, CH77BF-US, CH60BF, CH30BF-US, touch the heating zone selection control that you want to set the timer for. Touching the Timer and then adjust the time by touching the “-“... - Page 14 Hint: Touch the “-“ or “+” control of the timer once will decrease or increase by 1 minute. Touch and hold the ”-“ or “+” control of the timer will decrease or increase by 10 minutes. 4. Touch the “-“ control, if the “00” will show in the minute display, the timer is cancelled.
- Page 15 Setting the timer to turn more than one cooking zone Model: CH77BF-AU, CH77BF-US, CH60BF, CH30BF-US 1. If more than one heating zone use this function, the timer indicator will show the lowest time. (e.g. zone 1# setting time of 3 minutes, zone 2# setting time of 6 minutes, the timer indicator shows “3”.)
-
Page 16: Power Management
2. When cooking timer expires, the corresponding cooking zone will be switched off automatically. NOTE: If you want to change the time after the timer is set, you have to start from step 1. Power Management Power management function on Group A •If both zones are working on/above power stage 7, these two zones will be automatically switched on and off by turns, which was controlled by software. - Page 17 • Using a lid will reduce cooking times and save energy by retaining the heat. • Minimise the amount of liquid or fat to reduce cooking times. • Start cooking on a high setting and reduce the setting when the food has heated through.
-
Page 18: Heat Settings
Heat Settings The settings below are guidelines only. The exact setting will depend on several factors, including your cookware and the amount you are cooking. Experiment with the cooktop to find the settings that best suit you. Heat setting Suitability •... -
Page 19: Hints And Tips
Boilovers, melts, and Remove these immediately with • Remove stains left by melts and hot sugary spills on a fish slice, palette knife or razor sugary food or spillovers as soon the glass blade scraper suitable for as possible. If left to cool on the ceramic glass cooktops, but glass, they may be difficult to beware of hot cooking zone... -
Page 20: Technical Specification
Rating Power 5490-6533W 6039-7186W 6130-7295W Product Size 590X520X52m 770X520X52 900X520X52 L×W×H Built-in Dimension 560X490mm 560X490mm 870X490mm A×B Model CH30BF(US) CH77BF(US) Cooking Zones 2 zones 4 zones Frequency 50/60Hz 50/60Hz Supply Voltage 220-240V~ 220-240V~ Rating Power 2745-3267W 6039-7186W Product Size L×W×H... -
Page 21: Installation
48mm 560mm 490mm 50mm mini CH90BF 900mm 520mm 52mm 48mm 870mm 490mm 50mm mini CH30BF 11 in 20 in 2 in 2 in (US) mini CH77BF 30 in 20 in 2 in 2 in (US) mini Under any circumstances, make sure the ceramic cooker hob is well ventilated and the air inlet and outlet are not blocked. -
Page 22: Before Locating The Fixing Brackets
Note: The safety distance between the hotplate and the cupboard above the hotplate should be at least 760mm(30 in). 760mm 50mm mini 20mm mini Air intake Air exit 5mm 30 in 2 in mini 4/5 in mini Air intake Air exit 1/5 in Before locating the fixing brackets The hob should be placed on a stable, smooth surface (use the packaging). - Page 23 Adjust the bracket position to suit for different work surface’s thickness. Cautions 1. The ceramic cooker hob must be installed by qualified personnel or technicians. We have professionals at your service. Please never conduct the operation by yourself. 2. The ceramic cooker hob shall not be mounted to cooling equipment, dishwashers and rotary dryers.
-
Page 24: Connecting The Hob To The Mains Power Supply
Connecting the hob to the mains power supply The power supply should be connected in compliance with the relevant standard, or a single-pole circuit breaker. The method of connection is shown below. 1. If the cable is damaged or needs replacing, this should be done by an after-sales technician using the proper tools, so as to avoid any accidents. - Page 25 This appliance is labeled in compliance with European directive 2012/19/EU for Waste Electrical and Electronic Equipment (WEEE). By ensuring that this appliance is disposed of correctly, you will help prevent any possible damage to the environment and to human health, which might otherwise be caused if it were disposed of in the wrong way.
Need help?
Do you have a question about the CH30BF and is the answer not in the manual?
Questions and answers
How do I turn off the Gasland hob?
To turn off the GASLAND Chef CH30BF hob, touch the ON/OFF control. If no heat setting is chosen within one minute, the hob will automatically switch off. Additionally, the hob has an auto shutdown protection feature that turns it off if left unattended.
This answer is automatically generated