
Related Manuals for Knick Portavo 904X PH


Summary of Contents for Knick Portavo 904X PH
- Page 1 Portavo® 904(X) PH User Manual Portable Meter Read before installation. Keep for future use. www.knick.de...
- Page 3 Knick Elektronische Messgeräte GmbH & Co. KG at www.knick.de. Returns Clean and securely package the product before returning it to Knick Elektronische Messgeräte GmbH & Co. KG. If there has been contact with hazardous substances, the product must be de- contaminated or disinfected prior to shipment.
-
Page 4: Table Of Contents
Table of Contents Package Contents ................6 Overview of the Portavo 904(X) PH ..........7 Intended Use ........................7 Value-Added Features ....................8 Protective Cover ......................9 Hook ..........................9 Display ......................... 10 Keypad ........................11 Commissioning ................. 12 Inserting the Batteries ................... 12 Batteries for Application in Hazardous Locations........ - Page 5 Error Codes and Device Messages ........... 40 “Sensoface” Messages .................... 41 Error Messages ......................42 Product Line ..................43 Accessories/Options ....................43 pH Sensors ......................... 44 Knick CaliMat Buffer Solutions ................45 Specifications ..................46 Buffer Tables ..................50 Index ....................60...
-
Page 6: Package Contents
• Safety guide • Quickstart guide in various languages • Test report 2.2 according to EN 10204 For Portavo 904X PH Ex version: • EU Declaration of Conformity • Control drawing no. 209.009-110 (ATEX, IECEx, cFMus) User manuals, certificates, the Paraly SW 112 PC software, and other product infor-... -
Page 7: Overview Of The Portavo 904(X) Ph
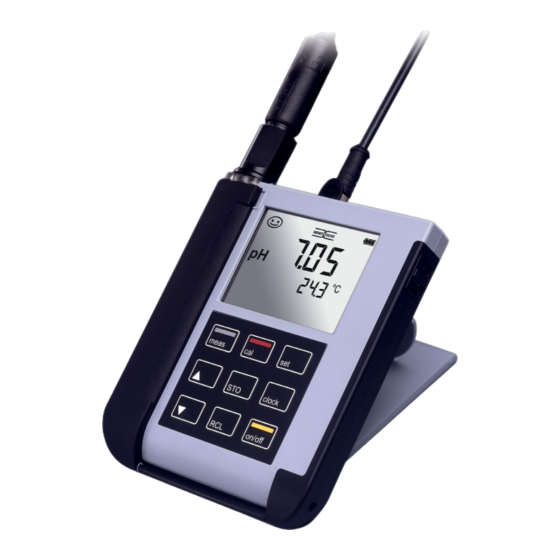
Overview of the Portavo 904(X) PH Intended Use The Portavo 904(X) PH is a portable pH me- ter. With a plain text line on a high-contrast LCD, operation is largely intuitive. The device variant 904X PH is available for applications in hazardous locations up to Zone 0. -
Page 8: Value-Added Features
Overview of the Portavo 904(X) PH Value-Added Features Memosens The Portavo 904 can communicate with Memosens sensors. When these digital sensors are connected to the meter, they are automatically identified and indicated by the logo shown on the right. Furthermore, Memosens allows the storage of calibration data, which will be available and can still be used when the sensor is connected to another Memosens-capable device. -
Page 9: Protective Cover
Overview of the Portavo 904(X) PH Protective Cover The front of the meter is protected by a cover, which can be completely flipped over and secured to the back for oper- ation. A label on the inner side of the cover explains the control functions and device messages. -
Page 10: Display
Overview of the Portavo 904(X) PH Display The meter has a three-line display for showing alphanumeric information such as measurement and calibration data, temperatures, and date/time. Additional information is provided by means of icons (Sensoface, battery icon, etc.). Some typical displays are shown here. Measuring (display of measured value, tempera- ture, date and time) -
Page 11: Keypad
Overview of the Portavo 904(X) PH Keypad The keys of the membrane keypad have a noticeable pressure point. They have the following functions: on/off Switches the meter on and displays the device and calibration data (see Start-up) meas Switches the meter on / Activates measuring mode / Data logger, stopping Start calibration... -
Page 12: Commissioning
Only open the battery compartment of the Portavo 904X outside the hazardous location. • The device cannot be repaired by users. For inquiries regarding repairs, please contact Knick Elektronische Messgeräte GmbH & Co. KG at www.knick.de. • Never use the USB port within the hazardous location. Inserting the Batteries With four AA batteries, the Portavo has an operating time of over 1000 h. -
Page 13: Batteries For Application In Hazardous Locations
Commissioning A battery icon in the display indicates the battery power level: Icon fully filled Batteries at full capacity Icon partially filled Battery capacity is sufficient Icon empty Battery capacity not sufficient; calibration is possible, no logging Icon blinks Max. 10 operating hours remaining, measure- ment is still possible NOTICE! It is absolutely necessary to replace the batteries. -
Page 14: Connecting A Sensor
Commissioning Connecting a Sensor The Portavo 904(X) PH provides several connections so that many types of sensors can be used for measurement. Note that only one sensor may be connected to the meter at a time. The meter automatically recognizes a connected Memosens sensor and switches accordingly. -
Page 15: Switching On The Meter
Commissioning Switching On the Meter When you have connected the sensor, you can switch on the meter by pressing the meas or on/off key. If you press meas, the meter immediately switches to measuring mode. Analog sensors: After pressing the on/off key, the meter displays selected adjust- ment data before it switches to measuring mode. -
Page 16: Configuration
(Option 001) | ORP OFFSET (for ORP or pH/ORP combo sensors) | TEMP. OFFSET (Option 001) | FREE CAL 1 | 2 | 3 | 1-2-3 (for CALIMATIC, Manual, FREE CAL) -01- Mettler-Toledo 2.00|4.01|7.00|9.21 -02- Knick CaliMat 2.00|4.00|7.00|9.00|12.00 -03- Ciba (94) 2.06|4.00|7.00|10.00 -04- NIST Technical 1.68|4.00|7.00|10.01|12.46... -
Page 17: Calibration
Calibration CALIMATIC Calibration (Calibration with automatic buffer recognition) The calibration method is selected in the configuration menu. Calibration is required to adjust the sensor to the meter. It is indis‑ pensable for achieving comparable and reproducible measurement results. Measurement Calibration method, the number of calibration points and CALIMATIC the buffer set have been selected in the configuration menu. - Page 18 Calibration MANUAL Calibration (Manual calibration) The calibration method is selected in the configuration menu. Measurement The number of calibration points has been MANUAL selected in the configuration menu. CAL 1/2/3 PRESS CAL pH display blinks Take the temperature‑corrected pH value from PRESS CAL the buffer description and enter it using .
- Page 19 Calibration DATA INPUT Calibration (Calibration by entering known sensor values) The calibration method is selected in the configuration menu. Measurement DATA INPUT ZERO POINT Use to select the zero point value. SLOPE Use to select the slope value. The calibration data will be displayed successively: Date and time ZERO POINT...
- Page 20 Calibration ISFET Calibration – available if an ISFET sensor is connected The calibration method is selected in the configuration menu. When using ISFET sensors for pH measurement, the individual operating point of the sensor first needs to be determined, and should be in the pH 6.5...pH 7.5 range. The sensor is immersed in a buffer solution with a pH value of 7.00 for this purpose.
- Page 21 Calibration CAL SOP Calibration (Option 001 SOP, must have been configured in Paraly SW 112 PC software) In the Paraly SW 112 PC software, you specify which buffers are to be used in which sequence. You can combine buffer solutions from different buffer sets. Please note that the minimum distance allowed between two buffer solutions is Δ 2 pH.
- Page 22 Calibration ORP OFFSET Calibration (available if an ORP or pH/ORP combo sensor is connected) Selected in the configuration menu. Measurement You can specify an offset for the ORP value mea‑ sured by the sensor. ORP OFFSET After calibration has been activated, the follow‑ ing values are listed in the display: •...
- Page 23 Calibration TEMP. OFFSET OFFSET (option) Temperature calibration (offset) Selected in the configuration menu. Measurement You can specify an offset for the temperature measured by the sensor. TEMP. OFFSET After calibration has been activated, the follow‑ ing values are listed in the display: •...
- Page 24 Calibration FREE CAL Calibration (Free selection of calibration method) FREE CAL calibration is selected in the configuration menu. Measurement Use to select the required calibration CALIMATIC blinks method (CALIMATIC, MANUAL, DATA INPUT, ISFET‑ZERO, CAL SOP (Option 001), ORP OFFSET (for ORP or pH/ORP combo sensors), or TEMP.
-
Page 25: Measurement
Measurement Keys for Once you have completed all preparations, you can start with measurement the actual measurement. 1) Connect the desired sensor to the meter. Some sensors require a special preparation. Information on this can be found in the sensor’s user manual. 2) Switch the meter on using the on/off or meas key. -
Page 26: Data Logger
Data Logger The Data Logger The meter provides a data logger. Prior to use, it must be configured and then activated. You can choose from the following logger types: • DIFF (signal-controlled logging of measured variable and temperature) • INT (time-controlled logging at a fixed interval) •... -
Page 27: Operating Modes Of The Data Logger (Logger Type)
Data Logger Operating Modes of the Data Logger (Logger Type) Manual Logging when Logger is Activated (SHOT) In this mode, a measured value is recorded each time the STO key is pressed. Measurement Logger activated The measured value is saved to the address of the last recorded value + 1 Manual Logging when Logger is Deactivated Measurement Logger deactivated... - Page 28 Data Logger Difference (DIFF) When the delta range (process variable and/or temperature) related to the last entry is exceeded, a new entry is created and the delta range is displaced upwards or downwards by the delta value. The first entry is automatically created when the data logger is started.
-
Page 29: Data Logger Menu
Data Logger Data Logger Menu Select using arrow keys, confirm by pressing set. Logger view CONT Select start address and start the data logger START Deletes all entries and starts the data logger at start address 0001 Deletes all entries Selects and configures logger type (see table below) Configuring the Data Logger... -
Page 30: Configuring The Logger Type
Data Logger Configuring the Logger Type Logger Select (default in bold print) type OFF / pH 0.01…14.00 / pH 1.00 DIFF Delta pH / mV OFF / 1… 1000 mV / 1 mV OFF / 0.1 … 50.0 °C / 1.0 °C Delta °C / °F OFF / 0.1 …100.0 °F / 1.0 °F Interval... -
Page 31: Starting The Data Logger Using Cont
Data Logger Starting the Data Logger using CONT Prerequisite: Data logger is configured. Every time the meter has been switched off, the data logger must be restarted (exception: SHOT). Measurement Measured value is maintained Logger: CONT blinks Address of the last recorded value + If desired: Select a start address using . -
Page 32: Displaying The Logger Data
Data Logger Displaying the Logger Data Pressing the RCL key displays all stored values. The Paraly SW 112 PC software allows convenient management of the data logger. Measurement The “RCL” icon and the last record- Use to select the desired address. ed value is displayed. -
Page 33: Stopping The Data Logger
Data Logger Stopping the Data Logger You can stop the data logger at any time by pressing the meas key. Measurement, logger activated meas Data logger is stopped. “LOGGER” and “active logger type” icons are no longer displayed. It is still possible to hold a measured value by pressing STO and send it to any desired address. -
Page 34: Clock
Clock Press the clock key to access the clock mode. Date and time will be displayed in the format as set in the configuration menu. To set the clock, proceed as follows: Display of time+date Hour display blinks Set value. SET HOUR Minute display blinks Set value. -
Page 35: Options
Options Option 001 SOP (Standard Operating Procedure) Scope: Cal SOP Calibration Method The calibration method must be configured using the Paraly SW 112 PC software. Here, you specify which buffers are to be used in which sequence. You can combine buffer solutions from different buffer sets. -
Page 36: Enabling Options / Tan Input
Options Enabling Options / TAN Input When you have bought an option, you receive a document with a code (TAN) for enabling this option on your device. Press the set key to access the configuration mode. Use the arrow keys to select the “TAN TEMP CAL” function, for exam- ple, where you can enter the TAN for enabling the option. -
Page 37: Access Codes For Conf, Cal, And Data Logger
Options Access Codes for CONF, CAL, and Data Logger (with Option 001 SOP only) Press the set key to access the configuration mode. Use the arrow keys to select the “SETUP CODE” function and set an access code for configuration, “CAL CODE” to set an access code for calibration, and/or “LOGGER CODE”... -
Page 38: Inputting The Rescue Tan
The manufacturer can generate a rescue TAN (TAN RESCUE). For this purpose, please have the serial number of the corresponding device to hand. If you have any questions, please contact Knick Elektronische Messgeräte GmbH & Co. KG using the contact details provided on the last page of this document. -
Page 39: Paraly Sw 112 Pc Software
Make the following backups prior to upgrading or downgrading: • Read out Portavo data logger. • Save the Portavo device configuration in Paraly. The Paraly SW 112 PC software, incl. a detailed user manual, can be downloaded from www.knick.de. -
Page 40: Error Codes And Device Messages
Error Codes and Device Messages Error messages are indicated as “ERROR …” on the display. Information on the sensor condition is indicated by the “Sensoface” icon (friendly, neutral, sad) possibly accom- panied by an info message (“INFO …”). Example of an error message: Example of a “Sensoface”... -
Page 41: Sensoface" Messages
Error Codes and Device Messages “Sensoface” Messages The “Sensoface” icon provides information on the sensor condition: Sensoface Meaning Sensor is okay Calibrate the sensor soon Calibrate or replace the sensor The “neutral” and “sad” Sensoface icons are accompanied by an “INFO …” message to give a hint to the cause of deterioration. -
Page 42: Error Messages
Error Codes and Device Messages Error Messages The following error messages can be shown in the display. Message Cause Remedy Battery empty Replace batteries blinks ERROR 1 pH value out of range Check whether the measurement ERROR 2 ORP value out of range conditions correspond to the adjusted measuring range. -
Page 43: Product Line
Product Line Accessories/Options Item Order No. Robust field case (for meter, sensor, ZU0934 various small parts and user manual) Li-ion battery (for Portavo 904 PH only) ZU0925 Replacement quiver (5 units) ZU0929 Adapter for process sensors with Ø 12 mm and PG 13.5 thread ZU0939 for use with quiver Sensor protection for process sensors with Ø... -
Page 44: Ph Sensors
Memosens sensor (offset correction) Temperature detector adjustment in the Memosens sensor SW-P002 (offset correction) Paraly SW112 PC software for configuration and firmware updates: Free download from www.knick.de pH Sensors Please visit our website for more information on our product range: www.knick.de. -
Page 45: Knick Calimat Buffer Solutions
Product Line Knick CaliMat Buffer Solutions Ready-to-Use Quality pH Buffer Solutions pH Value (20 °C/68 °F) Quantity Order No. 2.00 250 ml CS-P0200/250 4.00 250 ml CS-P0400/250 1000 ml CS-P0400/1000 3000 ml CS-P0400/3000 7.00 250 ml CS-P0700/250 1000 ml CS-P0700/1000... -
Page 46: Specifications
Specifications pH/mV input pH socket DIN 19 262 (13/4 mm) pH measuring range -2 … 16 Decimal places* 2 or 3 Input resistance 1 x 10 Ω (0 … 35 °C/32 … 95 °F) Input current 1 x 10 (at RT, doubles every 10 K) Measuring cycle Approx. - Page 47 (TAN option) probe adjustment in the Memosens sensor (offset correction) FREE CAL Free selection of calibration method Calimatic buffer sets * -01- Mettler-Toledo 2.00/4.01/7.00/9.21 -02- Knick CaliMat 2.00/4.00/7.00/9.00/12.00 -03- Ciba (94) 2.06/4.00/7.00/10.00 -04- NIST technical 1.68/4.00/7.00/10.01/12.46 -05- NIST standard 1.679/4.006/6.865/9.180 -06- HACH 4.01/7.00/10.01/12.00...
- Page 48 Specifications Connections 1x pH socket DIN 19262 2x 4-mm socket for separate temperature detector 1x M8 socket, 4 pins, for Memosens lab cable 1x micro USB-B for data transmission to PC Portavo 904X: Be sure to observe the safety instructions when using the USB port.
- Page 49 Specifications RoHS conformity According to Directive 2011/65/EU Power supply Portavo 904 Batteries: 4x AA alkaline or 4x NiMH (rechargeable) or 1x Li-ion battery, USB chargeable Portavo 904X 4x AA batteries For battery types, see Control Drawing No. 209,009-110 Operating time Approx.
-
Page 50: Buffer Tables
Buffer Tables -01- Mettler-Toledo Nominal values in bold. °C... - Page 51 Buffer Tables -02- Knick CaliMat Nominal values in bold. °C...
- Page 52 Buffer Tables -03- Ciba (94) Nominal values: 2.06 4.00 7.00 10.00 °C 1) extrapolated...
- Page 53 Buffer Tables -04- Technical Buffers to NIST Nominal values in bold. °C 1) values added...
- Page 54 Buffer Tables -05- NIST Standard (DIN 19266: 2015-05) Nominal values in bold. °C Note: The actual pH(S) values of the individual batches of the reference materials are documented in a certificate of an accredited laboratory. This certificate is supplied with the respective buffers. Only these pH(S) values shall be used as standard values for the secondary reference buffer materials.
- Page 55 Buffer Tables -06- HACH Nominal values: 4.01 7.00 10.01 (± 0.02 at 25 °C) °C...
- Page 56 Buffer Tables -07- WTW Technical Buffers Nominal values in bold. °C...
- Page 57 Buffer Tables -08- Hamilton Nominal values in bold. °C...
- Page 58 Buffer Tables -09- Reagecon Nominal values in bold. °C 1) values added...
- Page 59 Buffer Tables -10- DIN 19267 Nominal values in bold. °C 1) extrapolated...
-
Page 60: Index
Index 0000 DELETED (“data deleted” display) 33 AA batteries 12 Access codes (option) 35 Accessories 43 Activating the logger 31 Analog pH input 14 Application in hazardous locations 7 Arrow keys 11 Automatic calibration (Calimatic) 17 Base stand (accessory) 43 Batteries 13 Batteries for application in hazardous locations 13 Battery capacity 13... - Page 61 Index Configuration, access control 35 Configure data logger 29 Connecting a sensor 14 Connecting cable for Memosens 14 Connection, USB (battery) 12 Continuous recording of measured values 27 Control elements 11 CONT, starting the data logger 31 Cyclic recording of measured values 27 Data input (pH calibration) 19 Data Logger 26 Data logger, access control 35...
- Page 62 Interrupting the data logger 33 Interval (data logger mode) 27 Introduction 7 ISFET calibration 20 Keypad 11 Knick CaliMat buffer solutions 45 Laboratory cable for Memosens sensors 43 Li-ion battery (accessory) 43 Lithium-ion battery 12 Logger 26 LOGGER CODE 35...
- Page 63 Index meas, switch-on 15 Measured-value recording 27 Measured values, switching the display 25 Measuring 25 Memory for measured values 26 Memosens 8 Memosens cable (accessory) 43 Memosens connecting cable 14 Memosens sensors 14 Menu of data logger 29 Menu structure of data logger 29 Menu structure of pH configuration 16 Messages 40 Micro USB port 7, 14...
- Page 64 Index Parameter settings (pH configuration) 16 pH buffer solutions 45 pH calibration, CAL SOP (Option) 21 pH calibration, FREE CAL 24 pH configuration 16 pH Sensor 14 Portavo 904 X 12 Power-on 15 Power One 4106 battery 13 Product features 7 Product line 43 Product presentation 7 Protective cover 9...
- Page 65 Index Setting the time and date 34 SETUP CODE 35 Setup (pH configuration) 16 SHOT (data logger mode) 27 Smiley face (icon) 8 SOP calibration 21 SOP, Option (Standard Operating Procedure) 35 Specifications 46 Start address (data logger) 27 Starting the data logger using CONT 31 Starting the data logger using START 31 START, starting the data logger 31 STO key 11...
- Page 66 Index Value-added features 8 Viewing recorded data 32 Viewing the logger data 32...
- Page 68 Knick Elektronische Messgeräte GmbH & Co. KG Headquarters Beuckestraße 22 • 14163 Berlin Germany Phone: +49 30 80191-0 Fax: +49 30 80191-200 info@knick.de www.knick.de Local Contacts www.knick-international.com Copyright 2021 • Subject to change Version: 3 This document was last updated on March 31, 2021 The latest documents are available for download on our website under the corresponding product description.
Need help?
Do you have a question about the Portavo 904X PH and is the answer not in the manual?
Questions and answers