Table of Contents
Advertisement
Available languages
Available languages
Quick Links
READ BEFORE USE!
WARNING
USE PROPANE GAS ONLY!
-Do not store or use gasoline or other flammable
vapors in the vicinity of this or any other appliance.
- Service must be performed by a qualified installer,
service agency or the gas supplier.
For use with cylinders marked PROPANE only. DO
NOT connect to a remote gas supply.
If the fire table is stored indoors, detach and
leave propane cylinder outdoors.
Design certified under ANSI Z21.97 • CSA 2.41-
(2012) Requirements for Outdoor Gas Fireplaces
OWNER'S MANUAL
Model No.:HYFP50095-45
WARNING
For Outdoor Use Only! Use Propane Gas Only !
Propane cylinders sold separately.
WARNING
Improper installation,adjustment,alteration,
service or maintenance can cause injury or
property damage. Read the owner's manual
thoroughly before installing or servicing this
equipment. If the information in this manual is
not followed exactly, a fire or explosion may
result causing property damage, personal injury
or loss of life.
The propane cylinder must be disconnected when
this fire table is not use.
DANGER
If you smell gas:
1. Shut off gas to the appliance.
2. Extinguish any open flame.
3. If odor continues, keep away from the
fire table and immediately call your gas
supplier or fire department.
This fire table must be attended at all
times!
An LP-cylinder not connected for use shall
not be stored in the vicinity of this or any
other appliance.
Item No.: 67938
Advertisement
Table of Contents

Subscribe to Our Youtube Channel
Related Manuals for BOND MANUFACTURING HYFP50095-45


Summary of Contents for BOND MANUFACTURING HYFP50095-45
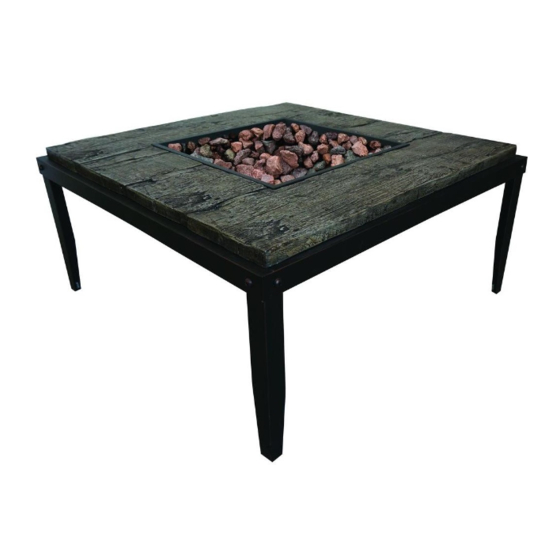
- Page 1 OWNER'S MANUAL Model No.:HYFP50095-45 Item No.: 67938 READ BEFORE USE! WARNING For Outdoor Use Only! Use Propane Gas Only ! Propane cylinders sold separately. WARNING Improper installation,adjustment,alteration, service or maintenance can cause injury or property damage. Read the owner's manual thoroughly before installing or servicing this equipment.
- Page 2 SAFETY INFORMATION Please read and understand this entire manual before attempting to assemble, operate or install the product. Failure to follow the dangers, warnings and cautions contained in this owners manual may result in a fire or explosion causing damage to propert , serious bodily injury or death. WARNING •...
- Page 3 SAFETY INFORMATION • Never lean over the open fire table or place hands or fingers on the upper portion of an operational unit. • Keep any electrical supply cords and the fuel supply hose away from any heated surfaces. • Combustible materials should never be within 72 inches of the top, 48 inches of the back or sides of the fire table.
- Page 4 SAFETY INFORMATION fire table.
-
Page 5: Hardware Contents
WARNING ! * Do not light or use gas unit if lava rocks are wet. Ensure lava rocks are completely dry before igniting as intense heat could cause the rock to crack. * Lava Rocks could hit somebody's face or eyes during initial start of this unit , so please keep away from the firebowl for the first 20 minutes after it has been ignited. - Page 6 ASSEMBLY INSTRUCTIONS * Please keep these owner's manual for future reference. *If you have opened the carton and removed all packages, please disregard the STEP 1 and 2. See the STEP 3 directly. STEP 1. (1) Open the carton , make sure the 4 pieces of the carton STEP 2.
- Page 7 ** Connect the Pressure-Regulating Valve to the gas tank. See Figure F. 1) Turn the cylinder valve clockwise to close the gas supply on the gas tank. 2) Screw Regulator Coupling clockwise by hand only. Make sure it is fastened. See WARNING and Figures : WARNING This screen must be clear and free of obstructions...
-
Page 8: Routine Care
Caution: *If the burner does not ignite with the valve open, gas will continue to flow out of the burner and could accidently ignite with risk of injury. 10 in (25 cm) Observe flame height when lit: Flame should possibly be a yellow/blue color between 2 to 10 inches high. -
Page 9: Troubleshooting
TROUBLESHOOTING PROBLEM CAUSE CORRECTIVE ACTION Igniter pin and burner are wet Wipe dry with a cloth Igniter battery is incorrectly Check that battery is correctly inserted inserted. Call customer service for replacement Igniter pin cracked or broken part Fire table won't Electrode wire is loose or Reconnect wire to the igniter light... - Page 10 IF YOU HAVE QUESTIONS OR CONCERNS PLEASE CALL BOND TOLL FREE # 1-866-771-BOND(2663) OR TO BETTER EXPEDITE YOUR REQUEST FEEL FREE TO EMAIL US customer.service@bondmfg.com OR VISIT OUR WEBSITE UNDER CUSTOMER SERVICE SUPPORT www.bondmfg.com BOND MANUFACTURING CO. 1700 West 4th Street, Antioch, CA 94509...
-
Page 11: Manual Del Usuario
MANUAL DEL USUARIO ¡LEER ANTES DE USAR! Número de Artículo: 67938 Núm. de fábrica:HYFP50095-45 ADVERTENCIA ¡Solamente Para Uso Externo! ¡Usar Solamente Gas Propano! Los cilindros de gas propano se venden por separado. ADVERTENCIA Instalación, ajuste, alteración, servicio o mantenimiento indebido puede causar daño corporal o de propiedad. - Page 15 ¡ADVERTENCIA! * Ne pas allumes les gaz ou utilisez ci les pierres en lava sont mouiller. Assurer que les pierres en lava sont complètement sec avant d'allumer, parce que la chaleur peu fêler les pierres en lava. * Las piedras de lava podrían golpear la cara o los ojos de alguien durante el arranque inicial de la unidad, luego se ruega mantenerse fuera de la fuente de fuego durante los primeros 20 minutos después del encendido.
-
Page 16: Instrucciones De Montaje
INSTRUCCIONES DE MONTAJE * Por favor quédese con este manual del usuario para referencia futura. *Si usted abrió el cartón y sacó todos los paquetes, por favor ignore PASOS 1 y 2. Véase el PASO 3 di PASO 1. PASO 2. (1) Abra el cartón y vuélquelo cabeza abajo, asegurándose que las (1) Vuelque las cabezas de la fogata a gas en terreno plano. -
Page 17: Para Encender
** Conecte la Válvula Reguladora de Presión al tanque de gas. Vé ase Figura F. 1) Gire la válvula del cilindro en sentido de las agujas del reloj para cerrar el suministro de gas en el tanque de gas. 2) Enrosque el Tornillo Regulador de Conexión a mano solamente en sentido de las agujas del reloj. -
Page 18: Mantenimiento
A. Presione y agarre el Encendedor Eléctrico. Mientras tanto, empuje y gire el Botón de Control en sentido contra las agujas del reloj a la posición "BAJO". Continuar presionando el Botón de Control para encender el quemador. B. Después de encender, suelte el Encendedor Eléctrico. Continue presionando y agarre el Botón de Control por 45 segundos. C. -
Page 19: Resolución De Problemas
RESOLUCIÓN DE PROBLEMAS PROBLEMA CAUSA ACCIÓN CORRECTIVA El perno de encendido y el Seque con un trapo. quemador están húmedos. La pila de encendido está Compruebe que la pila esté colocada insertada incorrectamente. correctamente. El perno de encendido está Llame al servicio al cliente para obtener agrietado o roto. - Page 20 SE RUEGA LLAMAR A BOND SIN CARGOS al 1-866-771-BOND(2663) O PARA ACELERAR SU PEDIDO NO DEJE DE MANDARNOS UN CORREO ELECTRÓNICO AL customer.service@bondmfg.com O VISITE NUESTRA PÁGINA W EB BAJO ATENCIÓN AL CLIENTE CUSTOMER SERVICE SUPPORT www.bondmfg.com BOND MANUFACTURING CO. 1700 West 4th Street, Antioch, CA 94509...
Need help?
Do you have a question about the HYFP50095-45 and is the answer not in the manual?
Questions and answers