Table of Contents
Advertisement
Quick Links
Item# 50436
Lowe's# 733486
Improper installation, adjustment, alteration, service or maintenance can cause injury or
property damage. Read the owner's manual thoroughly before installing or servicing this
equipment. If the information in this manual is not followed exactly, a fire or explosion may
result causing property damage, personal injury or loss of life.
Save these instructions for future use. If
you are assembling this unit for someone
else, give this manual to him or her and
read and save for the future.
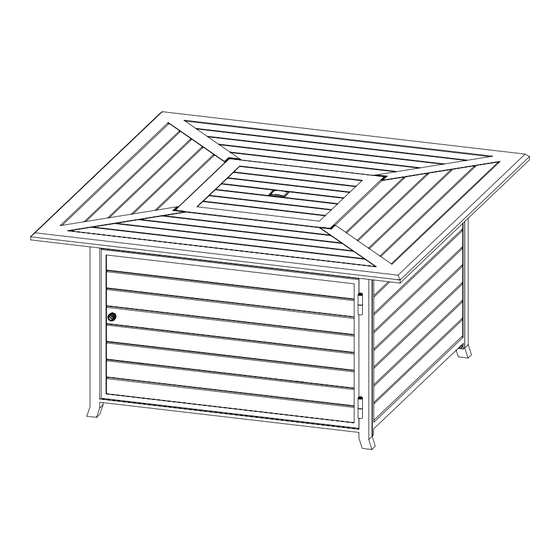
Gatewood Gas Fire Table
Owner's Manual
SERIES
DANGER
If you smell gas:
1. Shut off gas to the appliance.
2. Extinguish any open flame.
3. If odor continues, keep away from
the appliance and immediately call
your gas supplier or fire department.
WARNING
Do not store or use gasoline or other
flammable vapors and liquids in the
vicinity of this or any other appliance.
An LP-cylinder not connected for use
shall not be stored in the vicinity of
this or any other appliance.
WARNING
For outdoor use only.
Advertisement
Table of Contents

Related Manuals for BOND MANUFACTURING Gatewood 50436


Summary of Contents for BOND MANUFACTURING Gatewood 50436
- Page 1 SERIES Gatewood Gas Fire Table Item# 50436 Lowe’s# 733486 DANGER If you smell gas: 1. Shut off gas to the appliance. 2. Extinguish any open flame. 3. If odor continues, keep away from the appliance and immediately call your gas supplier or fire department. WARNING Do not store or use gasoline or other flammable vapors and liquids in the...
-
Page 2: Safety Information
• Do not sit or rest hands or feet on this heating unit. • Never place hands or fingers on upper portion of this unit while in use. • Keep all electrical cords and fuel supply hose away from heated surfaces. Bond Manufacturing Company | Page 2... - Page 3 • Combustible material should not be within 72 inches of the top of the unit, or within 48 inches around the entire unit. • Keep the appliance area clear and free from combustible material, gasoline and other flammable vapors and liquids. •...
- Page 4 Combustible materials should not be within 72 Min. Clearance Min. Clearance 48 in. (121.9 cm) 48 in. (121.9 cm) inches of the top of the unit, or within 48 inches around the entire unit. Min. Clearance 48 in. (121.9 cm) Bond Manufacturing Company | Page 4...
- Page 5 HARDWARE Item Description M6 x 20 Bolt M6 Washer M6 x 30 Bolt M8 x 16 Screw M8 Washer Propane Tank Strap Touch Up Paint Allen Wrench Wrench Before beginning assembly of this product be sure all parts are present. Compare parts with package contents list and hardware contents list.
- Page 6 CONTENTS Item Description Firebowl Back Panel Table Top Left Side Panel Right Side Panel Bottom Plate Door Panel Burner (preassembled) Guard (preassembled) Control Knob (preassembled) Igniter (preassembled) Battery (AA) LavaGlass™ 2 bags Protective Cover Bond Manufacturing Company | Page 6...
- Page 7 ASSEMBLY INSTRUCTIONS 1. Align the back panel (C) to the left side panel (E). Then attach by placing a M6 x 20 bolt (AA) through a M6 washer (BB), put the bolt and washer through the aligned bolt slots and loosely tighten with allen wrench (HH).
- Page 8 (D). Align the holes in the burner assembly corners (B) with the holes in the top of the table top (D) and replace the four screws and washers removed at the beginning of this step. Be sure to tighten completely. Bond Manufacturing Company | Page 8...
- Page 9 7. Attach the table top (D) to the panel construction by aligning the holes at the bottom of the table top (D) to the holes in the top of the panel construction and securing with four M8 x 16 bolts (DD) and four M8 washers (EE); tighten with wrench (II).
- Page 10 CYLINDER VALVE by turning the regulator coupling nut BLACK COUPLING NUT BLEED-OFF clockwise. Make sure it is fastened turn clockwise to connect VALVE securely and tighten connections by hand turn clockwise only. REGULATOR to reseal Bond Manufacturing Company | Page 10...
-
Page 11: Operation
OPERATION Before performing a leak test, be sure that no sparks can occur and you are in a spacious outdoor area. Connect the propane gas tank to the regulator and turn the valve on the unit to the “off” position. Brush a soap and water mixture on all connections. Turn the gas supply on; if bubbles occur on any connection there may be a leak. -
Page 12: Maintenance
• Not using manufacturer approved or supplied parts/accessories may result in a defective condition and void the warranty of this heating unit. • Always place lid (if applicable) or protective cover on heating item when not in use. Bond Manufacturing Company | Page 12... -
Page 13: Troubleshooting
Igniter battery is incorrectly inserted Check which direction the battery is inserted Igniter pin is broken Contact Bond Manufacturing for a Heating unit won’t light replacement part Electrode wire is loose or disconnected Reconnect wire to the igniter box located... -
Page 14: Warranty
• Use and installation other than what is listed in this manual. Please contact the manufacturer for replacement parts. CONTACT If you have any questions or concerns, please contact Bond Manufacturing Company at the below resources: Toll Free Phone 1-866-771-BOND (2663) | Monday - Friday, 8am - 4:30pm PST Email customer.service@bondmfg.com...
Need help?
Do you have a question about the Gatewood 50436 and is the answer not in the manual?
Questions and answers